manuals.online logo
Brands
  1. Home
  2. •
  3. Brands
  4. •
  5. Lanier R/C
  6. •
  7. Toy
  8. •
  9. Lanier R/C MARINER 40 MK II ARF User manual

Lanier R/C MARINER 40 MK II ARF User manual

Lanier R/C
Lanier R/C, inc. P.O. Box 458 Oakwood, GA 30566 Phone 770-532-6401 Fax 770-532-2163
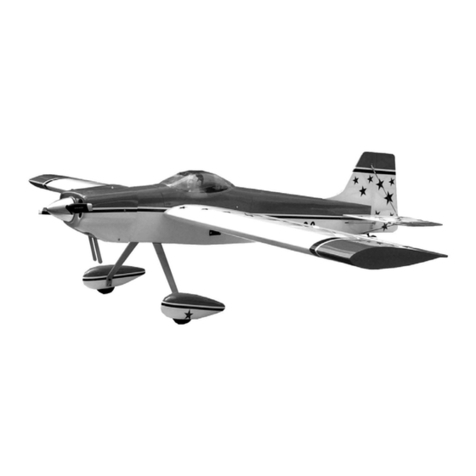
CAP 232CAP 232
ALMOSTALMOST--READYREADY--TOTO--FLY (ARF)FLY (ARF) Instruction ManualInstruction Manual
IMAA & IMAC LegalIMAA & IMAC Legal
Overall fuselage length: 79Overall fuselage length: 79--1/8”1/8”
Required Engine Size: 1.50 to 3.2 2Required Engine Size: 1.50 to 3.2 2--strokestroke
1.60 to 3.0 41.60 to 3.0 4--strokestroke
Fuselage Length:Fuselage Length: 5959--3/8”3/8”
Flying Weight: 12 to 17 lbs.Flying Weight: 12 to 17 lbs.
Wingspan: 80”Wingspan: 80”
Wing Area 1265 sq. in.Wing Area 1265 sq. in.
Radio: 4Radio: 4--channel with 5 Standard Servoschannel with 5 Standard Servos
Lanier R/C
2
PARTS LIST:
1LEFT WING PANEL 14 ENGINE BOX BOTTOM
2RIGHT WING PANEL 15 TRI-STOCK REINFORCEMENT
3LEFT AILERON 16 HARDWARE PACKS:
4RIGHT AILERON WING HARDWARE
5FIBERGLASS COWL TAIL HARDWARE
6ALUMINUM TUBE WING SPAR CANOPY HARDWARE
7FIBERGLASS WHEEL PANTS COWL HARDWARE
8ALUMINUM FORMED LANDING GEAR LANDING GEAR HARDWARE
9RUDDER WHEELS PANTS HARDWARE
10 HORIZONTAL STAB ENGINE HARDWARE
11 LEFT HAND ELEVATOR MISC. HARDWARE
12 RIGHT HAND ELEVATOR 17 CANOPY BASE
13 PLYWOOD FIREWALL
Lanier R/C
3
Thank you for purchasing our Cap 232 ARF. Before you
begin, please read through this manual and familiarize
yourself with what you have to do. Check all the parts. If you
findanydefectiveormissing,pleasecontactyourlocaldealer.
Warning:Warning: Thismodelisnotatoy. Itisdesignedformaximum
performance. Please seek advice if you are not familiar with
this kind of model. Operating this model without prior
preparationmaycauseinjuries. Safetyisthemostimportant
thing to remember.
WING ASSEMBLYWING ASSEMBLY
Wing Hardware
1. Locate the two ailerons and the hard points in them
For mounting the control horns. Hold the aileron up to the
wingandtheyshouldbebehindtheservomountinthewing.
2. Drill out the hole in each with a # 28 drill bit. (9/64”)
3. Install a #6 flat washer on a #6 –32 x 1-3/4” Pan Hd.
Screw. Insert the screw into to hole on the topside of the
aileron.
4. Slip a flat washer, lock washer and #6 hex nut on the
extendedendoftheboltandtighten. Threadonanylonhorn
bracket as shown in the photo.
5. Locate the 8 hinge points. Using one, push it into each
hole, on thewing and aileron, with atwistingmotion until the
center of the pivot point is aligned with the edge of the hole.
Put a drop of oil on the pivot point of each hinge and blot the
excess with a paper towel. Apply glue in the hole and some
nearthe endofthehingepoint. WerecommendPacerHinge
Glue or 30-min. epoxy. Do the aileron first, align the hinges,
allow the glue to cure and then mount it to the wing. Make
sure it is aligned properly.
Lanier R/C
4
6. Prepare the servo to be mounted in the servo well on
thewing. Locatethethreadedpushrodsandthreadahexnut
on each each of each. Now install a clevis on each end.
Mount the servo with four #2 x ½” sheet metal screws (not
supplied)andtheproperoutputarm. Adjusttheclevisestofit
with the aileron centered and the servo at neutral. Now
tightenthehex nutsagainst theclevis. Install thesafety clips
to ensure security
7. Remove the servo from the well but do not disturb the
linkagehookup. Pushathinstickthroughtheservoconnector
channel,atthewingroot,untilitcanbeseenintheservowell.
Tape on a length of string and pull it through the channel..
Connecta12”leadextension(notsupplied)totheservolead
and tape the connectors together. Tie the string to the end
connector and pull through the channel. Now remount the
servo. This completes the wing assembly
TAIL ASSEMBLYTAIL ASSEMBLY
Tail Hardware
1. Locate the rudder and elevators and the hard points in
themforthecontrolhorns. Theyarelocatedveryclosetothe
leading edge of the surfaces. Drill out each hole with a #28
drill bit (9/64”) in the elevator hard points. Install a #6 flat
washer on a #6-32 x 2-1/2” Pan Hd. Machine Screw. Insert
the screw into hole on topside of surface. Slip a flat washer,
lock washer and #6 hex nut, on the extended end of the
screw and tighten. Thread on a nylon horn bracket. Proper
adjustment can be made later. Repeat the above process
when installing the 3” threaded rod in the rudder.
2. Locate the 10 hinge points. Using one, pushitinto each
hole, in the rudder and elevator, with a twisting motion until
the center of the pivot point is aligned with the edge of the
hole. Put a drop of oil on the pivot point of each hinge and
blottheexcesswithapapertowel. Applyglueintheholeand
someneartheendof thehingepoint. WerecommendPacer
HingeGlue ora good30-min. Epoxy. Mountthehinges inthe
control surfaces only. Set them aside until the stab is
mounted to the fuselage.
Lanier R/C
5
3. Locate the Stab hold down bolt and remove it. At this
time you should determine whether you want to keep it
removableorglueinonpermanently. We recommend youWe recommend you
glueit on permanently usingthe added holding powerof theglueit on permanently usingthe added holding powerof the
bolt to retain it.bolt to retain it.
4. Remove covering from bolt hole in top of fairing and
bolt stab in place with proper alignment.
5. Mark the fuselage outline with a felt tip pen while
stab is bolted in place.
6. Offset the marked lines, inward 3/8”, and remove the
coveringbetweenthemwithasharpX-actoknife. Apply5min.
epoxy on the bare area and some on the fuselage saddle.
RemounttheStab,boltinplace. Wipeoffexcessepoxyatjoint
with a paper towel and Isopropyl Alcohol.
Nowassembletherudderandelevatorstothefinandstabas
described in step 5 of wing assembly.
7. Locate the Tail wheel hardware. Place a wheel collar
on the axle, then the wheel and finally another wheel collar.
Note:itmay be necessary todrillthe wheel hub witha 3/32’Note:itmay be necessary todrillthe wheel hub witha 3/32’
drill bit.drill bit. Centerthewheelontheaxleandtightenthewheel
collars. Lubricatethewheel sothat itwillrotateeasilyon the
axle.
Lanier R/C
6
8. Mount the tail wheel using 3-#4 x ½” sheet metal
screws. Use the first three holes in the mount.
9. Mount the tail wheel on the center of the fuselage
flush with the back edge. Hold in place and drill three 1/16”
holes through three holes in the mount. Drive in the screws
and tighten them.
10. Locate the spring and cut off excess wire, 1-1/4” from
spring, on the long end. Now bend a ¼”leg at 90 degree on
that end. Place the opposite end in the small hole on the
brassfitting at top of bearing shaft. Note where ¼” leg ends
onbottomofrudder. Markanddrilla1/16”hole. Note:make
sure the wheel is properly aligned before drill-ing the hole.
Harden the hole with thin CA. Insert the ¼” leg in the hole,
insert a #4 x ½” sheet metal screw in the same hole and
tighten. Do not over tighten and strip the threads. Use a
drop of thin CA to secure the screw.
11. Prepare the servos with the proper servo arm for the
rudder and elevators. Mount them in the servo wells with
#2x½” sheetmetal screws(not supplied) Locatethe short
pushrodsfor theelevatorsand cut 3/8”off both endsof each
one. ADremelcut-offwheelworksfinehere. Mounta#4hex
nut on the end ofeachpushrod. Nowmounta4-40clevis on
the ends of each..
12. Center the servo and elevator. Tape the elevator at
the tip so that it will not move. Adjust the clevises on the
pushrodtofitandhookuptoservoarmandcontrolhorn. Slip
on thesafetyclipsandtightenthehexnutsagainsttheclevis.
13. The rudder pushrod is the proper length. Assemble in
thesamemannerasdescribedabove. Note: We recommendNote: We recommend
you use two servos on the rudder, the two pushrods will actyou use two servos on the rudder, the two pushrods will act
asapullasapull--pullsetuppropullsetupprovidingmaximumforcewithnoflexingofvidingmaximumforcewithnoflexingof
the pushrods..the pushrods..
14. When using two servos on the elevators, it is necessaryWhen using two servos on the elevators, it is necessary
to use a “Y” connector with a servo reverser in one of theto use a “Y” connector with a servo reverser in one of the
“Y’s”thereby allowingbothservostobemountedinthesame“Y’s”therebyallowingbothservostobemountedinthe same
position. Maxx Productsposition. Maxx Products International (see notes) hasoneInternational(see notes)has one
withan internalpotsoadjustmentcanbemadeelectricallytowithaninternalpotsoadjustment canbemadeelectrically to
one elevator. Their “Y” connector, called the Miracle “Y”one elevator. Their “Y” connector, called the Miracle “Y”
Connector,has extra long leads.Of course withanexpensiveConnector,has extra long leads.Of course withanexpensive
computerradio youcan always connectcomputerradio youcan always connect the elevators in twothe elevators in two
differentchannelstherebyeliminatingtheneedfortheMiracledifferentchannelstherebyeliminatingtheneedfortheMiracle
“Y” Connector. However, you will need servo lead extensions.“Y” Connector. However, you will need servo lead extensions.
The rudder with two servos will then need a plain “Y”The rudder with two servos will then need a plain “Y”
connector and a servo lead extension.connector and a servo lead extension.
MOUNTING THEMOUNTING THE LANDING GEARLANDING GEAR
Lanier R/C
7
Landing Gear HardwareLanding Gear Hardware
1. Measure back 2-1/2” from the front former. Using a
square, draw a line across the fuselage with a felt tip pen.
Place the forward edge of the landing gear against the line
andcenteritonthefuselage. Tapethelandinggear in place.
Nowmatchdrillthemountingholesintothefuselageusinga
¼” drill bit.
2. Now drill out the center hole with a 5/16” drill bit.
Install the 1/4” T-nut on the inside applying thick CA around
the edge to hold it in place.
3. Before mounting the landing gear to the fuselage it
will be necessary to drill two holes in the landing gear struts.
Drill a hole ½” up, on the centerline of the 5/16” holeinthe
strut.
4. Mount the wheel axles on the landing gear struts.
Tighten the lock nuts securely.
5. Mount the landing gear, aligning the holes, and install
a ¼” x 1” cap screw with washer in the center hole.. Do not
tighten.. Install the other two cap screws, a flat washer on
each side, with a lock nut on each inside. Nowtightenallthe
screws.
Lanier R/C
8
6Locate the two wheel pants. Clean out the epoxy from
the½” holewith aburringtool sothat youhave aniceround
½” hole. Slide a pant over the axle, thru the ½” hole,
againstthelandinggearstrut. Thehexontheaxlenutshould
be in the ½’ hole on the pant and flat against the landing
gear. Alignthepantsothebottomsurfaceisparallelwiththe
bottomof the landing gear strut. Hold inplaceand mark the
location of the 5/32” hole on the landing gear strut, to the
wheel pant.
7. Drill the hole location on the wheel pant with a 3/16”
drill bit. Locate the Pant Hardware. Now install a 6-32T-nut
on the inside of the wheel pant. Use thick CA around the
edges to hold it in place. Now do the other pant.
8. Mount the wheel pant to the landing gear. First slip a
5/32wheelcollarontheaxle. Starttheaxlethruthe½”hole
in the pant, slip the wheel thru the opening and on the axle,
thenanotherwheelcollar. Tightenthewheelcollarslightlyso
thateverything will stay in place. Locatethe#6-32x ½ bolt
and a lock washer and secure the pant to the landing gear.
Align the wheel in the center of the pant opening and tighten
the wheel collars securely.
MOUNTING THE ENGINEMOUNTING THE ENGINE
Mounting the engineisalittle moreinvolved. Wehaveshown
the Fox 2..4 cu/in. engine installed with a Bisson muffler. If
you have a different choice of engine, it will undoubtedly
require different mounting requirements.. What we have
shownwillgiveyouagoodideahowtoproceed. Allmounting
hardware for engine is not supplied.
1. Set the cowl on a flat surface facing up. Measure the
distancefrom the surface to end of the cowl. Measure with a
tape thru the crankshaft hole in the cowl. Should be close to
12”. Now measure the engine from the mounting surface to
the propeller back plate.. The Fox engine is 5-1/4”. Cut off
the engine box side at 6-1/2”. Add the ½” engine shim and
that = 7”. 7 plus 5-1/4” = 12-1/4”. Thelite-plyshimis not
quite ½” so you end upwithapprox 3/16”spinner clearance
with the cowl
Lanier R/C
9
2. Nowthat wehave donethemath, measureout 6-1/2”on
eachengineboxside. Usingasquarefromthetopedgedraw
a line on the mark with a felt tip pen. Do both sides. Trim
excess off to the line using a razor saw. Now measure up
from the lower front edge 7/8”. Measure back 4=1/4”
drawing a line between the two points and trim off.
3. Install the 1/4” firewall between the sides and flush
withtheendsusing5-minepoxy. Pinittothesides,3places,
on each side with 1/16” dia toothpick or nail brad.
4. Construct a center point on the firewall 2-1/8” down
from the top and 2-3/4”infromthe leftsidefacingit. Extend
the lines to edges of the firewall.
5. Laminate two ¼” engine shims (not supplied) together
with thick CA. Tack glue to firewall aligning the centerlines.
Matchdrillthefourholesin theengineshimwitha¼”drillbit.
Now remove the shim.
6. Enlarge the four ¼” holes with a 5/16” drill bit. Install
four,10-32 T-nuts.
7. Apply thick CA to the edges of the T-nuts to hold them
in place. Install ½” tri-stock balsa pieces to reinforce the
firewall. Also add to short pieces in the corner at the former
and sides as shown.
8. GlueonthemotorshimwiththickCA. Besuretoalignthe
holes with the T-nuts. Epoxy on the 1/8” lite-ply bottom.
Scoreatthebendpointandcrack,donotbeakintwo,sothat
it will fit in one piece. Use 5-min epoxy.
Mount the engine with 4, 10-32 x 1-1/4” socket head bolts
and split lock washers (not supplied). Side thrust can be
added by shimming one side of the engine.
Lanier R/C
10
MOUNTING THE COWLMOUNTING THE COWL
Although the cowl comes painted, it needs more work on it
before it is ready to install.
1. Mount the cowl on the fuselage and tape it in place
with masking tape. Drill out the four retaining holes with a
#28 drill bit. Remove the cowl from the fuselage. Now drill
out the holes in the retaining lug with a 3/16” drill bit.
2. Locate the Cowl Hardware and find the four 6-32 T –
Nuts. Install one in each of the holes in the mounting lugs.
Apply thick CA to the edges of the T-nuts to hold them in
place.
3. Cut out an opening in the bottom of the cowl for the
engine head and muffler. Make sure the opening is large
enough for proper cooling. Use a Dremel Tool
with a sanding drum for best results. Began the cut
out small and enlarge it by steps so you can see your way
through it. Other engines will require a different cut out
configuration.
4. In order to install or remove the cowl, we cut the
exhaust pipes off short enough to clear the cowl ring at the
back edge of the cowl., when it passes by them. Once the
cowl is installed, a 3” piece of silicon tubing, ½” ID, is
mounted on each pipe. An automotive clamp isinstalled on
eachtoholdtheminplace.. Inordertoremovethecowlitwill
be necessary to remove the exhaust extensions. This will
provide a positive way of installing the cowl with the least
amount of work on the cowl.
Lanier R/C
11
MOUNTING THE CANOPYMOUNTING THE CANOPY
1. Locate the canopy and trim off the extra material
below the mold line. The mold line is the faint line you see
defining the canopy when trimmed. Lay the canopy over the
base to check the fit. It doesn’t quite fit, does it? Tape the
canopyinplaceandmark theplaces thatneed tobe trimmed.
Remove it and trim again. It should overlap the side by ½”
and the flange on the front should lap by ½”. The back
should be flush with the back former.
2. Once you have the canopy fitting just right, and you are
tired of trimming, or you are frustrated and don’t care
anymore, set it aside.
3Locate the canopy hardware bag. Mount the canopy
baseon thefuselage. Makesure it positionedup against the
forward former and tape down to hold. Locate the hold down
holes near the back edge of the canopy and down ½” from
the mounting edge on the fuselage. Drill out the holes, on
bothsides,witha#28drill. Nowremovethecanopyand drill
outtheholes inthe holddownflangewitha 3/16”drill. Install
a #6 T-nut on the inside of each flange. Apply thick CA
around the edges of the T-nut to hold them in place.
4If you intend to install a pilot and instrument panel
now is the time to do it. Paint the visible surface on the
canopy base flat black, then install the pilot and instrument
panel.. (not included).
5. Mount the canopy base on the fuselage using the
screwsto hold it inplace. Usinga tack rag,cleanthe canopy
thoroughlytoremovethedust. Insideandoutside. Placethe
canopyonthebaseandalign.. Tackglueitaroundtheedges
several places. Especially around the rear former.
6. When cured remove it from the fuselage. Now glue it
all around the edges. We recommend Pacer Technology
canopy glue. Tape with masking tape to hold it in place.
Whencured remove themaskingtape and applytrimtape of
matching color around the front and sides.
Lanier R/C
12
MOUNTING THE THROTTLE SERVOMOUNTING THE THROTTLE SERVO
1. Firstit willbenecessary toconstructa very simple servo
mount. Locatethelasercutpiecesandthetwo5/16”x5/16”
x7/8” wood beams. Lay downasmall piece ofwaxpaper on
aflatsurface. Mixupsome5-minepoxy. Gluethebeamsinto
the notches making sure they are square. Now glue in a
gusset under each beam.
2. Install the servo in the servo mount with four #2 x ½”
sheet metal screws. (not supplied). Orient it so the lead is
facing toward the back of the fuselage when mounted in
location.
3. Glue the mount to the side of the engine box using
thickCAorepoxy. Locateit1-3/8”downfromthetopedgeof
the engine box side and 3-3/8”fromthe insideofthefirewall
to the front edge of the mount.
4. Drill a ¼” hole in the firewall 1-3/8” down from the top
edge adjacent to the engine shim. Prepare the 6” threaded
throttle pushrod. Mount a 2-56 hex nut and clevis on each
end. Adjustthe clevisso that theywill fit betweenthe throttle
bellcrankandthe servoarm. Tighten thenuts andinstall the
clevis keepers. Make necessary adjustments when first
running the engine.
MOUNTING THE FUEL TANKMOUNTING THE FUEL TANK
Beforemountingthefueltankitwillbenecessarytoassemble
it. Thestopperinthetankis requiredfor gas. Itcan beused
for glow fuel but the pickup line will have to be changed to
silicone in case you decide to use a glow engine.
Lanier R/C
13
Fuel Tank Parts
1. Push the tube through the stopper. It is a tight fit and
you will have to force it. Parts are painted black to see it
better. Parts have been painted black for photo purposes.
2. Make up a stopper assembly. Carefully bend the vent
tube as shown. The Du-BroTubeBenderdoesagreatjobof
bendingwithnokinking. Whenbentandpositionedproperlyit
should extend into the bubble in the top of the tank. Cut the
pickup line to proper length when installed so the clunk will
movefreelywhentankisturnedup-side-down. Tiethepickup
line to the stopper assembly with the wire tie wrap. An extra
third line should be installed for filling the tank.
3. Locate the tank mount and the two tie straps. Thread
the tiesthroughtheholesasshownandcenterthem. Mixup
some 5-min. epoxy and glue the mount to the engine box
sidesandwingtubehousing. Centerthemountoverthetube
housing keepingit parallel with the top edgeofthe fuselage.
Allow epoxy to cure.
4. Place a piece of ¼” foam, (not supplied) the size of
the tank, (not supplied) on the tank mount. Now pull the tie
straps tight. Check to see that tank is securely in place.
Mounting the WingsMounting the Wings
1. Remove the covering from the holes in the side of the
fuselage. Use a sharp X-acto knife. Remove possible glue
build-upinwing spartube soaluminum sparcan beinserted.
CarefullyuseaDremelMotorwithsandingdrum. Iftubedoes
not slide through the fuselage, do to tolerances, sand the
inside of the tube in the fuselage with a large dowel with 220
paper glued to it until it does.
Lanier R/C
14
2. Slide the aluminum wing spar into the fuselage
centering it. Now slide on a wing panel pushing it up against
the fuselage. Grab the tube on the opposite side and push,
with a twisting motion, inward to make sure it is bottomed
keeping the wing panel against the fuselage.
Note: The aluminum anti rotation pins, on the wing may notNote: The aluminum anti rotation pins, on the wing may not
let the wing seat properly. If holes are not aligned, removelet the wing seat properly. If holes are not aligned, remove
wood, only ifwood, only if necessary,from front orback edge of holeinnecessary,from front or back edge of holein
fuselage. Do not remove from top or bottom edge.fuselage. Do not remove from top or bottom edge.
Check and make sure the pins are glued securely in place.
3. Locatethe wingretainerhard pointonthe topofthewing.
It is located on the centerline of the spar, 10” out from the
wing root. Using a #36 drill bit, drill through the hard point
andonesideofthealuminumspar. Nowtaptheholeandthe
aluminum spar with a 6-32tap. Counterborethe hole witha
¼” drill bit to recess the screw head flush with the wing
surface.
4. Now do the other side. Note: When removing the wing,
remove the screw from one side only and leave the spar
fastenedinonewingpanel. Ifbothscrewsareremoved,itwill
be extremely hard to find the hales in the spar again when
tryingtoinsert thelocking screws. Donotmakethismistake.
A small piece of transparent tape over each screw will hold
them in place.
Balancing the Cap 232Balancing the Cap 232
Oneofthemostimportant thingstodobeforeflyingyourCap
isto checktheCG(centerofgravity). TheCapshouldbalance
1” ahead of the wing spar with the nose tipped down at a 10
degree angle. To accomplish this it may be necessary to
movethe batteries forward oraft. Ifthat don’t doit,then you
must add weight. But only as a last resort. Of course, a lot
depends on how big and heavy an engine you install.
Control Surface TravelControl Surface Travel
In order to do the 3D maneuvers it will require a big engine
and lots of control travel. Before you program your radio for
those wild maneuvers, we recommend you set the control
travelasrecommended for the first trim flights. Then as you
becomemorefamiliarwiththeCap’sflightcharacteristicsyou
can change the travel to your style of flying..
Elevator travel plus 1’” minus 1
Aileron travel plus 3/4”, minus 3/4”
Rudder travel, all you can get
Lanier R/C
15
Installing the RadioInstalling the Radio
Useradiopackingfoam(notincluded),availableatyourlocal
hobbydealer)whenyouinstallthereceiverandbattery. The
batteries and receiver can be held in place with Velcro or
rubber bands. Route the receiver antenna back through the
fuselage using an antenna tube (not included) or route it
outside back to the vertical stab. If using an antenna tube,
lightlytapethereceiverantennatotheoutsideofthetube(or
routeinside the tube) and routeantennatube inside the aftaft
section of the fuselage.
PREPRE-- FLIGHT NOTESFLIGHT NOTES
Before the first flight, and to ensure some longevity in your
Cap 232, you will do well to check out a few things before
heading to the flying field.
1. As a reminder, balance the Cap with the fuel tank empty.
Depending on your type of flying you may want to adjust it
forward or aft.
2.Checkthecontrolsurfacetravelsagain..Wehavegivenyou
a starting point however; they may need to be fine tuned to
meet your flying needs.
3. Run the engine and check the idle. Have it ready so you
don't encounter any problems at the field.
4. Turn on the radio with the engine running to make sure
therearenointermittentglitches.Giveitagoodrangecheck.
5.Checkallhardwaretobesureitissecure. Thereisnothing
worse than losing an airplane on the first flight because of a
loose nut or clevis.
Notes:Notes:
A word about wrinkled covering. Because the airplane, when
shipped, has been put through many environmental
conditions, the covering will tend to wrinkle in places. A heat
gun will take them out when used with care. Your Cap 232 is
coveredwithUltraCote,thefinestfilmcoveringavailabletoday!
When using two servos on the elevator, a “Y” harnesswith a
servoreverserisrequiredin orderto keepboth servosinthe
samehookup configuration. Thisand otherrelatedproducts
(servoleadextensions,switchharnesswithchargingport)can
be purchased from Maxx Products, 815 Oakwood Rd., Unit D,
LakeZurich, IL, 60047. Theyhave many usefulR/C products.
Ask for their catalog.
We hope you enjoy flying your Cap 232. We have tried very
hard to ensure the best quality possible. All of the hardware
included in the kit is American made. Our Cap isstructurally
soundandwilltakeanymaneuveryoucando,exceptstraight
into the ground. Happy Fly ‘in!
HARDWARE FOR ARF CAP232HARDWARE FOR ARF CAP232
WINGWING
(10)Robart Super Hinge
(2) #6 x 1-3/4” Pan Hd Mach Screw Control horns)
(4) #6 flat washer
(2) #6 lock washer
(2) #6 hex nut
(2) #4-40 x 4” threaded rod Pushrod) Sullivan
(4) #4-40 clevis Sullivan)
(2) #4-40 hex nut
(2) #6 horn bracket
Lanier R/C
16
(2) #6 –32 x 1” Soc Hd. Cap screw (to hold wings on
spar)
TailTail
(10) Robart Super Hinge
(2) #6 x 2-1/2” pan hd. Mach. Screw control horn)
(elev.)
(1) #6 x 3” threaded rod full thread control horn)
(rudder)
(6) #6 flat washer
(4) #6 lock washer
(4) #6 hex nut
(4) #6 horn bracket
(2) #4-40 x 4” threaded rod (elev.) (2) #4-40 x 10”
threaded rod (rudder)
(8) #4-40 clevis
(8) #4 hex nut
(1) Sullivan tail Wheel 10 –22 lbs -1-1/4 “ wheel -
(2) 3/32” wheel collar
(4) #4 rd. head sheet metal screw
CANOPYCANOPY
(2) #6 X ¾” Soc. Hd. Bolt
(2) #6 blind nut
(2) #6 flat washer
(2) #6 lock washer
COWLCOWL
(4) #6 x ¾” soc hd. Bolt
(4) #6 blind nut
LANDING GEARLANDING GEAR
(2) ¼-20 x 1” soc. hd. cap screw
(5) ¼” flat washer
(1) ¼” split lock washer
((2) ¼-20 lock nut
(1) ¼-20 T-nut
(4) 3/16 wheel collar
(2) 3-1/2” wheel
(2) 3/16 X 2” wheel axle
MISCMISC
(1) 24 oz fuel tank gas only (glow fuel stopper and tube
not supplied)
(1) fuel tank platform (laser cut part) ¼” lite-ply
(2) 14” plastic tie strap
(1) firewall 4-1/8” x 4-13/16” birch ply
(2) engine box bottom 5-5/16” x 6-1/2” lite ply (laser
cut part)
(1) servo mount (laser cut part)
(1) ½” balsa tri-stock x 30”
WHEEL PANTSWHEEL PANTS
(2) #6-32 x ½ Soc Hd. Bolt
(2) #6-32 blind nut
(2) #6 split lock washer

Other manuals for MARINER 40 MK II ARF

9

Other Lanier R/C Toy manuals

Lanier R/C Dart ARF Instruction Manual

Lanier R/C

Lanier R/C Dart ARF Instruction Manual

Lanier R/C Corsair ARF User manual

Lanier R/C

Lanier R/C Corsair ARF User manual

Lanier R/C MARINER 40 MK II ARF User manual

Lanier R/C

Lanier R/C MARINER 40 MK II ARF User manual

Lanier R/C Radical 330 ARF User manual

Lanier R/C

Lanier R/C Radical 330 ARF User manual

Lanier R/C TAYLORCRAFT Instruction Manual

Lanier R/C

Lanier R/C TAYLORCRAFT Instruction Manual

Lanier R/C Shrike 40 User manual

Lanier R/C

Lanier R/C Shrike 40 User manual

Lanier R/C ripper User manual

Lanier R/C

Lanier R/C ripper User manual

Lanier R/C MARINER .40 User manual

Lanier R/C

Lanier R/C MARINER .40 User manual

Lanier R/C S.E.5A User manual

Lanier R/C

Lanier R/C S.E.5A User manual

Lanier R/C MARINER 40 MK II ARF User manual

Lanier R/C

Lanier R/C MARINER 40 MK II ARF User manual

Lanier R/C MARINER 40 MK II ARF User manual

Lanier R/C

Lanier R/C MARINER 40 MK II ARF User manual

Lanier R/C STINGER 120 ARF User manual

Lanier R/C

Lanier R/C STINGER 120 ARF User manual

Lanier R/C MARINER 40 MK II ARF User manual

Lanier R/C

Lanier R/C MARINER 40 MK II ARF User manual

Lanier R/C 94" Edge 540 ARF User manual

Lanier R/C

Lanier R/C 94" Edge 540 ARF User manual

Lanier R/C MARINER 40 MK II ARF User manual

Lanier R/C

Lanier R/C MARINER 40 MK II ARF User manual

Lanier R/C MARINER .120 User manual

Lanier R/C

Lanier R/C MARINER .120 User manual

Lanier R/C MARINER 40 MK II ARF User manual

Lanier R/C

Lanier R/C MARINER 40 MK II ARF User manual

Lanier R/C Stinger .60 ARF User manual

Lanier R/C

Lanier R/C Stinger .60 ARF User manual

Lanier R/C P-51 Instruction Manual

Lanier R/C

Lanier R/C P-51 Instruction Manual

Lanier R/C Stinger 60 User manual

Lanier R/C

Lanier R/C Stinger 60 User manual

Lanier R/C MARINER 40 MK II ARF User manual

Lanier R/C

Lanier R/C MARINER 40 MK II ARF User manual

Lanier R/C MARINER 40 MK II ARF User manual

Lanier R/C

Lanier R/C MARINER 40 MK II ARF User manual

Lanier R/C MARINER 40 MK II ARF User manual

Lanier R/C

Lanier R/C MARINER 40 MK II ARF User manual

Lanier R/C EXPLORER 40 User manual

Lanier R/C

Lanier R/C EXPLORER 40 User manual

Popular Toy manuals by other brands

Mattel Disnay Princess Fairytale Hair Rapunzel instructions

Mattel

Mattel Disnay Princess Fairytale Hair Rapunzel instructions

marklin BR 58 manual

marklin

marklin BR 58 manual

Ro Óg RunBike Instructions for use

Ro Óg

Ro Óg RunBike Instructions for use

Fisher-Price BARBIE M5727 Assembly

Fisher-Price

Fisher-Price BARBIE M5727 Assembly

Fisher-Price Laugh Smile & Learn L3480 Parents' guide

Fisher-Price

Fisher-Price Laugh Smile & Learn L3480 Parents' guide

Eduard P-61C exterior manual

Eduard

Eduard P-61C exterior manual

Team Durango DNX408 user guide

Team Durango

Team Durango DNX408 user guide

VQ Models CESSNA 188 AGWAGON instruction manual

VQ Models

VQ Models CESSNA 188 AGWAGON instruction manual

Pichler MINI DOMINO C9795 instruction manual

Pichler

Pichler MINI DOMINO C9795 instruction manual

PLAYMOBIL Country 70518 Assembly instruction

PLAYMOBIL

PLAYMOBIL Country 70518 Assembly instruction

Walthers Walthers Mainline RDC-1 operating instructions

Walthers

Walthers Walthers Mainline RDC-1 operating instructions

TT RC Sport Playerunknow's Battlegrounds PUBG Buggy Maintenance manual

TT RC Sport

TT RC Sport Playerunknow's Battlegrounds PUBG Buggy Maintenance manual

Viessmann 4162 operating instructions

Viessmann

Viessmann 4162 operating instructions

Faller 272560 manual

Faller

Faller 272560 manual

Balsa Taube 40 Assembly manual

Balsa

Balsa Taube 40 Assembly manual

LEXIBOOK RPB141 instruction manual

LEXIBOOK

LEXIBOOK RPB141 instruction manual

MOB KC2938 user manual

MOB

MOB KC2938 user manual

Eduard 49 222 manual

Eduard

Eduard 49 222 manual

manuals.online logo
manuals.online logoBrands
  • About & Mission
  • Contact us
  • Privacy Policy
  • Terms and Conditions

Copyright 2025 Manuals.Online. All Rights Reserved.