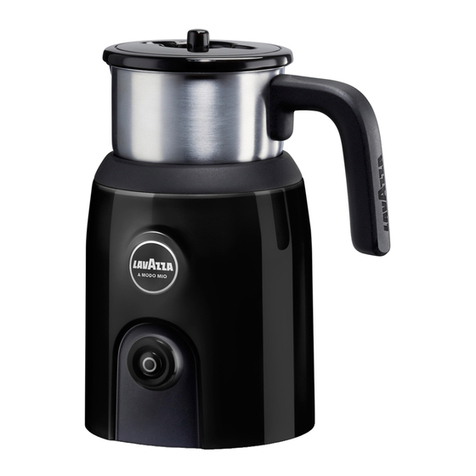
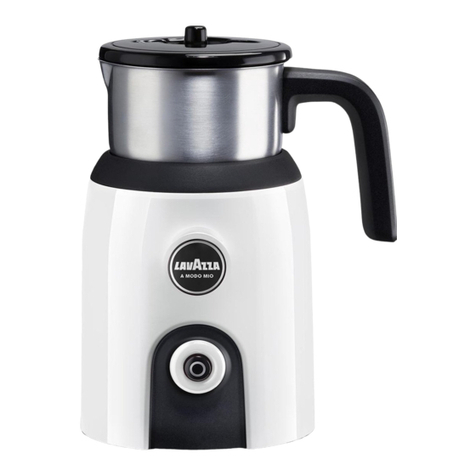
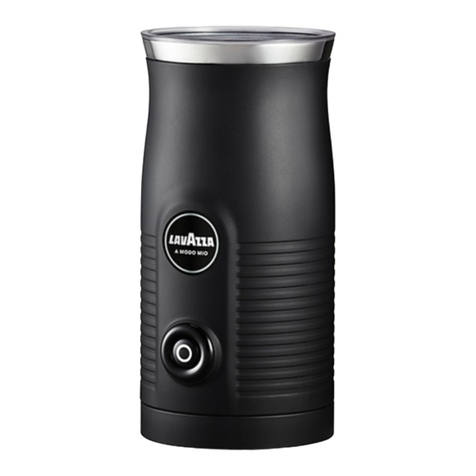
LAVAZZA 19673 a modo mio User manual

IT Manuale d’uso
EN Instructions for use
DE Gebrauchsanweisung
FR Mode d’emploi
ES Instrucciones de uso
Montalatte 3
Milk frother 8
Milchaufschäumer 13
Mousseur à lait 18
Espumador de leche 23

2
1
2
3
4
6
5
7

3
Montalatte
Collegamento alla rete
L’apparecchio deve esser collegato
esclusivamente a una presa di corrente con
messa a terra, installata a norma di legge.
Assicuratevi che la tensione di alimentazione
corrisponda a quella indicata sulla targhetta
portadati. Questo prodotto è conforme alle
direttive vincolanti per l’etichettatura CE.
Descrizione
1. Coperchio (e vano per riporre i frullini)
2. Frullino - dentellato (per montare il latte)
3. Corona liscia per il frullino dentellato
(per riscaldare il latte)
4. Recipiente del latte e manico
5. Base
6. Interruttore accensione/spegnimento
7. Cavo di alimentazione con spina
Importanti norme di sicurezza
∙Per evitare ogni rischio, le riparazioni
a questo apparecchio elettrico o
al cavo di alimentazione devono
essere effettuate dal nostro servizio
di assistenza tecnica. Nel caso siano
necessarie riparazioni, vi preghiamo
di inviare l’apparecchio al nostro
centro di assistenza tecnica (v. in
appendice).
∙Assicuratevi che l’apparecchio sia
disinserito dalla presa di corrente
e si sia raffreddato completamente
prima di pulirlo. Per informazioni
più dettagliate su come pulire
l’apparecchio, consultate la sezione
Manutenzione e pulizia.
∙Per evitare ogni rischio di scossa
elettrica, non pulite l’apparecchio con
acqua e non immergetelo in acqua.
∙Avvertenza: Il recipiente del latte si
riscalda durante il funzionamento.
Non toccatene le superfici calde.
Prendere il recipiente sempre dal
manico.
∙Avvertenza: Il cattivo uso può
essere causa di gravi lesioni alla
persona.
∙Questo apparecchio è studiato per
il solo uso domestico o per impieghi
simili, come per esempio
- in cucine per il personale, negozi,
uffici e altri ambienti simili di lavoro,
- in aziende agricole,
- da clienti di alberghi, motel e
sistemazioni simili,
- da clienti di pensioni “bed-and-
breakfast” (letto & colazione).
∙Il presente apparecchio può essere
usato da bambini (di almeno 8 anni
di età) e da persone con ridotte
IT

4
capacità fisiche, sensoriali o mentali,
o da persone senza particolari
esperienze o conoscenze, purché
siano sotto sorveglianza o siano
state date loro istruzioni sull’uso
dell’apparecchio e comprendano
pienamente i rischi e le precauzioni
di sicurezza che l’apparecchio
comporta.
∙Ai bambini non deve essere
consentito di giocare con
l’apparecchio.
∙Ai bambini non deve essere
consentito di effettuare operazioni
di pulizia o di manutenzione
sull’apparecchio a meno che non
siano supervisionati da un adulto e
siano comunque più grandi di 8 anni
di età.
∙L’apparecchio e il cavo di
alimentazione devono essere tenuti
sempre fuori della portata di bambini
di età inferiore agli 8 anni.
∙Avvertenza: Tutto il materiale di
imballaggio deve essere tenuto fuori della
portata dei bambini a causa del rischio
potenziale esistente, per esempio di
soffocamento.
∙Prima di ogni utilizzo dell’apparecchio,
controllate attentamente che
l’apparecchio e gli accessori inseriti non
presentino tracce di deterioramento.
Se per esempio fosse caduto battendo
su una superficie dura, o se è stata
usata una forza eccessiva nel tirare il
cavo di alimentazione, l’apparecchio
non va più usato: danni anche invisibili
ad occhio nudo potrebbero comportare
conseguenze negative sulla sicurezza nel
funzionamento dell’apparecchio.
∙Questo apparecchio è stato studiato
unicamente per riscaldare e montare il
latte. Non inserite altri tipi di sostanze
liquide o solide nel recipiente.
∙Non lasciate incustodito il montalatte
quando è in funzione.
∙Rispettate sempre, ad ogni ciclo, i segni
dei livelli di minimo e di massimo riportati
all’interno del recipiente.
∙La sporgenza nella parte bassa del
recipiente (segno del livello minimo)
deve essere coperta di latte. Se non
c’è abbastanza latte, l’apparecchio può
surriscaldarsi.
∙Per evitare il surriscaldamento,
l’apparecchio si spegnerà
automaticamente se messo in funzione
con il recipiente vuoto.
∙Attenzione: Riempire eccessivamente il
recipiente può essere pericoloso nel caso
il latte montato schizzi fuori.
∙Attenzione: Il coperchio deve essere
sempre inserito durante il funzionamento;
può essere aperto solo per aggiungere
polvere di cacao.
∙L’apparecchio può essere messo in
funzione solo con gli accessori originali
forniti dal produttore.
∙L’apparecchio deve essere sistemato
sempre su una superficie solida e piana.
∙Non poggiate mai l’apparecchio e il
cavo di alimentazione sopra fiamme o
5
superfici riscaldanti (es. fornelli o piastre
riscaldanti).
∙Non lasciate pendere liberamente il cavo
di alimentazione; tenete il cavo lontano
dagli elementi caldi dell’apparecchio.
∙Disinserite sempre la spina dalla presa
di corrente
-in caso di cattivo funzionamento,
-dopo l’uso,
-prima di pulire l’apparecchio.
∙Per disinserire la spina dalla presa
di corrente, non tirate mai il cavo di
alimentazione ma afferrate direttamente
la spina.
∙Nessuna responsabilità verrà assunta in
caso di danni risultanti da un uso errato o
dalla non conformità alle istruzioni.
Prima di adoperare l’apparecchio per la
prima volta
Eliminate tutto il materiale di imballaggio e
controllate che ci siano tutti i componenti
accessori.
Al primo utilizzo dell’apparecchio o dopo
un lungo periodo di inattività, pulitelo
accuratamente nel modo indicato nella
sezione Manutenzione e pulizia.
Conservare gli accessori
Gli accessori per montare e per riscaldare
possono essere riposti nel coperchio
dell’apparecchio. Sistemate prima la corona
liscia con il lato dell’apertura rivolto verso
l’alto e poi, all’interno, sistemate il frullino
dentellato.
Istruzioni d’uso
Vi consigliamo di utilizzare latte ad alto
tenore proteico. Per ottenere risultati migliori,
togliete il latte dal frigo immediatamente
prima del suo utilizzo.
La parte di sotto del recipiente e la zona di
contatto all’interno della base devono essere
pulite e asciutte.
Scelta del frullino
∙Se volete riscaldare il latte e montarlo
allo stesso tempo, utilizzate il frullino
dentellato.
∙Per riscaldare il latte, sistemate il frullino
dentellato all’interno della corona liscia;
inseriteli poi all’interno del recipiente
facendo attenzione che la corona liscia
sia rivolta verso il basso.
Quantità di riempimento
∙Rispettate sempre il segno di livello di
riempimento minimo e accertatevi che il
contenitore sia riempito con almeno 60 ml
di latte.
∙Per montare il latte, riempite il recipiente
con un massimo di 120 ml (segno
inferiore di livello massimo ).
∙Per riscaldare il latte, riempite il recipiente
con un massimo di 180 ml (segno
superiore di livello massimo ).
Riscaldare o montare a caldo il latte
1. Sistemate il recipiente sulla base.
2. Togliete il coperchio dal recipiente del
latte.
3. Inserite il frullino scelto sulla sporgenza
di montaggio che si trova sul fondo del
recipiente.
4. Versate la quantità di latte desiderata
nel recipiente.
5. Rimettete il coperchio sul recipiente.
6. Inserite la spina in una presa di corrente
a muro adatta.
7. Premete il tasto di accensione/
spegnimento (On/Off).
8. Sentirete un segnale acustico e anche

6
l’avvio del motorino.
L’apparecchio comincia a riscaldare e a
montare il latte.
Quando il latte sarà sufficientemente
caldo, il processo di riscaldamento
e di montatura si interromperà
automaticamente e sarà emessa una
serie di segnali acustici.
9. Ora potrete togliere il recipiente del latte
dalla base.
Versate il latte caldo e aiutandovi con
un cucchiaio fate cadere la schiuma del
latte.
Il sistema di raffreddamento del
motorino continua a funzionare per
un breve periodo ancora. Se non
desiderate continuare con altri cicli di
utilizzo, aspettate che il motorino di
raffreddamento si fermi completamente
e poi disinserite la spia dalla presa di
corrente.
Note
Lasciate che l’apparecchio si raffreddi
per 3-4 minuti prima di procedere a un
successivo ciclo di utilizzo.
Montare il latte a freddo
È possibile montare il latte senza doverlo
prima riscaldare.
1. Seguite i passi da 1 a 6 descritti nella
sezione Riscaldare o montare a caldo il
latte.
2. Premete e mantenete premuto il tasto
di accensione/spegnimento per almeno
2 secondi, sino a sentire un lungo
segnale acustico.
Il sistema di raffreddamento del
motorino si attiva.
Un attimo dopo, l’apparecchio comincia
a montare il latte.
Il processo per montare il latte si
interrompe automaticamente dopo 1
minuto.
Si sentirà una sequela di impulsi sonori.
3. Ora potete togliere il recipiente del latte
dalla base.
Il sistema di raffreddamento del
motorino continua a funzionare per un
breve lasso di tempo.
Dopo un ciclo per montare il latte a freddo
utilizzando latte freddo, è possibile avviare
immediatamente un nuovo ciclo per montare
e riscaldare il latte.
Preparare il cioccolata calda
Questo apparecchio è adatto anche per
la preparazione di bevande al cacao.
Procedete secondo quanto descritto nella
sezione Riscaldare o montare a caldo il latte
(dopo aver inserito l’accessorio frullino e la
corona) e accendete l’apparecchio. Dopo un
minuto circa, togliete il coperchio, inserite
la quantità desiderata di cacao in polvere
mentre è in corso il processo per montare il
latte e risistemate il coperchio in sede.
Per evitare che il meccanismo si blocchi, non
utilizzate cioccolato a scaglie o a pezzetti
quando preparate bevande al cacao.
Interruzione momentanea o definitiva
del ciclo
Se volete interrompere il ciclo per riscaldare
o per montare il latte, premete il tasto di
accensione/spegnimento (il sistema di
raffreddamento del motorino continuerà ad
essere udibile).
Se volete far continuare il ciclo per riscaldare
o montare il latte, premete di nuovo il tasto
di accensione/spegnimento. Se il latte ha
già raggiunto una certa temperatura al
momento in cui avete interrotto il processo,

7
allora l’apparecchio non può essere riattivato
immediatamente, dovrete aspettare 3-4
minuti perché si raffreddi.
Manutenzione e pulizia
∙Disinserite sempre la spina dalla presa
di corrente a muro e aspettate sino a
quando il motore sia completamente
fermo, prima di procedere alla pulitura
dell’apparecchio.
∙Per evitare il rischio di scosse
elettriche, non pulite la base né il cavo
di alimentazione con acqua e non
immergeteli in acqua.
∙Il recipiente, i frullini e il coperchio devono
essere lavati dopo ogni ciclo di utilizzo
con acqua calda e un poco di detersivo
oppure in lavastoviglie. Se necessario, il
frullino dentellato può essere pulito con
uno spazzolino adatto.
∙Asciugate accuratamente tutti gli
elementi.
∙La base può essere pulita con un panno
morbido leggermente umido imbevuto in
una piccola quantità di detersivo.
∙Non utilizzate soluzioni detergenti abrasive
o dure.
Smaltimento
Gli apparecchi contrassegnati con
questo simbolo devono essere
smaltiti separatamente dai normali
rifiuti domestici perché contengono
materiali di valore che possono essere
riciclati. Lo smaltimento adeguato protegge
l’ambiente e la salute umana. Le autorità
locali o il negoziante di riferimento possono
fornire ulteriori informazioni in materia.
Dichiarazione di garanzia
La garanzia sui nostri prodotti ha validità
di 2 anni dalla data di vendita (certificata
da scontrino fiscale) e comprende gli
eventuali difetti del materiale o di particolari
di costruzione. I danni derivanti da un uso
improprio, rotture da caduta o similari non
vengono riconosciuti. La presente garanzia
non pregiudica i vostri diritti legali, né i
diritti acquisiti in quanto consumatore e
riconosciuti dalla legislazione nazionale
vigente che disciplina l‘acquisto di beni.
La garanzia decade nel momento in cui gli
apparecchi vengono aperti o manomessi da
Centri non da noi autorizzati.
In caso aveste bisogno di assistenza,
contattate:
Videoelettronica
Via Dino Col, 6-R.
16149 Genova, Italy
Ufficio Tel. : (+39) 010 418609
Numero Verde: 800240279

8
Milk frother
Connection to the mains supply
The appliance should only be connected to
an earthed socket installed in accordance
with the regulations. Make sure that the
supply voltage corresponds with the voltage
marked on the rating label of the appliance.
This product complies with all binding CE
labelling directives.
Familiarisation
1. Lid (and storage for stirring heads)
2. Stirring head - serrated (for frothing
milk)
3. Smooth collar for serrated stirring head
(for heating milk)
4. Milk container and handle
5. Base
6. On/Off switch
7. Power cord with plug
Important safety instructions
∙In order to avoid hazards, repairs
to this electrical appliance or its
power cord must be carried out by
our customer service. If repairs are
needed, please send the appliance
to our customer service department
(see appendix).
∙Before cleaning the appliance,
ensure it is disconnected from the
power supply and has cooled down
completely. For detailed information
on cleaning the appliance, please
refer to the section Cleaning and
care.
∙To avoid the risk of electric shock, do
not clean the appliance with water
and do not immerse it in water.
∙Caution: The milk container heats
up during operation. Do not touch hot
surfaces.
Hold the container only by its handle.
∙Caution: Any misuse can cause
severe personal injury.
∙This appliance is intended for
domestic or similar applications, such
as the
- staff kitchens in shops, offices and
other similar working environments,
- agricultural working environments,
- by customers in hotels, motels etc.
and similar accommodation,
- in bed-and breakfast type
environments.
∙This appliance may be used by
children (at least 8 years of age) and
by persons with reduced physical,
sensory or mental capabilities, or
lacking experience and knowledge,
provided they have been given
supervision or instruction concerning
EN

9
the use of the appliance and fully
understand all dangers and safety
precautions involved.
∙Children must not be permitted to
play with the appliance.
∙Children must not be permitted
to carry out any cleaning or
maintenance work on the appliance
unless they are supervised and at
least 8 years of age.
∙The appliance and its power cord
must be kept well away from children
under 8 at all times.
∙Caution: Keep any packaging materials
well away from children – such materials
are a potential source of danger, e.g. of
suffocation.
∙Every time the appliance is used, the
main body including the power cord as
well as any attachment fitted should
be checked thoroughly for any defects.
Should the appliance, for instance, have
been dropped onto a hard surface, or if
excessive force has been used to pull the
power cord, it must no longer be used:
even invisible damage may have adverse
effects on the operational safety of the
appliance.
∙This appliance is solely designed for
heating up and frothing milk. Do not put
any other type of liquid or solid food in the
container.
∙Do not leave the milk frother unattended
while in use.
∙Always observe the minimum and
maximum level marks inside the container
for each application.
∙The protrusion in the bottom of the
container (min. level mark) must be
covered by the milk. If there is not enough
milk, the appliance may overheat.
∙To prevent such overheating, the
appliance will automatically switch off if it
is operated when empty.
∙Overfilling the container may cause
danger if frothing milk is forced out.
∙Caution: The lid must always be fitted
during operation; it should only be taken
off to add cocoa powder.
∙The appliance may only be used with the
original accessory parts provided by the
manufacturer.
∙The appliance must always be set on a
firm, level surface.
∙Do not allow the appliance or its power
cord to come into contact with open
flames or any hot surfaces such as hot-
plates.
∙Do not allow the power cord to hang free;
the cord must be kept well away from hot
parts of the appliance.
∙Always remove the plug from the wall
socket
-in case of any malfunction,
-after use,
-before cleaning the appliance.
∙When removing the plug from the wall
socket, never pull on the power cord;
always grip the plug itself.
∙No responsibility is accepted if damage
results from improper use, or if these
instructions are not complied with.
Before using for the first time
Remove any packaging materials and check
that all components are present.
Before the appliance is used for the first

10
time, or after extended periods of non-use, it
should be thoroughly cleaned as described
in the section Cleaning and care.
Storing accessories
The stirring and heating accessories may be
stored in the lid. First, put the smooth collar
in with its opening facing up, and then fit the
serrated head inside.
Operation
We recommend using milk with a high
protein content. For best results, the
milk should be taken from the refrigerator
immediately before frothing.
The underside of the container and the contact
area on the inside of the base must be clean
and dry.
Choosing the stirring head
∙For frothing and heating milk at the same
time, use the serrated head.
∙For simply heating milk, put the serrated
stirring head in the collar, making sure
they are fitted inside the container with the
collar facing down.
Fill amounts
∙Always observe the minimum mark and
ensure the container is filled with at least
60 ml milk.
∙For frothing, fill the container to a
maximum of 120 ml (lower max mark ).
∙For heating, fill the container to a
maximum of 180 ml (upper max mark
).
Heating or hot-frothing milk
1. Place the container onto the base.
2. Remove the lid from the milk container.
3. Place the selected head onto the
mounting protrusion inside the bottom
of the container.
4. Put the required amount of milk into the
container.
5. Place the lid on the container.
6. Insert the plug into a suitable wall
socket.
7. Press the On/Off switch.
8. There is then a beep-signal, and the
motor can be heard starting up.
The appliance begins to heat up and stir
the milk.
Once the milk is sufficiently hot, the
stirring and heating processes stop
automatically, and a number of beep-
signals are heard.
9. You can now remove the milk container
from the base.
Pour out the hot milk, or use a suitable
spoon to take off the milk froth.
The cooling system continues to run for
a brief period. If no further processing
cycle is needed, wait until the cooling
fan has stopped and then remove the
power cord from the socket.
Remarks
Allow the appliance to cool down for 3-4
minutes before a new cycle is started.
Cold-frothing of milk
You can also froth the milk without heating
it up first.
1. Follow the steps 1 to 6 as described in
the section Heating up or hot-frothing
milk.
2. Press and hold the On/Off switch for
about 2 seconds, until a long acoustic
signal is heard.
The motor cooling system is heard to

11
start up.
A moment later, the appliance starts to
stir the milk.
The stirring process stops automatically
after 1 minute.
A number of beep-signals are heard.
3. You can now remove the milk container
from the base.
The cooling system continues to run for
a brief period.
After a cold-frothing cycle using cold milk,
a new stirring and heating cycle may be
started immediately.
Making hot cocoa
The appliance is also suitable for the
preparation of cocoa beverages. Proceed
as described in Heating up or frothing milk
(having fitted the stirring insert and collar)
and turn the appliance on. Take off the lid
after about a minute, put in the desired
amount of cocoa powder while stirring
continues and replace the lid.
To prevent the mechanism from becoming
blocked, do not use grated chocolate or
chocolate chips for cocoa beverages.
Interrupting or ending a cycle
Press the On/Off switch to stop the heating
and stirring process (the motor cooling
system can be heard).
To continue the heating and stirring process,
press the On/Off switch again. If the milk had
already reached a certain high temperature
when the process was interrupted, the
appliance cannot be switched on right away,
but must be allowed to cool down for 3-4
minutes.
Cleaning and care
∙Always remove the plug from the wall
socket and wait until the motor has come
to a complete standstill before cleaning
the appliance.
∙To avoid the risk of electric shock, do not
clean the base or the power cord with
water and do not immerse them.
∙The container, stirring heads and lid
should be cleaned after each cycle of use
with hot water and a little detergent, or in
a dishwasher. If necessary, the serrated
stirring head may be cleaned with a
suitable brush.
∙Wipe all parts thoroughly dry.
∙The base may be cleaned with a damp
cloth and a little detergent.
∙Do not use abrasives or harsh cleaning
solutions.
Disposal
Devices marked with this symbol
must be disposed of separately
from your household waste, as
they contain valuable materials
which can be recycled. Proper disposal
protects the environment and human health.
Your local authority or retailer can provide
information on the matter.
Guarantee
This product is guaranteed against defects
in materials and workmanship for a period
of two years (Australia: one year) from the
date of purchase. Under this guarantee
the manufacturer undertakes to repair or
replace any parts found to be defective,
providing the product is returned to one
of our authorised service centres. This
guarantee is only valid if the appliance
has been used in accordance with the
instructions, and provided that it has not
been modified, repaired or interfered with

12
by any unauthorised person, or damaged
through misuse.
This guarantee naturally does not cover
wear and tear, nor breakables such as
glass and ceramic items, bulbs etc. This
guarantee does not affect your statutory
rights, nor any legal rights you may have
as a consumer under applicable national
legislation governing the purchase of goods.
If the product fails to operate and needs
to be returned, pack it carefully, enclosing
your name and address and the reason for
return. If within the guarantee period, please
also provide the guarantee card and proof
of purchase.
For Service in UK please contact:
HSCL
F.a.o. Lavazza returns department
Firwood Industrial Estate
Thicketford Road
Bolton, BL2 3TR
Telephone: 01204 558 168
For Service in Australia please call
Lavazza A Modo Mio customer service
1300 675 613
or go to www.lavazzamodomio.com.au
for further information on technical
assistance

13
Milchaufschäumer
Anschluss
Das Gerät nur an eine vorschriftsmäßig
installierte Schutzkontaktsteckdose
anschließen. Die Netzspannung muss
der auf dem Typenschild des Gerätes
angegebenen Spannung entsprechen. Das
Gerät entspricht den Richtlinien, die für die
CE-Kennzeichnung verbindlich sind.
Aufbau
1. Deckel mit Rühreinsätzen
2. Rühreinsatz gerippt (zum Aufschäumen
von Milch)
3. Glatte Ummantelung für gerippten
Rühreinsatz (zum Erhitzen von Milch)
4. Milchkännchen mit Griff
5. Basis
6. Ein-/ Austaste
7. Anschlussleitung mit Netzstecker
Sicherheitshinweise
∙Um Gefährdungen zu vermeiden
und um Sicherheitsbestimmungen
einzuhalten, dürfen Reparaturen am
Gerät und an der Anschlussleitung
nur durch unseren Kundendienst
durchgeführt werden. Daher im
Reparaturfall unseren Kundendienst
telefonisch oder per Mail
kontaktieren.
∙Vor jeder Reinigung den Netzstecker
ziehen und das Gerät abkühlen
lassen. Nähere Angaben zur
Reinigung entnehmen Sie bitte aus
dem Abschnitt Reinigung und Pflege.
∙Das Gerät darf aus Gründen der
elektrischen Sicherheit nicht mit
Flüssigkeiten behandelt oder gar
darin eingetaucht werden.
∙Das Milchkännchen wird während
des Gebrauchs heiß! Berühren Sie
nicht die heißen Oberflächen.
Fassen Sie das Milchkännchen nur
am Griff an.
∙Achtung! Missbrauch des Gerätes
kann zu Verletzungen führen.
∙Das Gerät ist dazu bestimmt,
im Haushalt und ähnlichen
Anwendungen verwendet zu werden,
wie z.B.
- in Küchen für Mitarbeiter in Läden,
Büros und anderen gewerblichen
Bereichen,
- in landwirtschaftlichen Betrieben,
- von Kunden in Hotels, Motels und
anderen Unterkünften,
- in Frühstückspensionen.
∙Das Gerät kann von Kindern ab
8 Jahren sowie von Personen
mit reduzierten physischen,
sensorischen oder mentalen
DE

14
Fähigkeiten oder Mangel an
Erfahrung und/oder Wissen benutzt
werden, wenn sie beaufsichtigt oder
bezüglich des sicheren Gebrauchs
des Gerätes unterwiesen wurden und
die daraus resultierenden Gefahren
verstanden haben.
∙Kinder dürfen nicht mit dem Gerät
spielen.
∙Reinigung und Benutzer-Wartung
dürfen nicht durch Kinder
durchgeführt werden, es sei denn sie
sind 8 Jahre und älter und werden
beaufsichtigt.
∙Kinder jünger als 8 Jahre sind vom
Gerät und der Anschlussleitung
fernzuhalten.
∙Halten Sie Kinder von
Verpackungsmaterial fern. Es besteht u.a.
Erstickungsgefahr!
∙Vor der Inbetriebnahme das komplette
Gerät inkl. Anschlussleitung und
eventueller Zubehörteile auf Mängel
und Beschädigungen überprüfen, die
die Funktionssicherheit des Gerätes
beeinträchtigen könnten. Falls das Gerät
z.B. zu Boden gefallen ist oder an der
Anschlussleitung gezogen wurde, können
von außen nicht erkennbare Schäden
vorliegen. In diesen Fällen das Gerät
nicht in Betrieb nehmen.
∙Das Gerät ist ausschließlich zum
Erwärmen und Aufschäumen von Milch
konzipiert. Füllen Sie keine anderen
Flüssigkeiten oder feste Lebensmittel ein.
∙Den Milchaufschäumer nur unter Aufsicht
betreiben.
∙Beachten Sie die Min.- und Max.-
Markierungen im Topf für die
verschiedenen Anwendungen.
∙Der Stutzen im Kannenboden (Min.-
Markierung) muss mit Milch bedeckt sein.
Bei zu geringer Milchmenge kann das
Gerät überhitzen.
∙Zum Schutz vor Überhitzung schaltet sich
das Gerät automatisch aus, wenn keine
Milch eingefüllt wurde.
∙Bei Überfüllung kann Milch überschäumen.
∙Achtung! Der Deckel darf bei Betrieb
nur zum Einfüllen von Kakaopulver
abgenommen werden und muss sonst
immer aufgesetzt sein.
∙Das Gerät darf nur mit dem Original-
Zubehör betrieben werden.
∙Das Gerät auf eine feste, ebene Fläche
stellen.
∙Achten Sie darauf, dass weder das Gerät
noch die Anschlussleitung einer heißen
Kochplatte oder offenem Feuer zu nahe
kommt.
∙Die Anschlussleitung nicht
herunterhängen lassen und von heißen
Geräteteilen fernhalten.
∙Den Netzstecker ziehen,
-bei Störungen während des
Betriebes,
-nach jedem Gebrauch,
-vor jeder Reinigung.
∙Den Netzstecker nicht an der
Anschlussleitung aus der Steckdose
ziehen, fassen Sie den Netzstecker an.
∙Wird das Gerät falsch bedient oder
zweckentfremdet verwendet, kann keine
Haftung für evtl. auftretende Schäden
übernommen werden.

15
Vor der ersten Inbetriebnahme
Entfernen Sie sämtliches
Verpackungsmaterial und prüfen Sie, ob alle
Teile vorhanden sind.
Reinigen Sie das Gerät vor der ersten
Inbetriebnahme und nach längerem
Nichtgebrauch wie unter Reinigung und
Pflege beschrieben ist.
Aufbewahrung Rühreinsätze
Die Rühreinsätze können am Deckel
aufbewahrt werden. Zunächst die glatte
Ummantelung mit der Öffnung nach
oben aufsetzen und dann den gerippten
Rühreinsatz einsetzen.
Bedienung
Wir empfehlen eine Milch mit möglichst
hohem Eiweißgehalt zu verwenden. Die
Milch muss kühlschrankkalt sein.
Die Unterseite des Milchkännchens und die
Innenseite der Basis müssen sauber und
trocken sein.
Rühreinsatz auswählen
∙Um Milch zu erhitzen und gleichzeitig
aufzuschäumen, wählen Sie den
gerippten Rühreinsatz.
∙Um Milch zu erhitzen, stecken Sie den
gerippten Rühreinsatz in die glatte
Ummantelung. Achtung! Der Rühreinsatz
muss mit der Ummantelung nach unten in
das Milchkännchen gesetzt werden.
Füllmengen
∙Bitte beachten Sie die Min-Markierung
und füllen Sie immer mindestens 60 ml
Milch ein.
∙Max. Milchmenge zum Aufschäumen: 120
ml (untere Max.–Markierung )
∙Max. Milchmenge zum Erwärmen: 180 ml
(obere Max.–Markierung )
Milch erhitzen oder warm aufschäumen
1. Stellen Sie das Milchkännchen auf die
Basis.
2. Nehmen Sie den Deckel vom
Milchkännchen ab.
3. Stecken Sie den ausgewählten
Rühreinsatz auf den Stutzen im
Kannenboden.
4. Füllen Sie die gewünschte Milchmenge
ein.
5. Setzen Sie den Deckel auf das
Milchkännchen.
6. Stecken Sie den Netzstecker in eine
Steckdose.
7. Drücken Sie die Ein-/Austaste.
8. Es ertönt ein Signalton und die
Belüftung des Gerätes ist zu hören.
Das Gerät beginnt die Milch zu rühren
und zu erhitzen.
Sobald die Milch ausreichend erhitzt
ist, stoppt das Gerät den Rühr- und
Heizvorgang automatisch und es
ertönen Signaltöne.
9. Sie können das Milchkännchen nun von
der Basis nehmen.
Gießen Sie die erwärmte Milch aus
bzw. entnehmen Sie den Milchschaum
mit Hilfe eines Löffels.
Die Motorlüftung ist noch eine Weile
zu hören. Wenn Sie keine weitere
Zubereitung mehr wünschen, ziehen
Sie den Netzstecker, sobald das
Lüftergeräusch erlischt.
Hinweis:
Bevor das Gerät erneut benutzt werden
kann, muss es zunächst für ca. 3-4 Minuten
abkühlen.

16
Milch kalt aufschäumen
Sie können auch Milch aufschäumen ohne
sie zu erhitzen.
1. Führen Sie die Schritte 1 bis 6 aus, wie
im Abschnitt „Milch erhitzen oder warm
aufschäumen“ beschrieben.
2. Drücken Sie die Ein-/Austaste und
halten Sie sie für ca. 2 Sekunden
gedrückt bis ein langer Signalton ertönt.
Die Belüftung des Gerätes ist zu hören.
Einen Augenblick später beginnt das
Gerät die Milch zu rühren.
Das Gerät stoppt den Rührvorgang
nach 1 Minute automatisch.
Es ertönen Signaltöne.
3. Sie können das Milchkännchen nun von
der Basis nehmen.
Die Motorlüftung ist noch eine Weile zu
hören.
Wenn kalte Milch nur aufgeschäumt wurde,
kann der Rühr- und Heizvorgang sofort
erneut gestartet werden.
Kakao zubereiten
Das Gerät ist auch zur Zubereitung von
Kakaogetränken geeignet. Gehen Sie
vor wie unter ‚Milch erhitzen oder warm
aufschäumen’ beschrieben und setzen Sie
den Rühreinsatz mit der Ummantelung ein.
Schalten Sie das Gerät ein und nehmen Sie
nach ca. 1 Minute den Deckel ab. Füllen
Sie die gewünschte Menge Kakaopulver
ein, während das Gerät die Milch umrührt.
Setzen Sie den Deckel wieder auf.
Zur Zubereitung von Kakao keine
Schokoraspeln oder –streusel verwenden,
da das Gerät dadurch blockieren kann.
Vorzeitiges Unterbrechen oder Beenden
Drücken Sie die Ein-/Austaste; der Heiz-
und Rührvorgang wird gestoppt und die
Belüftung des Gerätes ist zu hören.
Um den Heiz- und Rührvorgang
fortzusetzen, drücken Sie wieder die Ein-/
Austaste. Wenn der Vorgang unterbrochen
wurde als die Temperatur der Milch schon
hoch war, lässt sich das Gerät nicht wieder
sofort einschalten. Warten Sie dann ca. 3-4
Minuten.
Reinigung und Pflege
∙Vor jeder Reinigung den Netzstecker
ziehen und den Motorstillstand abwarten.
∙Die Basis und das Netzkabel dürfen aus
Gründen der elektrischen Sicherheit nicht
mit Wasser behandelt werden oder gar
darin eingetaucht werden.
∙Das Milchkännchen, die Rühreinsätze
und den Deckel nach jedem Gebrauch
gründlich in warmem Wasser mit etwas
Spülmittel oder in der Spülmaschine
reinigen. Zur Reinigung des gerippten
Rühreinsatzes gegebenenfalls eine
Bürste benutzen.
∙Alle Teile sorgfältig abtrocknen.
∙Die Basis nur mit einem weichen,
feuchten Tuch und etwas
Geschirrspülmittel reinigen.
∙Verwenden Sie keine scharfen und
scheuernden Reinigungsmittel.
Entsorgung
Geräte, die mit diesem Symbol
gekennzeichnet sind, müssen
getrennt vom Hausmüll entsorgt
werden. Diese Geräte enthalten
wertvolle Rohstoffe, die wiederverwertet
werden können. Eine ordnungsgemäße
Entsorgung schützt die Umwelt und die
Gesundheit Ihrer Mitmenschen. Ihre
Gemeindeverwaltung bzw. Ihr Fachhändler

17
gibt Auskunft über die ordnungsgemäße
Entsorgung.
Garantie
Severin gewährt Ihnen eine
Herstellergarantie von zwei Jahren ab
Kaufdatum. In diesem Zeitraum beseitigen
wir kostenlos alle Mängel, die nachweislich
auf Material- oder Fertigungsfehlern beruhen
und die Funktion wesentlich beeinträchtigen.
Weitere Ansprüche sind ausgeschlossen.
Von der Garantie ausgenommen sind:
Schäden, die auf Nichtbeachtung der
Gebrauchsanweisung, unsachgemäße
Behandlung oder normalen Verschleiß
zurückzuführen sind, ebenso leicht
zerbrechliche Teile wie z. B. Glas, Kunststoff
oder Glühlampen. Die Garantie erlischt
bei Eingriff nicht von Severin autorisierter
Stellen. Sollte eine Reparatur erforderlich
werden, setzen Sie sich bitte telefonisch
oder per Mail mit dem nachstehend
aufgeführten Kundendienst in Verbindung.
Die gesetzlichen Gewährleistungsrechte
gegenüber dem Verkäufer und eventuelle
Verkäufergarantien bleiben unberührt.
SEVERIN Service
Am Brühl 27
59846 Sundern
Telefon (02933) 982-460
Telefax (02933) 982-480

18
Mousseur à lait
Branchement au secteur
Cet appareil doit être branché sur une
prise de terre installée selon les normes
en vigueur. Assurez-vous que la tension
d’alimentation correspond à la tension
indiquée sur la fiche signalétique de
l’appareil. Ce produit est conforme à toutes
les directives relatives au marquage “CE”.
Familiarisez-vous avec votre appareil
1. Couvercle (avec rangement pour les
embouts)
2. Embout mélangeur - dentelé (pour faire
mousser le lait)
3. Collier lisse pour embout mélangeur
dentelé (pour réchauffer le lait)
4. Réservoir à lait et poignée
5. Base
6. Interrupteur marche/arrêt
7. Cordon d’alimentation avec fiche
Consignes de sécurité importantes
∙A fin d’éviter tout risque de blessures,
les réparations de cet appareil
électrique ou de son cordon
d’alimentation doivent être effectuées
par notre service clientèle. Si des
réparations sont nécessaires,
veuillez envoyer l’appareil à notre
service après-vente (voir annexe).
∙Débranchez toujours la fiche de
la prise murale et laissez refroidir
l’appareil avant de le nettoyer.
Pour des informations détaillées
concernant le nettoyage de l’appareil,
veuillez vous référer au paragraphe
Entretien et nettoyage.
∙Pour éviter le risque de choc
électrique, ne pas nettoyer l’appareil
à l’eau et ne pas le plonger dans
l’eau.
∙Attention : Le réservoir à lait
chauffe pendant la préparation. Ne
pas toucher les surfaces chaudes.
Tenez le réservoir uniquement par sa
poignée.
∙Attention : Une mauvaise utilisation
peut provoquer des blessures
corporelles graves.
∙Cet appareil est destiné à une
utilisation domestique ou similaire,
telle que
- dans les cuisines pour personnel,
dans des bureaux et autres locaux
commerciaux,
- dans des organisations agricoles,
- par la clientèle dans les hôtels,
motels et hébergements similaires,
- et dans des maisons d’hôtes.
∙Cet appareil peut être utilisé par des
enfants (à partir de 8 ans) et par des
FR

19
personnes souffrant de déficiences
physiques, sensorielles ou mentales,
ou manquant d’expérience ou de
connaissances, s’ils ont été formés
à l’utilisation de l’appareil et ont été
supervisés, et s’ils en comprennent
les dangers et les précautions de
sécurité à prendre.
∙Les enfants ne sont pas autorisés à
jouer avec l’appareil.
∙Les enfants ne doivent pas être
autorisés à nettoyer ou entretenir
l’appareil à moins d’être supervisés
et d’avoir plus de 8 ans.
∙L’appareil et son cordon
d’alimentation doivent être, à tout
moment, tenus hors de portée des
enfants de moins de 8 ans.
∙Attention : Tenez les enfants à l’écart
des emballages, qui représentent
un risque potentiel, par exemple, de
suffocation.
∙Avant toute utilisation, vérifiez
soigneusement que l’appareil, son cordon
d’alimentation et ses accessoires ne
présentent aucun signe de détérioration
qui pourrait avoir un effet néfaste sur la
sécurité de fonctionnement de l’appareil.
Au cas où l’appareil, par exemple, serait
tombé sur une surface dure, ou si une
force excessive aurait été employée pour
tirer sur le cordon d’alimentation, il ne doit
plus être utilisé.
∙Cet appareil est conçu pour réchauffer
et faire mousser le lait uniquement. Ne
mettre aucun autre liquide ou aliment
solide dans le réservoir.
∙Ne pas laisser le mousseur à lait sans
surveillance lorsqu’il est en marche.
∙Respectez les niveaux minimum et
maximum à l’intérieur du réservoir à
chaque utilisation.
∙L’axe d’entraînement au fond du réservoir
(niveau minimum) doit être recouvert
par le lait. S’il n’y a pas assez de lait,
l’appareil peut surchauffer.
∙Pour éviter une telle surchauffe, l’appareil
s’éteindra automatiquement s’il est mis en
marche à vide.
∙Attention : Un remplissage excessif du
réservoir peut se révéler dangereux car
la mousse de lait risque de déborder le
réservoir pendant la préparation.
∙Attention : Le couvercle doit être en
place à chaque utilisation; il ne doit être
enlevé que pour ajouter la poudre de
cacao.
∙L’appareil doit être utilisé uniquement
avec les accessoires d’origine fournis par
le fabricant.
∙L’appareil doit toujours être posé sur une
surface solide et stable.
∙Ne laissez jamais le boîtier ou le cordon
d’alimentation entrer en contact avec
une flamme ou une surface chaude telle
qu’une plaque chauffante.
∙Ne laissez pas le cordon d’alimentation
pendre librement ; le cordon devra
toujours être tenu à l’écart des surfaces
brûlantes de l’appareil.
∙Débranchez toujours la fiche de la
prise murale
-en cas de fonctionnement
défectueux,

20
-après l’emploi,
-avant de nettoyer l’appareil.
∙Ne débranchez pas l’appareil en tirant sur
le cordon ; tirez toujours sur la fiche.
∙Nous déclinons toute responsabilité en
cas de dommages éventuels subis par
cet appareil, résultant d’une utilisation
incorrecte ou du non-respect de ce mode
d’emploi.
Avant la première utilisation
Retirez tous les emballages et assurez-vous
que tous les éléments de l’appareil sont
présents.
Avant la première utilisation, et après
toute période prolongée de non utilisation,
l’appareil doit être soigneusement nettoyé
en suivant la méthode décrite au paragraphe
Entretien et nettoyage.
Rangement des accessoires
Les accessoires peuvent être rangés dans
le couvercle. Insérez d’abord le collier lisse
avec son ouverture vers le haut, puis insérez
l’embout dentelé.
Opération
Nous vous recommandons l’utilisation d’un
lait à haute contenance protéinique. Pour
de meilleurs résultats, le lait doit sortir du
réfrigérateur juste avant l’opération.
Le dessous du réservoir et la zone de contact
à l’intérieur de la base doivent être propres
et secs.
Choisir l’embout mélangeur
∙Pour faire mousser et réchauffer le lait en
même temps, utilisez l’embout mélangeur
dentelé.
∙Pour réchauffer le lait, placez l’embout
dentelé dans le collier lisse puis placez-les
dans le réservoir, le collier orienté vers
le bas.
Quantités de remplissage
∙Respectez toujours le repère de
remplissage minimum et assurez-vous
que le réservoir contient au moins 60 ml
de lait.
∙Pour faire mousser le lait, remplissez le
réservoir de 120 ml maximum (repère de
remplissage max inférieur ).
∙Pour réchauffer du lait, remplissez le
réservoir de 180 ml maximum (repère de
remplissage max supérieur ).
Réchauffer ou faire mousser du lait
chaud
1. Placez le réservoir sur la base.
2. Retirez le couvercle du réservoir à lait.
3. Placez l’embout mélangeur selectionné
sur l’axe d’entraînement à l’intérieur de
réservoir.
4. Versez la quantité requise de lait dans
le réservoir.
5. Placez le couvercle sur le réservoir.
6. Branchez la fiche de l’appareil sur une
prise murale.
7. Appuyez sur l’interrupteur marche/arrêt.
8. L’appareil émet un bip et le moteur se
met en marche.
L’appareil commence à chauffer et
remuer le lait.
Lorsque le lait arrive à la bonne
température, l’appareil cesse de
chauffer et remuer le lait et émet une
série de bips.
9. Vous pouvez à présent retirer le
réservoir à lait de sa base.
Versez le lait chaud ou retirez la
mousse de lait à l’aide d’une cuillère
Table of contents
Languages:
Other LAVAZZA Kitchen Appliance manuals

LAVAZZA
LAVAZZA CLASSY PRO User manual

LAVAZZA
LAVAZZA Magystra User manual

LAVAZZA
LAVAZZA LB1100 User manual

LAVAZZA
LAVAZZA A MODO MIO MilkUp User manual

LAVAZZA
LAVAZZA A MODO MIO Owner's manual

LAVAZZA
LAVAZZA MilkEasy User manual

LAVAZZA
LAVAZZA blue LB 400 CLASSY PLUS User manual

LAVAZZA
LAVAZZA MilkUp Owner's manual