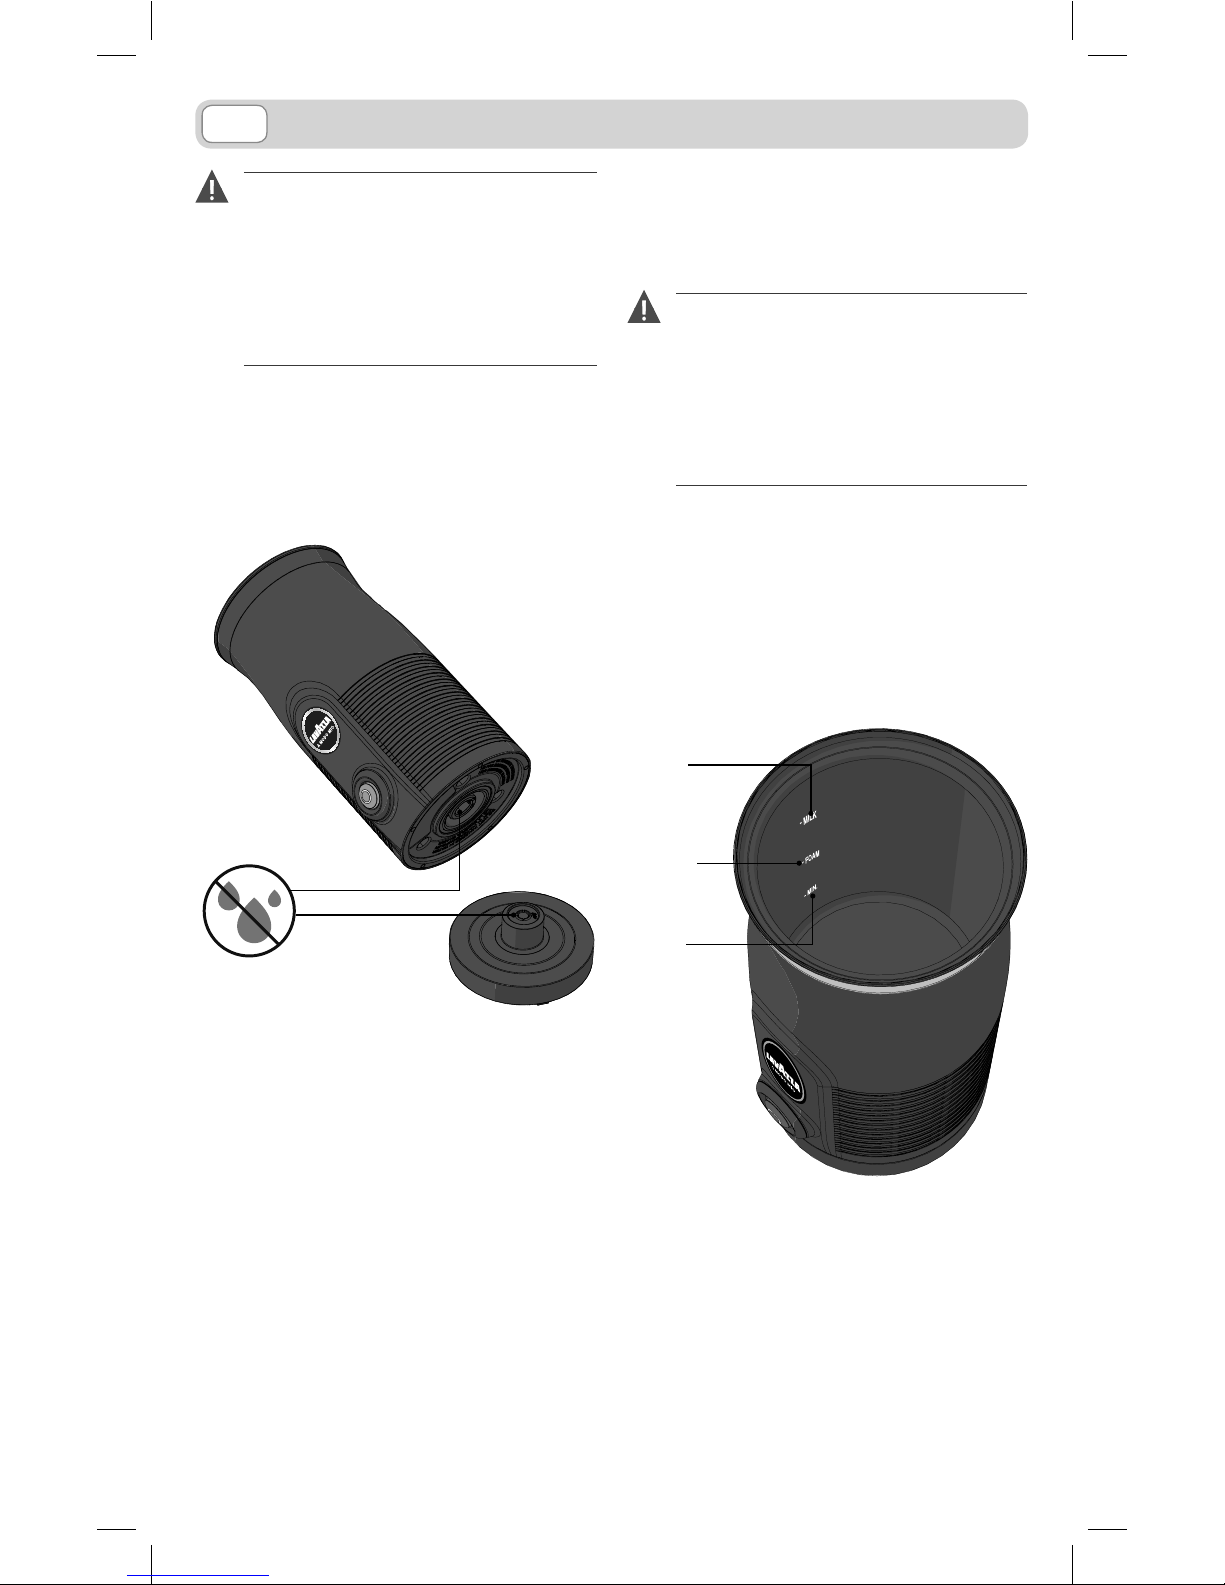
PREPARATION OF THE MILK FROTHER
No liability is held for damage caused
by:
• incorrect use not in accordance with
the intended purposes;
• repairs not carried out by authorized
service centres;
• tampering with the power supply cable;
• tampering with any parts of the ap-
pliance;
• the use of non-original spare parts
and accessories;
• storage at temperatures below 4°C;
• use in places with temperature below
10°C or above 40°C;
• use in places with relative humidity
above 95%;
In these cases, the warranty is not valid.
Remove any packaging materials and
check that all components are present.
Before the appliance is used for the first
time, or after extended periods of non-
use, it should be thoroughly cleaned as
described in the section “MAINTE-
NANCE AND CLEANING”.
This appliance can only be operated
with original accessories provided
by the manufacturer. No liability will
be assumed for any damage caused
by misuse of the milk frother or
non-compliance with the instructions
contained in this manual.
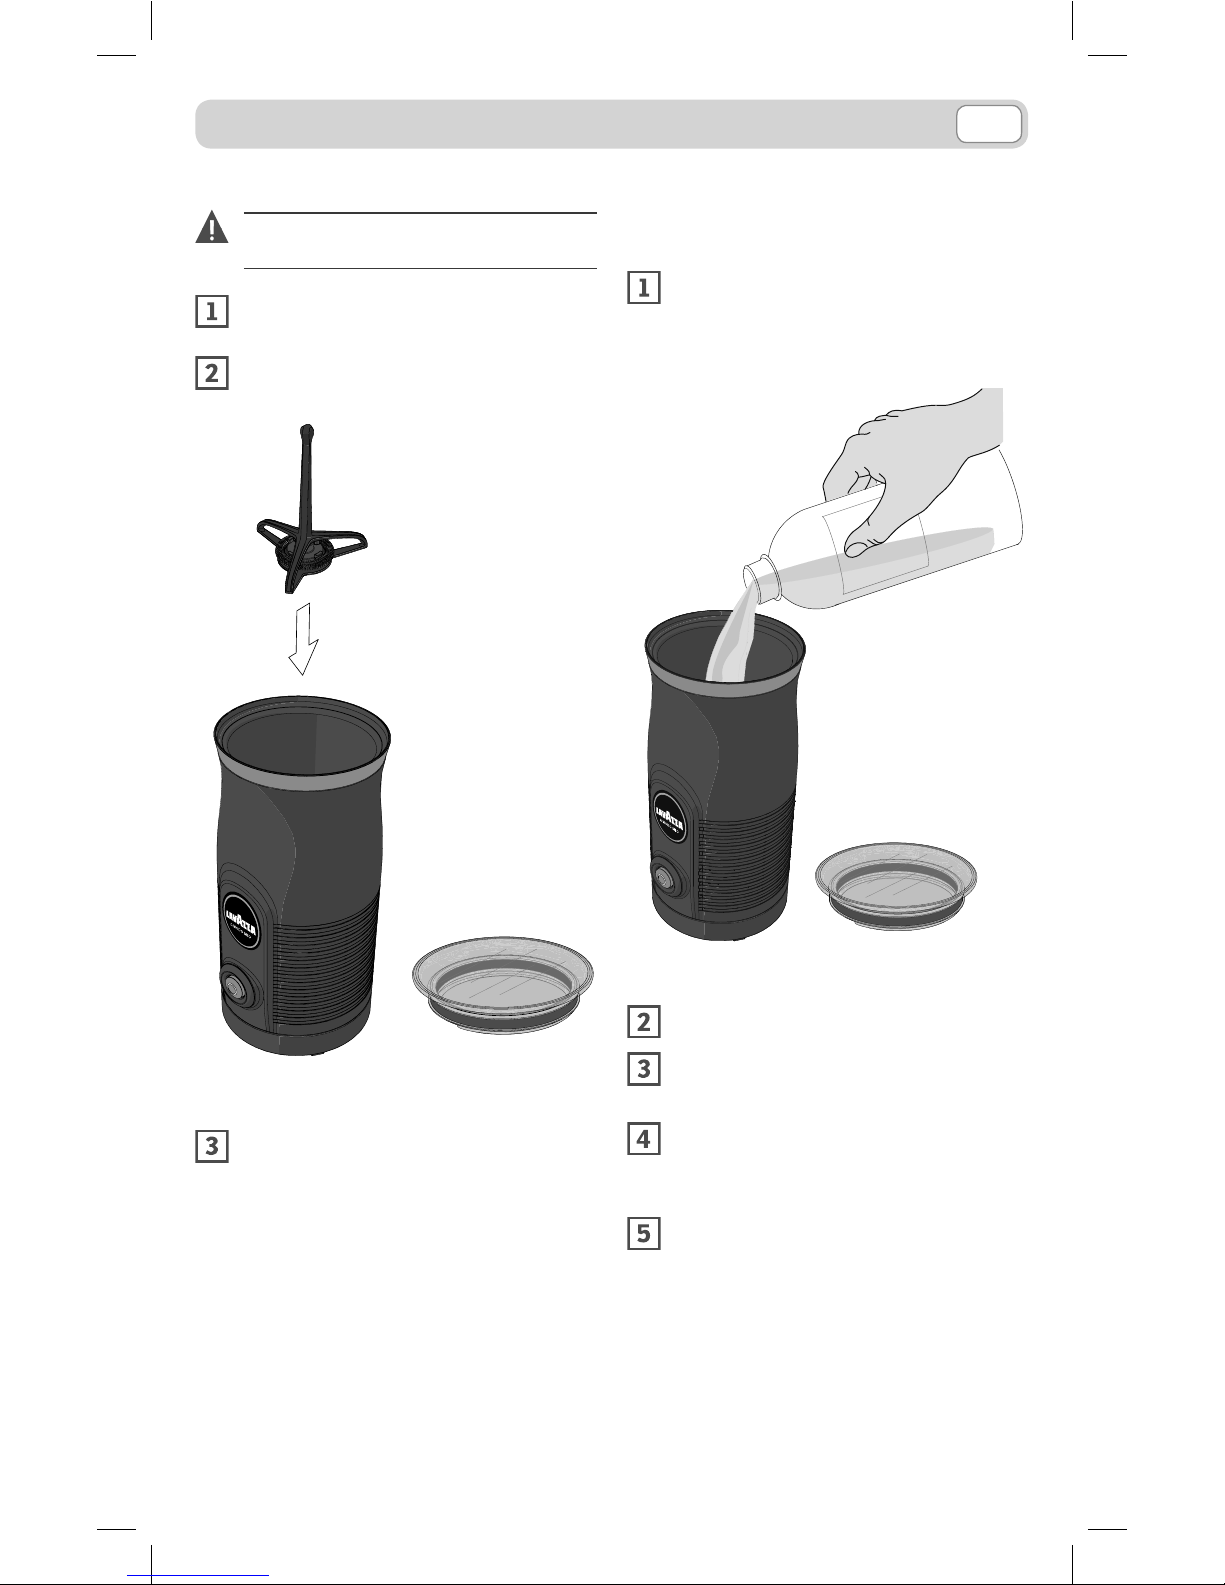
STARTING THE MILK FROTHER
Position the appliance on a stable,
flat surface, away from water and heat
sources. The milk frother base shall be
only connected to a grounded current
outlet, installed according to law reg-
ulations. Make sure that the supply
voltage corresponds with the voltage
marked on the rating label of the ap-
pliance. This product complies with all
binding CE labelling directives.
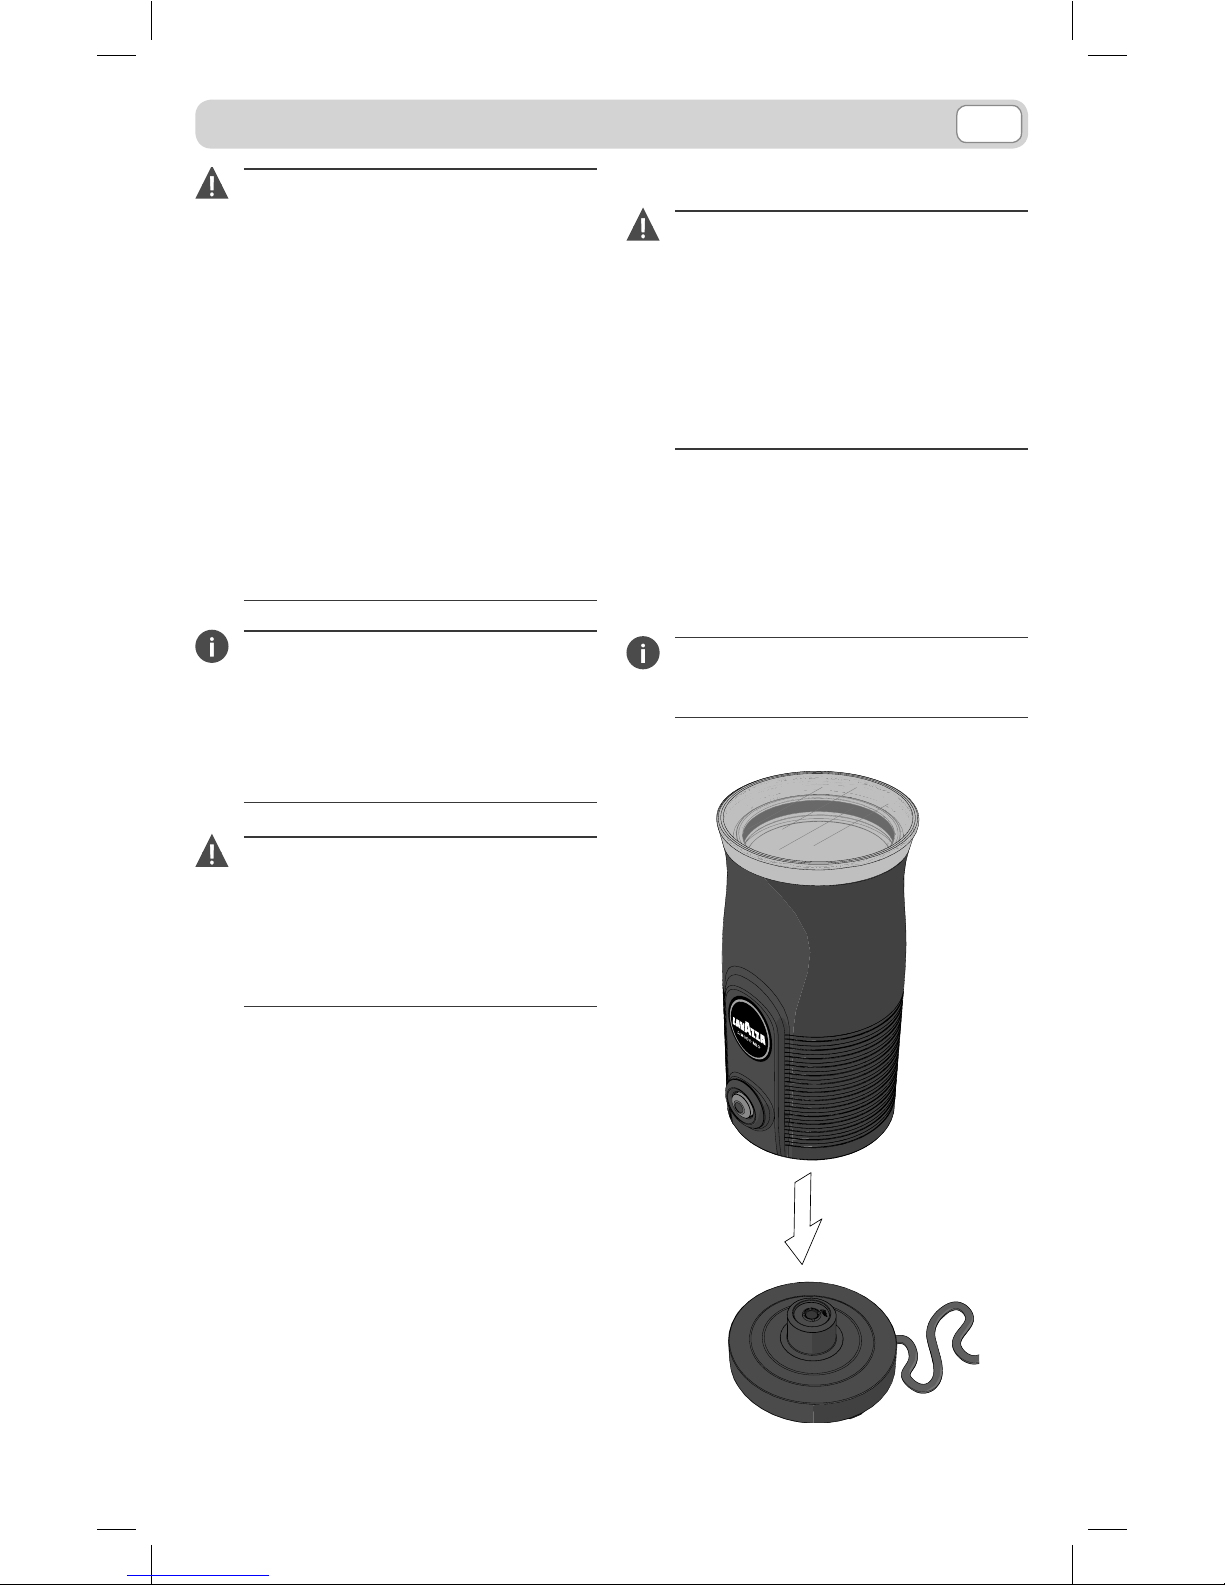
The first time you use the milk frother,
remove all cardboard and plastic packag-
ing. Insert the milk frother on the power
base, make sure to position it correctly.
Connect the power cord of the base to
the current outlet.
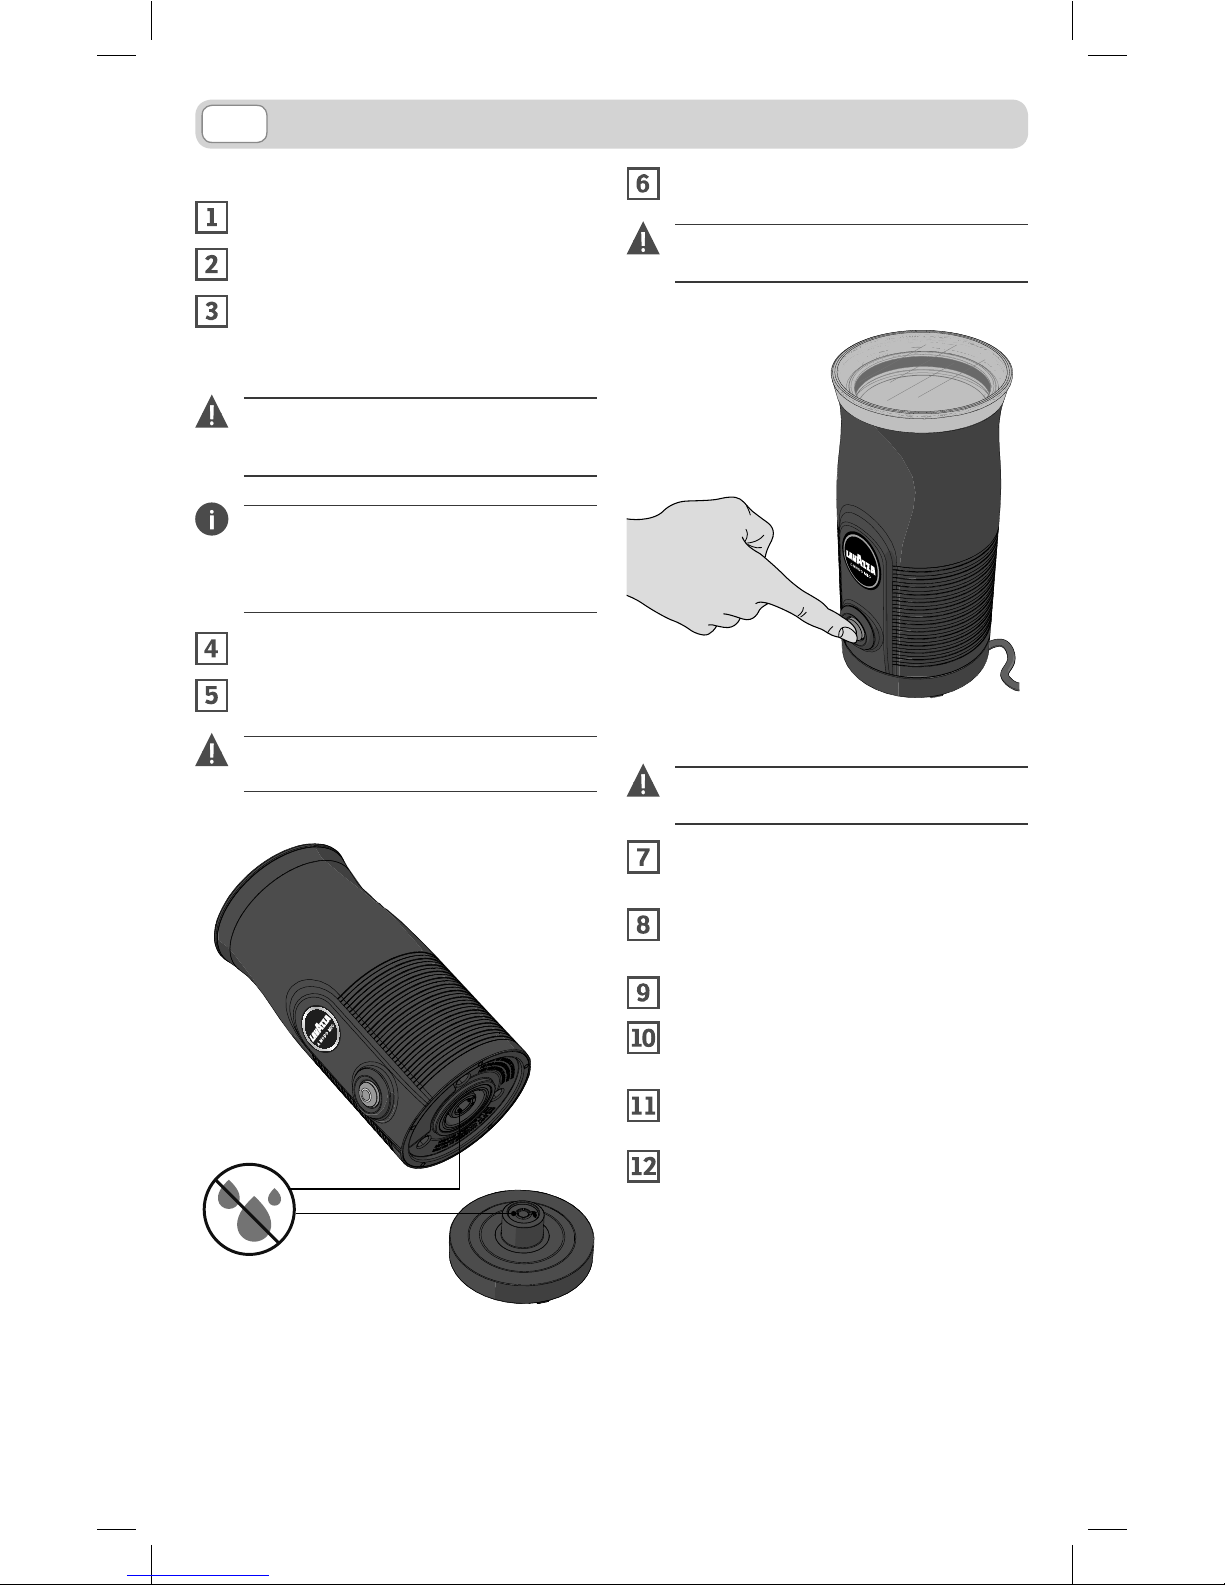
When inserting the milk frother on the
power base, the appliance will sound a
long acoustic signal.