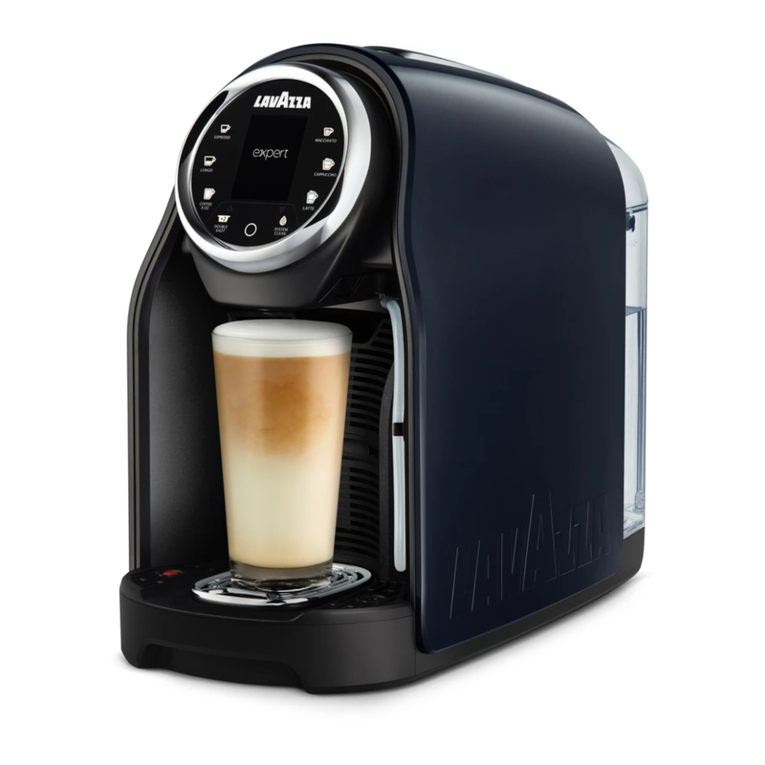
LAVAZZA blue LB 400 CLASSY PLUS User manual

LB 400 CLASSY PLUS USA 120V
TECHNICAL SUPPORT
MAINTENANCE MANUAL

Technical support maintenance manual
Rel. 0.00 / February 2020 III
CONTENTS
1.
GENERAL INFORMATION OF MANUAL............... 1
1.1. STRUCTURE OF MANUAL...........................1
1.1.1. Scope and contents....................................1
1.1.2. Messages used...........................................1
1.1.3. Addressees and qualified personnel...........1
1.1.4. Storing the manual......................................1
2. GENERAL SAFETY STANDARDS......................... 2
2.1. STOPPING FUNCTIONS...............................2
2.2. SAFETY DEVICES ........................................2
2.3. RESIDUAL RISKS .........................................2
3. HANDLING AND STORAGE.................................. 3
3.1. HANDLING .................................................... 3
3.2. STORAGE......................................................3
4. DEMOLITION AND WASTE DISPOSAL................ 3
4.1. INSTRUCTIONS FOR END-OF-LIFE
DISPOSAL TREATMENT ..........................3
5. OVERVIEW OF THE MACHINE............................. 4
5.1. MODEL..........................................................4
5.1.1. Machine identification data .........................4
5.1.2. Overall dimensions and weight...................4
5.1.3. Technical features....................................... 4
5.2. MACHINE COMPOSITION............................4
5.2.1. External components..................................5
5.2.2. Internal components ...................................5
5.3. USER INTERFACE........................................6
6. INSTALLATION, COMMISSIONING AND
CONFIGURATION.................................................. 6
6.1. UNPACKING..................................................6
6.2. POSITIONING ............................................... 6
6.3. START-UP PROCEDURES...........................7
6.3.1. ALARM MESSAGES...................................8
6.4. PROGRAMMING.........................................10
6.4.1. Resetting the default values......................10
7. ROUTINE MAINTENANCE................................... 10
7.1. DESCALING................................................10
7.2. CLEANING....................................................11
7.3. LUBRICATION............................................. 13
8. TROUBLESHOOTING.......................................... 14
8.1. INDICATION AND SOLUTION OF MOST
COMMON PROBLEMS........................... 14
9. RECOMMENDED TOOLS FOR DISASSEMBLY
AND ASSEMBLY OPERATIONS ......................... 17
10. GENERAL OPERATIONS .................................. 18
10.1. DISCONNECTING ELECTRIC WIRING....18
10.2. REMOVAL OF HYDRAULIC
CONNECTIONS ......................................19
11. DISASSEMBLING THE BODY........................... 21
11.1. EXTRACTING THE DRIP TRAY / USED
CAPSULE TRAY AND THE WATER
TANK ASSY.............................................21
11.2. DISASSEMBLING THE SIDE PANELS
AND THE TOP COVER........................... 21
11.3. EXTRACTING THE USER INTERFACE....24
12. REMOVING INTERNAL COMPONENTS........... 25
12.1. REMOVING THE VOLUMETRIC
DOSER.................................................... 25
12.2. EXTRACTING THE WATER TANK
INLET.......................................................25
12.3. REMOVING THE MILK FROTHER
SUPPORTASSY..................................... 25
12.4. DISASSEMBLING THE PUMP..................28
12.5. REMOVING THE 2AND 3-WAY
SOLENOID VALVE UNIT ASSY............... 30
12.6. EXTRACTING THE CPU BOARD.............31
12.7. REMOVING THE CAPSULE TRAY / MILK
FROTHER PRESENCE MICROSWITCH
ASSY....................................................... 31
12.8. EXTRACTING THE THERMOBLOCK
PROBE ....................................................32
12.9. REMOVING THE THERMOBLOCK AND
DISPENSING UNIT .................................32
12.9.1. Disassembling the THERMOBLOCK......34
12.9.2. Disassembling the DISPENSING UNIT..36
13. DIAGRAMS......................................................... 39
13.1. WIRING DIAGRAM....................................39
13.2. HYDRAULIC DIAGRAM ............................40

Page left intentionally blank.

Technical support maintenance manual
Rel. 0.00 / February 2020 1
1. GENERAL INFORMATION OF MANUAL
1.1. STRUCTURE OF MANUAL
Before performing any operation on the machine, the
maintenance technician must carefully read the instruc-
tions provided in this publication. No operation must be
performed before having read and properly understood
the contents of this manual. If in doubt as to how to cor-
rectly interpret the instructions, contact Lavazza S.p.A.
for clarications thereof.
1.1.1. SCOPE AND CONTENTS
This manual contains the information required for cor-
rect maintenance of the machine, as well as safety in-
structions, troubleshooting and diagrams. This manual
does not replace the Installation Manual supplied with
the machine.
All reproduction rights of this manual are reserved to
Luigi Lavazza S.p.A. (hereinafter Lavazza).
Any reproduction of the text and illustrations, even
partial, is prohibited. The information herein cannot be
disclosed to third parties without the written consent of
Lavazza which has exclusive property thereof.
Lavazza reserves the right of modifying the features of
the appliance dealt with in this manual without prior no-
tice. Furthermore it will not be held liable for any inac-
curacies attributable to printing errors and/or the con-
tents in it. Furthermore Lavazza informs that the images
or photographs of the machine included in this manual
have purely representative purposes and could undergo
changes without prior notice.
Check the Lavazza Technical Service website (at
https://ts.lavazza.com) to make sure you have the most
recent version available of this manual. If not, you may
download a more recent copy. We also suggest that you
consult further documentation on the machine, such as
Software, Quick Guide, Technical News, if provided on
the Lavazza Technical Service website.
1.1.2. MESSAGES USED
Attention
ATTENTION messages indicate even high risk
danger for the technician. The operations described
after this message must be carried out with the
utmost attention and in maximum safety, using
personal protective equipment.
Warning
WARNING messages are displayed before
procedures which could cause damage to the
machine if not complied with.
Environment
ENVIRONMENT messages are displayed before
procedures which could harm the environment if
not complied with.
Note
NOTE messages highlight further indications useful
for the maintenance technician.
1.1.3. ADDRESSEES AND QUALIFIED PERSONNEL
This manual is intended for technicians qualied to per-
form maintenance on the machine. Lavazza will not be
held liable for damage resulting from failure to comply
with this indication.
The machine can only be serviced by the technician
who, having read this manual:
- has specific experience in maintenance of profession-
al coffee machines;
- is capable of repairing the malfunctions of the ma-
chine/machines dealt with in this manual;
- has understood the technical contents, can correctly
interpret drawings and diagrams and has memorised
the safety information provided below;
- knows the main hygienic, accident-prevention, tech-
nological and safety standards;
- knows what to do in case of an emergency, where to
find the personal protective equipment and how to use
it correctly.
1.1.4. STORING THE MANUAL
In order to keep this manual intact over time, it is recom-
mended to:
- use it without damaging its contents in whole or in
part;
- refrain from removing, tearing or rewriting parts of the
manual for any reason whatsoever;
- keep the manual in a place protected against moisture
and heat, to avoid endangering the quality of the pub-
lication and legibility of all its parts;
- make the manual accessible for all maintenance per-
sonnel.
Warning
Should the manual be damaged or lost, you may
download a copy of it from the website Lavazza
Technical Service at https://ts.lavazza.com.
Technical support maintenance manual
Rel. 0.00 / February 2020
2
2. GENERAL SAFETY STANDARDS
Attention
Failure to comply with the basic safety standards or
precautions could lead to accidents during opera-
tion and maintenance. All the required accident pre-
vention measures must be taken while repairing the
machine. Lavazza will not be held liable for damage
caused by failure to comply with the general safety
standards provided in this manual.
The following are the main safety precautions to be
taken while operating on the machine. Lavazza cannot
foresee every possible situation which could entail a po-
tential hazard. Therefore the warnings provided in this
manual are not all-comprehensive. When making use
of tools, procedures, methods or work techniques which
are not specically recommended, make sure they do
place yourself or others in danger.
The adjustments, specications and illustrations in this
publication are based on the information available when
drafted and therefore could change at any time, affect-
ing the maintenance to be carried out. Make sure you
have the most recent version of this manual.
The machine must be connected to the electric mains
in compliance with the safety standards in force in the
Country of use.
The machine must be connected to a socket which
must be:
- compliant with the type of plug installed on the ma-
chine, if included;
- sized according to the data provided on the nameplate
at the bottom of the appliance;
- connected to an efficient and up to standard earthing
system.
Before performing any operation on the machine, make
sure it is unplugged and cooled off.
To avoid the risk of electrical shocks, the electrical parts
of the machine and the components around them must
not:
- come into contact with any type of liquid;
- be handled with moist or wet hands;
- be tampered with.
It is prohibited to:
- use the machine in the vicinity of flammable and/or
explosive substances and/or in a fire risk atmosphere;
- use non-original spare parts;
- make any type of technical modifications of the ma-
chine not included in the standard diagnostic and re-
pair procedures.
In case of re, use carbon dioxide (CO2) re extinguish-
ers. Do not use water or powder extinguishers.
If you must perform an unintended job or intervention,
following a procedure other than that indicated in the
manual, you must rst consult the technical service.
Structural damage, improper modications, tampering,
alterations or repairs can endanger the safety of the
machine.
2.1. STOPPING FUNCTIONS
The machine stops when the ON/Stand-by button on
the USER INTERFACE is selected.
2.2. SAFETY DEVICES
The machine dealt with in this publication has been
manufactured in compliance with specic standards in
force and therefore all potentially dangerous parts are
protected.
The machine is equipped with the following safety de-
vices:
- a thermal protector 120 °C positioned on the PUMP;
- two safety thermal fuses on the THERMOBLOCK.
Attention
Do not tamper with, eliminate or bypass the safety
devices to avoid causing serious risks for personal
protection and health.
2.3. RESIDUAL RISKS
The thorough risk analysis carried out allowed us to
eliminate most of the dangers linked to the use and
maintenance of the machine. Lavazza reminds you to
carefully abide by the instructions, procedures and rec-
ommendations provided in this manual, and to comply
with the safety standards in use, including the use of
the intended protective equipment, both integrated in
the machine and personal.
This chapter outlines some risks which the user could
encounter if the specic safety standards described in
the manual are not complied with.
- Never intervene on the electronic apparatus while
the machine is still powered. Deactivate the machine
completely by unplugging it before performing any
type of operation.
- Do not spray water to clean any part of the appliance

Technical support maintenance manual
Rel. 0.00 / February 2020 3
as running water could seriously damage the electric
and electronic components.
- Never act on the hydraulic system and on the boiler
before having emptied them and having checked that
the system is no longer pressurised.
- This machine is an appliance for making espresso cof-
fee. Any other use must be considered incorrect and
therefore dangerous.
Attention
Failure to comply with the standards above could
cause serious damage to persons, objects or
animals.
3. HANDLING AND STORAGE
3.1. HANDLING
Attention
The machine must be handled in compliance with
standards in force regarding the safeguarding of
health and safety at the workplace.
The machine must remain upright during handling and
transport according to the indications and symbols
printed on the packaging. Lift and position it with care.
Do not shake the machine. Use the original packaging
for occasional movements, ideal to hold and protect it.
3.2. STORAGE
The machine must be stored according to the following
conditions:
- minimum temperature: above 39.2 °F (4 °C);
- maximum temperature: below 104 °F (40 °C).
The device is contained in cardboard packages.
4. DEMOLITION AND WASTE DISPOSAL
4.1. INSTRUCTIONS FOR END-OF-LIFE DIS-
POSAL TREATMENT
This product conforms to Directive 2012/19/EU and the
relevant national implementations.
The symbol of the crossed-out wheeled bin ap-
plied to the appliance and/or packaging indi-
cates that, at the end of its useful life, the prod-
uct must be collected separately from other
waste.At the end of its life, the user must hand over the
appliance to suitable facilities for the separate collection
of electric and electronic waste.
Appropriate waste collection of the appliance and hand-
ing it over for recycling, treatment and environmentally
friendly waste disposal help to prevent potential nega-
tive consequences for the environment and human
health and favour the reuse and/or recycling of the ma-
terials making up the machine.
Illegal disposal of the product by the user entails the im-
plementation of the administrative sanctions stipulated
in the applicable environmental regulation.
Environment
INFORMATION FOR USERS OF PROFESSIONAL
APPLIANCES. The separate waste collection of this
appliance at the end of its life is organised and man-
aged by the manufacturer. The user who wishes to
dispose of this product must contact the manufac-
turer and follow the procedure applied to allow for
the separate waste collection of the appliance at the
end of its life.
Environment
INFORMATION FOR USERS OF HOUSEHOLD AP-
PLIANCES. At the end of its life, the user must hand
over the appliance to suitable facilities for the sepa-
rate collection of electric and electronic waste, or
hand it over to the retailer when purchasing a new
appliance of the same type, on a one to one basis.
In both cases, cut the power cable to make the ma-
chine unusable.

Technical support maintenance manual
Rel. 0.00 / February 2020
4
5. OVERVIEW OF THE MACHINE
5.1. MODEL
LB 400 CLASSY PLUS USA120V
5.1.1. MACHINE IDENTIFICATION DATA
The nameplate bears the following machine identica-
tion data:
- manufacturer;
- machine model;
- serial number;
- Lavazza product code;
- electric voltage (V) and frequency (Hz);
- electric power absorbed (W).
5.1.2. OVERALL DIMENSIONS AND WEIGHT
Depth 15 in (380 mm)
Width 5.7 in (145 mm)
Height 11 in (280 mm)
Weight 9.9 lb (4,5 kg)
5.1.3. TECHNICAL FEATURES
Power supply voltage 120 V
Power supply frequency 60 Hz
Installed power 1250 W
Water tank capacity 37.1 US fl. oz. (1,1 L)
Boiler type THERMOBLOCK
Water presence check Via the VOLUMETRIC
DOSER
Used capsules container
capacity 8
Power saving function After 4 hours of
inactivity
Dosage Programmable
ESPRESSO, LUNGO,
COFFEE 8 OZ. dose
5.2. MACHINE COMPOSITION
Note
When not expressly indicated in the text, the
position numbers of the machine parts refer to the
figures in chapters “5.2.1. External components”
and “5.2.2. Internal components”.

Technical support maintenance manual
Rel. 0.00 / February 2020 5
5.2.1. EXTERNAL COMPONENTS
1) Capsule insertion slot
2) Capsule loading lever
3) User interface
4) Dispenser spout
5) Cappuccino maker Assy (milk frother jug and
cover)
6) Cup/milk frothing jug rest grid
7) Drip tray
8) Used capsule tray
9) Tank lid
10) Water tank
11) Power cable
5.2.2. INTERNAL COMPONENTS
MACHINE FRONT
1) Milk frother support Assy
MACHINE BACK
2) Dispensing unit with integrated Thermoblock
3) 2 and 3-way solenoid valve unit
4) Water tank inlet
5) Pump
6) Volumetric doser
19
4
2
3
5
6
10
11
8
7
1
2
5
6
3
4

Technical support maintenance manual
Rel. 0.00 / February 2020
6
7) CPU board
8) USB port to update Firmware
5.3. USER INTERFACE
1) ESPRESSO selection
2) LUNGO selection
3) COFFEE 8 OZ. selection
4) ON/stand-by key
5) Warning - water tank empty/missing
6) Warning - drip tray/capsule drawer full
7) Warning - descaling required
8) MACCHIATO selection
9) CAPPUCCINO selection
10) LATTE selection
11) DOUBLE SHOT function
6. INSTALLATION, COMMISSIONING AND
CONFIGURATION
6.1. UNPACKING
Open the package taking care not to damage it.
Pull the bags out containing the drip tray, the grill grid
and the packaging that encloses the cappuccino maker
Assy. Then lift the top cardboard protection and remove
the machine - removing it from its protective casing.
Environment
The components making up the packaging must
be separated based on the nature of the materials
and disposed of in compliance with laws in force
regarding separate waste collection and disposal.
6.2. POSITIONING
For correct ergonomic use, it is recommended to install
the machine on a at, horizontal and stable surface,
away from water, ames and sources of heat. The cho-
sen area must be sufciently lit, ventilated, hygienic,
non-corrosive and/or non-explosive.
Furthermore, the socket must be easily reached by the
power cable.
The following recommendations apply for the appliance
to work properly:
- minimum and maximum room temperature: 41 °F (5
°C) ÷ 104 °F (40 °C).
Note
Foroperationsregardingpositioningofthemachine,
see the indications provided in the Installation
Manual supplied with the machine.
Warning
The machine is not fit to be installed outdoors
exposed to atmospheric agents. The presence of
magnetic fields or adjacent electric machines that
generate interference could cause the electronic
controller of the appliance to malfunction.
Attention
There must be free access to the machine and to
the plug to allow the user to intervene without any
constraint and to be able to immediately leave the
area if necessary.
7
8
1
2
3
4
9
10
11
8
5
6
7

Technical support maintenance manual
Rel. 0.00 / February 2020 7
6.3. START-UP PROCEDURES
To start the machine:
- remove the water tank, rinse and fill it using only fresh
non-carbonated drinking water;
- reposition the tank;
- plug in the machine;
- press the ON/Stand-by button.
The warm-up cycle begins.
When all the dispensing buttons remain on steady, the
machine is ready for use.
- Fill the hydraulic circuit.
Place a container under the dispensing spout. Do not
insert a capsule, keep the loading lever lowered, and
press a dispensing button.
- Once dispensing is complete, empty the container
and put it back under the dispensing spout.
Open and close the lever and run another full
dispensing cycle with water.
- Thoroughly clean the Cappuccino Maker Assy.
Remove the cover and fill the milk frothing jug (ref. 5-
par. 5.2.1) with water up to the “LATTE” level.
Put the cover back on and slide the Assy into the ma-
chine.
- Press the LATTE button (ref. 10 - par. 5.3) to start the
cleaning cycle.
- Once the cycle has finished, remove the Cappuccino
MakerAssy and wash all the parts with hot/cold water.
After having dried the parts, beverages can then be
dispensed.
Warning
The amount of water in the tank must never exceed
the maximum level (MAX) and must always be
maintained above the indicated minimum level
(MIN).
Note
When the machine switches on, the hydraulic cir-
cuit is filled by activating the pump. Upon the first
start-up, dispense at least 16.9 US fl. oz. (0,5 L) of
water with no capsule.
Note
For operating procedures and functioning logic of
the machine, follow the instructions provided in the
Installation Manual supplied with the machine.

Technical support maintenance manual
Rel. 0.00 / February 2020
8
6.3.1. ALARM MESSAGES
MACHINE STATE
Machine ready without Milk frothing jug
Delivering ESPRESSO
Delivering LUNGO
Delivering COFFEE 8 OZ.
Delivering DOUBLE SHOT
(only ESPRESSO supply)
Programming ESPRESSO measure
After pressing for 3 sec.
Programming LUNGO measure
After pressing for 3 sec.
Machine ready with Milk frothing jug

Technical support maintenance manual
Rel. 0.00 / February 2020 9
MACHINE STATE
Delivering MACCHIATO
Delivering CAPPUCCINO
Delivering LATTE
Delivering DOUBLE SHOT
Ex: Cappuccino delivery
No water in circuit or water tank removed
Full capsule drawer lled
Descaling required
Example:
= OFF
= ON
= Flashing
Orange lights
Orange lights
Orange lights

Technical support maintenance manual
Rel. 0.00 / February 2020
10
6.4. PROGRAMMING
The machine allows the desired amount of dispensed
producttobe set onlyforthe short ESPRESSO, LUNGO
and COFFEE 8 OZ. buttons.
Note
Doses cannot be adjusted for milk-based beverages
and the DOUBLE SHOT.
To set the dose:
- insert a BLUE or EXPERT Lavazza capsule in the
relevant compartment;
- close the capsule loading lever;
- put a cup under the dispensing spout;
- press and hold the desired button for at least 3
seconds
[The selected button will flash quickly while the others
switch off, except for the ON/Stand-by button];
- hold down the selected button;
- dispensing begins;
- once the desired amount has been dispensed, let go
of the button to stop the flow.
Note
The amount of product dispensed can be changed
by repeating the programming.
Note
If the dose setting exceeds the maximum amount
allowed, dispensing stops automatically, the select-
ed button flashes and the last set value is saved in
memory.
If a power cut should occur during the procedure,
the programming process will not be successful
and the last set dose remains saved.
6.4.1. RESETTING THE DEFAULT VALUES
Reset the default settings as follows:
- the machine must be connected to the electrical mains
and in Stand-by mode;
- the used capsule drawer must NOT be inserted;
- the Cappuccino Maker Assy must NOT be inserted;
- press the ESPRESSO (1), LUNGO (2), and DOUBLE
SHOT (11) buttons simultaneously for at least 3
seconds.
The dispensing buttons light up in order and the ma-
chine conrms the reset with 3 short beeps.
Afterwards, the machine goes back to Stand-by mode.
7. ROUTINE MAINTENANCE
7.1. DESCALING
The formation of limestone is a normal consequence of
use of the appliance. As such, descaling must be done
every 2-3 months the machine is used and/or when you
notice the machine is having trouble dispensing and/or
if the machine becomes noisy.
The machine’s warning light (7) comes on to request
descaling.
Note
The alarm signalling is only active in machine
“ready for use” mode.
To perform descaling, you must:
a) make sure the capsule insertion slot is empty;
b) empty the tank and fill it with a solution of descaling
liquid and water (8.4 US fl. oz. of each);
c) remove the Cappuccino Maker Assy;
2
11
1
7

Technical support maintenance manual
Rel. 0.00 / February 2020 11
d) place a large container underneath the dispensing
spout;
e) press the LUNGO (2) and CAPPUCCINO (9) but-
tons simultaneously for 3 seconds.
[the machine beeps];
f) press the COFFEE 8 OZ. (3) button to start the
descaling cycle;
[the COFFEE 8 OZ. (3) and the ON/STAND-BY (4) but-
tons ash].
Descaling consists of the dispensing cycles being re-
peated with no capsule, at intervals breaks, until the
tank is completely emptied.
g) Once the tank is emptied, the cycle is momentar-
ily stopped and the ON/STAND-BY and COFFEE 8
OZ. buttons and the descaling warning light stay on
steady, accompanied by a beep;
h) remove the tank, rinse it well and fill it with cold
drinking water, put it back in place and place a con-
tainer underneath the dispenser spout;
i) press the COFFEE 8 OZ. (3) button to start the
rinse cycle (drain the tank again).
Once rinsed, the machine beeps and runs the warm-up
cycle to return to the “ready to use” mode.
Warning
Once started, the cycle must be completed.
Note
We recommend using LAVAZZA DESCALING
products to descale the machine.
Attention
Do not descale the machine with vinegar.
7.2. CLEANING
Attention
Before cleaning the machine, make sure it is un-
plugged and wait for it to cool off.
For correct and long-lasting use of the machine, it is
recommended to:
- rinse the tank daily and fill it with cold drinking water;
- empty and clean the drip tray/used capsule drawer
every two/three days or when the specific warning
light (6) comes on;
- clean the dispenser spout weekly, dispensing water a
few times without inserting the capsule;
- unless there are specific indications, clean the exter-
nal components of the machine (except for the elec-
tric components) using non-abrasive cloths/sponges
soaked in cold/lukewarm water;
- wash the separated components that make up the
CAPPUCCINO MAKER ASSY every day (even in a
dishwasher, provided at low temperature).
29
3
4
3
6

Technical support maintenance manual
Rel. 0.00 / February 2020
12
Warning
When the machine is used intensively, perform the
cleaning operations more frequently.
Note
If the machine is not used for more than three days,
empty the tank and fill it with fresh water. Then
run a dispensing cycle (with no capsule) before
dispensing beverages.

Technical support maintenance manual
Rel. 0.00 / February 2020 13
7.3. LUBRICATION
Every time maintenance is performed lubricate certain components of the DISPENSING UNIT to preserve their ef-
cacy.
Figure A: apply a layer of grease
on the internal surface of the rear
body of the DISPENSING UNIT
(1) and on the thread of the THER-
MOBLOCK CONNECTION (2).
Recommended product: BE-
SLUX CAPLEX M-2 ATOX (Bru-
garolas) Grease.
Figure B: apply grease in the
groove of the cranks (3).
Recommended product: GRAS-
SO BESLUX CAPLEX M-2 ATOX
(Brugarolas) Grease.
Also apply a little grease on the
rods (4) and on the infusion cham-
ber (5), in the highlighted points.
Recommended product: FOOD
SPRAY (Nils).
Note
With regards to the recommended products, you may wish to check availability of updated product data
sheets on the Technical Service Lavazza website (https://ts.lavazza.com).
A
2
1
B3
3
5
4
4

Technical support maintenance manual
Rel. 0.00 / February 2020
14
8. TROUBLESHOOTING
8.1. INDICATION AND SOLUTION OF MOST COMMON PROBLEMS
PROBLEM POSSIBLE CAUSES SOLUTIONS
Machine does not turn on.
On/Stand-by warning lamp OFF. • The machine is not connected to the
power source.
• The machine is connected to a faulty
power cord.
• Power supply not available in the house-
hold mains.
• Connected the machine to the power
source.
• Connected the machine directly to the
power source.
• Connect another device to check the
availability of the power supply.
The machine will not switch on af-
ter the “On/Stand-by” button is
pressed.
• The touch interface fails to respond.
• Wrong simultaneous press of two but-
tons.
• Verify that the interface surface and
the user’s hands are clean and dry.
• Wait a few seconds, then press the
“On / Stand-by” button only.
Excessive heating time (i.e. more
than 40 seconds). • The machine is stored at low tempera-
tures (e.g. in a cellar or garage). • Keep the machine in a suitable place
over at least 1 hour.
Then, plug the machine into the mains
socket and try to switch it on.
Excessive machine noise. • The machine does not rest on a at, sta-
ble surface.
• The power supply cable has been posi-
tioned incorrectly.
• Movable parts not tted properly.
• No water in the tank.
• Capsule not present.
• Check the surface.
• Check the correct position of the cable
in the base of the machine.
• Fit the movable parts properly.
• Top up the tank with fresh drinking wa-
ter.
• Insert a Lavazza Blue or Expert
capsule or a compatible one.
Unit ready for use but failing to ac-
knowledge the button press. • Wrong button press/activation.
• Used capsule collection tray not tted.
• Press one of the illuminated buttons
with your ngertip, then check for the
acoustic signal (if activated) and the
proper blinking of the selected icon.
• Check the correct insertion of the tray,
with the resulting alarm warning lamp
switch-off. Check for correct supplying.
The lever remains closed after the
supply. • Used capsule tray full. • Empty the tray and try to open the le-
ver.
Failure to supply (the machine is
switched on, yet it supplies no cof-
fee or water).
• No water in the tank.
• Tank not inserted correctly.
• Capsule loading lever lifted or not low-
ered correctly.
• No water ow in the hydraulic circuit (no
activation).
• Capsule not compatible.
• Presence of limescale.
• Top the tank up with drinking fresh wa-
ter, then check for correct supplying.
• Correctly t the tank in, then check for
correct supplying.
• Lower the capsule loading lever up
to the stop, then check for correct
supplying.
• Disconnect the power cord, wait 10
seconds, then connect the power cord
again.
Switch the machine on and wait for the
heating cycle to be over.
Check for correct supplying (the
machine will automatically make
attempts at lling the hydraulic circuit).
• Try again by using another capsule
from a different package.
• Carry out the descaling procedure
by means of the Lavazza descaling
product.

Technical support maintenance manual
Rel. 0.00 / February 2020 15
PROBLEM POSSIBLE CAUSES SOLUTIONS
Water leaks in the coffee machine. • Tank damaged.
• Used capsule drawer lled.
• Capsule stuck.
• Capsule not compatible.
• Check for leaks in the tank, by keeping
it separate from the machine.
• Empty the used capsule drawer.
• Open and close the lever to drop the
capsule. Remove and empty the cap-
sule collection tray.
• Use suitable capsules (i.e. Lavazza
Blue or Expert capsules) or any other
compatible capsule.
On / Stand-by button blinking in
red. • Inadequate machine storing conditions /
Temporary lock. • Unplug the machine from the power
socket and allow it to rest at room tem-
perature enough time (max. 1 hour).
Plug the machine in again, then press
the switch-on button (make one at-
tempt only).
The loading lever either does not
reach the supply position or re-
quires an excessive closing effort.
• Spent capsule drawer lled.
• Capsule stuck.
• Empty the tray and make an attempt at
closing the lever.
• Open and close the lever to drop the
capsule.
Coffee is dispensed too fast and,
therefore, is not so creamy. • A previously used capsule is used.
• Capsule not present.
• Capsule not compatible.
• Use a new capsule.
• Insert the capsule.
• Try again by using another capsule
from a different package.
The coffee is cold. • Slow supplying – hydraulic circuit
clogged with limescale. • Perform the descaling procedure
by means of the Lavazza descaling
product.
The machine emits no sound. • Acoustic signal OFF. • Set the machine to the stand-by mode,
then simultaneously keep the “ES-
PRESSO ” and “MACCHIATO
”coffee buttons depressed over at
least 2 seconds.
Coffee ows out slowly drop by
drop. • Capsule not compatible.
• An inadequate pod has been used.
• Supplying device clogged.
• Hydraulic circuit clogged with limescale.
• Try again by using another capsule
from a different package.
• Remove the used capsule and use a
new one.
• Clean the coffee dispensing spout (see
MAINTENANCE AND CLEANING).
• Perform the descaling procedure
by means of the Lavazza descaling
product.
The milk-based beverage warning
lights are OFF and the buttons won’t
work.
• Milk jug missing or inserted wrongly.
• Milk cover positioned with the nozzles
facing the handle.
• Insert the milk jug.
The milk preparation warning lights will
be turned on if the jug is inserted cor-
rectly.
• Turn the milk cover so that the noz-
zle will face the direction opposite the
handle.
The milk preparation warning lights will
be turned on if the jug is inserted cor-
rectly.
Milk does not foam. • Milk unsuitable for use.
• Too hot milk temperature.
• Beater coil not tted into place.
• It is recommended that whole milk
(pasteurized or UHT-treated) and / or
cold skimmed milk from the fridge of
39.2 to 46.4°F (4 to 8°C) should be
used.
• Use milk at the fridge temperature (i.e.
ranging between 39.2 to 46.4°F (4 to
8°C).
• Make sure that the beater coil has
been tted into place correctly.

Technical support maintenance manual
Rel. 0.00 / February 2020
16
PROBLEM POSSIBLE CAUSES SOLUTIONS
The milk-based beverage tempera-
ture is too hot. • Insufcient amount of milk fed with re-
spect to the selected / desired amount. • Add more milk by following the indica-
tions of the icons on the milk jug.
The milk-based beverage tempera-
ture is too cold. • Excessive amount of milk fed with re-
spect to the selected / desired amount. • Decrease the amount of milk by follow-
ing the indications of the icons on the
milk jug.
Noisy operation of the cappuccino
maker during the preparation with
milk
• Milk shipping beater incorrectly tted into
place. • Fit the milk whipping beater into the
correct position, as shown in the
Manual.
No coffee available for preparing the
MACCHIATO, CAPPUCCINO and the
LATTE.
• Coffee capsule missing.
• Previous coffee capsule not discharged.
• Early removal of the milk jug.
• Insert a coffee capsule and prepare
the new desired beverage by eliminat-
ing the previous one.
• Discharge the used capsule, insert a
new one and prepare the new desired
beverage by eliminating the previous
one.
• Wait for the acoustic signal at the end
of preparing the selected beverage.
Milk spilling out of the jug • Milk jug broken.
• Excessive milk jug lling (above the up-
per notch / icon).
• Insufcient milk jug lling (below the se-
lected notch / icon).
• Selection of the same beverage used for
the previous preparation.
• Check the integrity of the milk jug. In
case of breakage.
• Fill with the correct amount, as shown
by the icons on the jug.
• Fill with the correct amount, as shown
by the icons on the jug.
• Prepare the new desired beverage by
eliminating the previous one and by
applying one cycle ONLY.
On / Stand-by button red warning
light with acoustic signal emitted
when preparing a milk-based
beverage.
• Products other than milk (e.g. powders)
have been used. • Use only milk to prepare the bever-
ages supplied by the machine.
Table of contents
Other LAVAZZA Kitchen Appliance manuals

LAVAZZA
LAVAZZA Magystra User manual

LAVAZZA
LAVAZZA A MODO MIO Owner's manual

LAVAZZA
LAVAZZA MilkEasy User manual

LAVAZZA
LAVAZZA 19673 a modo mio User manual

LAVAZZA
LAVAZZA A MODO MIO MilkUp User manual

LAVAZZA
LAVAZZA CLASSY PRO User manual

LAVAZZA
LAVAZZA MilkUp Owner's manual

LAVAZZA
LAVAZZA LB1100 User manual
Popular Kitchen Appliance manuals by other brands

Hobart
Hobart 1612 Assembly instructions

Cuisinart
Cuisinart HB154PCJU instructions

Philips
Philips HD2288/00 quick start guide

Kambrook
Kambrook KPC120 series Instruction booklet

KitchenAid
KitchenAid 5KSMMGAA quick start guide

Küppersbusch
Küppersbusch KC 960.30 Instructions for use and installation instructions