No: 341335 – 05/21
adorne
TM
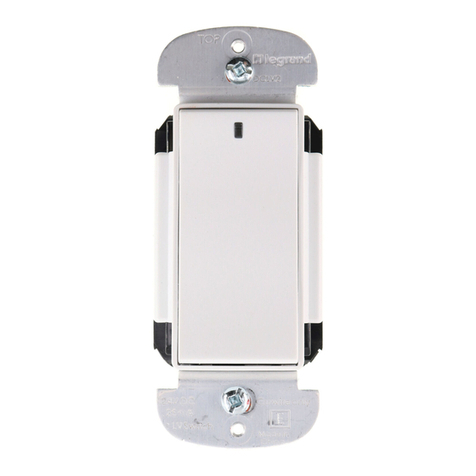
WNAL33/43 Wireless Smart Scene Controller Switches with Netatmo
WNAL33/43 Wireless Smart Scene Controller Switches with Netatmo
WNAL33/43 Wireless Smart Scene Controller Switches with Netatmo
Installation Instructions • Notice d’installation • Instrucciones de instalación
Catalog Number(s) • Numéro(s) de catalogue • Número(s) de catálogo: WNAL33+43
Country of Origin: Made in China • Pays d’origine : Fabriqué en Chine • País de origen: Hecho en China
NOTE: Skip section 2, if installing in an electrical box.
Wall Surface Installation
Use provided double sided stickers to install on a tiled or other smooth surface. Markings
on the back of the device indicate location for the stickers. If the wall surface is uneven
or rough where the adhesive may not work, use drywall screws if going on a wall stud or
drywall anchor if stud is not present.
REGULATORY INFORMATION
FCC NOTICE: This device complies with Part 15 of the FCC
rules. Operation is subject to the following two conditions:
(1) this device may not cause harmful interference, and (2)
this device must accept any interference received, including
interference that may cause undesirable operation.
This equipment has been tested and found to comply with
the limits for a Class B digital device, pursuant to Part 15
of the FCC Rules. These limits are designed to provide
reasonable protection against harmful interference in a
residential installation. This equipment generates, uses, and
can radiate radio frequency energy and, if not installed and
used in accordance with the instructions, may cause harmful
interference to radio communications. However, there is
no guarantee that interference will not occur in a particular
installation. If this equipment does cause harmful interference
to radio or television reception, which can be determined by
turning the equipment off and on, the user is encouraged to
try to correct the interference by one or more of the following
measures:
• Reorient or relocate the receiving antenna
• Increase the separation between the equipment and receiver
• Connect the equipment into an outlet on a circuit different
from that to which the receiver is connected
• Consult the dealer or an experienced radio/TV technician for
help
This equipment complies with FCC radiation exposure limits
set forth for an uncontrolled environment. This equipment
should be installed and operated with a minimum distance of
90 mm between the transmitter’s radiating structure(s) and the
body of the user or nearby persons.
NOTE: Any changes or modifications to this device that are not
expressly approved by the manufacturer will void the warranty
and the user’s authority to operate the equipment.
Contains FCC ID: 2AU5D-AHAWS
IC NOTICE: This device complies with Industry Canada
license-exempt RSS standards. Operation is subject to
the following two conditions: (1) this device may not cause
interference; and (2) this device must accept any interference,
including interference that may cause undesired operation of
the device.
RF EXPOSURE STATEMENT: This equipment meets the SAR
evaluation limits given in RSS-102 Issue 5 requirements at the
minimum separation distance of 90 mm to the human body.
Note: Any changes or modifications to this device that are not
expressly approved by the manufacturer, will void the warranty
and the user’s authority to operate the equipment.
IC: 25764-AHAWS
HVIN: WNAL33, WNAL43
RENSEIGNEMENTS SUR LA RÉGLEMENTATION
AVIS DE LA FCC : Ce dispositif est conforme à la section 15
des règlements de la FCC. On peut s’en servir sous réserve
des deux conditions suivantes : 1) ce dispositif ne provoque
pas d’interférences nuisibles; 2) il doit être en mesure
d’accepter toute interférence reçue, y compris les interférences
qui peuvent causer un fonctionnement indésirable.
Ce matériel a été mis à l’essai et a été jugé conforme aux
limites d’un dispositif numérique de classe B, conformément
à la section 15 des règlements de la FCC. Ces limites visent
à offrir une protection raisonnable contre les interférences
nuisibles dans une installation résidentielle. Ce matériel
génère, utilise et peut émettre des radiofréquences et, s’il
n’est pas installé ou utilisé conformément aux directives, peut
causer des interférences nuisibles aux communications radio.
Toutefois, il n’existe aucune garantie contre la possibilité
d’interférences au sein d’un milieu précis. Si ce matériel cause
des interférences nuisibles à la réception des téléviseurs et
des radios, ce qui peut être déterminé en mettant à l’arrêt, puis
en remettant en marche le matériel, l’utilisateur est encouragé
à tenter de corriger ces interférences par l’une ou plusieurs
des mesures suivantes :
• réorienter ou déplacer l’antenne de réception;
• augmenter la distance entre le matériel et le récepteur;
• brancher le matériel dans une prise de courant appartenant à
un circuit électrique différent de celui sur lequel le récepteur
est branché;
• demander de l’aide au fournisseur ou à un technicien
spécialisé en radio/télévision.
Ce matériel est conforme aux limites d’exposition aux
radiations de la FCC énoncées pour un environnement non
contrôlé. Ce matériel doit être installé et fonctionner à une
distance minimale de 90 mm entre la structure rayonnante
du transmetteur et l’utilisateur ou les personnes se trouvant à
proximité.
REMARQUE : Les changements ou les modifications apportés
à ce dispositif qui ne sont pas expressément approuvés par le
fabricant pourraient annuler la garantie ainsi que l’autorisation
de l’utilisateur à se servir du matériel.
Contient le n° d’ident. de la FCC ID: 2AU5D-AHAWS
AVIS DE L’IC : Ce dispositif est conforme aux normes CNR
pour les appareils exempts de licence d’Industrie Canada. On
peut s’en servir sous réserve des deux conditions suivantes :
1) ce dispositif
ne provoque pas d’interférences; 2) il doit être en mesure
d’accepter toute interférence, y compris les interférences qui
peuvent causer un fonctionnement indésirable.
ÉNONCÉ RELATIF À L’EXPOSITION AUX
RADIOFRÉQUENCES :
Ce dispositif est conforme aux limites d’évaluation du DAS
énoncées dans les exigences CNR 102, 5e édition à la
distance de séparation minimale de 90 mm de l’humain.
Remarque : Les changements ou les modifications apportés
à ce dispositif qui ne sont pas expressément approuvés par le
fabricant pourraient annuler la garantie ainsi que
l’autorisation de l’utilisateur à se servir du matériel.
IC: 25764-AHAWS
HVIN: WNAL33, WNAL43
INFORMACIÓN REGLAMENTARIA
TAVISO DE LA FCC: Este dispositivo cumple con la Parte
15 de las reglas de la FCC. La operación está sujeta a las
siguientes dos condiciones: (1) este dispositivo no debe
provocar interferencia dañina, y (2) este dispositivo debe
aceptar cualquier interferencia recibida, incluso interferencia
que pueda provocar una operación no deseada.
Este equipo ha sido probado y cumple con los límites para un
dispositivo digital Clase B, conforme a la Parte 15 de las reglas
de la FCC. Estos límites están diseñados para proporcionar
una protección razonable contra la interferencia dañina en una
instalación residencial.
Este equipo genera, usa y puede irradiar alimentación de radio
frecuencia y, si no se instala y usa de acuerdo con las
instrucciones, puede producir interferencia dañina a las
comunicaciones de radio.
Sin embargo, no existe garantía de que la interferencia no se
producirá en una instalación específica.
Si este equipo produce interferencia dañina a la recepción
de radio o televisión, lo cual puede determinarse apagando
y encendiendo el equipo, se sugiere al usuario que intente
corregir la interferencia mediante una o más de las siguientes
acciones:
• Reoriente o reubique la antena de recepción
• Aumente la separación entre el equipo y el receptor
• Conecte el equipo a una toma de corriente en un circuito
diferente al que está conectado el receptor
• Consulte al distribuidor o a un técnico experimentado de
radio/TV para obtener ayuda
Este equipo cumple con los límites de exposición a la radiación
de la FCC establecidos para un entorno no controlado. Este
equipo debe ser instalado y operado a una distancia mínima
de 90 mm entre la(s) estructura(s) de radiación del transmisor
y el cuerpo del usuario o las personas cercanas.
NOTA: Cualquier cambio o modificación no aprobada
expresamente por el fabricante de este dispositivo anulará
la garantía y la autoridad del usuario para utilizar el equipo.
Contiene ID de la FCC ID: 2AU5D-AHAWS
AVISO DE IC: Este dispositivo cumple con los estándares
RSS exentos de licencia de la Industria de Canadá. La
operación está sujeta a las siguientes dos condiciones: (1)
este dispositivo no debe provocar interferencia dañina, y (2)
este dispositivo debe aceptar cualquier interferencia, incluso
interferencia que pueda provocar una operación no deseada
del dispositivo.
DECLARACIÓN DE EXPOSICIÓN A RF: Este equipo cumple
con los límites de evaluación SAR proporcionados en los
requerimientos
RSS-102 Tema 5 en la distancia de separación mínima de
90 mm con el cuerpo humano. Nota: cualquier cambio o
modificación no aprobada expresamente por el fabricante de
este dispositivo anulará la garantía y la autoridad del usuario
para utilizar el equipo.
IC: 25764-AHAWS
HVIN: WNAL33, WNAL43
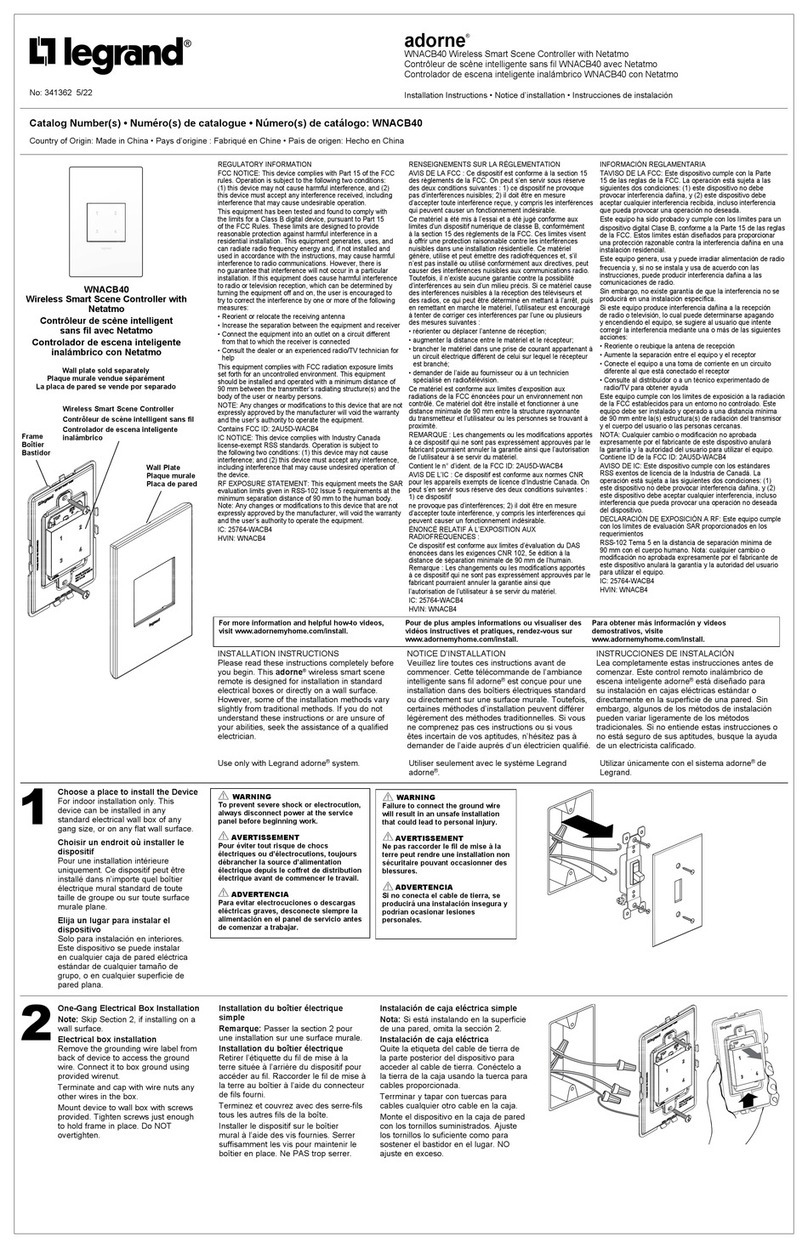
1Choose a place to install the Device
For indoor installation only. This
device can be installed in any
standard electrical wall box of any
gang size, or on any flat wall surface.
Choisir un endroit où installer le
dispositif
For indoor installation only. This
device can be installed in any
standard electrical wall box of any
gang size, or on any flat wall surface.
Elija un lugar para instalar el
dispositivo
For indoor installation only. This
device can be installed in any
standard electrical wall box of any
gang size, or on any flat wall surface.
2
Use only with Legrand adorneTM system. Utiliser seulement avec le système Legrand
adorneTM.
Utilizar únicamente con el sistema adorneTM de
Legrand.
For more information and helpful how-to videos,
visit www.adornemyhome.com/install.
Pour de plus amples informations ou visualiser des
vidéos instructives et pratiques, rendez-vous sur
www.adornemyhome.com/install.
Para obtener más información y videos
demostrativos, visite
www.adornemyhome.com/install.
INSTALLATION INSTRUCTIONS
Please read these instructions completely before
you begin. This adorne™ dimmer is designed
to for installation in standard electrical boxes.
However, some of the installation methods vary
slightly from traditional methods. If you do not
understand these instructions or are unsure of
your abilities, seek the assistance of a qualified
electrician.
NOTICE D’INSTALLATION
Veuillez lire toutes ces instructions avant de
commencer. Les commutateurs adorneTM sont
conçus pour être installés dans des boîtes
électriques standard. Toutefois, certaines
méthodes d’installation peuvent différer
légèrement des méthodes traditionnelles. Si vous
ne comprenez pas ces instructions ou si vous
êtes incertain de vos aptitudes, n’hésitez pas à
demander de l’aide auprès d’un électricien qualifié.
INSTRUCCIONES DE INSTALACIÓN
Lea completamente estas instrucciones antes
de comenzar. Los interruptores adorneTM están
diseñados para la instalación en cajas eléctricas
estándares. Sin embargo, algunos de los métodos
de instalación pueden variar ligeramente de
los métodos tradicionales. Si no entiende estas
instrucciones o no está seguro de sus aptitudes,
busque la ayuda de un electricista calificado.
Wireless Smart Scene
Controller Switches
Frame
Boîtier
Bastidor Wall Plate
Plaque murale
Placa de pared
Wireless Smart Dimmer
Wireless Smart Dimmer
Wireless Smart Dimmer
Using Adhesive
Utilisation d’adhésif
Uso de adhesivo
Using Screws
Utilisation de vis
Uso de tornillos
Adhesive mounting is not the recommended mounting method utilizing real materials, cast metal or Hubbardton Forge®Wall Plates
Le montage adhésif n’est pas la méthode de montage recommandée lors de l’utilisation de matériaux réels, de métal moulé ou des
plaques murales Hubbardton Forge®.
El montaje con adhesivo no es el método de montaje recomendado si usa materiales reales, metal fundido o placas de pared
Hubbardton Forge®.
3WARNING
Failure to connect the ground wire
will result in an unsafe installation
that could lead to personal injury.
AVERTISSEMENT
Ne pas raccorder le fil de mise à la
terre peut rendre une installation non
sécuritaire pouvant occasionner des
blessures.
ADVERTENCIA
Si no conecta el cable de tierra, se
producirá una instalación insegura y
podrían ocasionar lesiones
personales.
WARNING
To prevent severe shock or electrocution,
always disconnect power at the service
panel before beginning work.
AVERTISSEMENT
Pour éviter tout risque de chocs
électriques ou d’électrocutions, toujours
débrancher la source d’alimentation
électrique depuis le coffret de distribution
électrique avant de commencer le travail.
ADVERTENCIA
Para evitar electrocuciones o descargas
eléctricas graves, desconecte siempre la
alimentación en el panel de servicio antes
de comenzar a trabajar.
Note: Skip Section 3, if installing
on a wall surface.
Electrical box installation
Remove the grounding wire label
from back of device to access the
ground wire. Connect it to box
ground using provided end cap.
If installing this device with sofTap
smart dimmer with Netatmo,
WNAL50 or other wired Netatmo
devices, follow their instructions on
how to terminate the spare wires
in the box.
Mount device to wall box with
screws provided. Tighten screws
just enough to hold frame in place.
Do NOT overtighten.
Remarque: Passer la section
3 pour une installation sur une
surface murale.
Installation du boîtier électrique.
Retirer l’étiquette du fil de mise à la
terre située à l’arrière du dispositif
pour accéder au fil. Raccorder le
fil de mise à la terre au boîtier à
l’aide du capuchon d’extrémité
fourni. Si le dispositif est installé
avec l’interrupteur intelligent
sofTap WNAL10 avec Netatmo,
suivre ses directives sur la façon
de terminer les connexions des fils
de rechange. Installer le dispositif
sur le boîtier mural à l’aide des
vis fournies. Serrer suffisamment
les vis pour maintenir le boîtier en
place. Ne PAS trop serrer.
Nota: Si está instalando en la
superficie de una pared, omita la
sección 3.
Instalación de caja eléctrica.
Quite la etiqueta del cable de tierra
de la parte posterior del dispositivo
para acceder al cable de tierra
Conéctelo a la toma de tierra de
la caja usando la tapa superior
provista. Si instala este dispositivo
con el Interruptor sofTapSmart
con Netatmo, WNAL10, siga sus
instrucciones sobre cómo terminar
los cables de reserva. Monte el
dispositivo en la caja de pared con
los tornillos suministrados. Ajuste
los tornillos lo suficiente como para
sostener el bastidor en el lugar.
NO ajuste en exceso.
Ground Wire
Mise à la terre
Cable a tierra
Wall plate sold separately
Plaque murale vendue séparément
La placa de pared se vende por separado
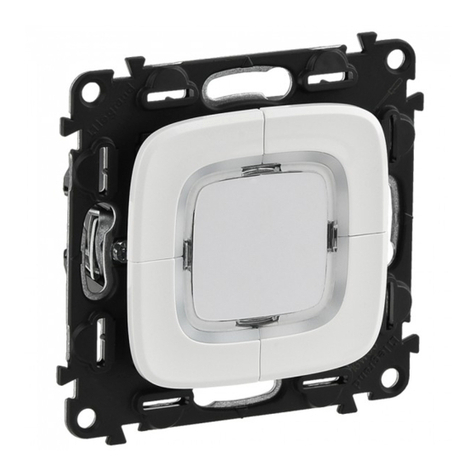
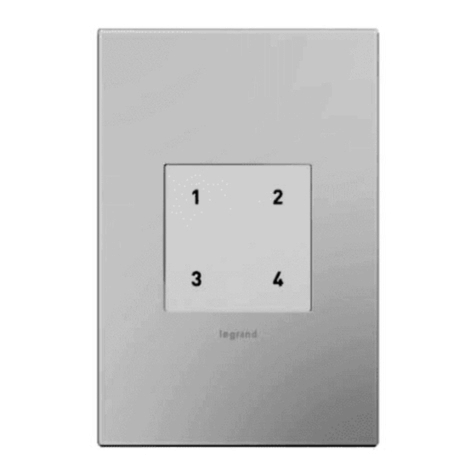
WNAL33 Home/Away
WNAL33 Home/Away
WNAL33 Home/Away
WNAL43 Wake/Sleep
WNAL43 Wake/Sleep
WNAL43 Wake/Sleep


