LEGRAND MRIR1 User manual

REV DESCRIPTION INT: REV. DATE APPROVED
1 ECO# CO1790 MJS 9/27/06 CG
2 ECO# 02412 DR
TITLE BOX PAGE ONLY.
DO NOT MAKE FILM • DO NOT PRINT
MATERIAL: White 16lb (60g/m sq), uncoated, prefer recycled stock
Ink: Black
Print Two Sides, 2 sheets 8.5” (Wide) x 11” (High),
stapled upper left corner
OR
Print Two Sides, 1 sheet 11” x 17”
folded to 8.5” x 11”
IF YOU HAVE ANY QUESTIONS REGARDING SPECIFICATIONS OR REQUIRE
ADDITIONAL FILE FORMATTING, PLEASE CONTACT Mary Jo Sowinski.
Phone: 408-486-7511
Email: maryjo.sowinski@wattstopper.com
All information in this drawing is the property of Watt Stopper/Legrand
and cannot be copied or used without the written approval of
Watt Stopper/Legrand.
Title: MRIR1 Installation Instructions
SANTA CLARA, CALIFORNIA
DRAWN BY
PLM
MARCOM
ENGINEERING
QA
TITLE BOX PG
SOWINSKI
SCALE 1:1
Drawing #:
07068
Orig. Drawing Date: 27 SEP 06
Revision Date: 28 SEP 07
REV. #:
2
Inside Right PageInside Left Page
Back of Sheet
431.8mm
17”
215.9mm
8.5”
9
.4mm
11”
4-page
booklet
fold
MRx###
Front Page
Back Page
Center Fold
Front of Sheet
MRx###
279.4mm
11”
MRx###

Installation Instructions
SPECIFICATIONS
UL and cUL Listed
Input Voltage .................................... 12VDC, 50mA minimum
AC-DC adaptor (provided)..............................120VAC, 60Hz
IR Frequency .................................................................36KHz
Control Inputs:
Internal IR receiver
3.5mm jack for connection to an optional
external IR sensor or IR repeater system
Output ................................................ TopDog RF commands
DESCRIPTION
The MRIR1 providess Top Dog™ wireless network
connectivity via commonly available IR learning remotes.
Miro house and room scenes are invoked based on IR codes
transmitted from the included Programming Remote or
a user supplied learning remote (e.g., Philips Pronto, or
those by other manufacturers such as Universal Remote,
RTI etc.). This allows the preferred IR remote to integrate
with the Miro wireless network to execute house and room
scenes and also control audio video components.
The MRIR1 interface module is designed with an integrated
36Khz IR receiver located at an opening placed at the top of
the device. The MRIR1 also has a 3.5mm mini stereo jack
allowing direct connection to existing Xantech IR receivers.
Additional receiver options may be available from Xantech
or other vendors. Watt Stopper has tested the MRIR1 with
Xantech Dinky Link model 480B-30.
The included infrared Programming Remote is a Legrand
model 88229 CAD transmitter. It can be configured for a
number of Groupe codes that change it’s functionality . See
IR Programming Remote Code Configuration.
Top Dog™ Wireless Communication
Wireless devices use radio signals to communicate with
each other to control lighting and other types of electric
loads in selected areas. These wireless devices use the
900MHz band for high-speed control communication. Using
Watt Stopper “frequency-agile” Top Dog™ technology, these
wireless devices avoid interference with other 900MHz
devices, such as cordless phones and baby monitors.
POWER FAIL MEMORY
After a power failure, all wireless devices automatically
return to the state that they were in immediately prior
to loss of power. All configuration and scene control
information is preserved.
APPLICATION ASSISTANCE
The MRIR1 functions as part of a network that may contain
a variety of wireless devices. Instructions for installation,
binding operations, and use are included with the relevant
wireless devices. Application support information and
installation guides are available online.
ENVIRONMENT AND ORIENTATION
Do not locate the MRIR1 close to any device that may
cause radio frequency interference or behind large metal
objects that can block radio reception. Avoid TV sets,
computers, refrigerators, microwave ovens, range hoods,
safes, etc. The infrared receiver must also have a clear line
of sight view of the areas where the IR remote control will
be operated. Avoid fluorescent light fixtures, direct sunlight,
frosted or tinted glass obstructions.
INSTALLATION
A screw slot on the base of the MRIR1 interface is provided
for wall mounting. Alternatively, the base of the unit is
equipped with rubber feet for shelf-top operation.
1. Complete the physical installation and binding of
all other wireless devices in the network. Use an
appropriate scene controller or hand held scene
remote to set up the scenes that will be executed based
on the decoded IR transmissions.
2. Plug the MRIR1’s power supply into a convenient
120VAC outlet, and connect the power cord to the
power supply jack on the MRIR1.
3. The status LED lights yellow, indicating that the unit
is ready for configuration. See SET HOUSE ID in this
manual.
IR Programming Remote, MRIR1 interface, power supply
MRIR1
Infrared Remote Control Interface
with Programming Remote

BINDING THE MRIR1
Set House ID and Room Binding
1. Go to a previously configured Room Scene Controller
in the room where the MRIR1 is to operate. Start a
Room Binding by pressing the UP/DN buttons on the
controller. If the MRIR1 doesn’t need to be bound to
a room (it will only be used to execute house scenes)
you can start the binding from any device in the house,
confirm that the house binding is successful, then skip
to step 3.
The MRIR1 house binding is successful when it’s LED
starts blinking green.
2. To include the MRIR1
in the room where the
binding was initiated,
go to the MRIR1 and
simultaneously press
and hold it’s buttons
while the house binding
is still active (LEDs on all
devices in the house are
blinking).
The MRIR1 room binding is successful and it is included
in the room when it’s LED starts blinking yellow
(amber).
3. When binding is complete, terminate the binding from
the device that started the binding (simultaneously hold
and hold the buttons until the unit stops blinking).
Setup of the MRIR1 is complete.
Changing House/Room ID
To change the House ID, reset the MRIR1 to its factory
default state (“0” for House and Room ID). Press and hold
the buttons for 10 seconds, until the LED turns solid yellow
(amber). When the unit returns to defaults, it can accept a
new House ID.
To change the Room ID (when the House ID is correct),
initiate a Room Binding from a device with the desired Room
ID. Include the MRIR1 into the Room by simultaneously
pressing it’s buttons to include or exclude it. When the
MRIR1 is included it’s LED blinks yellow (amber). When
excluding the MRIR1 from a room the Room ID is cleared
leaving the device with no Room ID.
When a House ID has been assigned but the Room ID is at
the factory default of “0” then in the normal operating mode
the MRIR1 will show a Red LED error condition indicating
that the unit is not yet bound to a specific room.
THE IR PROGRAMMING REMOTE
The Programming Remote supplied
with the MRIR1 uses the Legrand
CAD IR data protocol. This
protocol is built into the
MRIR1 interface, which
translates the codes from
the IR remote to Top Dog
commands for wireless
transmission to the Miro
network.
You can use the Programming Remote
to directly control the MRIR1, or you
can use the Programming Remote to
teach a “learning remote” the codes.
Refer to the instructions supplied with
the learning remote for programming
and protocol information. For more
information about remotes, go to www.RemoteCentral.com.
Teaching Mode Procedures
To teach a learning remote using the Programming Remote
you must set the Programming Remote to the desired
Groupe code and Scene Selection.
1. Set the Groupe code for the Programming Remote
using the rotary dial under the battery cover. See the IR
Programming Groupe Code Configuration section for
a description of each code. Note the markings next to
the dial to determine the
location of each Groupe
code setting. Use a small
screwdriver to rotate
the dial. Each time you
change from one code to
another, you should hear
a faint “click” indicating
proper placement of the
dial.
2. Set the Scene Select
switch. When the Scene
Select switch on the
Programming Remote is
in the top position it is set
for scenes 1-10, in the
bottom position it is set
for the Aux mode, which
provides an alternate
set of functions for the buttons. The Aux functions are
determined by the Groupe selection.
3. Place the learning remote and the Programming
Remote about 6 to 12 inches apart, with the IR transmit/
receive lenses aimed at each other.
4. Put the learning remote in Learn mode (according to the
instructions provided with the remote).
5. Press a button on the learning remote that you want to
teach a function or scene then press the button on the
Programming Remote that invokes the desired function
or scene. Repeat as necessary until the remote is fully
programmed.
6. Terminate the Learn mode on the learning remote then
test operation of the system using the learning remote.
Aux House
Panic
OFF ON
Aux Room
Ramp
Down UP
Scene
Scene
Scene
Scene
Scene
1
1
OFF
9
7
1
5
1
3
ON
10
8
6
1
4
1
2
Scene
Select
1-10
Aux
House
Room
Programming
Remote
for use
with
Miro MRIR1
Signal
transmission
indicator
light
Scene
Select
Switch
House Scenes
(Groupe 1)
Scene Select @1-10
Scenes 1-10
House OFF & House ON
Scene Select @Aux
Button 1= Panic OFF
Button 2= Panic ON
House OFF & House ON
Room Scenes
(Groupe 2)
Scene Select @1-10
Scenes 1-10
Room OFF & Room ON
Scene Select @Aux
Scenes 11-15
Button 9 = Ramp DOWN
Button 10 = Ramp UP
Room OFF & Room ON
Santa Clara, CA 800.879.8585
Control
Buttons
Status LED
Green
Yellow (amber)
Red
Pushbuttons
Top
Bottom
Press both
simultaneously
Internal
IR Receiver
Jack for
External IR Receiver
Power Supply Jack
1
2
3
4
5
6
7
8
9
10
11
12
+_
9 Volt
Alkaline
battery
Battery
connector
Marking label
locations
Battery cover
Groupe
selector
dial

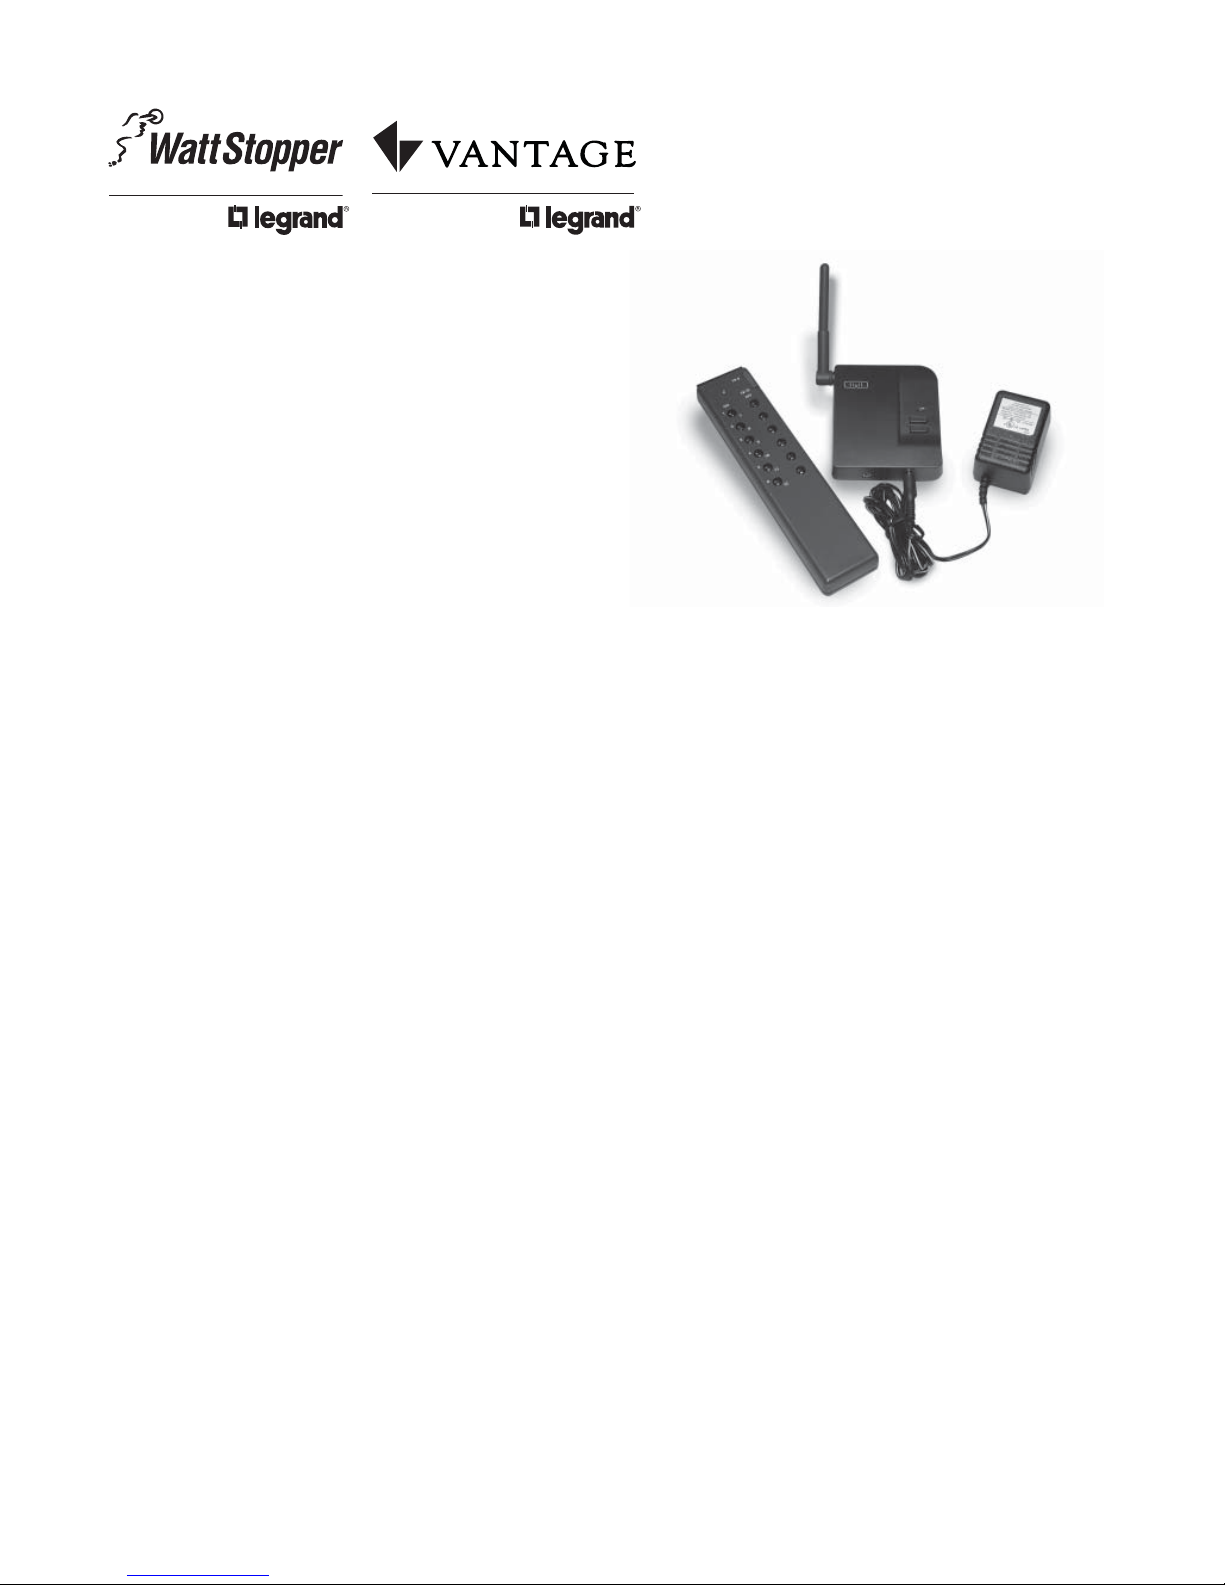
IR PROGRAMMING REMOTE GROUPE CODE
CONFIGURATION
Groupe code 1- Recall House Scene
Groupe code 1 commands the MRIR1 to recall house scenes.
When the Scene Select switch is in the upper position (1-10)
the Programming Remote recalls house scenes 1-10, House
OFF and House ON. When the Scene Select switch is in the
lower position (Aux) button 1 (top left) is Panic OFF, button 2
(top right) is Panic ON, button 11 is House ON and button 12
is House OFF.
Groupe code 2 - Recall Room Scene
Groupe code 2 commands the MRIR1 to recall Room Scenes.
When the Scene Select switch is in the upper position the
Programming Remote recalls room scenes 1-10, Room
OFF and Room ON. When the switch is in the lower position
(Aux), it recalls room scenes 11-15, button 9 performs a
proportional Ramp Down, button 10 performs a proportional
Ramp Up, button 11 is Room ON and button 12 is Room OFF.
About Room Proportional Ramp Commands: In a standard
Miro installation, a Proportional Ramp is performed using
the paddle on a room scene controller. The amount of fade
is reflected in the duration of the press. Most IR devices,
however, transmit their command data on the initial button
action, therefore the MRIR1 proportional ramp function has
been adapted.
To initiate a Proportional Ramp command, press and release
the corresponding Ramp Down or Ramp Up button on the
Programming Remote. When the desired output level is
achieved, press and release any button to stop the action.
Since the ramp operation requires multiple operations
(1-Start, 1-Stop), the ramp speed associated with the IR
command operates roughly 30% slower than that issued by
a Miro wireless scene controller. This should aid the user in
making adjustments with more accuracy.
Please note: Since most IR remotes issue the same
command several times to ensure that the command
was received, the MRIR1 treats subsequent identical IR
commands as a retransmission of the same command.
Therefore, it is possible that the Proportional Ramp
command may not be functional on all learning remotes.
IR Groupe code 3/4 - Save House/Room Scene
When using Groupe code 3 or 4, the MRIR1 issues a
save house or room scene command in place of the
recall function. It is unlikely that this command would be
programmed into a learning remote. This capability is
included to aid the user or commercial installer to quickly
store new scenes without having to change the setup of an
existing Miro House or Room Scene Controller. When a new
scene is stored using the MRIR1, it is stored using the default
fade-time of 2 seconds.
IR Groupe code 5/6 - Start/Stop House/Room Scene Binding
When using Groupe code 5 or 6, the unit starts/stops a house
or room scene binding for the corresponding scene. This
command should not be programmed into a learning remote
and is included to aid the user during setup of House and
Room Scenes. When the Groupe code is set to 5 or 6, the
user can start or stop a binding operation by pressing the
corresponding scene button. This function could be used
by an installer to dramatically speed up the commissioning
process as a change from scene binding to another scene
binding would simply be the press of a button.
TESTING
Test scene recall by pressing a scene button on the
programmed learning remote or on the Miro Programming
Remote. The LED on the MRIR1 will blink twice indicating the
command was sent to the wireless Miro network.
TROUBLESHOOTING
Using the MRIR1 with an IR repeater system
If you are using an IR repeater system with the
MRIR1, make sure it is working correctly with
the Programming Remote. If not, you will need
to troubleshoot the IR repeater system.
During Set House ID, the LED is not flashing on some
Wireless devices.
• If LED is solid green before initiating house ID binding:
The device already has another house ID. Reset
it to the factory default so that it can be bound to
the desired house ID. Resetting to factory defaults
is described in the “I need to start over” issue.
• If LED is solid yellow (amber) after
initiating house ID binding:
The device may be out of range of the initiating
device. It may be necessary to add a MRR2 Repeater if
reception to a particular area of the house is blocked.
After teaching the customer’s learning remote, there is no
response from the MRIR1.
Try sending the same code from the Programming
Remote. If that works correctly, there may have
been a problem during the learning process. IR
signals are susceptible to interference by sunlight
and fluorescent lighting. Try moving to a location
that is not affected by sunlight or a fluorescent
lighting fixture, place the Programming Remote
closer or further away from the learning remote
and then re-teach the desired commands.
I need to start over.
You can reset any wireless device to factory default
settings by pressing and holding the Up/Down buttons
on the until the LED changes to solid yellow (amber)
(approximately 10 seconds). During the process, the
LED flashes yellow (amber) and when complete,
it changes to solid yellow (amber). The device can
then be reconfigured, exactly like any new device.

FCC NOTICE
This equipment has been tested and found to comply with
the limits for a Class B digital device, pursuant to part 15
of the FCC Rules. These limits are designed to provide
reasonable protection against harmful interference in a
residential installation. This equipment generates, uses
and can radiate radio frequency energy and, if not installed
and used in accordance with the instructions, may cause
harmful interference to radio communications. However,
there is no guarantee that interference will not occur in a
particular installation. If this equipment does cause harmful
interference to radio or television reception, which can be
determined by turning the equipment off and on, the user is
encouraged to try to correct the interference by one or more
of the following measures:
• Reorient or relocate the receiving antenna.
• Increase the separation between the equipment and
receiver.
• Connect the equipment into an outlet on a circuit
different from that to which the receiver is connected.
• Consult the dealer or an experienced radio/TV
technician for help.
Caution: Any changes or modifications to this device
not explicitly approved by manufacturer could void your
authority to operate this equipment.
WARRANTY INFORMATION
Manufacturer warranties its products to be free of
defects in materials and workmanship for a period
of five (5) years. There are no obligations or liabilities
on the part of manufacturer for consequential
damages arising out of, or in connection with, the
use or performance of this product or other indirect
damages with respect to loss of property, revenue or
profit, or cost of removal, installation or reinstallation.
Please
Recycle
07068r2 9/2007
Watt Stopper Customers contact: Vantage Customers contact:
1061 South 800 East
Orem, UT 84057
Phone: 800.555.9891
www.vantagecontrols.com
2800 De La Cruz Blvd.
Santa Clara, CA 95050
Phone: 800.879.8585
www.wattstopper.com
Table of contents
Other LEGRAND Recording Equipment manuals

LEGRAND
LEGRAND 036 06 User manual

LEGRAND
LEGRAND 0 883 32 User manual

LEGRAND
LEGRAND 0 026 93 Instruction manual

LEGRAND
LEGRAND 3 109 72 User manual

LEGRAND
LEGRAND 0 488 77 User manual

LEGRAND
LEGRAND VADDIO EasyUSB MicPOD I/O Instruction Manual

LEGRAND
LEGRAND VANTAGE MRHC3 User manual

LEGRAND
LEGRAND 0 883 31 User manual

LEGRAND
LEGRAND 0 626 00 User manual

LEGRAND
LEGRAND VADDIO OneLINK Bridge AV User manual