2
Z
N
AUX
MOD
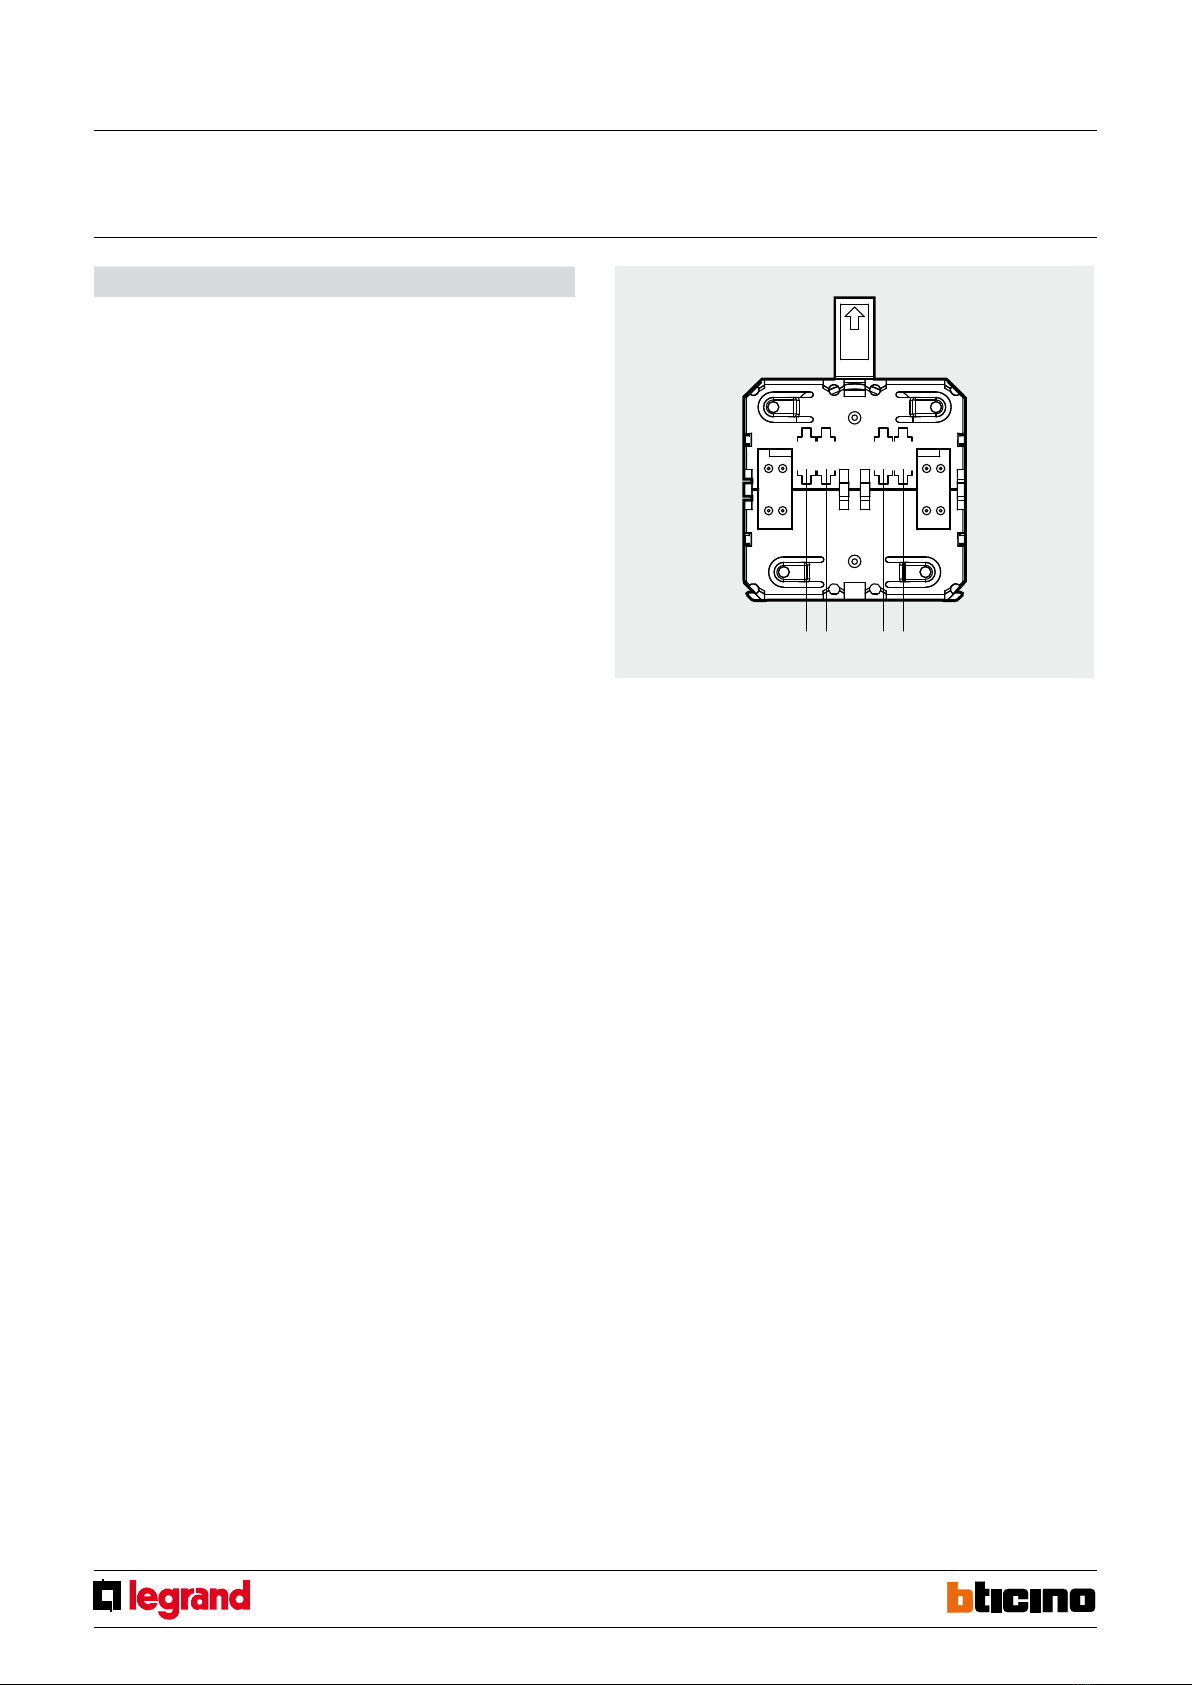
Z MODN° AUX
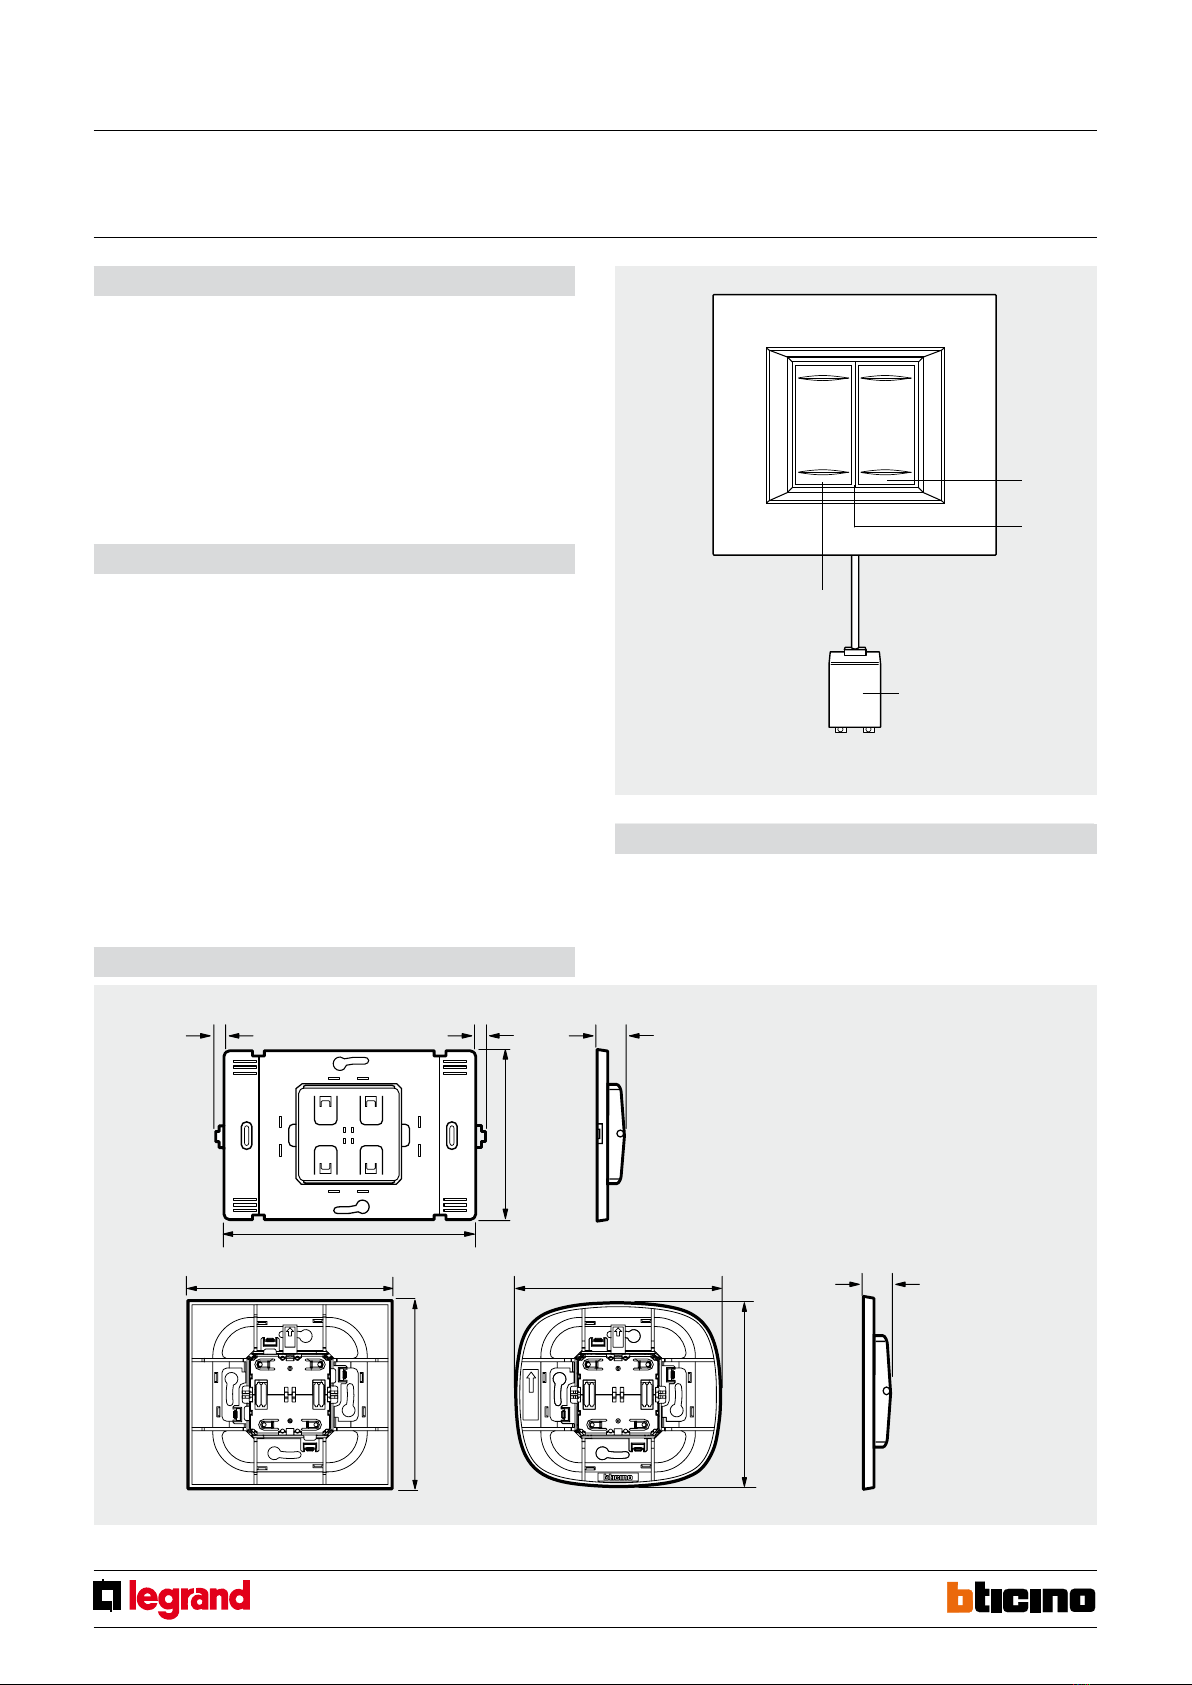
HA4619 HB4619 L4619
Conguration
The device requires allocation of the zone it belongs to, the progressive number of the
sensors within the same zone, and the setting of the detection mode, as well as the
possible allocation of an auxiliary prealarm channel.
WARNING: The congurationoperationsmustbeperformedwiththebattery disconnected
Z
This congurator assigns the number of the appropriate zone to the detector.
Congurator 1 assigns zone 1 to the detector, congurator 2 assigns zone 2 and so on to a
maximum of 8 zones Congurator 9 assigns the device to the group of auxiliary devices.
N
This congurator assigns the progressive number of the detector inside the appropriate
zone.
Congurator 1 identies the rst detector, congurator 2 identies the second and so on
to a maximum of 9 sensors (IR detectors and contact interface) for each of the 8 zones.
Note: to complete the activations using the relay actuator type HD/HC/ HS/L/N/NT4614
and AM5794 see the appropriate technical sheet.
MOD
Do not congure.
AUX
The congurator in the AUX socket activates the auxiliary function of the corresponding
auxiliary channel. It therefore enables controlling auxiliary actuator devices, provided
that they have been congured using the same auxiliary channel.
Note: to complete the activations using the relay actuator type HD/HC/ HS/L/N/NT4614
and AM5794 see the appropriate technical sheet.
Pairing remote receivers
1. Switch the system to“maintenance”mode.
2. Press the programming pushbutton of the radio receiver for ve seconds, until the red
LED comes on.
3. Press the RESET key for 5 seconds of the receiver.
4. If the pairing of the device has been performed correctly, the red LED of the radio
receiver will go o.
If this does not happen, repeat the procedure from step 3. If the LED ashes, it means
that the device memory is full.
5. To pair other devices, repeat from step 2.
6. Perform self learning of the system from the central unit.
7. Exit“maintenance”mode.
Cancelling remote receivers
1. Switch the system to maintenance mode.
2. Remove the power supply from the receiver.
3. Press and hold the programming pushbutton while reconnecting the power supply to
the radio receiver.
4. After 5 seconds the LED ashes orange. If the pushbutton is released at this time, only
the remote controls are cancelled.
5. After releasing the pushbutton, the LED becomes xed orange. When the LED goes
o, cancellation has been completed.
6. Perform self-learning of the system from the central unit and exit “maintenance”
mode.
Internal view
Radio ooding detector
MQ00056-c-EN 19/05/2014