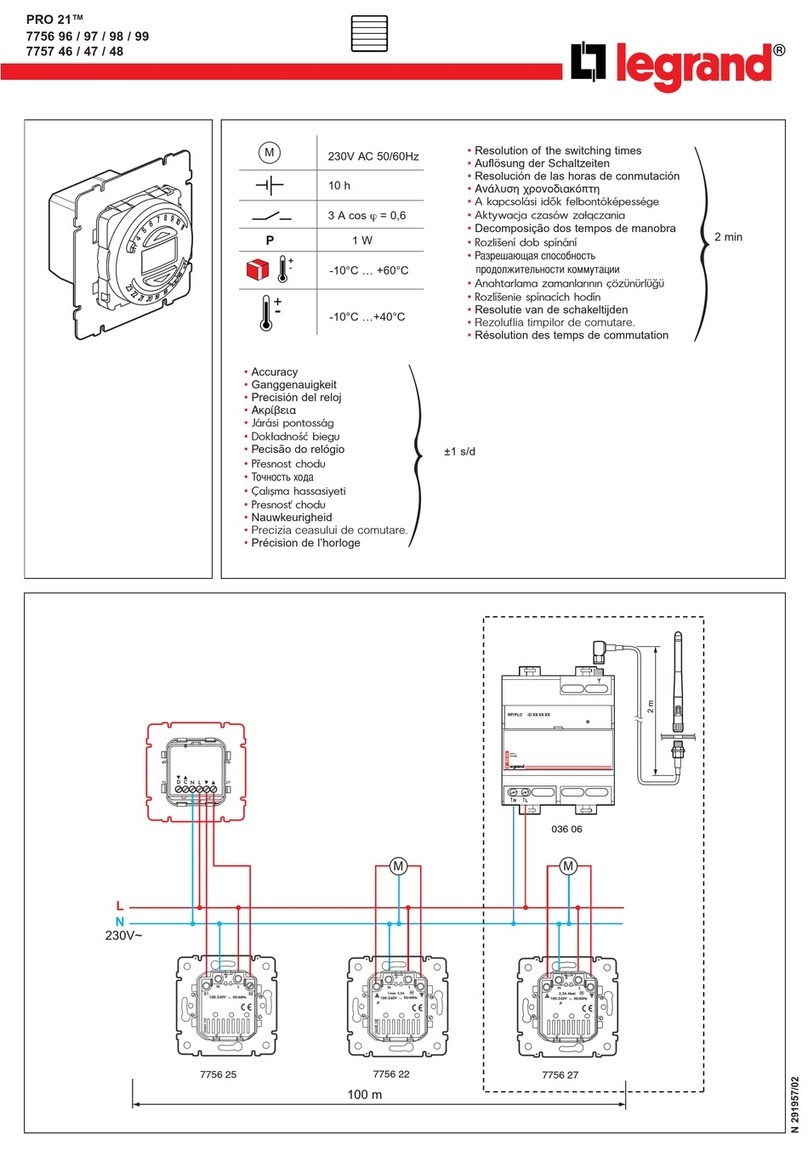
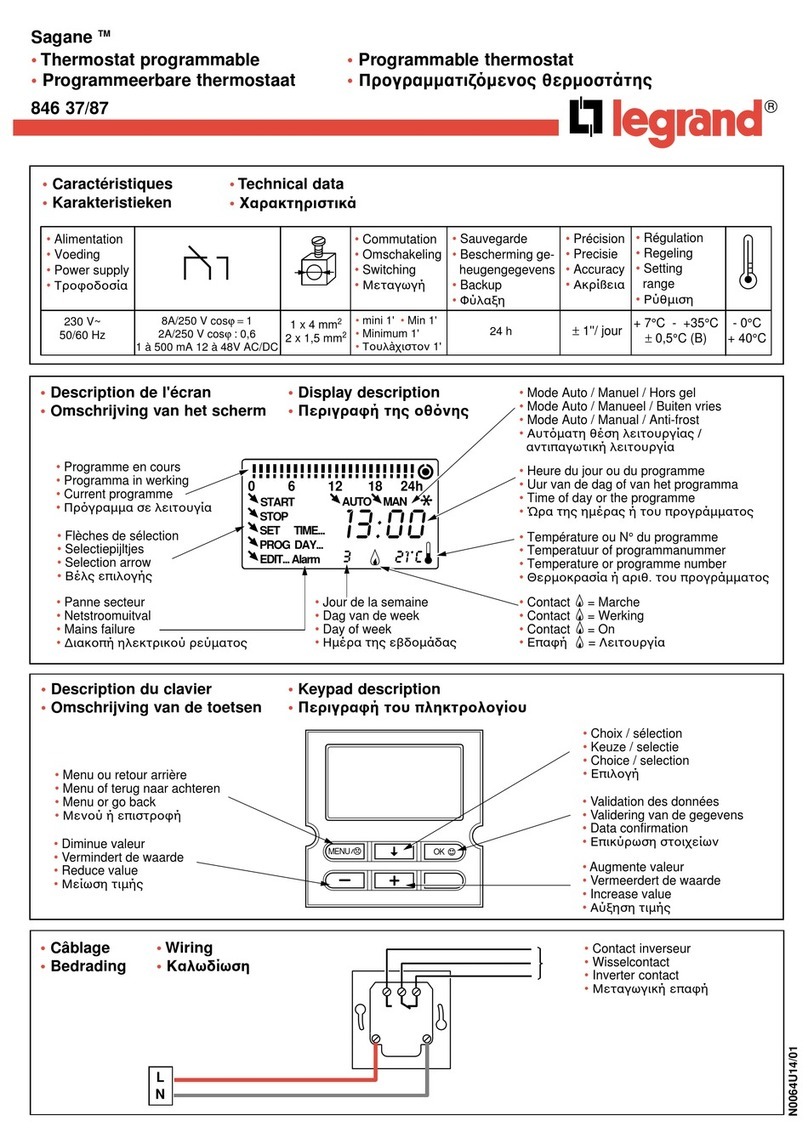
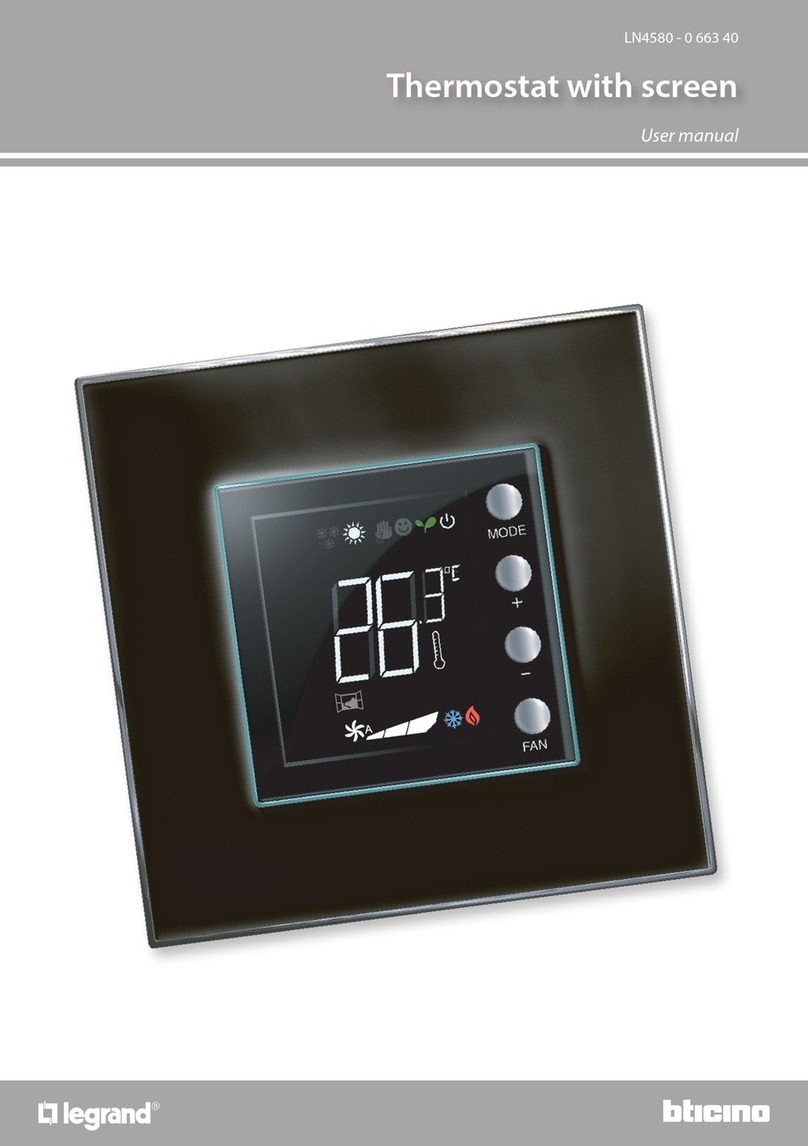
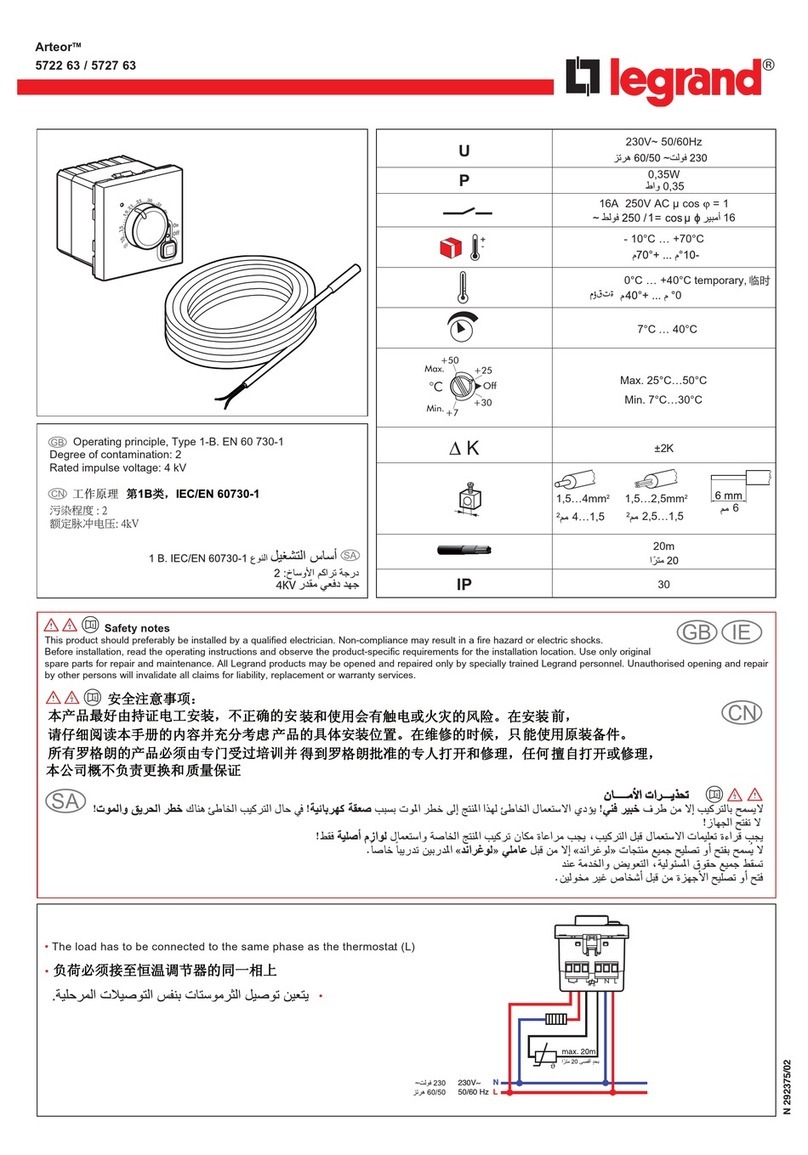
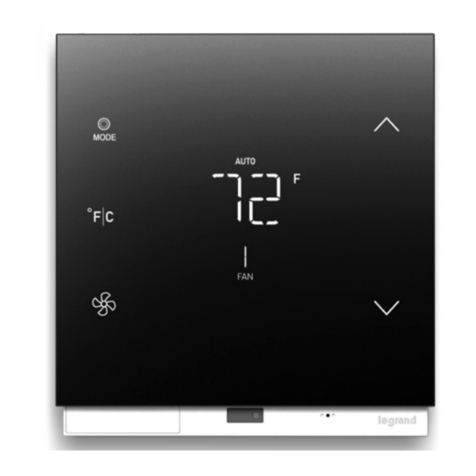
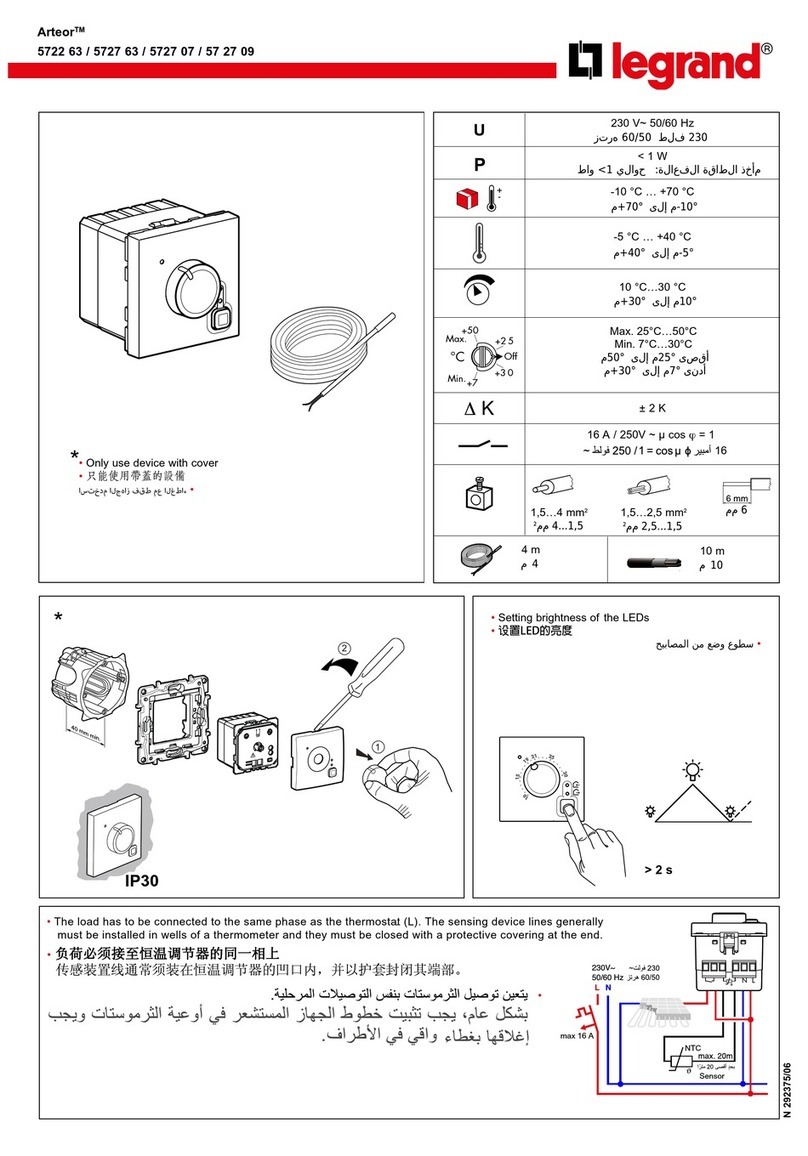
LEGRAND In One 674 40 User manual

• Avec un courant de charge supérieur à 4 A, il est recommandé d’utiliser un contacteur.
• Bij laststroom groter dan 4A is het aangeraden een zekering te voorzien.
• It is advisable to use a contactor when operating with a load higher than 4A.
• Bei einem Laststrom grösser 4A ist es empfehlenswert, ein Schütz einzusetzen.
• Con una corriente de carga de más de 4 A, se recomienda incorporar un contactor.
• При токе нагрузки более 4 А рекомендуется использовать контактор.
• 4 Amperden büyük yük kullanıldığında kontaktör kullanılması tavsiye edilir.
230 V
LN
N
L
L
N
N
L
230 V
réf. 040 49
674 40
674 40
674 40
• Conforme à la norme NFC 47110 - Catégorie B ( ∆ 1 K)|
• Volgens de norm EN 60 730-1, 2-9
• Corresponds to rule EN 60 730-1, 2-9
• Entspricht der Norm EN 60 730-1, -2-9
• Corresponde a la norma EN 60730-1, -2-9
• Соответствует стандартам ГОСТ Р МЭК 60730-1-2002, ГОСТ Р МЭК 730-2-9-94
• EN 60 730-1, 2-9 standartına uygun
®
• Important:
La régulation de température n‘est effective que
deux heures après la mise sous tension (période de
stabilisation thermique de l‘électronique).
• Belanrijk : De temperatuurregulatie is pas effektief
2 uur na het onder spanning plaatsen.
(Thermische stabilisatieperiode van de electronica).
• Important : Temperature regulation is only effective
two hours after the device has been switched on.
(Thermal stabilisation period for the electronics).
• Hinweis : Die Temperaturregelung funktioniert erst
2h nach Inbetriebnahme richtig (Dauer der
thermischen Stabilisierung).
• Importante: La regulación de la temperatura
es únicamente efectiva 2 horas después de
haber conectado el dispositivo (período de
estabilización térmica del sistema electrónico).
• Важное замечание:
Точная регулировка температуры возможна
только через 2 часа после ввода устройства в
эксплуатацию (время стабилизации температуры
электронного оборудования)
• Önemli: Sıcaklık ayarlama ancak cihaz açıldıktan iki
saat sonra etkili olabilir. (Elektronik cihazların stabil duruma
gelme periyodu ).
1,7 m
1,7 м
N 292286/02
• La carte imprimée accessible par les ouvertures ne doit pas être touchés par des objets métalliques.
• De platine, toegankelijk via de opening, mag niet met metalen voorwerpen in kontakt komen.
• The printed circuit board that is accessible by the openings must not be touched with any metallic items.
• Die durch die Öffnungen zugängliche Leiterplatte nicht mit metallischen Gegenständen berühren.
• La placa de circuito accesible por los huecos no puede ser tocada con objetos metálicos.
• Печатная плата, видимая через отверстия, не должна соприкасаться с металлическими частями.1
• Açıklıllardan temas edilebilen baskı devreye metal cisimlerle temas edilmemelidir.
ESDEFR GBNL TR
8A / 250V ~ µ cos ϕ = 1
2A / 250V ~ µ cos ϕ = 0,6
8 A / 250 В ~ μ cos ϕ = 1
2 A / 250 В ~ μ cos ϕ = 0,6
P
Мощность
0,6W
0,6 Вт
1mA … 500mA
12…48V~ / 12…24V –...
1 мА … 500 мA
12…48 В~ / 12…24 В –...
+
-
(~ 7°C) … +30°C
(~ 7°C)… +30°C
8A max
до 8 A
- 10°C … +70°C
от – 10 °C до +70 °C
- 5°C … +40°C
от – 5 °C до +40 °C
2x 1,5mm2
2x 1,5 мм2
RU

• Appuyer sur LEARN
• Druk op LEARN
• Press LEARN
• LEARN betätigen
• Pulsar en LEARN
• Нажмите кнопку LEARN
• LEARN tuşuna basın
• Apprentissage du scénario
• Inlezen van het scenario
• Learn scenario
• Szenario einlernen
• Aprendizaje del escenario
• Программирование сценария
• Senaryo Öğrenme
• Etape 1: débuter l‘apprentissage (sur l’EMETTEUR)
• Stap 1: beginnen met inlezen (op de ZENDER)
• Step 1: Start the learn phase (on the TRANSMITTER)
• Etape 2: ajouter un acteur au scénario (sur le RECEPTEUR)
• Stap 2: een actor toevoegen aan het scenario (op de ONTVANGER)
• Step 2: Add an actor to the scenario (on the RECEIVER)
• Schritt 2: Einen Empfänger zum Szenario hinzufügen (am EMPFÄNGER)
• Etapa 2: añadir un receptor al escenario (en el RECEPTOR)
• Этап 2: добавление приемного устройства в сценарий (на ПРИЕМНИКЕ)
• Etape 3: enregistrer le scénario (sur l’EMETTEUR)
• Stap 3: het scenario registreren (op de ZENDER)
• Step 3: Record the scenario (on the TRANSMITTER)
1
• Appuyer sur LEARN
• Druk op LEARN
• Press LEARN
• LEARN betätigen
• Pulsar en LEARN
• Нажмите кнопку LEARN
• LEARN tuşuna basın
6
• Appuyer sur LEARN
• Druk op LEARN
• Press LEARN
• LEARN betätigen
• Pulsar en LEARN
• Нажмите кнопку LEARN
• LEARN tuşuna basın
4
• Appuyer sur la touche de commande qui doit être associée au emetteur
• Druk op de bedieningstoets die aan de zender moet zijn toegevoegd
• Press the command key that is to beassociated with the transmitter
• Die Bedientaste drücken, die dem Sender zugeordnet werden soll
• Pulsar la tecla de mando que se debe asociar con el emisor
• Нажмите кнопку управления, которую необходимо связать с передающим устройством сценария
• Verici ile ilişkilendirilecek kumanda tuşuna basın
5
• Les voyants de tous les produits s‘éteignent. Le scénario est enregistré.
• De controlelampjes van alle producten gaan uit. Het scenario is geregistreerd.
• The indicator lamps ofall the products go off. The scenario is recorded.
• Die Leuchtdioden an allen Geräten werden ausgeschaltet. Das Szenario ist abgespeichert.
• Los pilotos de todos los productos se apagan. Se graba el escenario.
• Индикаторы всех устройств выключены. Сценарий записан.
• Bütün ürünlerin gösterge lambaları söner. Senaryo kaydedilmiştir.
• Touche LEARN
• Toets LEARN
• LEARN button
• LEARN-Taste
• Tecla LEARN
• Кнопка LEARN
• LEARN (öğrenme) tuşu
• Voyant LEARN
• Controlelampje LEARN
• LEARN indicator light
• LEARN-Kontrollanzeige
• Piloto LEARN
• Индикатор LEARN
• LEARN ışığı
• Touches de commandes
• Bedieningstoetsen
• Control button
• Bedientaste
• Tecla de mando
• Кнопки управления
• Kumanda tuşu
L
L
L
L
L
• Voyant LEARN Delesteur
• Controlelampje LEARN Delesteur
• LEARN indicator light Delesteur
• LEARN-Kontrollanzeige Delesteur
• Piloto LEARN Delesteur
• Индикатор LEARN устройства отключения
неприоритетных нагрузок
• LEARN ışığı Silici(delestör)
D
• Voyant LEARN switch
• Controlelampje LEARN switch
• LEARN indicator light switch
• LEARN-Kontrollanzeige switch
• Piloto LEARN switch
• Индикатор LEARN выключателя
• LEARN ışığı Anahtar
S
674 40: EMETTEUR, ZENDER, TRANSMITTER, SENDER, EMISOR, ПЕРЕДАТЧИК, VERİCİ
• Pour ajouter plusieurs produits au scénario, répéter pour chaque récepteur les opérations 4 et 5 .
• Herhaal voor het toevoegen van meerdere producten aan het scenario voor iedere ontvanger de handelingen 4 en 5 .
• To add a number of products to the scenario,repeat operations 4 and 5 for each receiver.
• Um mehrere Geräte dem Szenario zuzuordnen, sind die Arbeitsschritte 4 und 5 an jedem Empfängergerät zu wiederholen.
• Para añadir varios productos al escenario, repetir para cada emisor las operaciones 4 y 5 .
• Для добавления каждого нового устройства в сценарий следует повторно выполнить действия 4 и 5
• Senaryoya daha fazla sayıda ürün eklemek için 4 ve 5 numaralı işlemleri her alıcı için tekrarlayın.
•Légende •Legenda •Key •Legende •Leyenda • Условные обозначения •Tuş
• Le voyant s‘éteint/allumé
• Het controlelampjegaat
uit/aan
• The indicator lamp is off/on
• Die Anzeige ist aus/an
• El piloto se apaga/inserta
• Индикатор выключен/горит
• Gösterge lambası kapalı/açık
• Le voyant clignote lentement
• Het controlelampje knippert
langzaam
• The indicator lamp blinks slowly
• Die Anzeige blinkt
• El piloto parpadea lentamente
• Индикатор мигает
• Gösterge lambası yavaş yanıp söner
• Le voyant clignote rapidement
• Het controlelampje knippert snel
• The indicator lamp blinks quickly
• Die Anzeige blinkt schnell
• El piloto parpadea rápidamente
• Индикатор учащенно мигает
• Gösterge lambası hızlı yanıp söner
• Le voyant flashe
• Het controlelampje flitst
• The indicator lamp flashes
• Die Anzeige blitzt mehrfach auf
• El piloto se destella
• Индикатор производит серию
коротких вспышек в течение 5 с
• Gösterge lambası flaşlama yapar
• dans 2s appuyer sur la touche de commande pour changer entre switch et delesteur
• druk daarna binnen de 2 s op de bedieningstoets om tussen Switch en Delesteur over te schakelen
• afterwards within 2s press the command key, in order to change between switch and delesteur
• danach innerhalb von 2s die Bedientaste drücken, um zwischen Switch und Delesteur zu wechseln
• antes de que transcurran 2 s pulsar la tecla de mando para cambiar entre switch y delesteur
• через 2 с нажмите кнопку управления для переключения выключатель/устройство отключения неприоритетных нагрузок
• Daha sonra kumanda tuşuna 2saniye basılı tutarak anahtar ve delestör arasında seçim yapın
2
2s
2s L
3
L
3
D
S
D
S
• 1.Adım: Öğrenme sürecini
başlat (VERİCİ üzerinde)
• Schritt 1: Einlernmodus aktivieren (am SENDER)
• Etapa 1: iniciar el aprendizaje (en el EMISOR)
• Этап 1: начало программирования (на ПЕРЕДАТЧИКЕ)
• 2.Adım: Senaryoya
actor ekleyin
(ALICI üzerinde)
• Schritt 3: Szenario abspeichern (am SENDER)
• Etapa 3: grabar el escenario (en el EMISOR)
• Этап 2: запись сценария (на ПЕРЕДАТЧИКЕ)
• 3.Adım: Senaryoyu kaydedin
(VERİCİ üzerinde)

• Touche LEARN
• Toets LEARN
• LEARN button
• LEARN-Taste
• Tecla LEARN
• Кнопка LEARN
• LEARN tuşu
• Voyant LEARN
• Controlelampje LEARN
• LEARN indicator light
• LEARN-Kontrollanzeige
• Piloto LEARN
• Индикатор LEARN
• LEARN gösterge lambası
• Touche de commandes
• Bedieningstoets
• Control button
• Bedientaste
• Tecla de mando
• Кнопки управления
• Kumanda tuşu
LC
E
674 40: RECEPTEUR, ONTVANGER, RECEIVER, EMPFÄNGER, RECEPTOR, ПРИЕМНИК, ALICI
H
• Apprentissage du scénario
• Inlezen van het scenario
• Learn scenario
• Szenario einlernen
• Aprendizaje del escenario
• Программирование сценария
• Senaryo öğrenme
• Etape 1: débuter l‘apprentissage (sur l’EMETTEUR)
• Stap 1: beginnen met inlezen (op de ZENDER)
• Step 1: Start the learn phase (on the TRANSMITTER)
• Etape 2 :ajouter un acteur au scénario (sur le RECEPTEUR)
• Stap 2 :een actor toevoegen aan het scenario (op de ONTVANGER)
• Step 2 :Add an actor to the scenario (on the RECEIVER)
• Schritt 2: Einen Empfänger zum Szenario hinzufügen (am EMPFÄNGER)
• Etapa 2: añadir un receptor al escenario (en el RECEPTOR)
• Этап 2: добавление приемного устройства в сценарий (на ПРИЕМНИКЕ)
• Appuyer sur LEARN
• Druk op LEARN
• Press LEARN
• LEARN betätigen
• Pulsar en LEARN
• Нажмите кнопку LEARN
• LEARN tuşuna basın
3
• Appuyer sur la touche de commande suffissament jusqu’á ce que la fonction demandée
• Druk op de bedieningstoets tot de nodige functie is geselecteert
• Press the command key repeatedly until the required function is selected
• Die Bedientaste so oft drücken, bis die zu verknüpfende Funktion ausgewählt ist
• Pulsar repetidamente la tecla de mando hasta la función pedida es seleccionada
• Нажимайте кнопку управления для выбора требуемой функции
• İstenilen işlev seçilene kadar kumanda tuşuna yeteri kadar basın
4LH/C/E
L
• Appuyer sur LEARN
• Druk op LEARN
• Press LEARN
• LEARN betätigen
• Pulsar en LEARN
• Нажмите кнопку LEARN
• LEARN tuşuna basın
1
• Appuyer sur la touche de commande qui doit être associée au récepteur
• Druk op de bedieningstoets die aan de ontvanger moet zijn toegevoegd
• Press the command key that is to beassociated with the receiver
• Die Bedientaste drücken, die dem Empfänger zugeordnet werden soll
• Pulsar la tecla de mando que se debe asociar con el receptor
• Нажмите кнопку управления, которую необходимо связать с приемным устройством сценария
• Alıcı ile ilişkilendirilecek kumanda tuşuna basın
2
LL
AUTO
S
e
l
e
c
t
S
e
l
e
c
t
AUTO -4K
MAN -4K
AUTO
MAN
AUTO
MAN
�-2K
-1K
COM
•Arrêt
•UIT
•OFF
•AUS
• DESCON
• Стоп
• KAPALI
AUTO
674 40
• Appuyer sur LEARN
• Druk op LEARN
• Press LEARN
• LEARN betätigen
• Pulsar en LEARN
• Нажмите кнопку LEARN
• LEARN tuşuna basın
5• Les voyants de tous les produits s‘éteignent. Le scénario est enregistré.
• De controlelampjes van alle producten gaan uit. Het scenario is geregistreerd.
• The indicator lamps ofall the products go off. The scenario is recorded.
• Die Leuchtdioden an allen Geräten werden ausgeschaltet. Das Szenario ist abgespeichert.
• Los pilotos de todos los productos se apagan. Se graba el escenario.
• Индикаторы всех устройств выключены. Сценарий записан.
• Bütün ürünlerin gösterge lambaları söner. Senaryo kaydedilmiştir.
L
• Etape 3 :enregistrer le scénario (sur l’EMETTEUR)
• Stap 3 :het scenario registreren (op de ZENDER)
• Step 3 :Record the scenario (on the TRANSMITTER)
• 1.Adım: Öğrenme sürecini başlatın
(VERİCİ üzerinde)
• Schritt 1: Einlernmodus aktivieren (am SENDER)
• Etapa 1: iniciar el aprendizaje (en el EMISOR)
• Этап 1: начало программирования (на ПЕРЕДАТЧИКЕ)
• 2.Adım: Senaryoya bir
aktör ekleyin
(ALICI üzerinde )
• 3.Adım: senaryoyu kaydedin (VERİCİ üzerinde)
• Schritt 3: Szenario abspeichern (am SENDER)
• Etapa 3 : grabar el escenario (en el EMISOR)
• Этап 3: запись сценария (на ПРИЕМНИКЕ)

• Effacement d’un scénario
• Wissen van een scenario
• Clearing a scenario
• Löschen eines Szenarios
• Borrado de un escenario
• Senaryonun silinmesi
• Effacer tous les scénarios liés à la touche de commande (sur l’EMETTEUR)
• Wis alle scenario’s die verbonden zijn met de bedieningstoets (op de ZENDER)
• Clear all the scenarios linked with the command key (on the TRANSMITTER)
• Effacer tous les scénarios liés à la touche de commande (sur l’EMETTEUR)
• Wis alle scenario’s die bij dit product horen (op de ZENDER)
• Clear all the scenarios linked to this product (on the TRANSMITTER)
• Appuyer sur LEARN
• Druk op LEARN
• Press LEARN
• LEARN betätigen
• Pulsar en LEARN
• Нажмите кнопку LEARN
• LEARN tuşuna basın
1
• Appuyer sur la touche de commande et maintenir 10s
• Druk op de bedienings-toets en houd deze 10s ingedrukt
• Press the command keyand hold it down for 10 s
• Die Steuertaste drücken und 10 s gedrückt halten
• Pulsar en la tecla de mando y mantener por 10 s
• Kumanda tuşuna 10 sn boyunca basılı tutun
2
• Appuyer sur LEARN
• Druk op LEARN
• Press LEARN
• LEARN betätigen
• Pulsar en LEARN
• Нажмите кнопку LEARN
• LEARN tuşuna basın
1
• Appuyer sur LEARNet maintenir 10s
• Druk op LEARN en houddeze 10s ingedrukt
• Press LEARN and holddown for 10 s
• Die LEARN-Taste drücken und 10 s gedrückt halten
• Pulsar en LEARN y mantener por 10 s
• LEARN tuşuna basın ve 10 sn boyunca basılı tutun.
2
• Sämtliche Szenarien löschen
• Añadir un receptor al escenario (en el EMISOR)
• Ürünle ilişkilendirilmiş bütün senaryoların silinmesi ( verici üzerinden)
• Alle einer Steuertaste zugeordneten Szenarios löschen
• Borrar todos los escenarios vinculados a la tecla de mando
• Kumanda tuşu ile ilişkilendirilmiş bütün senaryoların silinmesi
( verici üzerinden)
• Le scénario est effacé
• Het scenario is gewist
• The scenario is cleared
• Das Szenario ist gelöscht.
• El escenario se borra
• Senaryo silinir
10 s
• Retour du produit en configuration usine
• Terugkeer van het productnaar de standaardconfiguratie
• Return the product to factory configuration
• Rückprogrammierung des Geräts auf Werkseinstellung.
• Retorno del producto a la configuración de fábrica.
• Cihazın fabrika ayarlarına döndürülmesi
10 s
L
L
L
L
•Modification d’un scénario
•Wijziging van een scenario
•Modification of a scenario
•Ein bestehendes Szenario ändern
•Modificación de un escenario
•Senaryonun değiştirilmesi
• Etape 1 : ouvrir le scénario (sur l’EMETTEUR)
• Stap 1: het scenario openen (op de ZENDER)
• Step 1: Open the scenario (on the TRANSMITTER)
• Schritt 1: Das Szenario aktivieren (am SENDER)
• Etapa 1: abrir el escenario (en el EMISOR)
• Adım 1: Senaryoyu başlatın ( verici üzerinden)
• Etape 2a : modifier l‘état d‘un acteur du scénario (sur le RECEPTEUR
• Stap 2a: de staat van een actor van het scenario wijzigen (op de ONTVANGER)
• Step 2a : Modify the state ofan actor in the scenario (on the RECEIVER)
• Schritt 2a: Den Status eines Empfängers ändern (am EMPFÄNGER)
• Etape 2a: modificar el estado de un receptor (en el RECEPTOR)
• Adım 2a: Senaryodaki aktörün durumunu değiştirin ( verici üzerinden)
• Etape 2b : supprimer un acteur du scénario (sur lle RECEPTEUR)
• Stap 2b: een actor van het scenario verwijderen (op de ONTVANGER)
• Step 2b : Remove an actor from the scenario (on the RECEIVER)
• Schritt 2b: Einen Empfänger löschen (am EMPFÄNGER)
• Etape 2b: suprimir un receptor (en el RECEPTOR)
• Adım 2b: Senaryodaki aktörü senaryodan çıkartın ( verici üzerinden)
• Etape 3 : enregistrer le scénario (sur l’EMETTEUR)
• Stap 3 : het scenario registreren (op de ZENDER)
• Step 3 : Record the scenario (on the TRANSMITTER)
• Schritt 3: Szenario abspeichern (am SENDER)
• Etapa 3 : grabar el escenario (en el EMISOR)
• Adım 3: Senaryoyu kaydedin ( verici üzerinden)
• Appuyer sur LEARN
• Druk op LEARN
• Press LEARN
• LEARN betätigen
• Pulsar en LEARN
• Нажмите кнопку LEARN
• LEARN tuşuna basın
5
• Les voyants de tous les produits s‘éteignent.Le scénario est enregistré.
• De controlelampjes van alle producten gaan uit. Het scenario is geregistreerd.
• The indicator lamps ofall the products go off. The scenario is recorded.
• Die Leuchtdioden an allen Geräten werden ausgeschaltet. Das Szenario ist abgespeichert.
• Los pilotos de todos los productos se apagan. Se graba el escenario.
• Bütün ürünlerin üzerindeki ışıklar söndüğünde senaryo kaydedilir.
• Les voyants de tous les produitsdu scénario clignotent.
• De controlelampjes van alle productenvan het scenario knipperen.
• The indicator lamps of all the product in the scenario blink.
• Die Leuchtdioden an allen Geräten blinken.
• Los pilotos de todos los productos del escenario parpadean.
• Senaryo dahilinde bulunan bütün ürünlerin ışıkları yanıp sönmeye başlar.
• Appuyer sur la touche de commande quel‘on souhaite associer
• Druk op de bedienings-toets die u toe wilt voegen
• Press the command keythat is to be associated
• Gewünschte Steuertaste drücken
• Pulsar en la tecla de mando que se desea
• İlişkilendirilecek kumanda tuşuna basın
4
• Appuyer sur LEARN
• Druk op LEARN
• Press LEARN
• LEARN betätigen
• Pulsar en LEARN
• Нажмите кнопку LEARN
• LEARN tuşuna basın
4
• Appuyer sur LEARN
• Druk op LEARN
• Press LEARN
• LEARN betätigen
• Pulsar en LEARN
• Нажмите кнопку LEARN
• LEARN tuşuna basın
1
• dans 2s appuyer sur la touche de commande pour changer entre switch et delesteur
• druk daarna binnen de 2 s op de bedieningstoets om tussen Switch en Delesteur over te schakelen
• afterwards within 2s press the command key, in order to change between switch and delesteur
• danach innerhalb von 2s die Bedientaste drücken, um zwischen Switch und Delesteur zu wechseln
• antes de que transcurran 2 s pulsar la tecla de mando para cambiar entre switch y delesteur
• Anahtar ve yük atma işlevi arasında değiştirmek için , 2 sn içerisinde kumanda tuşuna basın
L
LLL
L
L
2
2s
2s L
3
L
3
D
S
D
S
Other LEGRAND Thermostat manuals

LEGRAND
LEGRAND Arteor Series User manual

LEGRAND
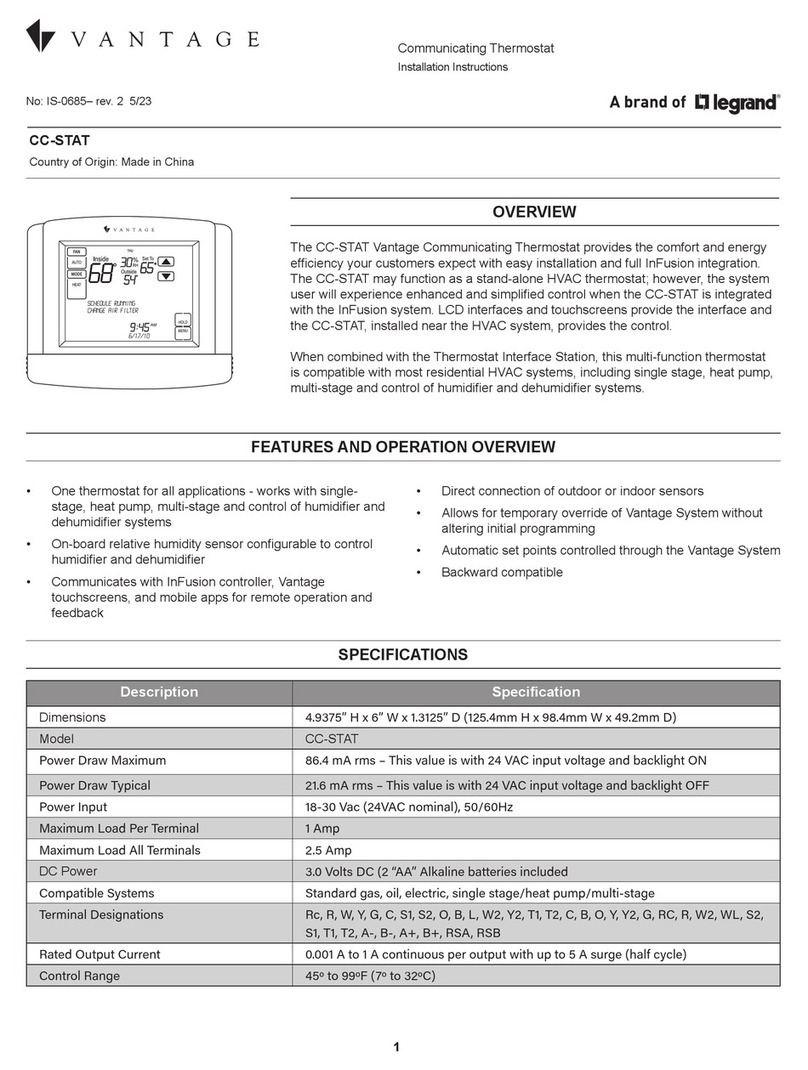
LEGRAND VANTAGE CC-STAT User manual

LEGRAND
LEGRAND 6830 31 User manual

LEGRAND
LEGRAND MyHOME User guide

LEGRAND
LEGRAND Smarther User manual

LEGRAND
LEGRAND bticino MyHOME Smarther SXG8002 Operating manual

LEGRAND
LEGRAND Pass & Seymour WZ3TSTATH User manual

LEGRAND
LEGRAND PRO 21 7756 96 User manual

LEGRAND
LEGRAND Mosaic 767 21 User manual

LEGRAND
LEGRAND PRO 21 7756 84 User manual