manuals.online logo
Brands
  1. Home
  2. •
  3. Brands
  4. •
  5. Leigh Country
  6. •
  7. Outdoor Furnishing
  8. •
  9. Leigh Country TX 94101 User manual

Leigh Country TX 94101 User manual

Other Leigh Country Outdoor Furnishing manuals
Leigh Country TX 94104 User manual

Leigh Country

Leigh Country TX 94104 User manual

Leigh Country TX 93480 User manual

Leigh Country

Leigh Country TX 93480 User manual

Leigh Country TX 93548 User manual

Leigh Country

Leigh Country TX 93548 User manual

Leigh Country TX 94062 User manual

Leigh Country

Leigh Country TX 94062 User manual
Leigh Country TX94094 User manual

Leigh Country

Leigh Country TX94094 User manual

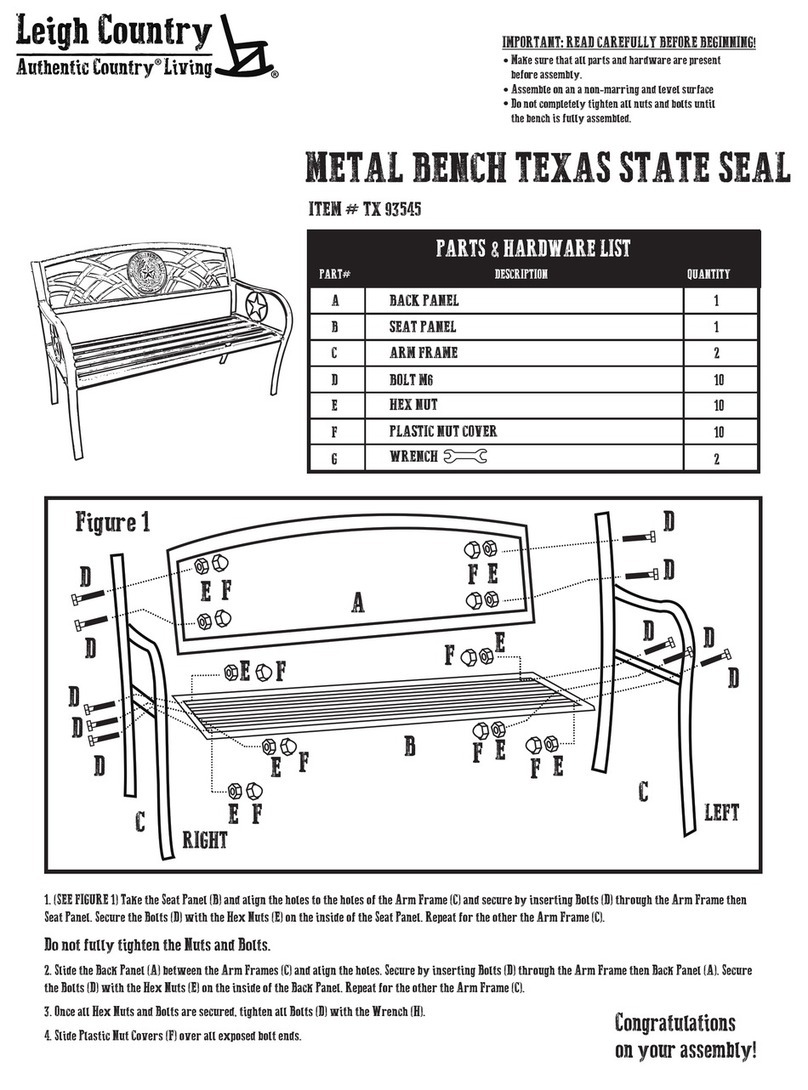
Leigh Country METAL BENCH TEXAS STATE SEAL TX 93545 User manual

Leigh Country

Leigh Country METAL BENCH TEXAS STATE SEAL TX 93545 User manual

Leigh Country Char-Log Aspen Series User manual

Leigh Country

Leigh Country Char-Log Aspen Series User manual

Leigh Country TX 94062 User manual

Leigh Country

Leigh Country TX 94062 User manual

Leigh Country TX 36600 User manual

Leigh Country

Leigh Country TX 36600 User manual

Popular Outdoor Furnishing manuals by other brands

felton industries FELEPG5T6 Assembly instruction

felton industries

felton industries FELEPG5T6 Assembly instruction

Dreamo OTF-503S quick start guide

Dreamo

Dreamo OTF-503S quick start guide

Garden Furniture Direct Borrowdale Assembly instructions

Garden Furniture Direct

Garden Furniture Direct Borrowdale Assembly instructions

Rowlinson Clarendon Assembly instructions

Rowlinson

Rowlinson Clarendon Assembly instructions

Garden Treasures 8201268 Assembly instructions

Garden Treasures

Garden Treasures 8201268 Assembly instructions

Safavieh Outdoor Marson PAT7062 quick start guide

Safavieh Outdoor

Safavieh Outdoor Marson PAT7062 quick start guide

SSC-LUXon 990070716 Assembly & operating instructions

SSC-LUXon

SSC-LUXon 990070716 Assembly & operating instructions

supremo LEISURE 2-Seat Stool 110*40cm Assembly instruction

supremo LEISURE

supremo LEISURE 2-Seat Stool 110*40cm Assembly instruction

Hatteras Hammocks DCA1-K-HH instructions

Hatteras Hammocks

Hatteras Hammocks DCA1-K-HH instructions

Lemeks Palmako PA120-5959 Assembly, installation and maintenance manual

Lemeks

Lemeks Palmako PA120-5959 Assembly, installation and maintenance manual

OLT 24 Assembly manual

OLT

OLT 24 Assembly manual

forest-style HACIENDA 2354 Building instructions

forest-style

forest-style HACIENDA 2354 Building instructions

Courtyard Creations RUS0188-WM Assembly instructions

Courtyard Creations

Courtyard Creations RUS0188-WM Assembly instructions

kingsley-bate MC-55 Assembly instructions

kingsley-bate

kingsley-bate MC-55 Assembly instructions

Weltevree Carrier product manual

Weltevree

Weltevree Carrier product manual

Grange Fencing Elite Arch Assembly instructions

Grange Fencing

Grange Fencing Elite Arch Assembly instructions

Grosfillex AUVENT YR14 Assembly instructions

Grosfillex

Grosfillex AUVENT YR14 Assembly instructions

X-METAL EAGLE 33511 Assembly instructions

X-METAL

X-METAL EAGLE 33511 Assembly instructions

manuals.online logo
manuals.online logoBrands
  • About & Mission
  • Contact us
  • Privacy Policy
  • Terms and Conditions

Copyright 2025 Manuals.Online. All Rights Reserved.

Item No.: TX 94101
Instruction Manual
Read the instructions before use of this product.
For warranty information, please refer to the back page of
this instruction manual.
Please keep this instruction manual for future reference.

This beautifully crafted and finished  is an inviting piece of
furniture for any home.
United General Supply strives to design, manufacture or distribute goods of the
highest quality. For more products, please visit www.leighcountry.com
Limited One Year Finish Warranty
** (non-transferable) **
This product is cover under United General Supply’s (UGS) one (1) year limited warranty. To
the original purchaser of this furniture, UGS warrants that this piece of furniture is and will be
free from defects in material and workmanship for up to one year from the date of purchase
under normal use and proper care. Replacement of defective or missing parts will be sent at
no charge to the customer for a period of 15 days from the date of purchase. UGS will no
longer be responsible for missing parts or hardware 15 days after date of purchase.
Freight, packaging, labor or material charges to and from our customer service center is not
covered under the warranty and is therefore the customer’s responsibility. the limited warranty
does not cover this piece of furniture for commercial purposes, abusive use, damage by
modification, freeze damage, rust, fading and issues caused by improper care.
For the least maintenance, place under covered area.
Proof of purchase (date register receipt) and photos will be required for warranty claims.
For any questions or claims, please contact customer service.
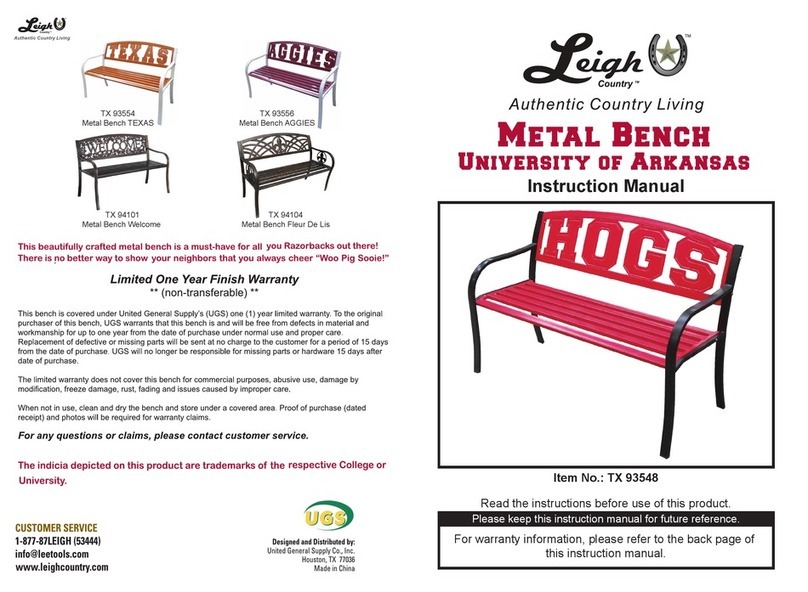
TX 93546
Flags over Texas Metal Bench
TX 93547
Texas Seal Metal Bench
TX 94106
Metal End Bench
TX 94104
Metal Bench Fleur De Lis
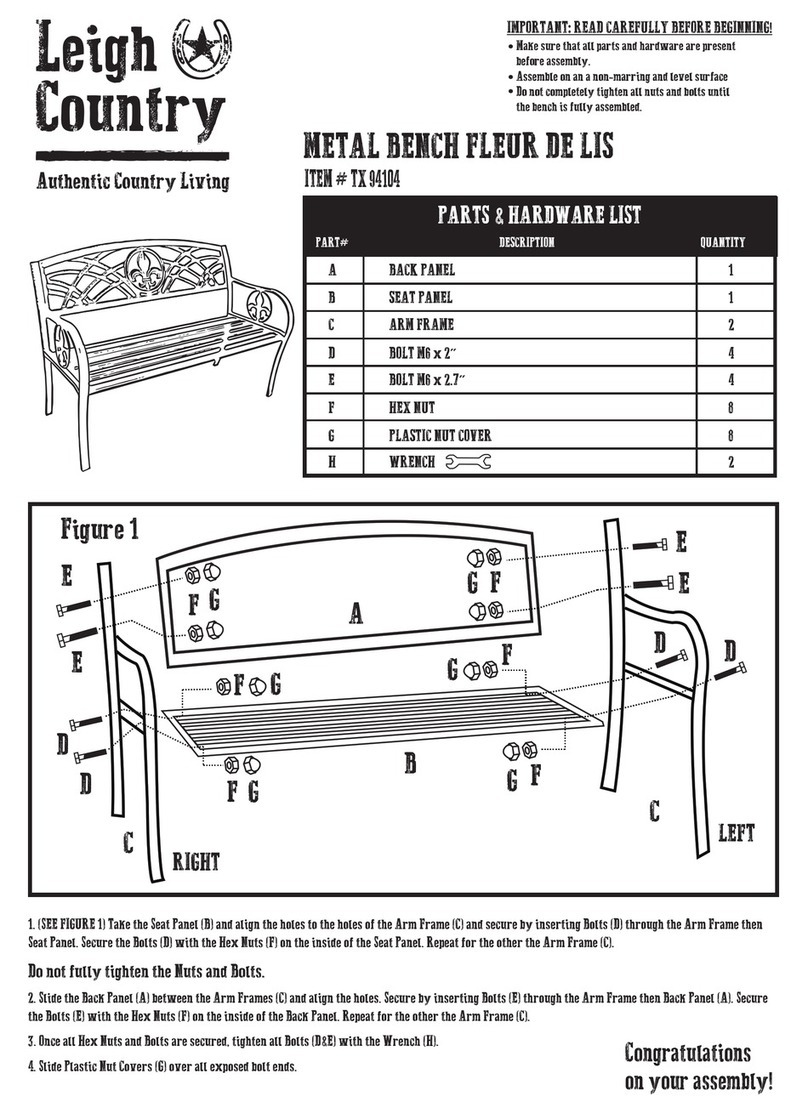
PARTS & HARDWARE LIST
BACK PANEL
SEAT PANEL
ARM FRAME
BOLT M6 x 2”
BOLT M6 x 2.7”
HEX NUT
PLASTIC NUT COVER
WRENCH
A
B
C
D
E
F
G
H
8
8
2
1
1
2
4
4
PART# DESCRIPTION QUANTITY
Please make sure that every piece of furniture and all hardware
are present before assembling this bench.
Parts Detail
GH
1. (SEE FIGURE 1) Take Seat Panel (B) and align the holes to the holes
of the Arm Frame (C) and secure by inserting Bolts (D) through the Arm
Frame then Seat Panel. Secure the Bolts (D) with the Hex Nuts (F) on
the inside of the Seat Panel. Repeat for the other the Arm Frame (C).
Do not fully tighten the Nuts and Bolts.
2. Slide Back Panel (A) between the Arm Frames (C) and align the holes.
Secure by inserting Bolts (E) through the Arm Frame then Back Panel (A).
Secure the Bolts (E) with the Hex Nuts (F) on the inside of the Back Panel.
Repeat for the other the Arm Frame (C).
3. Once all Hex Nuts and Bolts are secured, tighten all Bolts (D&E) with
the Wrench (H).
4. Slide Plastic Nut Covers (G) over all exposed bolt ends.
ASSEMBLY INSTRUCTIONS
Until every part and piece is set and secured in
place, do NOT secure the nuts tightly together.
Figure 1
CAUTION:
G G
G
G