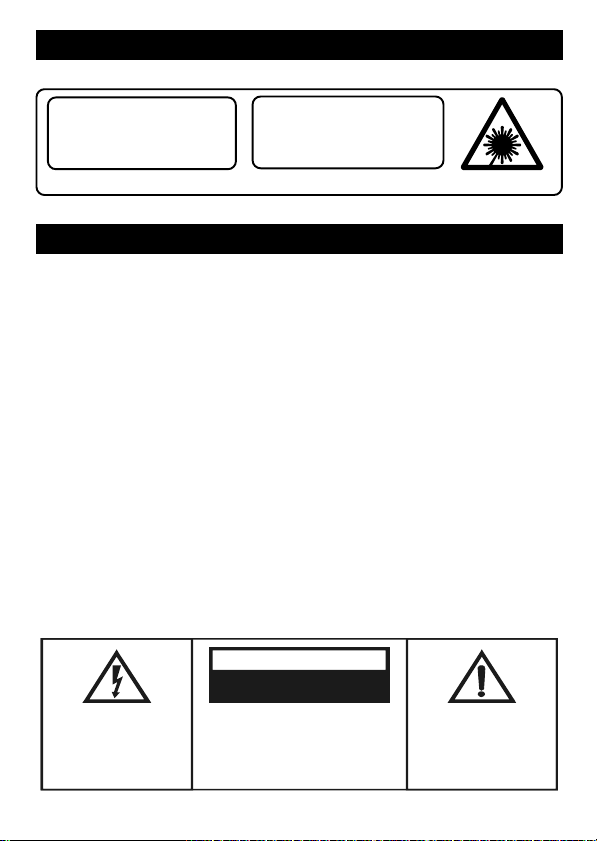
LENCO CR-2600CD User manual

DIGITAL CLOCK RADIO WITH
COMPACT DISC PLAYER
INSTRUCTION MANUAL
CR-2600CD
R

WARNING
CLASS 1 LASER PRODUCT
This product contains a low power laser device.
CLASS 1 LASER PRODUCT
APPAREIL Á LASER DE CLASSE 1
PRODUCTO LASER DE CLASE 1
CAUTION
INVISIBLE LASER RADIATION
WHEN OPEN AND INTERLOCKS
DEFEATED.
AVOID EXPOSURE TO BEAM
PRECAUTIONS
Follow the advice below for safe and appropriate operations.
ON PLACEMENT
• Do not use the unit in places which are extremely hot, cold, dusty, or humid.
• Place the unit on a flat and even surface.
• Do not restrict the air flow of the unit by placing it in a place with poor air flow, by covering it with a cloth,
or by placing it on a carpet.
ON SAFETY
• When connecting and disconnecting the AC cord, grip the plug and not the cord itself. Pulling the cord
may damage it and create hazard.
• When you are not going to use the unit for a long period of time, disconnect the AC power cord.
ON AC VOLTAGE
• Before use, check that the rated voltage of your unit matches your local voltage.
ON CONDENSATION
• When left in a heated room where it is warm and damp, water droplets or condensation may form inside
the CD player.
• When there is condensation inside the unit, the unit may not function normally.
• Let it stand for 1 to 2 hours before turning the power on, or gradually heat the room up and dry the unit
before use.
* Ensure a minimum distance of 5 cm around the apparatus for sufficient ventilation.
* Ensure that the ventilation is not impeded by covering the ventilation openings with items,
such as newspapers, table-cloths, curtains, etc..
* Do not place naked flame sources, such as lighted candles on the apparatus.
* Take attention to the environmental aspects of battery disposal.
* Use the apparatus only in moderate climates (not in tropical climates).
* Do not expose the apparatus to dripping or splashing.
* Do not place objects filled with liquids, such as vases, on the apparatus.
Should any trouble occur, disconnect the AC power cord and refer servicing to qualified personnel.
ATTENTION : To reduce the risk of
electricshock,donotremovethecover.
There are no user serviceable parts
inside the unit. Refer all servicing to
qualifiedpersonnel.
The exclamation point within
the triangle is a warning sign
alerting the user of important
instructions accompanying
the product.
The lightening flash with
arrowhead symbol within the
triangle is a warning sign
alerting the user of
"dangerous voltage" inside
the unit.
CAUTION
RISK OF ELECTRIC SHOCK
DO NOT OPEN
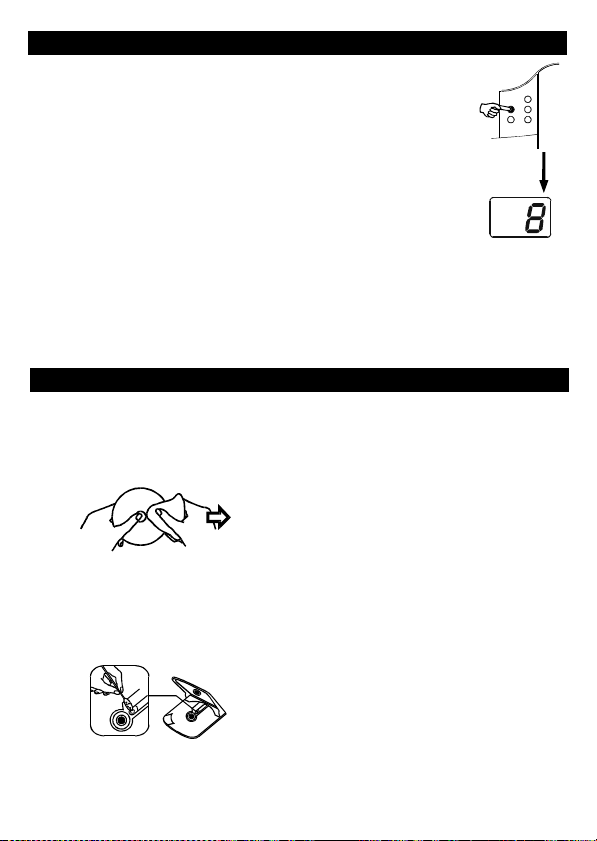
Warning: Do not touch the lens.
DO NOT THROW BATTERIES IN FIRE !
In case of misfunction due to electrostatic discharge the apparatus has to be reset by disconnecting it from
mains supply.

CONTROLS
1. CD DOOR
2. AC power Cord
3. Battery Compartment
4. Wire Antenna
5. Alarm ( OFF ) Button
6. Hour Button
7. Time Button
8. Minute Button
9. Sleep Button
Use to select automatic radio
shut-off time ( up to 1 hour 59 minutes )
1 . Fun tion Swit h ( CD / FM )
11. Open button
12. Snooze Button
Press to shut off alarm temporarily
( alarm sounds again in approximately
9 minutes )
13. Tuning Control
Use to select desired radio station
14. Play / Pause Button
15. Stop Button
16. Ba k Button
17. Program Button
18. Next Button
19. Speaker
2 . Program Indi ator
21. CD display
22. Dial S ale
23. LED alarm lo k display
24. PM Indi ator ( Option )
Lights when clock time is PM
25. Alarm Indi ator ( AL )
Lights when alarm is set
26. FM Stereo Indi ator
27. Speaker
28. Volume Control
29. Power (ON / OFF / AUTO / BUZZER)
3 . Ear phone Ja k
1
27
3
25
579
21
1
1
1
3
1
4
1
6
30
1
8
28
1
5
1
7
29
2
26
4
24
6
23
8
22
1
0
20
1
2
1
9
GB 1

POWER SUPPLY
CAUTION
TO PREVENT ELECTRICAL SHOCK, MATCH WIDE BLADE OF PLUG TO WIDE SLOT, FULLY INSERT.
OPERATION WITH AC POWER
1. PLEASE CAREFULLY CHECK THAT THE VOLTAGE INDICATED ON YOUR SET CORRESPONDS TO THE
VOLTAGE OF YOUR LOCAL AREA.
2. INSERT THE AC POWER CORD INTO AN AC OUTLET.
GB 2
POWER ON AND OFF
SLIDE THE POWER SWITCH TO THE "ON" OR "OFF" POSITION TO TURN THE UNIT ON OR OFF.
ANTENNA
FOR FM RECEPTION LAY OUT THE EXTERNAL FM WIRE ANTENNA AND ADJUST DIRECTION, FOR
OPTIMUM RECEPTION.
FOR AM RECEPTION IN THE UNIT HAS A BUILT-IN DIRECTIONAL ANTENNA. TO IMPROVE THE SIGNAL
OF WEAK STATIONS ROTATE THE UNIT UNTIL THE BEST RECEPTION IS FOUND.
DO NOT CONNECT THIS WIRE TO ANY OUTDOOR ANTENNA .
PREPARATION
PLUG THE AC POWER CORD INTO AN AC OUTLET . THE CLOCK DISPLAY SHOWS FLASHING . THIS IS
A NORMAL CONDITION THAT WARNS THE USER THE TIME SHOWN IS INCORRECT . FLASHING CLOCK
DISPLAY ALSO APPEARS AFTER A POWER INTERRUPTION IF THE BACKUP BATTERY IS EXHAUSTED
OR NOT INSTALLED .
PRIVATE LISTENING
PLUG IN HEADPHONES Ø3.5 MM STEREO MINI-PLUG ) TO THE PHONES JACK. WHEN
HEADPHONES ARE PLUGGED IN, THE SPEAKERS ARE AUTOMATICALLY DISCONNECTED.
BATTERY BACKUP
THE CLOCK TIME AND ALARM SETTINGS CAN BE PROTECTED AGAINST POWER FAILURE BY A
9V BATTERY NOT SUPPLIED ) . IN THE EVENT OF A POWER FAILURE , THE DISPLAY IS BLANK ,
BUT THE CLOCK TIME AND ALARM SETTINGS ARE HELD IN MEMORY. WHEN THE POWER
INTERRUPTION ENDS, THE DISPLAY APPEARS AGAIN . DURING A POWER INTERRUPTION , THE
CLOCK TIME MAY GAIN OR LOSS A FEW MINUTES PER HOUR AND MAY REQUIRE RESETTING . )
BATTERY INSERTION
1 . REMOVE THE COVER OF THE BATTERY COMPARTMENT ON THE BOTTOM OF THE UNIT).
2 . CONNECT A 9V BATTERY AN ALKALINE - TYPE BATTERY IS RECOMMENDED ) TO THE
BATTERY TERMINAL INSIDE THE COMPARTMENT .
3 . PLACE THE CONNECTED BATTERY IN THE COMPARTMENT AND REPLACE THE COVER .
FOR OPTIMUM PERFORMANCE , THE BATTERY SHOULD BE REPLACED EVERY 6 MONTHS.
FITTING THE BATTERIES

GB 3
THE RADIO
RADIO OPERATION
1 . SET THE POWER SWITCH TO ON TO TURN THE RADIO ON .
TO TURN THE RADIO OFF , SET THIS SWITCH TO OFF . )
2 . SET THE FUNCTION SWITCH TO SELECT THE FM BAND.
3 . ADJUST THE TUNING CONTROL TO SELECT THE DESIRED RADIO STATION .
4 . ADJUST THE VOLUME CONTROL TO SET THE VOLUME TO THE DESIRED LEVEL .
SETTING THE CLOCK
1 . PRESS THE HOUR BUTTON AND TIME BUTTON TOGETHER TO ADVANCE THE HOUR DISPLAY
UNTIL THE CORRECT HOUR APPEARS . THEN , RELEASE BOTH BUTTONS .
2 . PRESS THE MINUTE BUTTON AND TIME BUTTON TOGETHER TO ADVANCE THE MINUTE DISPLAY
UNTIL THE CORRECT MINUTES APPEAR . THEN , RELEASE BOTH BUTTONS .
SETTING THE WAKEUP TIME
1 . PRESS AND HOLD THE ALARM BUTTON .
2 . PRESS THE HOUR OR MINUTE BUTTON TO SET THE CLOCK DISPLAY TO THE DESIRED WAKE - UP
TIME .
3 . RELEASE THE ALARM BUTTON . THE CLOCK DISPLAY WILL SHOW THE CURRENT TIME .
TO WAKE TO THE MUSIC :
SLIDE THE POWER SWITCH TO THE AUTO POSITION , AND ADJUST THE VOLUME CONTROL TO THE
LISTENING LEVEL YOU WANT.
SELECT THE WAKE-UP SOURCE BY SLIDING THE FUNCTION SWITCH TO CD / FM ).
- IN THE RADIO MODE, THE SELECTED RADIO STATION WILL PLAY.
- IN THE CD MODE, THE DISC LOADED IN THE CD COMPARTMENT WILL PLAY.
- IF NO BUTTON IS PRESSED, ALARM WILL LAST FOR 2 HOURS.
WAKE TO ALARM :
TO AWAKEN BY ALARM , SET THE POWER SWITCH TO THE BUZZER POSITION.
SNOOZE ( REPEAT ALARM )
WHEN THE ALARM SOUNDS CD / RADIO / BUZZER ) AT THE PRESET TIME , YOU CAN TURN OFF
THE SOUND TEMPORARILY BY PRESSING THE SNOOZE BUTTON . THE ALARM WILL SOUND AGAIN
WITHIN 9 MINUTES . THIS CYCLE CAN BE REPEATED FOR UP TO ONE HOUR.
TO STOP ALARM ( CD / RADIO / BUZZER ) :
SIMPLY SET THE POWER SWITCH TO OFF OR PRESS THE ALARM BUTTON .
SLEEP TIMER ( AUTOMATIC SHUT - OFF )
IF YOU WISH TO FALL ASLEEP WHILE LISTENING TO MUSIC , YOU CAN SET THE RADIO / CD TO TURN
OFF AUTOMATICALLY AFTER A PRESET TIME UP T0 1 HOUR 59 MINUTES ) .
1 . SET THE FUNCTION SWITCH TO OFF, AUTO OR BUZZER POSITION . PRESS AND HOLD THE SLEEP
BUTTON AND HOUR / MINUTE BUTTON SIMULTANEOUSLY UNTIL THE DESIRED SLEEP TIMER SETTING
APPEARS.
2 . AFTER THE PRE - SET TIME IS OVER , THE CD / RADIO WILL STOP AUTOMATICALLY.
3 . IF THE CD / RADIO IS LIKE TO BE SWITCHED OFF AT ANY TIME , PRESS THE SNOOZE BUTTON.
THE CLOCK

2 . Open the disc door by pushing the CD door open
button.
GB 4
COMPACT DISC PLAYBACK
FUNCTION
OPEN
1 . Set to CD
3. Insert a disc with the label side facing up.
4 . Close the disc door.
The disc will rotate and the display window will
show a symbol " ".
5. Press the Play / Pause button.
Track number " 1 " will be shown.
TO STOP PLAYBACK
Press the STOP button and the display shows the total
tracks of the disc.
TO INTERRUPT PLAYBACK
Press the Play/Pause button and the track number
will be flashed.
Press the button again to resume playback.
TO SKIP TO THE BEGINNING OF A TRACK
• Press either one of the skip buttons according to the desired skip direction .
• Play/back resumes from the selected track .
• When the button is pressed once during play , the previous track starts again .
• When the button is pressed once during play , the next track plays .
SEARCHING FOR A PASSAGE WITHIN A TRACK
• Keep the or button pressed during playback , and release the button as soon as you
recognise the desired passage. Then normal CD playback will resume from this point.
CD

PROGRAM PLAYBACK
PROGRAMMED PLAYBACK
Programmed playback enables tracks on a disc to be played in the desired order. Up to 20 tracks
can be programmed.
1. Press the " PROGRAM " button.
2. Press the " NEXT " and " BACK " buttons to select the desired track number.
3. Press " PROGRAM " button again to memorize the track.
4. Repeat steps 2 and 3 until all desired tracks are programmed.
5. Press the " PLAY/PAUSE " button to start. " PROGRAM INDICATOR " is flashing.
6. Press " STOP " button to stop programmed playback.
7. Press " PROGRAM " and " PLAY/PAUSE " buttons to resume programmed playback.
8. Open the CD door or turn off the CD player to clear the programmed memory.
Note : Programming can only be made when the player is in stop mode. CDdisplay
" PROGRAM "
MAINTENANCE
CLEANING CD
IF THE CD SKIPS OR WILL NOT PLAY , THE DISC
MAY NEED CLEANING . BEFORE PLAYING, WIPE
THE DISC FROM THE CENTRE OUT WITH A
CLEANING CLOTH. AFTER PLAYING, STORE THE
DISC IN ITS CASE.
CLEANING THE CD LENS
IF THE CD LENS IS DUSTY, CLEAN IT WITH A BRUSH-
BLOWER. BLOW SEVERAL TIMES ON THE LENS
AND REMOVE THE DUST WITH THE BRUSH. FINGER
PRINTS MAY BE REMOVED WITH A COTTON SWAB
MOISTENED WITH ALCOHOL.
CLEANING THE UNIT
DO NOT USE VOLATILE CHEMICALS ON THIS UNIT.
CLEAN BY LIGHTLY WIPING WITH A SOFT CLOTH.
WARNING
SHOULD THE CD DOOR BE OPENED BEFORE THE
READING OF THE CD COMPLETED, A JAMMING
NOISE MAY OCCUR. THIS IS RESOLVED BY CLOSING
THE CD DOOR.
CARE AND MAINTENANCE
TO CLEAN THE CABINET, UNPLUG THE UNIT AND
WIPE OFF DUST AND STAINS WITH A SOFT CLOTH
MOISTENED WITH A MILD SOAP-AND-WATER
SOLUTION ONLY . DO NOT USE BENZINE, THINNER
OR SIMILAR CHEMICALS TO CLEAN THE CABINET.
NOTES ON BATTERY BACKUP
• PLEASE NOTE THAT THIS UNIT WILL NO
OPERATE FULLY BY BATTERY POWER ALONE.
THE BATTERY PROVIDES A BACK-UP SYSTEM
ONLY IN THE EVENT OF AN IN TERRUPTION IN
THE MAIN AC POWER SUPPLY .
• A GOOD BATTERY WILL KEEP THE CLOCK
OPERATING NORMALLY, BUT A WEAK BATTERY
WILL CAUSE IRREGULAR CLOCK OPERATION .
GB 5
Note on CD-R/RW discs
- Becauseof non-standardized formatdefinition/ production ofCD-R/RW, playback qualityand performance are
notguaranteed.
- Manufacturerisnotresponsiblefor theplayabilityofCD-R/RWduetorecording conditions, suchasPC performance,
writing software, media ability, etc.
- Do not attach a seal or label to either side of the CD-R/RW disc. It may cause a malfunction.

SPECIFICATION
CDSECTION
Channels: 2 channels
S / N ratio: 55 dB
Wow& Flutter: undetectable
Samplingfrequency: 44.1kHz 8 x oversampling
Quantization: 1 bitD/A converter
Pick up light source: Semi - conductor laser
Pick up wave length 790 nm
RADIOSECTION
Tuning ranges: FM 87.5 - 108MHz
Antennas: FMWireAntenna
GENERAL
Outputpower: 1.1W+1.1W(RMS)
Power consumption: 12W
Speaker: 3"8OHM
Phones jack: 3.5MM
Powersource: AC :230V ~ 50Hz
(INDICATED ON THE REAR OF THE UNIT)
DC: 9V (1 x 006P)
Dimensions: 183(L)x220(D)x107(H)mm
Weight 1.4KG
Due to continuing improvement, the features and the design are subject to change without notice.
Where to place the item :
Today’sfurnitureiscoated with a wide variety of lacquers and synthetic-coatings that are treated with an extensive
rangeofcleaning products. Therefore, the possibilitythatsome of these substancescontaincomponents that react
adversely to the rubber feet of the item and soften them, cannot be completely excluded. The rubber feet of the
appliance can cause discoloring to furniture surfaces. If necessary, place the appliance on a non-slide surface.
GB 6
If at any time in the future you should need to dispose of this product please note that Waste electrical
products should not be disposed of with household waste. Please recycle where facilities exist.
Check with your Local Authority or retailer for recycling advice. (Waste Electrical and Electronic
Equipment Directive)
Table of contents
Other LENCO Radio manuals

LENCO
LENCO NR-006 User manual

LENCO
LENCO DIR-170WA User manual

LENCO
LENCO PDR-015 User manual

LENCO
LENCO DIR-150 User manual

LENCO
LENCO DIR-110BK User manual

LENCO
LENCO SCD-69 User manual

LENCO
LENCO IR-2100 User manual

LENCO
LENCO PDR-040 User manual

LENCO
LENCO MCR-112 User manual

LENCO
LENCO DIR-100 User manual

LENCO
LENCO SCD-301 User manual

LENCO
LENCO NR-001 User manual

LENCO
LENCO IR-2000 User manual

LENCO
LENCO SCD-100 User manual

LENCO
LENCO BT-9000 User manual

LENCO
LENCO CR-620 User manual

LENCO
LENCO DAR-015 User manual

LENCO
LENCO DIR-260BK User manual

LENCO
LENCO PDR-011 User manual

LENCO
LENCO CR-615BK User manual