ENGLISH
INSTALLATION INSTRUCTIONS
WARNING: TO AVOID FIRE, SHOCK, OR DEATH; TURN OFF POWER AT CIRCUIT BREAKER OR FUSE AND TEST THAT POWER IS OFF BEFORE WIRING!
CAUTIONS: - TO BE INSTALLED AND/OR USED IN ACCORDANCE WITH ELECTRICAL CODES AND REGULATIONS.
- IF YOU ARE UNSURE ABOUT ANY PART OF THESE INSTRUCTIONS, CONSULT AN ELECTRICIAN.
- ENSURE THAT THE LOCKING PLUG AND/OR CONNECTOR HAS THE PROPER ELECTRICAL RATING FOR THE SYSTEM ON WHICH IT IS BEING INSTALLED.
- THESE DEVICES ARE FOR GROUNDING CIRCUITS, OR EQUIPMENT GROUNDING ONLY. DO NOT USE IN NON-GROUNDING APPLICATIONS.
NOTE: WIRE SIZE AND TYPE MUST COMPLY WITH APPROPRIATE LOCAL ELECTRICAL CODES. IN USA REFER TO NEC TABLES ARTICLE 400. USE COPPER WIRE ONLY.
SELECT A CABLE OF SUITABLE AMPACITY, SERVICE, AND TEMPERATURE RATING.
THE CORD TYPES ARE: S, SO, SOO, SOW, ST, STO, STOO.
THE CORD GAGES ARE FROM # 10 AWG TO # 4 AWG.
THE CORD STRAIN RELIEF FOR BOTH THE CLAMP TYPE, AND THE NUT TYPE DESIGN, WILL ACCOMMODATE CORD DIAMETERS FROM .680" (17.3 mm) TO 1.200" (30.5 mm).
TO INSTALL:
NOTE: Leviton 50A 3 Wire and 4 Wire Locking Plugs and Connectors are available with either a Clamp type cable strain relief, or Nut type.
Installation using CLAMP type strain relief - DIAGRAM 1:
1. WARNING: TO AVOID FIRE, SHOCK, OR DEATH TURN OFF POWER AT CIRCUIT BREAKER OR FUSE AND TEST THAT POWER IS OFF BEFORE
WIRING!
2. Separate housing from wiring module by grasping device firmly from front. With thumb, press and hold the release button and twist housing counterclockwise.
3. Loosen (or remove) the two cable clamp screws from housing. Remove, or keep cable clamp insert, depending on cable size, as per gage on device, or see
CABLE CLAMP STRAIN RELIEF CHART.
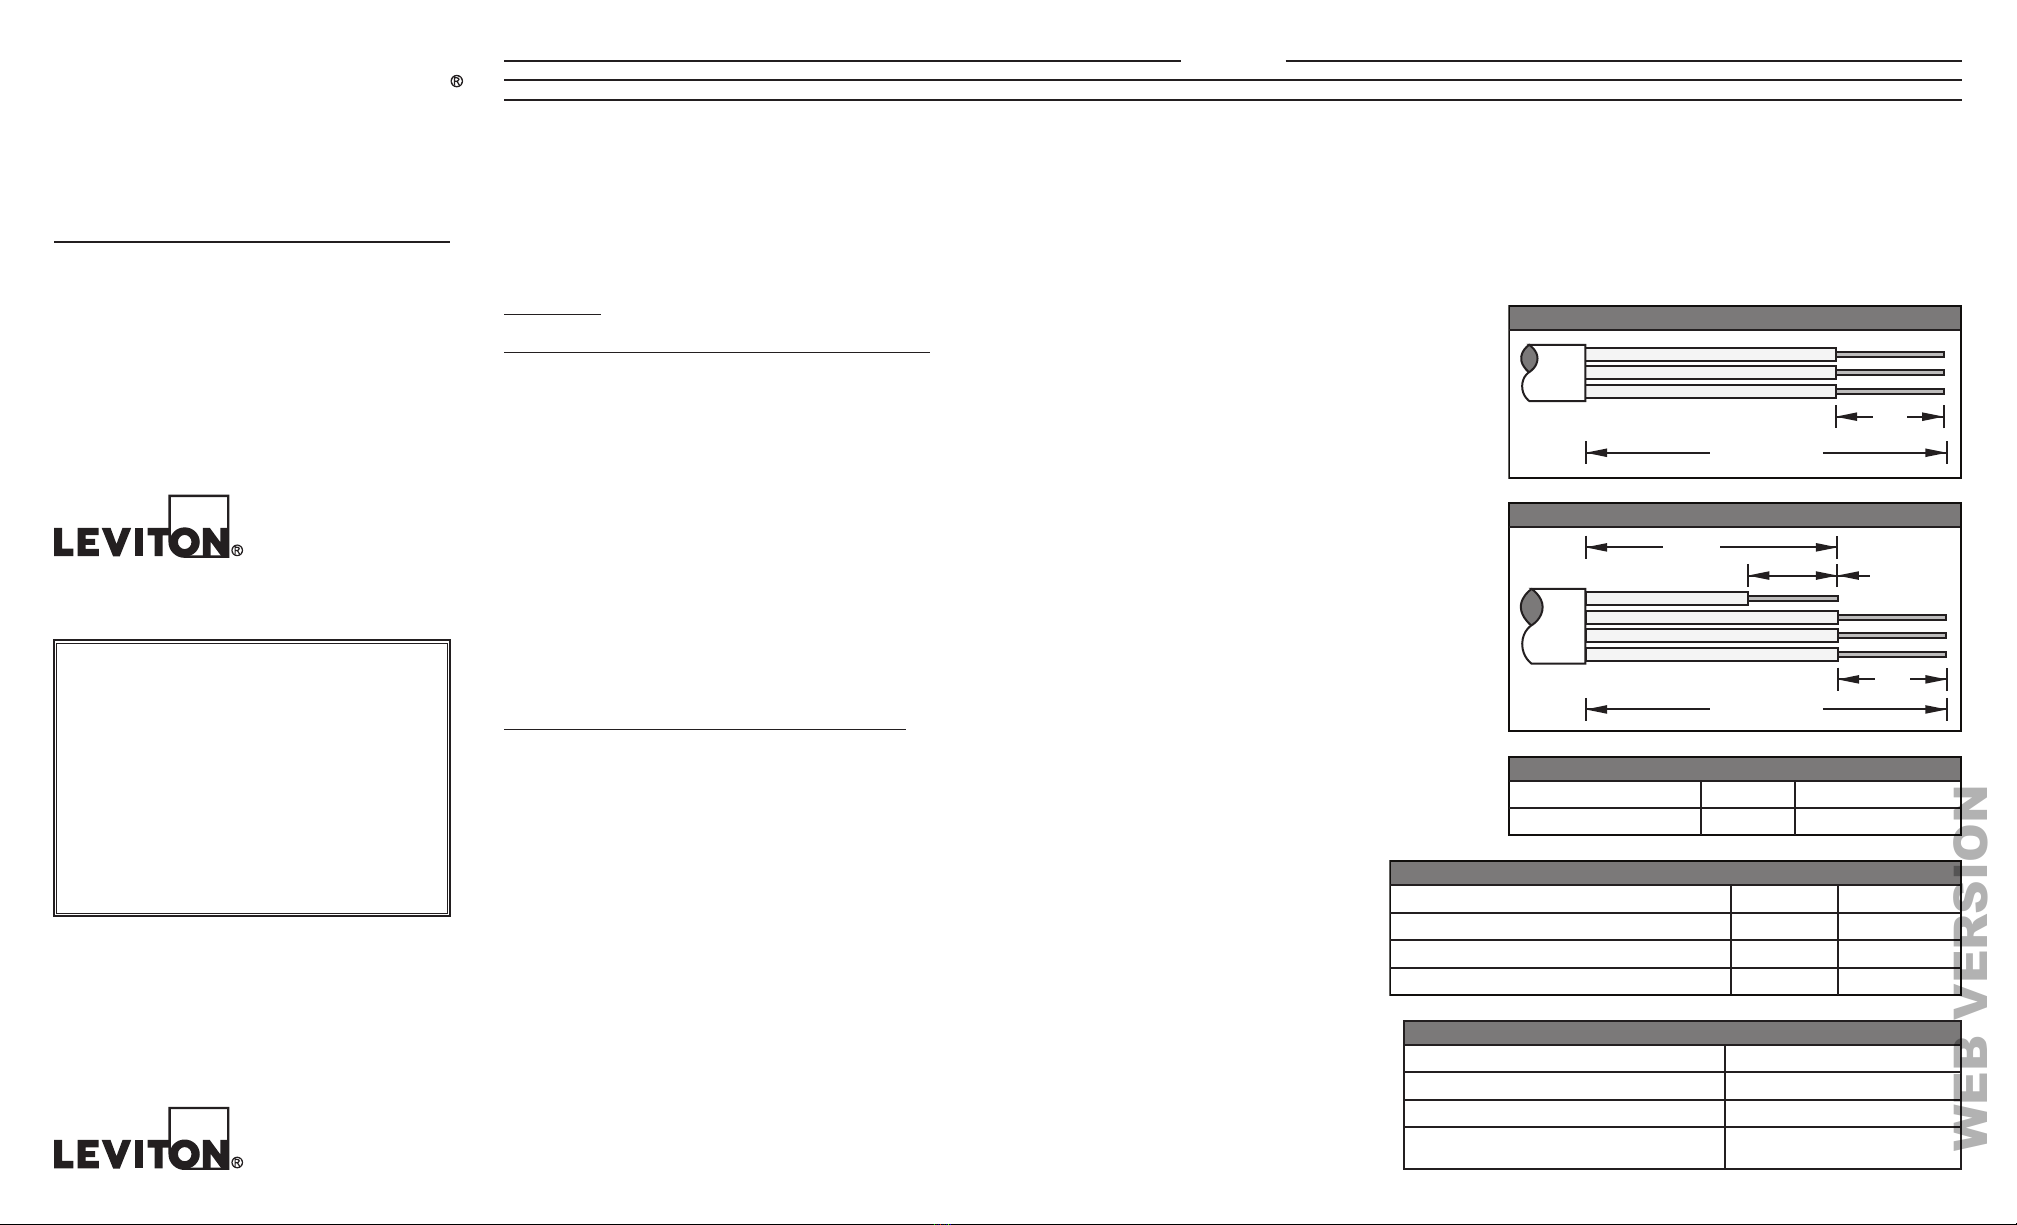
4. Feed cable through housing, and strip 2-1/2" (63.5 mm) from cord jacket, making sure not to cut insulation on conductors.
5. On 3 wire installations: Strip all insulation from conductors 3/4" (19.1 mm), as per strip GAGE molded on the back of wiring module.
6. On 4 wire installations: The length of the grounding conductor is shorter because the wiring chamber is located higher on the back cover: Cut
GROUNDING conductor to a length of 1-3/4" (44.5 mm) and strip insulation 5/8" (15.9 mm). Strip insulation on the other conductors 3/4" (19.1 mm), as per
strip GAGE molded on the back of wiring module.
7. Make sure that stripped conductors are clean, and of a bright copper color. If necessary twist strands of each stripped conductor tightly. DO NOT TIN
CONDUCTORS.
8. NOTE: DO NOT LOOSEN TERMINAL SCREWS.
9. Attach grounding wire first by inserting stripped conductor into grounding wire well, and tighten terminal to 35 in-lb of torque, using a 5/32" Allen wrench.
CAUTION: TERMINALS MUST TIGHTEN ONTO CONDUCTORS, NOT INSULATION.
10. With grounding conductor tightened, align each stripped conductor to marked wire well on wiring module as per TABLE 1. Insert each conductor and tighten
each wiring terminal 35 in-lb of torque, using a 5/32" Allen wrench. Check for stray wire strands.
11. Reattach wiring module to housing by engaging the thread of the two parts. Press and hold the release button and turn housing clockwise until completely
tightened.
12. Alternately tighten cord clamp screws to 20 in-lb (2.3 Nm).
Installation using NUT type strain relief - DIAGRAM 2:
1. WARNING: TO AVOID FIRE, SHOCK, OR DEATH TURN OFF POWER AT CIRCUIT BREAKER OR FUSE AND TEST THAT POWER IS OFF BEFORE
WIRING!
2. Separate housing from wiring module by grasping device firmly from front. With thumb, press and hold the release button and twist housing counterclockwise.
3. Remove nut from back of housing by turning counterclockwise. Select proper size of rubber bushing and strain relief grip washer. Break off from the four sizes
supplied. See NUT TYPE STRAIN RELIEF CHART.
4. Insert selected rubber bushing right side up on back of housing as shown in DIAGRAM 2.
5. Insert cord through nut, strain relief grip washer, and feed cable through housing. See DIAGRAM 2. DO NOT REVERSE ORIENTATION OF STRAIN RELIEF GRIP WASHER AND RUBBER BUSHING.
6. Strip 2-1/2" (63.5 mm) from cord jacket, making sure not to cut conductors insulation.
7. On 3 wire installations: Strip all conductors insulation 3/4" (19.1 mm), or as per strip GAGE molded on the back of wiring Module.
8. On 4 wire installations: The length of the grounding conductor is shorter because the wiring chamber is located higher on the
back cover: Cut GROUNDING conductor to a length of 1-3/4" (44.5 mm) and strip insulation 5/8" (15.9 mm). Strip insulation on the other
conductors 3/4" (19.1 mm), as per strip GAGE molded on the back of wiring module.
9. Make sure that stripped wires are clean, and of a bright copper color. If necessary twist strands of each stripped conductor tightly.
DO NOT TIN CONDUCTORS.
10. NOTE: DO NOT LOOSEN TERMINAL SCREWS.
11. Attach grounding wire first by inserting stripped conductor into grounding wire well and tightening terminal to 35 in-lb of torque, using a 5/32"
Allen wrench. CAUTION: TERMINALS MUST TIGHTEN ONTO CONDUCTORS, NOT INSULATION.
12. With grounding conductor tightened, align each stripped conductor to marked wire well on wiring module as per TABLE 1. Insert each
conductor and tighten each wiring terminal to 35 in-lb of torque, using a 5/32" Allen wrench. Check for stray wire strands.
13. Reattach wiring module to housing by engaging the thread of the two parts. Press and hold the release button and turn housing clockwise
until completely tightened.
14. Push strain relief grip washer up against rubber bushing. Push up the cable relief nut to engage housing thread. Firmly hold housing, and
tighten the cable relief nut, turning clockwise, until completely tightened.
50A Locking
Plugs and Connectors
3 Wire and 4 Wire
Installation Instructions
4 WIRE STRIP GAGE
3/4"
(19.1 mm)
5/8"
(15.9 mm)
1-3/4"
(44.5 mm)
2-1/2" (63.5 mm)
CABLE CLAMP STRAIN RELIEF CHART
Cable clamp with insert
Cable clamp with out insert
AWG 10/3, 10/4, 8/3
AWG 8/4, 6/3, 6/4, 4/3
.650 – .835
.930 – 1.20
TABLE 1
G, GRND, GREEN, or Eq G (Grounding terminal)
W, or WHITE (Neutral terminal)
X, Y, Z, or BLANK (Hot terminal)
Terminal Designation
Bare, Green, or Green/Yellow wire
White or Gray wire
Other than White, Green, Gray,
Green/Yellow or Bare wire
Conductor Color
For Technical Assistance Call: 1-800-824-3005 (USA Only) or
1-800-405-5320 (Canada Only) www.leviton.com
LIMITED LIFETIME WARRANTY AND EXCLUSIONS
Leviton warrants to the original consumer purchaser and not for the
benefit of anyone else that this product at the time of its sale by Leviton
is free of defects in materials and workmanship under normal and proper
use during the lifetime of the product. Leviton’s only obligation is to
correct such defects by repair or replacement, at its option. For details
visit www.leviton.com or call 1-800-824-3005. This warranty excludes
and there is disclaimed liability for labor for removal of this product or
reinstallation. This warranty is void if this product is installed improperly
or in an improper environment, overloaded, misused, opened, abused, or
altered in any manner, or is not used under normal operating conditions
or not in accordance with any labels or instructions. There are no
other or implied warranties of any kind, including merchantability
and fitness for a particular purpose. Leviton is not liable for
incidental, indirect, special, or consequential damages, including
without limitation, damage to, or loss of use of, any equipment,
lost sales or profits or delay or failure to perform this warranty
obligation. The remedies provided herein are the exclusive remedies
under this warranty, whether based on contract, tort or otherwise.
3 WIRE STRIP GAGE
3/4"
(19.1 mm)
2-1/2" (63.5 mm)
NUT TYPE STRAIN RELIEF CHART
No. 1 Bushing and Grip Washer (smallest diameter)
No. 2 Bushing and Grip Washer
No. 3 Bushing and Grip Washer
No. 4 Bushing and Grip Washer (largest diameter)
AWG 10/3 - 10/4
AWG 8/3
AWG 8/4 - 6/3
AWG 6/4 - 4/3
.650 – .710
.835
.930 – .990
1.055 – 1.200
PK-93454-10-00-0B
PK-93454-10-00-0B
© 2019 Leviton Mfg. Co., Inc.
black & white


