LG VDS-ST1 Series User manual

OWNER'S MANUAL
AUTO EMPTY
CHARGING STATION
Read this owner's manual thoroughly before operating the
appliance and keep it handy for reference at all times.
ENGLISH
VDS-ST1****
MFL71780907
Rev.05_102521
www.lg.com
Copyright © 2021 LG Electronics Inc. All Rights Reserved.

TABLE OF CONTENTS
2
3 IMPORTANT SAFETY
INSTRUCTIONS
3 READ ALL INSTRUCTIONS BEFORE USE
3 WARNING STATEMENTS
7 CAUTION STATEMENTS
8 INSTALLATION
8 Product Overview
11 Installing the Charging Station
13 Storing the Accessories
14 OPERATION
14 Charging the Battery
16 Getting Started
20 MAINTENANCE
20 Cleaning the Appliance
24 TROUBLESHOOTING
24 Before Calling for Service

3IMPORTANT SAFETY INSTRUCTIONS
ENGLISH
IMPORTANT SAFETY INSTRUCTIONS
READ ALL INSTRUCTIONS BEFORE USE
Safety Messages
Your safety and the safety of others are very important.
We have provided many important safety messages in this manual and on your appliance. Always read and
follow all safety messages.
All safety messages will tell you what the potential hazard is, tell you how to reduce the chance of injury,
and tell you what may happen if the instructions are not followed.
WARNING STATEMENTS
WARNING
• To reduce the risk of explosion, fire, death, electric shock, injury or scalding to persons when using this
product, follow basic precautions, including the following:
Technical Safety
• This appliance is not intended for use by persons (including children) with reduced physical, sensory or
mental capabilities, or lack of experience and knowledge, unless they have been given supervision or
instruction concerning use of the appliance by a person responsible for their safety.
• Do not allow the appliance to be used as a toy. Close attention is necessary when used by or near
children.
• Do not allow children to play with or hang on the appliance.
• Do not use the appliance with a damaged power cord or plug. The cord must be replaced. If the
appliance is not working as it should, has been dropped, damaged, left outdoors, or dropped into water,
return it to an LG Electronics service center.
• Do not pull or carry by the cord, use the cord as a handle, close a door on the cord, or pull the cord
around sharp edges or corners. Do not run the appliance over the cord. Keep the cord away from heated
surfaces.
• Do not unplug by pulling on the cord. To unplug, grasp the plug, not the cord.
• Place the cords from other appliances out of the area to be cleaned.
• Have servicing performed by a qualified repair person using only identical replacement parts. This will
ensure that the safety of the product is maintained.
This is the safety alert symbol.
This symbol alerts you to potential hazards that can kill or injure you and others. All safety messages
will follow the safety alert symbol and either the word WARNING or CAUTION.
These words mean:
WARNING
You may be killed or seriously injured if you do not follow instructions.
CAUTION
You may be injured or cause damage to the product if you do not follow instructions.

4IMPORTANT SAFETY INSTRUCTIONS
Battery
• Never use the battery and the charging station from other appliances with this appliance. Use only the
battery and the charging station provided by LG Electronics.
• Use appliances only with specifically designated battery packs. Use of any other battery packs may
create a risk of injury and fire.
• Recharge only with the charger specified by the manufacturer. A charger that is suitable for one type of
battery pack may create a risk of fire when used with another battery pack.
• Never use the battery and the charging station from this appliance with other appliances.
• Unplug the power cord from the outlet and remove the battery if the appliance will not be used for an
extended period of time.
• Do not use modified or damaged batteries.
• When disposing of the battery or the appliance, remove the battery from the appliance and safely
dispose of it.
• Do not use a battery pack or appliance that is damaged or modified. Damaged or modified batteries may
exhibit unpredictable behavior resulting in fire, explosion or risk of injury.
• Do not disassemble, remove or short-circuit the battery.
• Have the battery replaced when it is no longer able to hold a charge.
• Refer to the Charging the Battery section instructions for the method of replacing the battery.
• When disposing of this appliance, follow regulations for disposal of rechargeable lithium-ion batteries.
• Follow all local ordinances and regulations when handling or disposing of the battery.
• Disconnect the battery pack before cleaning or servicing.
• Prevent unintentional starting. Ensure the switch is in the off position before connecting to the battery
pack, picking up or carrying the appliance. Carrying the appliance with your finger on the switch or
energizing an appliance that has the switch on invites accidents.
• When the battery pack is not in use, keep it away from other metal objects, like paper clips, coins, keys,
nails, screws or other small metal objects, that can make a connection from one terminal to another.
Shorting the battery terminals together may cause burns or a fire.
• Under abusive conditions, liquid may be ejected from the battery. If this happens, avoid contact. If
contact accidentally occurs, flush with water. If liquid contacts eyes, additionally seek medical help.
Liquid ejected from the battery may cause irritation or burns.
• Do not modify or attempt to repair the appliance or the battery pack (as applicable) except as indicated
in the instructions for use and care.
Installation
• To avoid an electrical shock or fire, do not install, charge or store the appliance where it may be exposed
to water, rainfall or high humidity.
• Install, charge and store the appliance in a well-ventilated place.
• Avoid operating the appliance in areas where there is a risk of leakage of flammable gas, industrial oil or
metallic dust.
• Do not store or install the appliance, power cord or plug near heating devices or open flames.
• Install the charging station on a firm, level surface.
• Install the device so that it does not tip over.
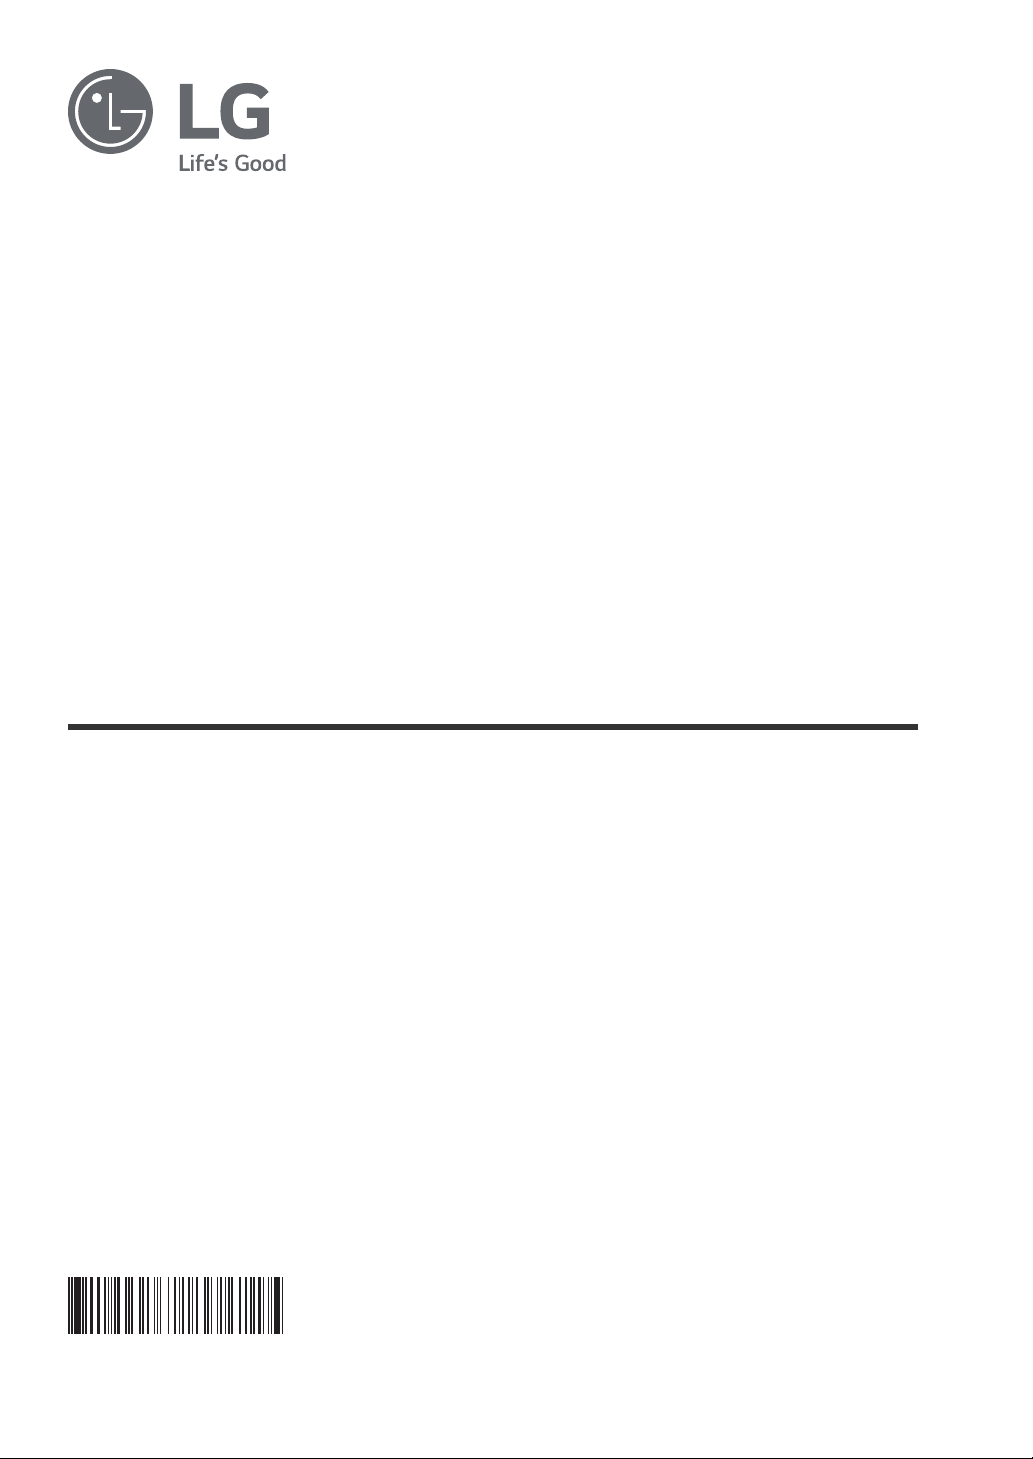
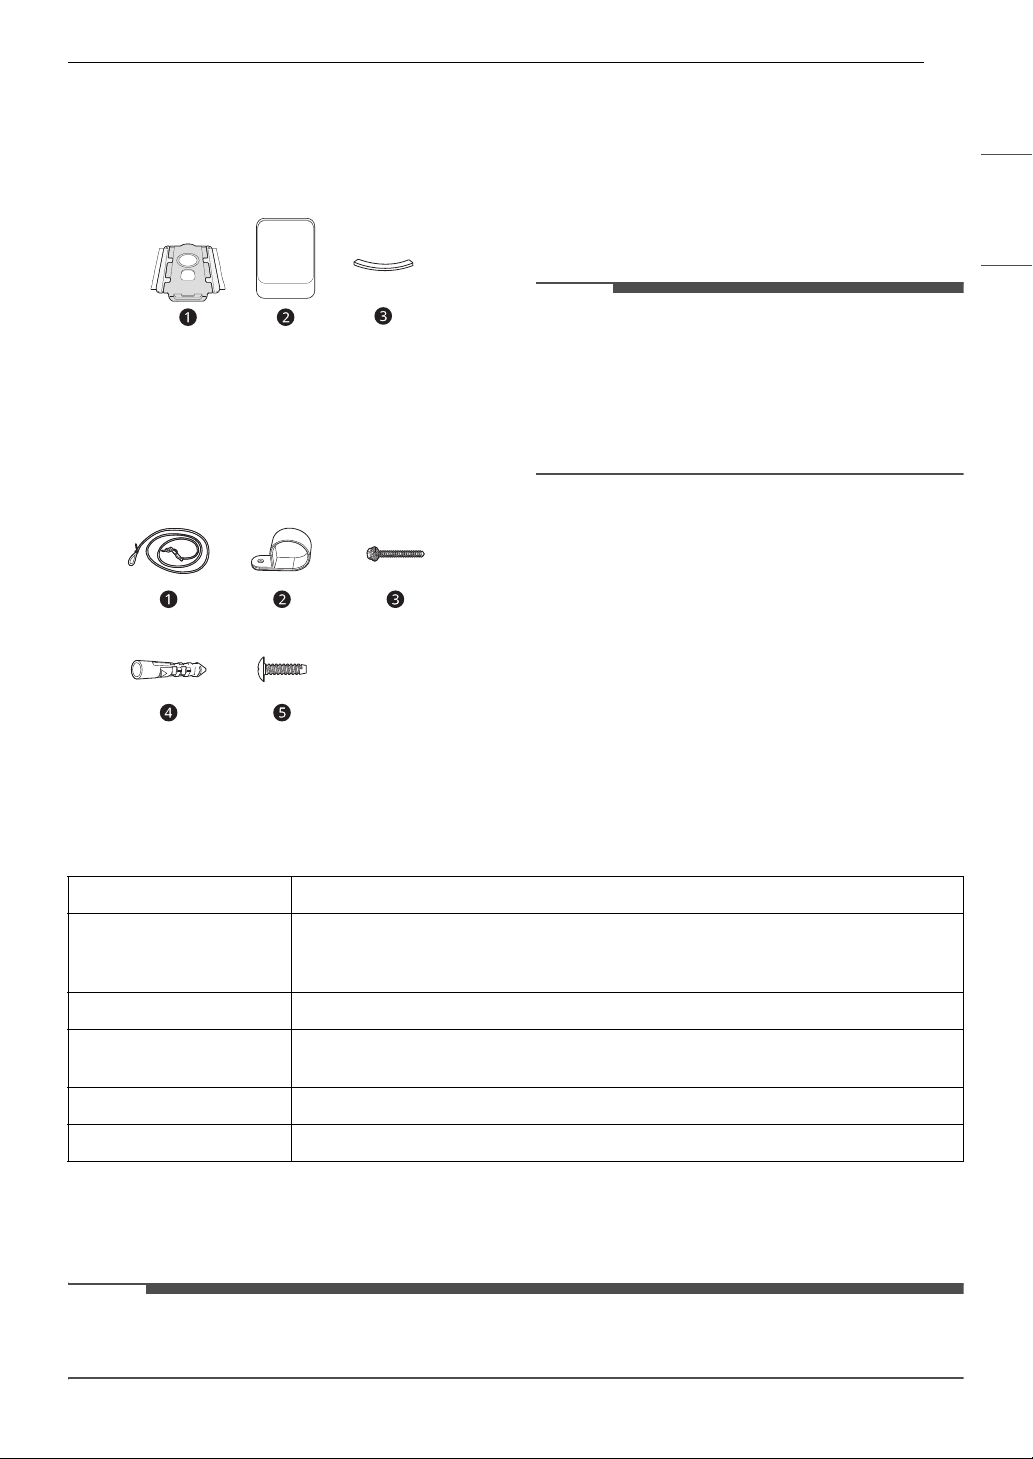
• To prevent tipping, self-standing mode installations should be anchored to the wall using the provided
anchoring kit.
• Use the anchoring screws only when attaching to concrete or similar solid surfaces.
• Never drill into a wall without first checking that the area behind it is free from power conduits,
plumbing, vents, or cables.
• Do not use or store the appliance at temperatures below 41 °F (5°C) or above 100 °F (38°C).

5IMPORTANT SAFETY INSTRUCTIONS
ENGLISH
• Do not store or install the appliance where it is exposed to temperatures below freezing or exposed to
outdoor weather conditions.
• When installing or moving the appliance, be careful not to pinch, crush, or damage the power cord or
plug.
Operation
• This appliance is exclusively for use with the LG Electronics CordZero A9 Vacuum Cleaner. Do not use it
for other appliances or other purposes.
• Use only as described in this manual. Use only manufacturer’s recommended attachment.
• This appliance is designed for normal indoor domestic use only. It is not to be used for any non-
residential, commercial, or industrial application.
• Do not use or store the appliance in any outdoor location, garage environment or on wet surfaces.
• This product should only be used with a 120 V~ 60 Hz outlet. Make sure to check the power specifications
of the place where you intend to use the appliance.
• This appliance is equipped with a power cord having an equipment-earthing / grounding conductor
(earthing pin) and a grounding power plug. The power plug must be plugged into an appropriate outlet
that is installed and earthed / grounded in accordance with all local codes and ordinances.
• Do not handle the power cord, plug, or appliance controls with wet hands.
• Wipe any moisture or dirt off the cord or plug with a dry cloth.
• Unplug the power cord using the plug, not the cord. Pulling on the cord can damage it and result in
electric shock or fire.
• Never attempt to operate this appliance if it is damaged, malfunctioning, partially disassembled, or has
missing or broken parts, including a damaged cord or plug. Take it to an authorized LG Electronics
service center or dealer for assistance.
• Do not apply excessive force to the power cord to bend it, or place it under a heavy object as this will
damage it.
• Do not use multiple-outlet adapters with this appliance. Make sure to use a power socket with a capacity
of 10 A.
• Do not plug the appliance into a damaged or loose outlet.
• Make sure to unplug the power cord from the outlet when the appliance is not to be used for an
extended period of time.
• Do not damage, alter, excessively bend, twist, pull, pinch or heat the power cord.
• Before using the appliance, remove any wire or string on the floor.
• Avoid touching the prongs of the power plug with your finger(s) when unplugging the power cord.
• Do not cover the power cord with a rug or carpeting.
• Push the power plug firmly into the wall outlet so that it is not loose.
• If the product has been submerged, contact an LG Electronics service center or dealer for instructions
before resuming use.
• If the product makes a strange noise or emits an odor or smoke, discontinue use and contact an LG
Electronics customer information center.
• Only qualified technicians or service personnel from LG Electronics may disassemble, repair or modify
the appliance.
• Never insert a sharp metal object such as a pin, nail or knife in a hole or gap in the appliance or the
charging station.
• Make sure that no water, beverage or detergent gets inside the appliance or the charging station.
• Do not allow children to use the appliance.
• Do not let children or pets get close to the appliance when using, charging or storing.
• Keep clothing and hair, fingers, or other parts of the body away from openings and moving parts.

6IMPORTANT SAFETY INSTRUCTIONS
• Do not use in an enclosed space where vapors are present from paint thinner, mothproofing substances,
flammable dust or other explosive or toxic materials.
• Make sure that the filter is installed before use.
• Do not touch the charging terminals on the appliance or the charging station, or insert an electrified
object inside the appliance or the station.
• Do not lean the appliance on walls, chairs or tables.
• If the earth leakage breaker is tripped when the product is put on the charging station, immediately
remove the appliance from the charging station. Contact an LG Electronics customer service center.
• Do not use or store a heating device or flammable substance (ether, benzene, alcohol, chemicals,
combustible sprays, insecticide, air freshener or cosmetics) in close proximity to the appliance.
• Do not attempt to clean up a liquid substance (water, beverage), odorous substances (candy, chocolate,
pet excrement), metal objects (blades, pins), flammable substances, surfactants, or glass shards with this
appliance.
• In the event of a gas leak (natural gas, propane gas, etc.) do not operate this or any other appliance.
Open a window or door to ventilate the area immediately.
• Do not hold the charging station upside down with the battery in the charging station.
• Do not expose the appliance, and the battery in particular, to heat, a heating device or direct sunlight.
• Do not keep the appliance or its battery inside a vehicle which is exposed to direct sunlight.
• Never allow any water, beverage or detergent to get inside the battery.
• Do not apply physical impacts to the battery.
• Do not use the appliance without the dust bag and filters in place.
• Do not suck up anything that is burning or smoking, such as cigarettes, matches, or hot ashes.
• Do not use to suck up flammable or combustible liquids, such as gasoline, or use in areas where they
may be present.
• Do not use outdoors.
Maintenance
• Make sure to unplug the power cord from the outlet when cleaning or maintaining the charging station.
• Do not spray or use water, inflammable materials such as gasoline or thinners, or surfactants such as
detergent or bath soap near the appliance.
Disposal
• Keep packing materials out of the reach of children. Packaging materials can pose a suffocation risk for
children.
• Destroy the carton, plastic bag, and other packing materials after the appliance is unpacked. Children
might use them for play. Cartons covered with rugs, bedspreads, or plastic sheets can become airtight
chambers.
• Dispose of this appliance according to local, state, and regional laws and regulations.
• Contact your local city council or the related government authority before disposing of this appliance.
• In case a rechargeable battery is included in this product, the entire device should be recycled in
compliance with rechargeable battery recycling standards because of the internal battery. To dispose of
properly, call (800) 822-8837 or visit www.call2recycle.org.

7IMPORTANT SAFETY INSTRUCTIONS
ENGLISH
SAVE THESE INSTRUCTIONS
CAUTION STATEMENTS
CAUTION
• To reduce the risk of injury to persons, malfunction, or damage to the product or property when using
the appliance, follow basic safety precautions, including the following:
Operation
• Do not open the door of the product using excessive force.
• Do not carry the product with the vacuum cleaner, nozzles, or accessories inside; it may cause injury or
product damage.
• When opening and closing the product door or control panel, be careful not to get your fingers caught.
• Remove all the protective plastic from the Vacuum Cleaner before use. Otherwise, it may cause
abnormal noise during the dust emptying operation.
• Keep the area around the charging station clean. A strong airstream can be emitted from the exhaust on
the back of the product, causing dust to accumulate on the floor.
• This appliance has a built-in safety device to prevent damage from overheating. If the appliance
becomes overheated after extended use, it may automatically turn off. If this occurs, leave the appliance
in a cool, well-ventilated area for about an hour before turning on the power again.
• Do not subject the product to shocks or drop it.
• Do not install wet or damp filters.
• Do not clean the product with a volatile or organic solvent (thinner or acetone).
• Always use a soft cloth to clean the appliance.
• Remain aware of your surroundings while using the appliance to avoid colliding with people or animals.
• Do not kick or apply force to the appliance.
• Do not put any object other than the appliance, especially a metallic or magnetic object, on the charging
station.
• Keep fingers away from pinch points when assembling the appliance or the charging station.
• Do not let a child or a pet hang onto the charging station.
• Follow all applicable state and local codes and regulations when installing the mounting station.
• Do not use the double-sided tape to anchor the charging station on wallpaper. Use the provided screws
to anchor the charging station. The weight of the charging station and the appliance could damage the
paper.
• Do not remove the battery during operation.

8INSTALLATION
INSTALLATION
Product Overview
The images in this guide may be different from the actual components and accessories, which are subject
to change by the manufacturer without prior notice for product improvement purposes.
NOTE
• For your safety and for extended product life, use only authorized components. The manufacturer is not
responsible for product malfunction, property damage or bodily injury caused by the use of separately
purchased unauthorized components, parts, or non-LG products.
Front View
† There is also a nozzle hook on the right.
NOTE
• Use the charging station only with the provided vacuum cleaner. Using a vacuum cleaner other than the
one designed to be used with the charging station may result in improper sealing of the product and
failure to empty dust from the vacuum cleaner.
Part Name Part Name
aControl Panel gExhaust Filter (Expendable)
bVacuum Cleaner Mounting Unit hBase Plate
cNozzle Hook†iCleaning Brush
dBedding Nozzle or Pet Nozzle jCrevice Tool
eDust Bag (Expendable) kCombination Tool
fMotor Protection Filter (Expendable)

9INSTALLATION
ENGLISH
Accessories
† This accessory is only available on some models.
Included Accessories
aDust Bag (Expendable)
bBase Plate
cGaskets (4EA)
Installation Kit
aCord (includes slide and loop)
bMounting bands (2EA)
cWall Mounting Screw
dWall Mounting Anchor
eProduct Mounting Screw
NOTE
• The dust bag exhaust filter and the motor
protection filter will eventually need to be
replaced. Contact an LG Electronics customer
service center.
• The product is shipped with a dust bag already
installed.
Specifications
Appliance
Battery
The charging station finishes charging one battery before charging the second.
The auxiliary battery will start charging only when the battery in the vacuum cleaner is fully charged.
NOTE
• The number of batteries varies depending on the vacuum cleaner purchased. The auxiliary battery is
available to buy separately.
Model VDS-ST1****
Dimensions
(Width X Depth X
Height)
10.0 in X 11.7 in X 39.7 in
255 mm X 297 mm x 1009 mm
Weight Approximately 22.3 lb (10.1 kg)
Power Consumption 9 A (Cleaning)
0.6 A (Charging)
Input 120 V~ 60 Hz
Output DC 28.3 V / 1.15 A

10 INSTALLATION
FCC Notice
This equipment has been tested and found to
comply with the limits for a Class B digital device,
pursuant to Part 15 of the FCC Rules. These limits
are designed to provide reasonable protection
against harmful interference in a residential
installation. This equipment generates, uses, and
can radiate radio frequency energy and, if not
installed and used in accordance with the
instructions, may cause harmful interference to
radio communications. However, there is no
guarantee that interference will not occur in a
particular installation. If this equipment does
cause harmful interference to radio or television
reception, which can be determined by turning the
equipment off and on, the user is encouraged to
try to correct the interference by one or more of
the following measures:
• Reorient or relocate the receiving antenna.
• Increase the separation between the equipment
and the receiver.
• Connect the equipment into an outlet on a
circuit different from that to which the receiver is
connected.
• Consult the dealer or an experienced radio/TV
technician for help.
Any changes or modifications in construction of
this device which are not expressly approved by
the party responsible for compliance could void
the user’s authority to operate the equipment.
Supplier’s Declaration of
Conformity
This device complies with part 15 of the FCC Rules.
Operation is subject to the following two
conditions:
(1) This device may not cause harmful interference
and
(2) This device must accept any interference
received, including interference that may cause
undesired operation.
Model EAC63382208
Voltage DC 25.9 V
Capacity 2400 mA
Trade Name LG
Responsible Party LG Electronics USA, Inc.
Address 111 Sylvan Avenue
North Building
Englewood Cliffs, NJ 07632
Email [email protected]

11INSTALLATION
ENGLISH
Installing the Charging
Station
CAUTION
• Do not allow children or pets to hang onto the
charging station. They could be injured or cause
damage to the appliance.
• Take care not to drop the product parts while
unpacking them to avoid appliance damage or
personal injury.
NOTE
• The cost of a service call to install or reinstall the
charging station is not covered under the
warranty.
Installation
Follow the steps below to install the charging
station on a hard and level floor.
CAUTION
• Do not install on carpeted floors or rugs. The
product may fall, causing injury or damage.
• If the base plate and the product are not
properly assembled, the product may fall over,
causing product damage or injury.
1 Before installing the product, attach the
gaskets ato the four grooves on the rear of
the base plate b.
• Peel off the paper from the gasket, remove
foreign substances from the groove, and
then attach the sticky side of the gasket to
the base plate.
• Attaching the gaskets on the base plate can
prevent the base plate from slipping or
scratching the floor when installing the
product.
2 Place the base plate on a flat, hard surface
with the long side facing forward. Place the
product onto the base plate.
• Install the base plate with at least 2" (5cm)
of clearance in the rear. If you plan to store
the mop nozzle on the station, allow more
than 2" (5 cm).
• Keep an 8" (20cm) radius in the front clear
of obstacles in order to open the doors of
the station.
3 Place the station on the base plate and press
down firmly on all sides to secure it on the
base.
• When properly assembled, the base plate
and station should sit flat on the floor with
no wobbling or bulges in the base plate.
4 Using the anti-tip kit, fix the product firmly to
the wall.
5 cm
20 cm

12 INSTALLATION
5 Plug the power plug into the outlet.
• When the power plug is connected
correctly, the status display flashes, and the
product setting is initialized. Once
initialization is completed, the status display
turns off.
• Use a velcro tie to bind and tidy the excess
cable.
Anti-tip Kit Installation
The anti-tip kit is designed to secure the product to
the wall in order to prevent it from tipping over
and causing personal injury or damage to itself or
the floor.
WARNING
• Carefully read and follow the guidelines in order
to prevent property damage or personal injury.
• Do not lean against the product or place a heavy
object on top of it.
• Manage and supervise children or pets to
prevent them from knocking into or climbing on
the product.
• If you prefer not to install this kit immediately,
ensure that you keep it out of the reach of
children.
• Do not use this kit for purposes other than the
installation of the charging station.
• Wear gloves and protective clothing in order to
prevent personal injury.
• When drilling a hole in concrete, take caution
and wear protective goggles.
• Before drilling into a wall, make sure that there
are no vents, gas or water pipes, or electrical
cables behind the wall.
1 Before moving the product to its final
position, mark the location on the wall where
you will attach the anti-tip cord. If you are not
drilling into a wall stud, you will need to use
the wall mounting anchor.
• Install the wall mounting anchor and the
mounting band directly behind the product.
2 Attach one of the mounting bands to the loop
at one end of the cord.
3 If drilling into drywall, use a 4 mm bit to drill a
hole 1 3/4" (44.5 mm) deep at the marked
location and insert the wall mounting anchor
first. Then screw the mounting band into the
anchor with the wall mounting screw. When
screwing into a wall stud or concrete, use the
wall mounting screw without the anchor.
4 Thread the other end of the cord through the
slide as shown to form a loop. Attach the
second mounting band to this loop.
5 Use the product mounting screw to attach the
mounting band to the back of the product.
6 Place the product in its final location and use
the slider to adjust the length of the cord until
there is about 1 inch of play in the cord.
2"(5 cm)

13INSTALLATION
ENGLISH
CAUTION
• Do not tighten the wall mounting screw
excessively. Doing so may cause the wall
mounting to come loose and the product to fall,
resulting in personal injury or product damage.
• For best results, attach the mounting band to a
wall stud or a solid wall. If the screw pulls out of
the wall and the product falls, personal injury or
product damage may result.
• If the distance between the wall and the product
is too great, the product may fall.
Storing the Accessories
Storing the Tools
Use the product to store the inlet and components
provided with the vacuum cleaner.
The components may differ depending on the
vacuum cleaner model.
Using the Nozzle Hooks
1 Open the nozzle hook aon both sides of the
product.
• To open the nozzle hooks, press on the right
side. Be careful not to pinch fingers when
opening.
2 Hang the nozzle on the nozzle hook.
Storage Inside
1 Open the left door of the product and insert
the bedding nozzle or the pet nozzle afor
storage.
2 Open the right door and insert the
combination tool b, the crevice tool cand
the cleaning brush dfor storage.
NOTE
• Before moving the product, unplug it and
remove the vacuum cleaner, nozzles, and
accessories.
• To carry the product, open both doors and hold
the areas shown.

14 OPERATION
OPERATION
Charging the Battery
Before Charging the Battery
• Make sure that the adapter is connected to both
the charging station and the power outlet.
• Fully charging a single battery usually takes
about 4 hours. It will take twice as long to charge
both the main and auxiliary batteries.
• The battery will not be charged if the indoor
temperature is below 41 °F (5°C). Only charge
the battery when indoor temperatures are
between 41 °F (5°C) and 100 °F (38 °C).
• The battery will eventually need to be replaced.
Due to the battery characteristics, runtime is
shortened after using the appliance repeatedly
for an extended period.
• The last bar on the battery indicator begins to
blink when the battery needs to be recharged.
Use the appliance with a fully charged battery.
• If the main battery is charging on the charging
station, the auxiliary battery will only start
charging once the main battery is fully charged.
• To maintain battery life on dual-battery models,
swap the positions of the two batteries
periodically, between the main body and the
auxiliary charging station.
Charging the Product Body
Storing the appliance on the charging station
automatically recharges the battery.
1 Press the Power button to turn the appliance
off.
2 Put the product body onto the charging
station by aligning it to the hook aof the
charging station.
• Make the extension pipe its shortest length
and insert it into the appliance.
• The appliance cannot be loaded onto the
charging station if either the combination
tool or the crevice tool is inserted. Use the
charging station only after removing the
combination tool or the crevice tool, if
either happens to be fitted.
• If you don't hear a beep, reload the
appliance on the charging station, making
sure the nozzle is horizontal.
• When charging is complete, the battery
level indicator (@) lights up briefly and then
turns off to save energy.
• To save energy while charging the product
body, press the Select Mode button to
switch to the manual dust emptying mode.
WARNING
• Make sure to securely fit the product body onto
the charging station. If the appliance falls off the
charging station, it could cause injuries, property
damage or product damage.
Charging the Auxiliary Battery
After the vacuum cleaner has finished charging,
the auxiliary battery will start charging.
One or two batteries are provided. The number of
batteries varies depending on the model
purchased.
1 Lift the front of the control panel located at
the top of the charging station.
2 To insert, align the battery with the outline of
the battery charger.

15OPERATION
ENGLISH
3 Press the battery down into the compartment.
NOTE
• Insert the auxiliary battery completely. If the
auxiliary battery is inserted correctly, the
auxiliary battery icon (*) flashes.
• The auxiliary battery icon (*) in the status
display flashes during charging and then lights
up briefly and turns off to save energy when
charging is complete.

16 OPERATION
Getting Started
Control Panel Features
Control Panel
List Descriptions
aStatus Display The display shows the dust emptying operation status or when to replace the
dust bag, charging status of the auxiliary battery, and dust emptying mode.
b
Start Press the Start/Stop button once to start the dust emptying operation when
using the manual dust emptying mode.
• When you purchase the product, the automatic dust emptying mode is
set by default.
•WhentheStart/Stop button is selected, a melody plays. Mount the
vacuum cleaner. The dust bin cover opens automatically, and dust
emptying operation begins.
Stop Press the Start/Stop button once to cancel or pause the dust emptying
operation.
• Dust emptying operates in 3 stages, and its function is different for
each stage (preparation ~ dust emptying ~ finishing).
- Pressing the Start/Stop button in the Preparation Stage (mounting
the body of the vacuum cleaner): The dust emptying operation is
canceled and the product returns to the charging status.
- Pressing the Start/Stop button in the Dust Emptying Stage (the dust
bin cover opens automatically, and the dust emptying operation
begins): The dust emptying (replace bag) indicator flashes white
along with emitting a beeping sound, and the dust emptying
operation is paused.
Repress the Start/Stop button to start additional dust emptying
operation.
- Pressing the Start/Stop button in the Finishing Stage (the dust bin
cover closes automatically, the body of the vacuum cleaner is
released): Pressing the Start/Stop button does not work
Change Dust
Emptying Mode
Press Select Mode button to switch between automatic or manual dust
emptying mode.
(PSW\'XVW
67$57
6723
6(/(&7
02'(

17OPERATION
ENGLISH
Status Display
NOTE
• Remove all the protective plastic from the vacuum cleaner before use. Otherwise, it may cause abnormal
noise during the dust emptying operation.
Emptying the Vacuum's Dust Bin
Using the Auto Mode
When the automatic dust emptying mode is set,
the dust emptying operation starts automatically
whenever the vacuum cleaner is properly inserted
into the product.
When you purchase the product, the automatic
dust emptying mode is set by default.
1 Insert the vacuum cleaner into the product.
• After adjusting the length adjustment pipe
of the vacuum cleaner to the shortest
length, attach it to the product.
• If the vacuum cleaner pipe is connected to a
combination tool or a crevice tool, the
vacuum cleaner doesn't fit inside the
product. Use it without the combination
tool or the crevice tool.
• If the vacuum cleaner fits properly inside
the product, the alarm will sound. If the
alarm does not sound, reinsert the vacuum
List Descriptions
a
Dust Emptying
(Replace Bag)
Indicator
• Indicates the dust emptying operation status or when to replace the
dust bag.
- White: Product is emptying dust.
- Flashing red: If the indicator flashes red while emptying dust, replace
the dust bag at the end of the dust emptying operation.
- Flashing red, beeping: If the dust emptying operation is complete and
the dust bag is full, the indicator will flash red, beep 10 times and
then turn off.
- If the indicator flashes red, replace the dust bag to maintain product
performance.
b
Auxiliary Battery
Indicator
• Indicates the charging status of the auxiliary battery.
- Flashes: When the auxiliary battery is mounted in the charger.
- Lights up briefly and then turns off: Auxiliary battery charging is
complete.
- The auxiliary battery will not charge until the battery mounted in the
vacuum cleaner is fully charged. Check the battery level on the handle
of the vacuum cleaner to check whether charging is complete.
c
Auto Emptying
Indicator
• Lights to indicate that the automatic dust emptying mode is on.
- Automatic dust emptying mode automatically starts to operate every
time the vacuum cleaner is mounted correctly onto the product.
- If you remove the vacuum cleaner and mount it immediately, dust
emptying operation may not start automatically, depending on the
circumstance. If it doesn't start automatically, select the Start/Stop
button to start.
AUTO

18 OPERATION
cleaner, making sure that the nozzle sits flat
on the floor.
• Before starting the dust emptying
operation, pull the easy dust emptying lever
on the vacuum cleaner down 2 or 3 times to
sweep away the dust to make the operation
easier.
2 When the dust emptying operation is
complete, a melody sounds, the dust
emptying (replace bag) icon turns off, and the
vacuum cleaner starts charging.
Using the Manual Mode
1 Press Select Mode to change from the Auto
mode to the Manual mode.
2 Insert the vacuum cleaner into the product.
3 Press the Start/Stop button. The dust
emptying (replace bag) icon flashes white,
and the dust emptying operation begins
along with a melody. Do not try to remove the
vacuum once the operation starts.
4 When the dust emptying operation is
complete, a melody sounds, the dust
emptying (replace bag) icon turns off, and the
vacuum cleaner starts charging.
WARNING
• Do not wash the vacuum cleaner body or the
inlet with water. If water enters the built-in
motor, it can cause electric shock or fire.
CAUTION
• Do not forcibly remove the vacuum cleaner
during the dust emptying operation or when it is
paused. Since the vacuum cleaner is mounted,
the product may break or fall, causing injury or
product damage.
- Remove the vacuum cleaner after the dust
emptying (replace bag) icon in the status
display is turned off completely.
• Do not put foreign objects such as hands,
garbage, or toys in the dust suction area of the
product without a vacuum cleaner mounted.
• Do not push, pull, or lean on the product; it may
fall, causing injury or damage.
• Do not put objects like smartphones on the
product's control panel. The product may
malfunction due to vibration, or the object may
fall to the floor, causing injury or damage.
• If the power suddenly turns off during the dust
emptying operation, the vacuum cleaner is
mounted and cannot be removed. Causes for
power loss include a power outage, a turned off
power strip, an unplugged power cord, and a
tripped circuit breaker.
• After the power comes back on, remove the
vacuum cleaner when the settings on the
vacuum cleaner mounting unit are reset.
NOTE
• The sound of the high-performance motor may
be louder than the existing wireless vacuum
cleaner. It is normal to hear sounds such as the
vacuum cleaner, dust bin cover opening, product
operating unit, and suction.
• The vacuum cleaner mounting unit of the
charging station is cleaned with a stronger
suction force just before the dust emptying
operation is over. The sound may increase, but
this is normal and not a fault.
• During the dust emptying operation, the product
and auxiliary battery are not charged for safety
reasons.
• For best results in areas with extra hair or pet
dander, empty the vacuum dust bin more often
during cleaning.
• Replace the dust bag every month to maintain
the dust emptying performance. The
replacement cycle may vary depending on the
environment, and may be especially short in
conditions with a lot of dust or pet hair.
• The dust bin may not be emptied completely
under certain conditions (very full, contains long
hairs, etc.). If this happens, press Start/Stop to
repeat the emptying process.
• Clean the dust bin's inside, the easy dust
emptying lever and the large dust separator to
remove remaining dust. For more information,
see the vacuum cleaner owner's manual.

19OPERATION
ENGLISH
• The UV function in the dust bag enclosure
automatically starts when the vacuum cleaner is
inserted into the product. It runs for 2 hours or
until the door is opened or the vacuum cleaner is
removed.

20 MAINTENANCE
MAINTENANCE
Cleaning the Appliance
Before Cleaning the Appliance
• Replace the dust bag when the dust emptying
(replace bag) icon flashes red.
• Replace the dust bag every month to maintain
the dust emptying performance.
• Clean the motor protection filter and the
exhaust filter every 3 months or if the dust
emptying function seems weaker.
• Disconnect the power plug from the outlet
before cleaning the product.
• If the product smells, replace the dust bag and
clean the filter.
• The frequency of cleaning varies depending on
the usage environment and usage time. In a
dusty environment, clean frequently.
• Fine dust may remain on the dust bin cover due
to static electricity generated during the dust
emptying operation; periodically clean the dust
bin cover.
WARNING
• Never wash the product body with water. Water
could reach the motor and cause electric shock
or fire.
• Do not allow foreign objects to enter the motor.
Doing so may cause electric shock, fire or
product damage.
Cleaning the Product Body
1 Disconnect the power plug from the outlet.
2 Wipe the control panel using a soft cloth.
• Product may malfunction if there is dust on
the control panel.
3 Clean the dust around the dust suction area
using a vacuum cleaner.
4 Lift the product and clean the base plate.
• Before moving the product, unplug it and
remove the vacuum cleaner, nozzles, and
accessories.
5 Reassemble the product and the base plate.
• Make sure that the product and the base
plate are properly assembled.
Changing the Dust Bag
1 Open the left and right doors of the
component storage.
2 Hold the product with one hand and open the
dust bag door with the other hand.
Other manuals for VDS-ST1 Series
1
Table of contents
Other LG Batteries Charger manuals
Popular Batteries Charger manuals by other brands

Flight Display Systems
Flight Display Systems FDPWRU28-2 Installation and operation manual

Velleman
Velleman SOL6N user manual

Uniteck
Uniteck UNICHARGE 1,5.12 manual

NEXPEAK
NEXPEAK NC350 User guide & warranty

Datalogic
Datalogic C-3000 Quick reference guide

ABB
ABB ADC-90-200-C1 Operation and installation manual