LG SLH-G1 Series User manual

Quick Installation Guide
for Hybrid Inverter
LG Energy Solution strongly advises users to exercise due care in following
LG Energy Solution’s product installation manual. Warranty claims are invalid if damage is
caused by human error in a manner inconsistent with the installation manual’s instructions.
Version 0.0
SLH-G1 Series
(SLH-G1-050-GL | SLH-G1-060-GL)

2
General Disclaimer
• The information in this quick installation guide is subject to
change due to product updates or other reasons. This guide
cannot replace the product labels or the safety precautions in
the user manual unless otherwise specied. All descriptions
here are for guidance only.
• Before installations, read through the quick installation guide.
For additional information, please see the user manual.
• All operations should be performed by trained and
knowledgeable technicians who are familiar with local
standards and safety regulations.
• Check the deliverables for correct model, complete contents,
and intact appearance. Contact the manufacturer if any
damage is found or any component is missing.
• Use insulating tools and wear personal protective equipment
when operating the equipment to ensure personal safety.
Wear anti-static gloves, clothes, and wrist strip when touching
electronic components to protect the inverter from damage.
The manufacturer shall not be liable for any damage caused by
static electricity.
• Strictly follow the installation, operation, and conguration
instructions in this guide and user manual. The manufacturer
shall not be liable for equipment damage or personal injury if
you do not follow the instructions.
Safety Disclaimer
WARNING
PV panel safety:
1. Ensure the component frames and the bracket system are
securely grounded.
2. Connect the DC cables using the delivered PV connectors. The
manufacturer shall not be liable for any equipment damage if
other connectors are used.
3. Ensure the DC cables are connected tightly, securely, and
correctly. Inappropriate wiring may cause poor contacts or
high impedances, and damage the inverter.
4. Measure the DC cable using the multimeter to avoid reverse
polarity connection. Also, the voltage should be under the
max DC input voltage. The manufacturer shall not be liable for
the any damage caused by reverse connection and extremely
high voltage.
5. The PV strings cannot be grounded. Ensure that the minimum
insulation resistance of the PV string to the ground meets
the minimum insulation resistance requirements before
connecting the PV string to the inverter. R=Max. Input
Voltage/30mA.
6. The PV modules used with the inverter must have an
IEC61730 class A rating.
Inverter safety:
1. The voltage and frequency at the connecting point should
meet the on-grid requirements.
2. Additional protective devices like circuit breakers or fuses are
recommended on the AC side.
Specication of the protective device should be at least 1.25
times the rated AC output rated current.
3. Make sure that all the groundings are tightly connected.
When there are multiple inverters, make sure that all the
grounding points on the enclosures are equipotential bonding.
4. Do not start the BACK-UP function if there is no battery in
the PV system. The manufacturer shall not be liable for the
risks caused by not following this rule.
5. Do not apply mechanical load to the terminals, otherwise the
terminals can be damaged.
6. All labels and warning marks should be visible after the
installation. Do not scrawl, damage, or cover any label on the
device.
7. Do not touch the running equipment to avoid being hurt as its
temperature may exceed 60°C. Do not install the equipment
at a place within children's reach.
8. Unauthorized dismantling or modication may damage the
equipment. the damage is not covered under the warranty.
9. If there is any radio or wireless communication equipment
below 30MHz near the inverter, you have to:
• Install the inverter at least 30m far away from the wireless
equipment.
• Add a low pass EMI lter or a multi winding ferrite core to
the DC input cable or AC output cable of the inverter.
10. Warning labels on the inverter are as follows.
ENGLISH
Safety Precautions
1

3
HIGH VOLTAGE HAZARD. High voltage
exists during the inverter’s running.
Disconnect all incoming power and turn off
the product before working on it
5min
Delayed discharge. Wait 5 minutes after
power off until the components are
completely discharged.
Read through the user manual before any
operations.
Potential risks exist. Wear proper PPE
before any operations.
High-temperature hazard. Do not touch
the product under operation to avoid being
burnt.
Do not dispose of the inverter as household
waste. Discard the product in compliance
with local laws and regulations, or send it
back to the manufacturer.
CE marking
RCM marking
Grounding point.
NA NA
Battery safety:
1. The battery used with the inverter must be approved by
the inverter manufacturer. The approved battery list can be
obtained through the ofcial website.
2. Before installations, read through the corresponding battery's
User Manual to learn about the product and the precautions.
Strictly follow its requirements.
3. If the battery is discharged completely, please charge it
in strict accordance with the corresponding model's User
Manual.
4. The battery current may be inuenced by temperature,
humidity, weather condition, etc., which may limit the current
and affect the load capacity.
5. If the battery does not start properly, contact the After-sales
Service as soon as possible. Otherwise, the battery will be
damaged permanently.
6. Measure the DC cable using the multimeter to avoid reverse
polarity connection. Also, the voltage should be under the
permissible range.
7. To avoid damaging the inverter, do not connect one battery to
multiple inverters.
Check Before Power On
No. Check Item
1The product is rmly installed at a clean place that is
well-ventilated and easy-to-operate.
2The PE, DC input, AC output, and communication
cables are connected correctly and securely.
3 Cable ties are intact, routed properly and evenly.
4 Unused ports and terminals are sealed.
5The voltage and frequency at the connection point
meet the inverter grid connection requirements.
EU Declaration of Conformity
LG Energy Solution, Ltd. hereby declares that the inverter with
wireless communication modules sold in the European market
meets the requirements of the following directives:
• Radio Equipment Directive 2014/53/EU (RED)
• Restrictions of Hazardous Substances Directive 2011/65/EU
and (EU) 2015/863 (RoHS)
• Waste Electrical and Electronic Equipment 2012/19/EU
• Registration, Evaluation, Authorization and Restriction of
Chemicals (EC) No 1907/2006 (REACH)
LG Energy Solution, Ltd. hereby declares that the inverter
without wireless communication modules sold in the European
market meets the requirements of the following directives:
• Electromagnetic compatibility Directive 2014/30/EU (EMC)
• Electrical Apparatus Low Voltage Directive 2014/35/EU
(LVD)
• Restrictions of Hazardous Substances Directive 2011/65/EU
and (EU) 2015/863 (RoHS)
• Waste Electrical and Electronic Equipment 2012/19/EU
• Registration, Evaluation, Authorization and Restriction of
Chemicals (EC) No 1907/2006 (REACH)

4
LED Indicators
Indicator Status Description
The inverter is power on and in
the standby mode.
The inverter is starting up and in
the self-check mode.
The inverter is in normal
operation under grid-tied or off-
grid modes.
BACK-UP output overload.
A fault has occurred.
The inverter is powered off.
The grid is abnormal and the
inverter is in off-grid mode.
The grid is normal and the
inverter is in grid-tied mode.
BACK-UP is off.
The monitoring module of the
inverter is resetting.
The inverter fails to connect with
the communication terminal
device.
Faults between the
communication terminal device
and Server.
The monitoring of the inverter
operates well.
The monitoring module of the
inverter has not been started
yet.

5
Allgemeiner Haftungsausschluss
• Die Informationen in dieser Kurzanleitung zur Installation
können aufgrund von Produktupdates oder aus anderen
Gründen geändert werden. Diese Anleitung kann die
Beschriftungen auf den Produkten oder die im Handbuch
beschriebenen Sicherheitsvorkehrungen nicht ersetzen, sofern
keine anderen Angaben gemacht werden. Alle Beschreibungen
dienen nur zur Orientierung.
• Lesen Sie vor der Installation die Kurzanleitung zur Installation.
Weitere Angaben nden Sie im Betriebshandbuch.
• Alle Arbeiten sollten von geschulten und sachkundigen
Technikern durchgeführt werden, die mit den örtlichen Normen
und Sicherheitsvorschriften vertraut sind.
• Überprüfen Sie Ihre Geräte auf korrekte Modelle,
Vollständigkeit und intaktes Aussehen. Wenden Sie sich an den
Hersteller, wenn Sie Schäden feststellen oder ein Teil fehlt.
• Verwenden Sie isolierte Werkzeuge und tragen Sie aus
Sicherheitsgründen bei laufendem Betrieb persönliche
Schutzausrüstung. Tragen Sie antistatische Handschuhe,
Tücher und Handgelenkbänder, wenn Sie Elektronikteile
berühren, um den Wechselrichter vor Schäden zu schützen.
Bei Auftritt statischer Elektrizität ist der Hersteller nicht für
Sachschäden verantwortlich.
• Halten Sie sich genau an die Anweisungen zur Installation,
zum Betrieb und zur Konguration in dieser Anleitung und
im Betriebshandbuch. Der Hersteller haftet nicht für Geräte-
oder Personenschäden aufgrund von Nichtbeachtung von
Anweisungen.
Sicherheitshinweis
WARNUNG
Sicherheit des PV-Bedienfelds:
1. Bauteilrahmen und Halterungssystem müssen sicher geerdet
sein.
2. Schließen Sie die Gleichstromkabel an die mitgelieferten PV-
Klemmen an. Bei Nutzung anderer Verbinder ist der Hersteller
nicht für Sachschäden verantwortlich.
3. Die Gleichstromkabel müssen fest, sicher und korrekt
angeschlossen sein. Eine unsachgemäße Verdrahtung kann
einen schlechten Kontakt oder hohe Impedanz verursachen
oder den Umrichter beschädigen.
4. Messen Sie das Gleichstromkabel mit dem Multimeter durch,
ob keine Verpolung vorliegt. Die Spannung sollte unterhalb
der maximalen Gleichstromeingangsspannung liegen. Der
Hersteller ist nicht für Schäden aufgrund von Verpolung und
Überspannung haftbar.
5. Die PV-Stränge sind nicht zu erden. Vor dem Anschluss
des PV-Strangs an den Wechselrichter müssen Sie
kontrollieren, ob dessen Mindestisolationswiderstand
zur Erde die Mindestvoraussetzungen erfüllt. R = Max.
Eingangsspannung/30 mA.
6. Die mit dem Wechselrichter genutzten PV-Module müssen
der Klasse A der IEC61730 entsprechen.
Wechselrichtersicherheit:
1. Spannung und Frequenz am Anschluss sollten den
Voraussetzungen des Stromnetzes entsprechen.
2. Weitere Schutzvorrichtungen wie Leistungsschalter oder
Sicherungen sind wechselstromseitig empfohlen. Die
Spezikation der Schutzvorrichtung sollte mindestens
das 1,25-fache des Nennausgangsstroms auf der
Wechselstromseite betragen.
3. Alle Erdungen müssen fest angeschlossen sein. Bei mehreren
Wechselrichtern ist zu beachten, dass alle Erdungspunkte an
den Gehäusen mit einem Potenzialausgleich versehen sein
müssen.
4. Starten Sie die Backupfunktion (Notstrom oder Ersatzstrom)
nicht, wenn die PV-Anlage keine Batterie enthält. Der
Hersteller ist nicht für die Risiken haftbar, die durch
Nichtbeachtung dieser Regel entstehen.
5. Die Klemmen dürfen nicht mechanisch belastet werden, sonst
können sie Schaden nehmen.
6. Alle Beschriftungen und Warnmarkierungen sollten nach dem
Aufbau sichtbar sein. Kratzen Sie keine Beschriftungen auf
dem Gerät an, beschädigen Sie sie nicht und decken Sie sie
nicht ab.
7. Berühren Sie die laufende Anlage nicht. Es besteht
Verletzungsgefahr, da die Temperatur 60°C übersteigen kann.
Die Anlage darf nicht für Kinder zugänglich sein.
8. Eine unbefugte Demontage oder Änderung kann zu
Sachschäden führen, die nicht durch die Gewährleistung
abgedeckt sind.
DEUTSCH
Sicherheitsvorkehrungen
1

6
9. Wenn sich in der Nähe des Wechselrichters eine Funk- oder
drahtlose Kommunikationseinrichtung mit einer Frequenz von
unter 30 MHz bendet, ist folgendes zu beachten:
• Der Wechselrichter sollte mindestens 30 m entfernt
aufgebaut werden.
• Schalten Sie dem Gleichstromeingangskabel oder dem
Wechselstromausgangskabel des Wechselrichters einen EMI-
Tiefpasslter oder einen gewickelten Ferritkern hinzu.
10. Auf dem Wechselrichter benden sich folgende
Beschriftungen.
HOCHSPANNUNGSGEFAHR. Trennen Sie
vor Arbeiten am Gerät den Strom und
schalten Sie es aus
5min
Verzögerte Entladung. Nach dem
Abschalten des Stroms warten Sie 5
Minuten, bis die Bauteile vollständig
entladen sind.
Beachten Sie die Anleitung, bevor Sie an
diesem Gerät arbeiten.
Es bestehen potenzielle Risiken. Tragen Sie
bei jedem Betrieb die korrekte PSA.
Hochtemperaturgefahr. Wegen
Verbrennungsgefahr darf das Gerät
während des Betriebs nicht berührt werden.
Erdungspunkt. Bezeichnet die Stelle zum
Anschließen des PE-Kabels.
Der Wechselrichter darf nicht im Hausmüll
entsorgt werden. Entsorgen Sie das Produkt
vorschriftsgemäß oder senden Sie es an den
Hersteller zurück.
CE-Markierung
Batteriesicherheit:
1. Die Batterie im Wechselrichter muss vom Hersteller
genehmigt sein. Die Liste der zugelassenen Batterien ist auf
der ofziellen Webseite zu nden.
2. Beachten Sie vor dem Aufbau das Betriebshandbuch der
Batterie und informieren Sie sich über das Produkt und die
Vorsichtsmaßnahmen. Beachten Sie strikt die entsprechenden
Vorgaben.
3. Wenn die Batterie vollständig entladen ist, laden Sie sie
gemäß dem Betriebshandbuch des entsprechenden Modells
auf.
4. Der Batteriestrom kann von Temperatur, Luftfeuchtigkeit,
Wetter usw. begrenzt werden; darunter leidet u. U. auch die
Batteriekapazität.
5. Wenn die Batterie nicht korrekt startet, wenden Sie sich so
schnell wie möglich an den Kundendienst. Andernfalls wird die
Batterie dauerhaft beschädigt.
6. Messen Sie das Gleichstromkabel mit dem Multimeter durch,
ob keine Verpolung vorliegt. Die Spannung sollte im zulässigen
Bereich liegen.
7. Wegen der Gefahr von Sachschäden sollte ein Batteriepack
nicht mit mehreren Wechselrichtern vernetzt werden.
Prüfungen vor dem Einschalten
Nr. Prüfung
1Das Produkt ist an einem sauberen, gut belüfteten
und leicht zu bedienenden Ort fest installiert.
2
Die PE-, Gleichstromeingangs-,
Wechselstromausgangs- und Kommunikationskabel
sind richtig und sicher angeschlossen.
3Die Kabelbinder sind intakt, ordnungsgemäß und
gleichmäßig verlegt.
4Unbenutzte Anschlüsse und Klemmen sind
verschlossen.
5Spannung und Frequenz am Anschluss entsprechen
den Voraussetzungen des Stromnetzes.

7
EU-Konformitätserklärung
LG Energy Solution, Ltd. versichert hiermit, dass der auf dem
europäischen Binnenmarkt verkaufte Wechselrichter mit
drahtlosen Kommunikationsmodulen die Anforderungen der
folgenden Richtlinien erf llt:
• Funkanlagenrichtlinie 2014/53/EU
• Richtlinien 2011/65/EU und (EU) 2015/863 zur
Beschränkung der Verwendung bestimmter gefährlicher
Stoffe (RoHS)
• Elektro- und Elektronik-Altgeräte 2012/19/EU
• Registrierung, Bewertung, Zulassung und Beschränkung von
Chemikalien (EG) Nr. 1907/2006 (REACH)
LG Energy Solution, Ltd. versichert hiermit, dass der auf dem
europäischen Binnenmarkt verkaufte Wechselrichter ohne
drahtlose Kommunikationsmodule die Anforderungen der
folgenden Richtlinien erf llt:
• Richtlinie 2014/30/EU (EMV) zur elektromagnetischen
Verträglichkeit
• Niederspannungsrichtlinie 2014/35/EU für elektrische
Betriebsmittel
• Richtlinien 2011/65/EU und (EU) 2015/863 zur
Beschränkung der Verwendung bestimmter gefährlicher
Stoffe (RoHS)
• Elektro- und Elektronik-Altgeräte 2012/19/EU
• Registrierung, Bewertung, Zulassung und Beschränkung von
Chemikalien (EG) Nr. 1907/2006 (REACH)
LED-Anzeigen
Anzeige Status Beschreibung
Der Wechselrichter ist
eingeschaltet und im
Ruhezustand.
Der Wechselrichter startet
und bendet sich im
Selbsttestmodus.
Der Wechselrichter läuft
normal im Netzparallel- oder
Inselbetrieb.
Überlastung des
Backupausgangs.
Ein Fehler ist aufgetreten.
Der Wechselrichter ist
abgeschaltet.
Das Netz ist anomal und der
Wechselrichter bendet sich im
Inselbetrieb.
Das Netz ist normal und der
Wechselrichter bendet sich im
Netzparallelbetrieb.
Backup ist ausgeschaltet.
Das Überwachungsmodul
des Wechselrichters wird
zurückgesetzt.
Der Anschluss des
Wechselrichters an das
Kommunikationsendgerät ist
nicht hergestellt worden.
Störungen zwischen
Kommunikationsendgerät und
Server.
Die Wechselrichterüberwachung
läuft einwandfrei.
Das Überwachungsmodul des
Wechselrichters ist noch nicht
gestartet.

8
Aviso legal general
• La información contenida en la presente guía de instalación
rápida puede cambiar debido a actualizaciones del producto
u otros motivos. Esta guía no puede sustituir a las etiquetas
del producto ni a las precauciones de seguridad del manual
del usuario, a no ser que se especique otra cosa. Todas las
descripciones aquí realizadas tienen únicamente nes de guía.
• Antes de instalar, lea la totalidad de la guía de instalación
rápida. Para obtener información adicional, consulte el manual
del usuario.
• Todas las operaciones deben ser llevadas a cabo por técnicos
formados y con conocimientos que estén familiarizados con los
estándares y normas de seguridad locales.
• Compruebe los productos suministrados para vericar que
el modelo sea correcto, los contenidos estén completos y su
aspecto sea el de un producto intacto. Póngase en contacto
con el fabricante si se encuentra algún daño o si falta algún
componente.
• Para garantizar la seguridad personal, utilice herramientas
aislantes y equipo de protección individual cuando utilice el
equipo. Utilice guantes, ropa y muñequeras antiestáticos
cuando toque dispositivos electrónicos para proteger el
inversor de posibles daños. El fabricante no se responsabiliza
de los daños provocados por electricidad estática.
• Siga con exactitud las instrucciones de instalación, uso y
conguración de esta guía y este manual del usuario. El
fabricante no será responsable de los daños del equipo o las
lesiones si no sigue las instrucciones.
Aviso legal de seguridad
Advertencia
Seguridad de los paneles fotovoltaicos:
1. Asegúrese de que los bastidores de los componentes y el
sistema de soportes estén bien conectados a tierra.
2. Conecte los cables de CC utilizando los conectores
fotovoltaicos suministrados. El fabricante no se responsabiliza
de los daños del equipo si se utilizan otros conectores.
3. Asegúrese de que los cables de CC estén conectados con
rmeza, correctamente y de forma segura. Un cableado
inadecuado puede provocar malos contactos o altas
impedancias y provocar daños en el inversor.
4. Mida el cable de CC con un multímetro para evitar la conexión
con polaridad inversa. Además, la tensión debe estar por
debajo de la tensión máxima de entrada de CC. El fabricante
no se hace responsable de los daños provocados por conexión
inversa y tensión extremadamente alta.
5. Las cadenas fotovoltaicas no pueden conectarse a tierra.
Asegúrese de que la resistencia de aislamiento mínima de la
cadena fotovoltaica con respecto a la conexión a tierra cumple
los requisitos de resistencia de aislamiento mínima antes de
conectar la cadena fotovoltaica al inversor.
R = Máx. tensión de entrada/30 mA.
6. Los módulos fotovoltaicos utilizados con el inversor deben
tener una clasicación IEC61730 de clase A.
Seguridad del inversor:
1. La tensión y la frecuencia en el punto de conexión deben
cumplir los requisitos de la red.
2. Se recomienda instalar dispositivos de protección
adicionales, como disyuntores o fusibles, en el lado de CA. La
especicación del dispositivo de protección debe ser al menos
1,25 veces la corriente nominal de salida de CA.
3. Asegúrese de que todas las tomas de tierra estén bien
conectadas. Cuando haya varios inversores, asegúrese de
que todos los puntos de conexión a tierra de las cajas tengan
conexión equipotencial.
4. No inicie la función BACK-UP si no hay batería en el sistema
fotovoltaico. El fabricante no se responsabiliza de los riesgos
provocados por no seguir esta norma.
5. No aplique carga mecánica a los terminales, ya que, de lo
contrario, estos pueden resultar dañados.
6. Todas las etiquetas y marcas de advertencia deben ser visibles
después de la instalación.
No tape, garabatee o dañe ninguna etiqueta del dispositivo.
7. Para no lesionarse, no toque el equipo en funcionamiento, ya
que su temperatura puede superar los 60 °C. No instale el
equipo en un lugar al alcance de los niños.
8. El desmontaje o la modicación no autorizados pueden dañar
el equipo, y estos daños no están cubiertos por la garantía.
ESPANOL
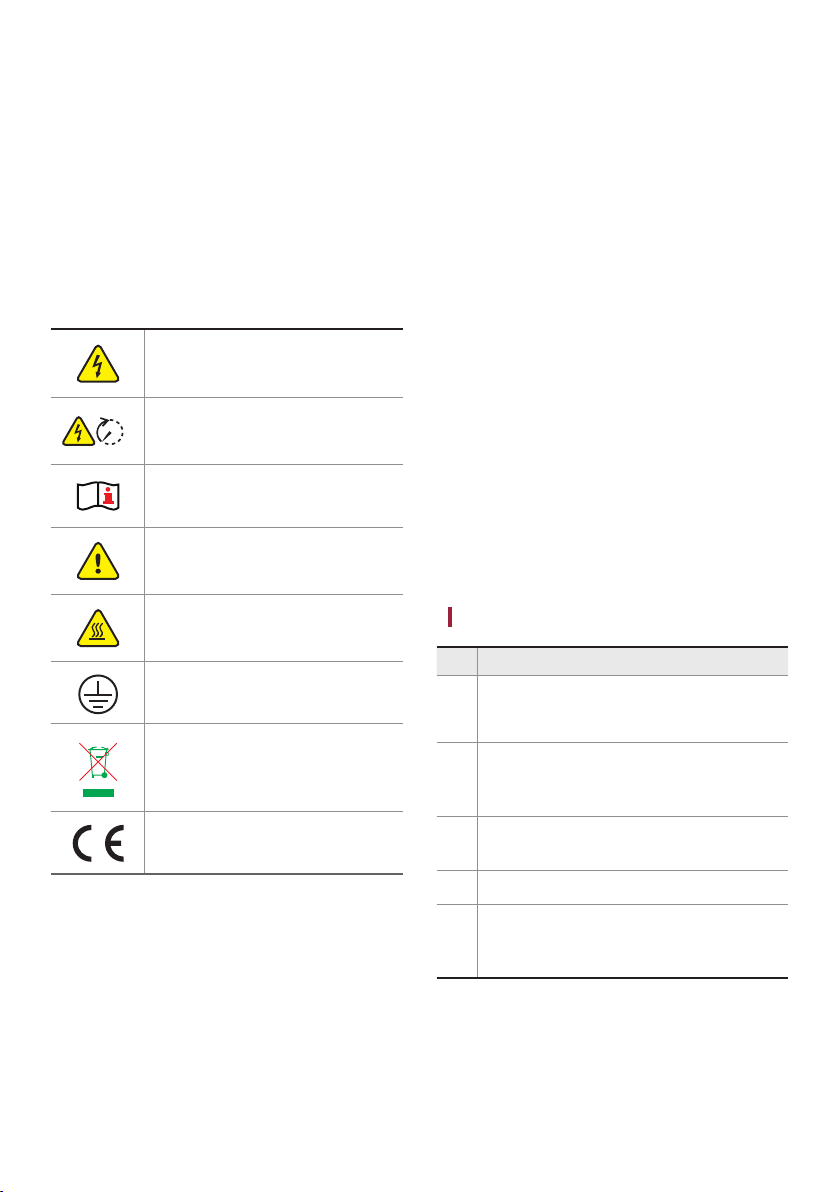
Precauciones de seguridad
1

9
9. Si hay algún equipo de radio o de comunicación inalámbrica
por debajo de 30 MHz cerca del inversor, tiene que:
• Instalar el inversor a una distancia mínima de 30 m del
equipo inalámbrico.
• Añadir un ltro EMI paso bajo o un núcleo de ferrita de varios
devanados al cable de entrada de CC o al cable de salida de
CA del inversor.
10. Las etiquetas de advertencia del inversor son las que se
indican a continuación.
PELIGRO DE ALTA TENSIÓN. Desconecte
toda la alimentación entrante y apague el
producto antes de efectuar trabajos en él.
5min
Descarga retardada. Espere 5 minutos tras
el apagado hasta que los componentes se
descarguen por completo.
Lea la guía antes de trabajar en este
dispositivo.
Existen riesgos potenciales. Utilice EPI
adecuados antes de efectuar cualquier
operación.
Peligro de alta temperatura. Para evitar
quemarse, no toque el producto en
funcionamiento.
Punto de conexión a tierra. Indica la posición
de conexión del cable PE.
No elimine el inversor como residuo
doméstico. Deseche el producto de acuerdo
con las leyes y reglamentos locales o envíelo
al fabricante.
Marcado CE
Seguridad de la batería:
1. La batería utilizada con el inversor debe estar aprobada por el
fabricante del inversor. La lista de baterías aprobadas puede
obtenerse en el sitio web ocial.
2. Antes de efectuar una instalación, lea el manual del usuario
de la batería correspondiente para conocer el producto y las
precauciones. Siga estrictamente sus requisitos.
3. Si la batería se ha descargado por completo, cárguela
siguiendo estrictamente el manual del usuario del modelo
correspondiente.
4. La corriente de la batería puede verse inuida por la
temperatura, la humedad, las condiciones meteorológicas,
etc., que pueden limitar la corriente y afectar a la capacidad
de carga.
5. Si la batería no funciona correctamente, póngase en contacto
con el servicio posventa lo antes posible. De lo contrario, la
batería sufrirá daños permanentes.
6. Mida el cable de CC con un multímetro para evitar la conexión
con polaridad inversa. Además, la tensión debe estar por
debajo del intervalo permitido.
7. Para evitar daños en el inversor, no conecte un paquete de
baterías a varios inversores.
Prüfungen vor dem Einschalten
N.º Elemento de comprobación
1
El producto está instalado rmemente en un lugar
limpio con una buena ventilación y facilidad para las
operaciones.
2
Los cables PE, de entrada de CC, de salida de CA y de
comunicación están conectados correctamente y de
forma segura.
3Las bridas para cables están intactas y colocadas
correcta y uniformemente.
4 Los puertos y terminales no utilizados están sellados.
5
La tensión y la frecuencia en el punto de conexión
cumplen los requisitos de conexión a la red del
inversor.

10
Declaración UE de conformidad
LG Energy Solution, Ltd. declara por la presente que el inversor
con módulos de comunicación inalámbrica comercializado en
el mercado europeo cumple los requisitos de las siguientes
directivas:
• Directiva sobre equipos radioeléctricos 2014/53/UE (RED)
• Directiva sobre restricciones a sustancias peligrosas
2011/65/UE y (UE) 2015/863 (RoHS)
• Residuos de aparatos eléctricos y electrónicos 2012/19/UE
• Registro, evaluación, autorización y restricción de sustancias
químicas (CE) n.º 1907/2006 (REACH)
LG Energy Solution, Ltd. declara por la presente que el inversor
sin módulos de comunicación inalámbrica comercializado en
el mercado europeo cumple los requisitos de las siguientes
directivas:
• Directiva de compatibilidad electromagnética 2014/30/UE
(CEM)
• Directiva sobre aparatos eléctricos de baja tensión 2014/35/
UE (DBT)
• Directiva sobre restricciones a sustancias peligrosas
2011/65/UE y (UE) 2015/863 (RoHS)
• Residuos de aparatos eléctricos y electrónicos 2012/19/UE
• Registro, evaluación, autorización y restricción de sustancias
químicas (CE) n.º 1907/2006 (REACH)
LED-Anzeigen
Anzeige Status Beschreibung
El inversor está encendido y en
modo en espera.
El inversor se pone en
marcha y está en modo de
autocomprobación.
El inversor está en
funcionamiento normal en los
modos conectado a la red o
independiente de la red.
Sobrecarga de salida BACK-UP.
Se ha producido un fallo.
El inversor está apagado.
La red es anómala y el inversor
se encuentra en modo
independiente de la red.
La red es normal y el inversor
está en modo conectado a la red.
BACK-UP está desactivado.
El módulo de supervisión del
inversor se está restableciendo.
El inversor no logra conectarse
con el dispositivo terminal de
comunicación.
Fallos entre el dispositivo
terminal de comunicación y el
servidor.
La supervisión del inversor
funciona bien.
El módulo de supervisión del
inversor aún no se ha puesto en
marcha.

11
Esclusione di responsabilità generale
• Le informazioni contenute in questa guida all'installazione
rapida possono essere soggette a modiche a causa
di aggiornamenti del prodotto o per altri motivi. Salvo
diversamente specicato, questa guida non sostituisce le
etichette dei prodotti o le precauzioni di sicurezza descritte nel
manuale d'uso.
Tutte le descrizioni qui riportate sono a titolo indicativo.
• Prima dell'installazione, leggere la guida rapida all'installazione.
Per maggiori informazioni consultare il manuale d'uso.
• Tutte le operazioni devono essere eseguite da tecnici addestrati
e competenti che conoscono gli standard locali e le norme di
sicurezza.
• Controllare che i prodotti consegnati siano corretti nel modello,
completi nei contenuti e integri nell'aspetto. Contattare il
produttore se si riscontrano danni o se manca un componente.
• Quando si eseguono interventi sull'apparecchiatura, utilizzare
strumenti isolati e indossare dispositivi di protezione
individuale a tutela della propria sicurezza. Per prevenire danni
all'inverter, quando si toccano componenti elettronici indossare
guanti, panni e polsini antistatici. Il produttore declina ogni
responsabilità per danni causati dall'elettricità statica.
• Seguire scrupolosamente le istruzioni per l'installazione, il
funzionamento e la congurazione contenute in questa guida
e nel manuale d'uso. Il produttore non è responsabile di danni
all'apparecchiatura o di lesioni personali se non si seguono le
istruzioni.
Esclusione di responsabilità per la sicurezza
Avvertenza
Sicurezza dei pannelli FV:
1. Assicurarsi che le intelaiature dei componenti e le staffature
siano saldamente messe a terra.
2. Collegare i cavi CC utilizzando i connettore PV in dotazione.
Il produttore declina ogni responsabilità per danni
all'attrezzatura conseguenti all'utilizzo di connettori diversi.
3. Assicurarsi che i cavi CC siano collegati saldamente, in modo
sicuro e corretto. Un cablaggio inadeguato può causare
contatti scadenti, impedenze elevate e danneggiare l'inverter.
4. Misurare il cavo CC utilizzando un multimetro per evitare un
collegamento con polarità invertita.
Anche la tensione deve essere inferiore alla tensione di
ingresso CC massima. Il produttore declina ogni responsabilità
per danni causati da collegamenti invertiti e tensione
eccessivamente alta.
5. Le stringhe FV non possono essere collegate a terra. Prima di
collegare la stringa FV all'inverter, assicurarsi che la resistenza
d'isolamento minima della stringa FV a terra rispetti i requisiti
previsti per la resistenza d'isolamento minima. R = tensione di
ingresso max./30 mA.
6. I moduli FV utilizzati con l'inverter devono essere di classe A
secondo lo standard IEC 61730.
Sicurezza dell'inverter:
1. La tensione e la frequenza nel punto di collegamento devono
soddisfare i requisiti on-grid.
2. Si raccomanda l'uso di ulteriori dispositivi di protezione sul
lato CA, come interruttori automatici o fusibili. Le speciche
del dispositivo di protezione devono essere di almeno 1,25
volte la corrente di uscita nominale CA.
3. Assicurarsi che le messe a terra siano ssate saldamente. In
presenza di inverter multipli, assicurarsi che il collegamento
di tutti i punti di messa a terra sugli involucri sia di tipo
equipotenziale.
4. Non avviare la funzione BACK-UP se l'impianto FV è senza
batteria. Il produttore declina ogni responsabilità per rischi
causati dalla mancata osservanza di questa norma.
5. Non applicare carichi meccanici ai morsetti, altrimenti
potrebbero danneggiarsi.
6. A installazione conclusa, tutte le etichette e i segnali di
avvertenza devono essere visibili.
Non scarabocchiare, danneggiare o coprire le etichette sul
dispositivo.
7. Non toccare l’apparecchiatura in funzione per evitare
lesioni dovute a temperature superiori ai 60°C. Installare
l'apparecchiatura in un luogo fuori dalla portata dei bambini.
8. Lo smontaggio o la modica non autorizzati possono
danneggiare l'apparecchiatura e i danni non sono coperti dalla
garanzia.
9. Se nelle vicinanze dell'inverter sono presenti apparecchiature
radio o di comunicazione wireless di frequenza inferiore a 30
MHz, è necessario:
• Installare l'inverter ad almeno 30 m dall'apparecchiatura
wireless.
ITALIANO
Precauzioni di sicurezza
1

12
• Aggiungere un ltro EMI passa basso o un nucleo di ferrite
con avvolgimento multi-giro al cavo di ingresso CC o al cavo
di uscita CA dell'inverter.
10. Le etichette di avvertenza sull'inverter sono le seguenti:
PERICOLO ALTA TENSIONE. Scollegare tutte
le alimentazioni e spegnere il prodotto prima
di intervenire.
5min
Scarica ritardata. Dopo lo spegnimento
attendere 5 minuti no a quando i
componenti non saranno completamente
scarichi.
Leggere attentamente la guida prima di
intervenire su questo dispositivo.
Presenza di rischi potenziali. Prima di
eseguire qualsiasi intervento indossare DPI
adeguati.
Pericolo alta temperatura. Non toccare il
prodotto mentre è in funzione per evitare
ustioni.
Punto di messa a terra. Indica la posizione
per il collegamento del cavo PE.
Non smaltire l'inverter come riuto
domestico. Smaltire il prodotto
conformemente alle leggi e alle normative
vigenti a livello locale, oppure rispedirlo al
produttore.
Marchio CE
Sicurezza della batteria:
1. La batteria utilizzata con l'inverter deve essere approvata dal
produttore dell'inverter.
Un elenco delle batterie approvate è scaricabile dal sito web
ufciale.
2. Prima di eseguire l'installazione, leggere attentamente il
manuale d'uso della batteria per familiarizzare con il prodotto
e con le precauzioni di sicurezza. Rispettare rigorosamente i
suoi requisiti.
3. Se la batteria è completamente scarica, effettuarne la ricarica
rispettando rigorosamente quanto descritto nel manuale
d'uso del relativo modello.
4. La corrente della batteria può essere inuenzata da
temperatura, umidità, condizioni metereologiche, ecc. che
possono limitare la corrente e condizionare la capacità di
carico.
5. Se la batteria non può essere avviata correttamente, rivolgersi
immediatamente al servizio di post-vendita. In caso contrario
la batteria subirà danni permanenti.
6. Misurare il cavo CC utilizzando un multimetro per evitare un
collegamento con polarità invertita.
Inoltre la tensione deve essere inferiore al limite ammesso.
7. Per evitare di danneggiare l'inverter, non collegare un pacco
batterie a inverter multipli.
Controllo prima dell'accensione
No. Cosa da controllare
1Il prodotto è ben installato in un luogo pulito, ben
ventilato e facile da usare.
2L'ingresso CC, PE, l'uscita CA e i cavi di comunicazione
sono collegati in modo corretto e sicuro.
3Le fascette di cablaggio sono intatte, posate
correttamente e in modo uniforme.
4 Le porte e i morsetti inutilizzati sono sigillati.
5
La tensione e la frequenza nel punto di collegamento
devono soddisfare i requisiti per il collegamento alla
rete dell'inverter.

13
Dichiarazione di conformità UE
LG Energy Solution, Ltd. dichiara che l'inverter con moduli di
comunicazione wireless venduto sul mercato europeo soddisfa i
requisiti delle seguenti direttive:
• Direttiva europea sulle apparecchiature radio 2014/53/UE
(RED)
• Direttiva restrizione delle sostanze pericolose 2011/65/UE e
(UE) 2015/863 (RoHS)
• Riuti di apparecchiature elettriche ed elettroniche
2012/19/UE
• Registrazione, valutazione, autorizzazione e restrizione delle
sostanze chimiche (CE) n. 1907/2006 (REACH)
LG Energy Solution, Ltd. dichiara che l'inverter senza moduli di
comunicazione wireless venduto sul mercato europeo soddisfa i
requisiti delle seguenti direttive:
• Direttiva compatibilità elettromagnetica 2014/30/UE (EMC)
• Direttiva bassa tensione relativa agli apparecchi elettrici
2014/35/UE (LVD)
• Direttiva restrizione delle sostanze pericolose 2011/65/UE e
(UE) 2015/863 (RoHS)
• Riuti di apparecchiature elettriche ed elettroniche
2012/19/UE
• Registrazione, valutazione, autorizzazione e restrizione delle
sostanze chimiche (CE) n. 1907/2006 (REACH)
Spie LED
Spia Stato Descrizione
L'inverter è alimentato e in
modalità standby.
L'inverter si sta avviando ed è in
modalità autoverica.
L'inverter funziona in
modo normale in modalità
allacciamento alla rete oppure
off-grid.
Sovraccarico in uscita del
BACK-UP.
Si è vericato un guasto.
L'inverter è spento.
La rete presenta un'anomalia e
l'inverter è in modalità off-grid.
La rete funziona normalmente
e l'inverter è in modalità
allacciamento alla rete.
BACK-UP è spento.
Il modulo di monitoraggio
dell'inverter si sta resettando.
L'inverter non riesce a collegarsi
al dispositivo terminale di
comunicazione.
Guasti fra il dispositivo terminale
di comunicazione e il server.
Il monitoraggio dell'inverter
funziona correttamente.
Il modulo di monitoraggio
dell'inverter non è ancora stato
avviato.

14
INTRODUCTION
Product Introduction |Produktvorstellung |
Introducción al producto |Introduzione al prodotto
2
Parts |Teile |Piezas |Componenti
BACK-UP
OFF
COM1
COM2
PV1 PV2
+ +
BAT+ BAT- BMS METER
ON
ON-GRID
① ②③ ④ ⑤ ⑥ ⑦ ⑧ ⑨⑩
⑪
⑫ ⑬
1
Battery Terminal (BAT +/-)
2
BMS Communication Port (BMS)
3
Communication Module Port (COM1)
4
METER Communication Port (METER)
5
Communication Port (COM2)
6
PV Input Terminal (PV1/PV2)
7
DC Switch
8
AC Terminal (BACKUP)
9
AC Terminal (ON-GRID)
10
PE Terminal
BACK-UP
OFF
COM1
COM2
PV1 PV2
+ +
BAT+ BAT- BMS METER
ON
ON-GRID
① ②③ ④ ⑤ ⑥ ⑦ ⑧ ⑨⑩
⑪
⑫ ⑬
11
LED Indicators
BACK-UP
OFF
COM1
COM2
PV1 PV2
+ +
BAT+ BAT- BMS METER
ON
ON-GRID
① ②③ ④ ⑤ ⑥ ⑦ ⑧ ⑨⑩
⑪
⑫ ⑬
12
Mounting Plate
13
Heat Sink
Dimensions |Maße |Dimensiones |
Dimensioni
SYSTEM BACK-UP COM

15
x 1 x N
x 1
x 4
x 1
x 1
x 2
x 1
x 1
x N x 1 x 1
x 1 x 2 x 1
x 3 x 1
x 1
N = Quantity depends on the inverter model.
Space Requirements |
Abstandsanforderungen |
Requisitos de espacio |Ingombro
≥300mm
≥300mm ≥500mm
≥200mm ≥200mm
Children No Touch
Inverter Installation |Wechselrichteraufbau |
Instalació n del inversor |Installazione dell'inverter
3

16
Angle Requirements |
Winkelanforderungen |
Requisitos de ángulo |
Requisiti di angolatura
SYSTEM BACK-UP COM
SYSTEM BACK-UP COM
Installing the Inverter |
Installation des Wechselrichters |
Cómo instalar el inversor |
Installazione dell'inverter
Diameter: 10mm
Depth: 80mm

17
Electrical Connection |Elektroanschluss |Conexión eléctrica |
Allacciamento elettrico
4
PE Cable |PE-Kabel |Cable PE |Cavo PE
Copper, 4mm
2
≤ S ≤ 6mm
2
AC Cable (ON-GRID&BACK-UP) |
Wechselstromkabel (ON-GRID&BACK-UP) |
Cable de CA (ON-GRID y BACK-UP) |
Cavo CA (ON-GRID e BACK-UP)
Supported by SLH-G1-050-GL,SLH-G1-060-GL
3
1
4
65
7
2
0.8N·m
M3
23
4
5
1
10-15mm
12-14mm
Copper, 6mm
2
≤ S ≤ 8mm
2
1
2
1
2
Click
Click

18
DC Cable (PV) |Gleichstromkabel (PV) |
Cable de CC (PV) |Cavo CC (FV)
Click
MC4
4mm2≤S≤6mm2
7~8mm
7~8mm
1
23
4
2
3
4
1
≤ 600V
Click
Click
4mm2≤S≤6mm2
7~8mm
7~8mm
1
23
4
2
3
4
1
≤ 600V
Click
Click
Battery Cable (BAT) |Batteriekabel (BAT) |
Cable de batería (BAT) |Cavo batteria (BAT)

19
9.5-12.5mm
9.5-12.5mm
20mm
2
≤ S ≤ 35mm
2
10mm
10mm

20
Communication Connection |Kommunikationsanschluss |
Conexión de comunicación |Collegamento comunicazione
5
Load Control
1: DO1+
2: N/A
3: DO1-
Remote
Shutdown
4: Remote
Shutdown
5: GND
DI
6: DI+
7: DI-
Generator
8: DO2+
9: DO2-
DRED or RCR
10: COM/DRM0 or REF_1
11: REFGEN or REF_2
12: DRM 4/8 or DI_4
13: DRM 3/7 or DI_3
14: DRM 2/6 or DI_2
15: DRM 1/5 or DI_1
No. Color EMS/PAR
1 Orange and White RS485A (EMS)
2 Orange RS485B (EMS)
3 Green and White NC
4 Blue GND
5 Blue and White CAN_H(PAR)
6 Green CAN_H(PAR)
7 Brown and White BUS1(PAR)
8 Brown BUS2(PAR)
EMS/PAR EMS/PAR
EMS/PAR EMS/PAR
This manual suits for next models
2
Table of contents
Languages:
Other LG Inverter manuals

LG
LG LG N3K-V6 Series User manual

LG
LG LG A1C-V5 Series User manual

LG
LG A005KEEN261 User manual

LG
LG RESU10H Prime User manual

LG
LG MonoX ACe Assembly instructions

LG
LG LG N1C(W)-L5 Series User manual

LG
LG LG S1C-G3 Series User manual

LG
LG RESU16H Prime User manual

LG
LG LGXXXN1T-V5 User manual

LG
LG SIMs 2.0 User manual