manuals.online logo
Brands
  1. Home
  2. •
  3. Brands
  4. •
  5. LI-COR
  6. •
  7. Measuring Instrument
  8. •
  9. LI-COR LAI-2200 User manual

LI-COR LAI-2200 User manual

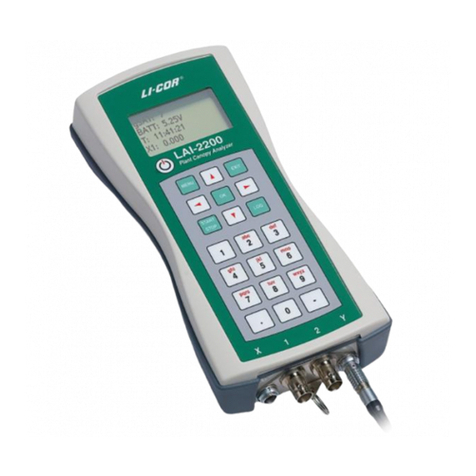
LAI-2200 Clear Sky Kit with GPS
Installation Instructions
This instruction sheet describes how to install the Clear Sky
Kit with GPS Upgrade (p/n 2200CLEAR) in the LAI-2200
Plant Canopy Analyzer.
Note: Some instruments may have different wire colors than
those shown in these instructions. This will not affect the
installation.
Clear Sky Kit with GPS Upgrade Includes
lGPS board (p/n 9922-135)
lGPS flex cable (p/n 388-13760)
lTwo 2-56 screws (p/n 122-10710)
lAnti-static wrist strap (p/n 619-05291)
lTwo light diffuser caps (for use on wands; p/n 6522-117)
lGPS Installation Instructions
lLAI-2200C Instruction Manual
lLAI-2200C Quick Start Guide
Tool Required: # 1 Phillips head screwdriver
Time Required: About 20 minutes
Download Latest Software
If you do not already have the latest versions, upgrade your
console firmware and File Viewer 2200 (FV2200). To check
your console's current firmware version, power on the control
unit, press Menu, and navigate to Firmware > Console > Info.
The latest software is available on the LI-COR website. Use
the FV2200 application on your computer to view and (if
needed) download the latest version of FV2200 and the
latest firmware. Select Help > Check for Software updates
> Show Wand and Console Information. Note where you
saved the new firmware file.
Update Console Firmware
1. After downloading the new firmware file to your com-
puter, attach the LAI-2200 console to the computer
using the USB Type A to USB Type Mini-B cable
included with your instrument (p/n 392-07872).
2. Locate the new firmware file on your computer (console
files end in .img). Copy the new file to the LAI-2200
mass storage device root directory (the drive is labeled
LAI).
3. "Eject" the LAI mass storage device, then disconnect the
LAI-2200 from the computer.
4. Power on the control unit and press Menu. Navigate to
Firmware > Console > Upgrade. Select the new firm-
ware file and press OK. The new firmware will take a
few minutes to install. Press OK when the "Complete"
message is displayed.
Disassembly
1. Power off the instrument. Remove the two screws that
secure the battery cover on the back of the console.
Open battery cover and remove batteries, if installed.
2. On the back of the console at the corners, pull back the
rubber cover and loosen the four corner screws that hold
the top and bottom of the case together. The screws
should remain captive under the gasket. Gently separate
the two halves of the enclosure.
3. Attach the anti-static wrist strap snugly around your
wrist and attach the clip to earth ground (e.g., a com-
puter chassis that is plugged in or other appliance
chassis that is plugged in). This will help prevent dam-
age from static electricity during installation.
4. Disconnect the light sensor and power cable connectors
(circled below) from the main PC board.
LI-COR® Biosciences
4647 Superior Street • Lincoln, Nebraska 68504
TEL: +1-402-467-3576 • FAX: +1-402-467-2819
envsales@licor.com • envsupport@licor.com • www.licor.com/env
Serving United States, Canada, and Mexico.
LI-COR GmbH, Germany • +49 (0) 6172 17 17 771
envsales-gmbh@licor.com • envsupport-gmbh@licor.com
Serving Andorra, Albania, Belarus, Cyprus, Estonia, Germany, Iceland, Latvia, Lithuania,
Liechtenstein, Malta, Moldova, Monaco, San Marino, Ukraine and Vatican City.
Install GPS Board
1. Remove screws from the locations shown and discard.
2. Install the GPS board as shown below, using two 2-56
screws (provided).
3. Install the flex cable as shown below. Open the retainer
clip on connector P3 of the main PC board by pulling up
on the edge of the brown strip. Carefully insert the prin-
ted end of the flex cable with the printed side up. Slide
it under the two small white tabs on either side. Snap
the retainer clip closed. Open the retainer clip on con-
nector P1 of the GPS board. Insert the remaining end of
the flex cable. Snap the retainer clip closed.
Reassembly
1. Reconnect the light sensor and power cable connectors
to the main PC board.
2. Join the top and bottom halves of the control unit. Be
sure the rubber seal is seated properly. Gently tighten all
four case screws. Torque to 4 in.-lb. if using a torque
screwdriver.
Caution: Be careful not to over-tighten the screws as
they may strip or break the plastic.
3. Install four AA batteries and the battery cover. Be sure
to observe proper polarity when installing batteries.
The Installation is complete. For use instructions, please refer
to the LAI-2200C Instruction Manual or Quick Start Guide.
LI-COR Ltd, United Kingdom • +44 (0) 1223 422102
envsales-UK@licor.com • envsupport-UK@licor.com
Serving UK, Ireland, and Scandinavia.
LI-COR Distributor Network:
www.licor.com/env/distributors
PCA-108, rev. 2
01/14

Other LI-COR Measuring Instrument manuals
LI-COR LI-8100 User manual

LI-COR

LI-COR LI-8100 User manual

LI-COR LI-800 User manual

LI-COR

LI-COR LI-800 User manual

LI-COR LI-600 User manual

LI-COR

LI-COR LI-600 User manual

LI-COR LI-800 User manual

LI-COR

LI-COR LI-800 User manual

LI-COR LI-7500 User manual

LI-COR

LI-COR LI-7500 User manual

LI-COR LI-8150 Multiplexer Installation and operating instructions

LI-COR

LI-COR LI-8150 Multiplexer Installation and operating instructions

LI-COR LI-600 User manual

LI-COR

LI-COR LI-600 User manual

LI-COR LI-800 Guide

LI-COR

LI-COR LI-800 Guide

LI-COR LI-7700 User manual

LI-COR

LI-COR LI-7700 User manual

LI-COR LI-3000C User manual

LI-COR

LI-COR LI-3000C User manual

LI-COR LI-830 Guide

LI-COR

LI-COR LI-830 Guide

LI-COR LI-8100A User manual

LI-COR

LI-COR LI-8100A User manual

LI-COR li-6262 User manual

LI-COR

LI-COR li-6262 User manual

LI-COR LI-8100A User manual

LI-COR

LI-COR LI-8100A User manual

LI-COR LI-200R User manual

LI-COR

LI-COR LI-200R User manual

LI-COR LI-7820 User manual

LI-COR

LI-COR LI-7820 User manual
LI-COR LI-3000C Use and care manual

LI-COR

LI-COR LI-3000C Use and care manual

LI-COR LI-250 User manual

LI-COR

LI-COR LI-250 User manual

LI-COR LI-250A User manual

LI-COR

LI-COR LI-250A User manual

LI-COR LAI-2000 How to use

LI-COR

LI-COR LAI-2000 How to use

LI-COR LI-250A User manual

LI-COR

LI-COR LI-250A User manual
LI-COR LI-820 User manual

LI-COR

LI-COR LI-820 User manual

LI-COR LI-820 User manual

LI-COR

LI-COR LI-820 User manual

LI-COR LI-3100C User manual

LI-COR

LI-COR LI-3100C User manual

Popular Measuring Instrument manuals by other brands

Xsens MTi Series Reference manual

Xsens

Xsens MTi Series Reference manual

Hamron 619-622 User instructions

Hamron

Hamron 619-622 User instructions

GE Druck DPI 705 user manual

GE

GE Druck DPI 705 user manual

NIEUWKOOP LX1100 user manual

NIEUWKOOP

NIEUWKOOP LX1100 user manual

palintest Green Drop Kit instructions

palintest

palintest Green Drop Kit instructions

Nibe EMK 270 installation instructions

Nibe

Nibe EMK 270 installation instructions

PCE Instruments PCE-CT 100 user manual

PCE Instruments

PCE Instruments PCE-CT 100 user manual

Kipp & Zonen CMP 3 instruction manual

Kipp & Zonen

Kipp & Zonen CMP 3 instruction manual

VOLTCRAFT VPT-100 operating instructions

VOLTCRAFT

VOLTCRAFT VPT-100 operating instructions

Brigade Backsense BS-9000 Installation & operation guide

Brigade

Brigade Backsense BS-9000 Installation & operation guide

RECO CRAGG RAILCHARGER 520603-2V150 instruction manual

RECO

RECO CRAGG RAILCHARGER 520603-2V150 instruction manual

TESTO 610 instruction manual

TESTO

TESTO 610 instruction manual

Voweek VGR2106 Operation manual

Voweek

Voweek VGR2106 Operation manual

Sequoia LISST-PORTABLE XR manual

Sequoia

Sequoia LISST-PORTABLE XR manual

Autometers Systems HORIZON HT-35 Quick setup guide

Autometers Systems

Autometers Systems HORIZON HT-35 Quick setup guide

Topcon RL-VH3C instruction manual

Topcon

Topcon RL-VH3C instruction manual

PowerSight PS4550 user manual

PowerSight

PowerSight PS4550 user manual

TOTAL Lubmarine Tech'Care user guide

TOTAL Lubmarine

TOTAL Lubmarine Tech'Care user guide

manuals.online logo
manuals.online logoBrands
  • About & Mission
  • Contact us
  • Privacy Policy
  • Terms and Conditions

Copyright 2025 Manuals.Online. All Rights Reserved.