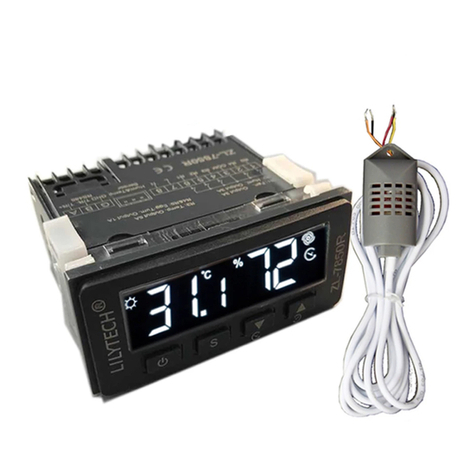
Lily Tech ZL-7918A User manual

ZL-7918A Humidity and Temperature Controller
For Incubator
Feature
ZL-7918A is an intelligent temperature and humidity controller, safe and stable, convenient to operate, applicable for control
of incubator, climate chamber, warehouse, and so on.
Specification
◇ Power supply: 100~240Vac, 50/60Hz.
◇ One temperature sensor (L = 2.0 meter), one humidity sensor (L = 2.0 meter).
◇ Setting range: Humidity 10 ~ 80% RH. Temperature 1 ~ 65℃
◇ Display range: Humidity 0 ~ 99% RH. Temperature -9.9 ~ 99
℃
.
◇ Measuring accuracy: Humidity ±3%@25℃. Temperature ±1%@25℃.
◇ Output control: 7 outputs (main-heater, aux-heater, lamp, humidity, egg-right-turning, egg-left-turning, fan).
◇ Output load: heater ≤ 1500W. Lamp ≤ 100W. Humidity, egg-turning and fan ≤ 1A/250Vac
◇ Hatched day counter: the maximum value is 99 days.
◇ Egg turn control: Turn period: 1 ~ 999 minutes. Turn driving time: 0 ~ 999 seconds. Turn times counter: 0 ~ 999 times.
◇ Air exhaustion control: Period: 1 ~ 999 minutes. Exhausting time: 0 ~ 999 seconds.
◇ Lamp control: Period: 1 ~ 999 minutes. Illuminating time: 0 ~ 999 seconds.
◇ Operation environment: -10 ~ 45℃, less than 90% RH without dew.
◇ Device dimension: 160 * 80 * 95 mm.
◇ Installation drilling size: 151.5 * 76.5 mm.
Version Information
When power supplied, the display shows
the"model “791 8A”, and version "A3.1
Setting and Query
Set temperature and humidity set-point
When temperature set-point (P3) or humidity set-point (P9) has been set, the temperature and humidity control
parameters will be generated automatically and accordingly.
Keeping【Set】depressed for 2 seconds to enter into temperature and humidity set-point setting status.
Press【Enter】to switch between temperature setting status and humidity setting status:
SV window displays “***” + “tt”: temperature setting status.
SV window displays “***” + “HH”: humidity setting status.
Press【▲】or【▼】to set the set-point “***” (Keeping the key depressed can fast set).
Keeping【Enter】depressed for 2 seconds will exit setting status, the settings will be saved, and temperature and
humidity control parameters will be generated automatically and accordingly.
The setting status will exit without saving if there is no key operation for 15 seconds.
Temperature set-point : factory default setting for is 38℃, set range is 1 ~ 65℃.
Humidity set-point: factory default setting is 60%RH, set range is 10 ~ 80%RH.
Set temperature and humidity control parameters
Note: Setting these parameters will change the automatically generated values!
Press【Set】and【▲】simultaneously to enter into temperature and humidity control parameter setting status.
Press【Enter】to select parameter:
SV window displays the selection from “***” + “P0” to “***” + “PP”.
Press【▲】or【▼】to set the value of the parameter (Keeping the key depressed can fast set).
Keeping【Enter】depressed for 2 seconds will exit setting status, the settings will be saved.
The setting status will exit without saving if there is no key operation for 15 seconds.
User Manual
".

Code
Function
Range
Note
Factory Default
P0
High temperature warning point
0 ~ 75℃
38.7
P1
Exhaustion temperature up limit
0 ~ 75℃
Start exhausting for cooling
38.2
P2
Exhaustion temperature low limit
0 ~ 75℃
Stop cooling exhausting
38.0
P3
Main temperature up limit
0 ~ 75℃
Main heater stops heating
38.0
P4
Main temperature low limit
0 ~ 75℃
Main heater starts heating
37.9
P5
Aux temperature up limit
0 ~ 75℃
Aux heater stops heating
37.7
P6
Aux temperature low limit
0 ~ 75℃
Aux heater starts heating
37.5
P7
Low temperature warning point
0 ~ 75℃
37.2
P8
High humidity warning point
0 ~ 99%
70
P9
Humidity up limit
0 ~ 99%
Humidify load stops humidifying
60
Pb
Humidity low limit
0 ~ 99%
Humidify load starts humidifying
55
Pc
Exhaustion humidity up limit
0 ~ 99%
Start ventilation for de-humidifying
65
Pd
Exhaustion humidity low limit
0 ~ 99%
Stop de-humidifying ventilation
60
PE
Over wet exhaustion protection
0/1
0: disable; 1: enable
0
PP
Low humidity warning point
0 ~ 99%
50
Set function control parameter
Press【Set】and【▼】simultaneously to enter into function control parameter setting status.
Press【Enter】to select parameter.
SV window displays the selection from “***” + “F1” to “***” + “FF”.
Press【▲】or【▼】to set the value of the parameter (Keeping the key depressed can fast set).
Keeping【Enter】depressed for 2 seconds will exit setting status, the settings will be saved.
The setting status will exit without saving, if there is no key operation for 15 seconds.
Function control parameter code table:
Code
Function
Range
Note
Factory Default
F1
Egg turn period
1 ~ 999 min
90
F2
Egg turn time
0 ~ 999 sec
0: no egg turning function
180
F3
Egg turn times
0 ~ 999 times
0: turn for ever
0
F4
Air exhausting period
1 ~ 999 min
120
F5
Air exhausting time
0 ~ 999 sec
0: no air exhausting
30
F6
Temperature calibration
-9.9 ~ 9.9℃
0.0
F7
Humidity calibration
-20 ~ 20%
0
F8
Illumination period
1 ~ 999 min
90
F9
Illumination time
0 ~ 999 min
0: no illuminating function
0
FF
Incubated days
0 ~ 99 day
Only clear operation
0
Check Incubated Days and Egg Turned Counter
Press【Enter】and【▲】simultaneously, SV window displays〖incubated days, FF〗“days” + “t1” for 2 seconds.
Press【Enter】and【▼】simultaneously, SV window displays egg-turned-counter “times” + “t2” for 2 seconds.
Control and Operation
On/off operation
Keep【Lamp - I/O】depressed for 2 seconds, controller turns on or off.
Illumination operation
Manual on/off: Press【Lamp - I/O】, lamp turns on or off.
Timer on/off: For every〖Illumination period, F8〗, lamp will be on for〖Illumination time, F9〗.
Temperature control
Main heater: When room temperature ≤〖Main temperature low limit, P4〗, the main heater will be on.
When room temperature ≥〖Main temperature up limit, P3〗, the main heater will be off.
Aux. heater: When room temperature ≤〖Aux temperature low limit, P6〗, the aux. heater will be on.
When room temperature ≥〖Aux temperature up limit, P5〗, the aux. heater will be off.
Temperature and humidity control parameter code table:

Fan: When room temperature ≥〖Exhaustion temperature up limit, P1〗, the fan will be on.
When room temperature ≤〖Exhaustion temperature low limit, P2〗, the fan will be off.
Humidity control
Humidifier: When room humidity ≤〖Humidity low limit, Pb〗, humidity output will be on.
When room humidity ≥〖Humidity up limit, P9〗, humidity output will be off.
Fan: When PE = 1, when room humidity ≥〖Exhaustion humidity up limit, Pc〗, the fan will be on.
When room humidity ≤〖Exhaustion humidity low limit, Pd〗, the fan will be off.
When PE = 0, no protecting exhaustion when over wet.
Egg Turn control
For every〖Egg turn period, F1〗, egg turn output will be on for〖Egg turn time, F2〗.
Egg turn left output and right output will be on alternatively.
1 left turn + 1 right turn = 1 egg-turn. Every egg-turn, egg-turned-counter increases 1.
When egg-turned-counter reaches〖Egg turn times, F3〗, there will be no egg turn, and LED “UP” and “DOWN” will
be blinking.
Fast check the egg-turned-counter: see paragraph at page 2: Check Incubated Days and Egg Turned Counter
Keeping【▲】depressed for 2 seconds can start to force left turning.
Keeping【▼】depressed for 2 seconds can start to force right turning.
Attention: When power supplied, or when controller offline, the egg-turned-counter will be reset to zero.
Exhaustion Timer control
For every〖Air exhausting period, F4〗, the fan will be on for〖Air exhausting time, F5〗.
Alarm control
When room temperature ≥〖High temperature warning point, P0〗, buzzer alarms, room temperature display blinks.
When room temperature ≤〖Low temperature warning point, P7〗, buzzer alarms, room temperature display blinks.
When room humidity ≥〖High humidity warning point, P8〗, buzzer alarms, room humidity display blinks.
When room humidity ≤〖Low humidity warning point, PP〗, buzzer alarms, room humidity display blinks.
The buzzer alarming can be stopped and restored by pressing【Enter】key.
Temperature and humidity calibration
The sensors have tolerance. They can reach to absolute 0.1℃ and 1% RH accuracy by calibration.
Room temperature can be calibrated by setting〖Temperature calibration, F6〗.
Room humidity can be calibrated by setting〖Humidity calibration, F7〗.
Incubated days
〖Incubated days, FF〗records the incubated days.
Fast check〖Incubated days, FF〗: see paragraph at page 2: Check Incubated Days and Egg Turned Counter
〖Incubated days, FF〗is saved even after power supply loses, and it is not cleared after system On/Off.
To make use of the data, it is necessary to clear the record before starting a new batch incubation.
When it reaches to 99, it will not increase any more, and will stay at 99.
Restore to factory setting
Keep【▲】and【▼】depressed simultaneously for 2 seconds, SV window displays “000” + “00”,buzzer beeps, then
release the keys’ pressing, the controller will restore to factory default settings.

LED
On
Blinking
Off
FAN
Fan on during〖Air
exhausting time, F5〗
Fan on, because of temperature and humidity protection exhaustion.
Fan off
HEAT1
Main heater on
Main heater off
HEAT2
Aux. heater on
Aux. heater off
UP
Egg left turning now
Egg-turned-counter has reached〖Egg turn times, F3〗
No left turning
DOWN
Egg right turning now
Egg-turned-counter has reached〖Egg turn times, F3〗
No right turning
WET
Humidifying output on
Humidifying output off
ALARM
Room temperature or humidity is over warning points, or sensor fails
Warning code
Code
Indication
E1
Temperature sensor failure
E2
Humidity sensor failure
E3
Room temperature is higher than〖High temperature warning point, P0〗
E4
Room temperature is lower than 〖Low temperature warning point, P7〗
E5
Room humidity is higher than〖High humidity warning point, P8〗
E6
Room humidity is lower than〖Low humidity warning point, PP〗
Wiring Diagram
Attention
The device is shipped with factory default
setting. It suits for normal hatching
requirements. It is even able to use
directly without any setting for other
parameters. About factory default setting,
see the tables above.
If need to set new temperature and humidity, please operate according to paragraph “Set temperature and humidity
set-point”. The Temperature and humidity control parameters will be generated automatically and accordingly.
If you try to set the Temperature and humidity control parameters, please set them based on understanding to avoid
hatching failure.
Humidity sensor will not work correctly when covered with dust, water or dew. Please keep it clean and dry.
The sensor is suitable to working within 20% to 80%RH.
Before clean sensor, be sure there is no static electricity in hands!
Manufacturer is responsible for the device itself, is not responsible to losses resulted by the failure of this device.
LED indication
Other Lily Tech Temperature Controllers manuals