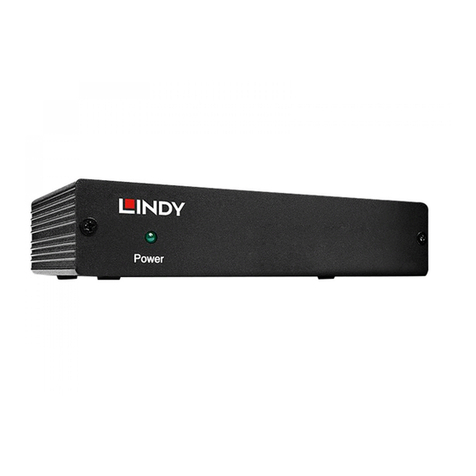
Lindy 32157 User manual

© LINDY ELECTRONICS LIMITED & LINDY-ELEKTRONIK GMBH - FIRST EDITION (December 2013)
USB RS232 Extender Cat.5, 70m
User Manual English
Benutzerhandbuch Deutsch
Manuel Utilisateur Français
Manuale Italiano
No. 32157
www.lindy.com
Tested to Comply with
FCC Standards
For Home and Office Use!


User Manual English
Introduction
Thank you for purchasing the LINDY USB to RS232 Cat.5 Extender, 70m. This device will extend your
RS232 devices up to a distance of 70m using a single Cat.5 (or higher) cable. It provides full-duplex remote
access and control of any RS232 protocol device. The Extender consists of a local Transmitter and remote
Receiver unit that are connected by network cable* providing you with a tremendous amount of flexibility
in your installation.
*network cable not supplied
Package Contents
•LINDY RS232 Extender; Transmitter & Receiver Units
•LINDY CD with drivers for Windows/Mac/Linux
•This manual
Features
•Extends RS232 peripherals up to 70 meters
•Compliant with USB 2.0 & 1.1 specification
•Compatible with RS232 protocols
•Transfer rate over 230kbps
•Bus powered, no external power supply required
•Supported OS: Windows / Mac / Linux
Specification
•Host interface USB
•Supported OS All modern USB enabled OS supported
•Chipset FTDI
•Connectors
oTransmitter - USB Type A Female / RJ45 Female
oReceiver - RJ45 Female / D9 Male
•LEDs
oTransmitter 1 ( Power)
oReceiver 3 ( TX / Power / RX )
•Power Bus powered
•Dimension
(W x D x H )
39 x 66 x 20 mm

User Manual English
Installation
Ensure the relevant drivers are installed before using this product.
Windows and Mac Drivers can be found on the included CD or downloaded from the FTDI website:
www.ftdichip.com/Drivers/VCP.htm, supported device “FT232BL(M)”
If a previous version of this LINDY Product has been installed on your system, drivers for this previous
device need to be uninstalled before installing any new drivers. See Uninstalling section.
Note: When using multiple Extenders on a single system, each Extender must be installed with an
individual driver, i.e. you have to repeat this installation procedure for each Extender you use.
Windows
1. Connect the Transmitter unit to the host computer via USB
2. Windows should automatically install the composite driver for this device. Once the driver has
been installed the Found New Hardware Wizard will launch
3. Click "Next" to proceed with the installation following the Wizard
4. The COM port emulation driver must be installed after this first installation has completed
5. Next connect the transmitter to the receiver with Cat.5 (or higher) cable up to a maximum length of
70m
6. Finally connect the Receiver to your sink equipment via a serial RS232 cable
7. The power LEDs will light up on both the Transmitter & Receiver and the Extender will be ready for
use
Uninstalling Instructions
Note: Uninstalling a device should be done through the Add/Remove utility.
1. Disconnect any parts of the Extender from your computer & equipment
2. Open the Add/Remove Utility located in "Control Panel\Add/Remove Programs”
3. Select "FTDI USB Serial Converter Drivers” from the list of installed programs
4. Click the "Change/Remove" button
5. Click "Continue" to run the Uninstaller or “Cancel” to exit
MAC OS X
1. Download the relevant driver from the VCP Drivers section of the FTDI web site, saving them to
your hard disk
2. The driver will be downloaded as a .dmg. Double clicking on this .dmg icon will start the installation
process

User Manual English
3. Click continue to proceed with the installation, following the instructions on screen. When the
installation is complete, reboot the computer.
4. Once rebooted:
a. Connect the Transmitter unit via USB to the host computer
b. Connect the transmitter to the receiver with Cat.5 (or higher) cable up to a maximum length
of 70m
c. Finally connect the Receiver to your sink equipment via a serial RS232 cable
5. Run System Preferences on the host computer and select Network (Go > Applications > System
Preferences > Network), you should see the text "New Port Detected”
6. Click OK and select Network Port Configurations from the Show dropdown. The new port can be
enabled from this screen by checking the ON box and clicking Apply Now
7. At this point, it is possible to exit Network and use the device as a COM port
If you wish to set the device up a modem for an Internet connection, select the new port from the Show
dropdown, it should be displayed as usbserial-XXXX.
Note: Entries for the following screen are specific to the Internet account of each user contact your ISP
for details.
Uninstalling Instructions
1. Start a Terminal session (Go > Applications > Utilities > Terminal) and enter the following
commands at the command prompt:
cd /System/Library/Extensions
rm -r FTDIUSBSerialDriver.kext
cd /Library/Receipts
rm -r FTDIUSBSerialDriver.kext
2. The driver will then be removed from the system
To remove the port from the system
3. Run System Preferences and select Network. Selecting Network Port Configurations from the
Show menu will display the port as greyed out
4. Select the uninstalled port and click Delete
5. Confirm the deletion to remove the port

Benutzerhandbuch Deutsch
Einführung
Vielen Dank dass Sie sich für den Kauf dieses LINDY USB RS232 Cat.5 Extenders entschieden haben.
Mit diesem Extender können Sie für Ihre RS232-Geräte mithilfe eines Cat.5-Kabels (oder höher) Distanzen
bis zu 70m überbrücken. Der Extender besteht aus einer Sende- und Empfangseinheit, die durch ein
Netzwerkkabel (nicht im Lieferumfang enthalten) verbunden sind und Ihnen somit große Flexibilität bei der
Installation bieten.
Lieferumfang
•LINDY RS232 Extender; Sende- und Empfangseinheit (Transmitter & Receiver)
•LINDY CD mit Treibern für Windows/Mac/Linux
•Dieses Handbuch
Eigenschaften
•Überbrückt Distanzen von RS232-Geräten bis 70m
•Kompatibel mit USB 2.0 & 1.1 Spezifikation
•Kompatibel mit RS232-Protokollen
•Datentransferrate über 230Kbit/s
•Bus powered, kein externes Netzteil erforderlich
•Unterstützte Betriebssysteme: Windows / Mac / Linux
Spezifikationen
•Host interface USB
•Unterstützte Systeme Alle modernen USB Betriebssysteme
•Chipset FTDI
•Anschlüsse
oSendeeinheit - USB Typ A Buchse / RJ45 Buchse
oEmpfangseinheit - RJ45 Buchse / D9 Stecker
•LEDs
oSendeeinheit 1 ( Power)
oEmpfangseinheit 3 ( TX / Power / RX )
•Power Bus powered
•Abmessungen
(B x T x H )
39 x 66 x 20 mm

Benutzerhandbuch Deutsch
Installation
Vergewissern Sie sich, dass die für das Produkt notwendigen Treiber installiert sind, bevor Sie
das Gerät verwenden.
Windows und Mac Treiber finden Sie auf beiliegender CD oder auf der FTDI Homepage:
www.ftdichip.com/Drivers/VCP.htm, supported device “FT232BL(M)”
Sollten Sie eine ältere Version dieses LINDY Produkts installiert haben, so löschen Sie bitte die alten
Treiber bevor sie neue installieren ( -> Deinstallation).
Beachten Sie bitte, falls Sie mehrere Extender in einem System installieren, dassjeder Extender mit einem
eigenen Treiber eingerichtet werden muss, d.h. Sie müssen diesen Installationsprozess für jeden
Extender, den Sie einsetzen, wiederholen.
Windows
1. Schließen Sie die Sendeeinheit an den USB Port des Host Computers an.
2. Windows installiert den Gerätetreiber automatisch; anschließend startet der Assistant für neue
Hardware.
3. Klicken Sie auf "Weiter".
4. Anschließend muss der Emulationstreiber für den COM-Port installiert werden.
5. Verbinden Sie dann Sende- und Empfangseinheit mittels eines Cat.5 (oder höher) Kabels mit
maximal 70m Länge.
6. Zum Schluss verbinden Sie Ihr RS232-Gerät mit einem seriellen RS232-Kabel.
7. Die Power-LEDs werden dann aufleuchten und der Extender ist einsatzbereit.
Deinstallation:
Die Deinstallation sollte über die Systemsteuerung mit dem Dienstprogramm “Software“ über
„Hinzufügen/Entfernen” erfolgen.
1. Trennen Sie alle Geräte des Extenders von Ihrem Computer.
2. Öffnen Sie “Systemsteuerung” und “Software/Programme”.
3. Wählen Sie "FTDI USB Serial Converter Drivers” aus der Liste der installierten Programme aus.
4. Klicken Sie auf "Entfernen".
5. Klicken Sie auf "Weiter" für Deinstallation oder “Abbrechen” zum Beenden.
MAC OS X
1. Laden Sie die VCP-Treiber (Virtual Com Port) von der FTDI Homepage herunter und speichern
Sie sie auf Ihrer Festplatte.
2. Klicken Sie auf das heruntergeladene „dmg“-Symbol, der Installationsprozess wird dann starten.

Benutzerhandbuch Deutsch
3. Folgen Sie den Anweisungen auf dem Bildschirm und starten Sie den Computer nach der
Installation neu.
4. Nach dem Neustart verbinden Sie die Sendeeinheit mittels eines USB-Kabels mit dem Host-
Computer, dann verbinden Sie Sende- und Empfangseinheit über ein maximal 70m langes Cat.5-
Kabel (oder höher). Zum Schluss schließen Sie Ihr RS232-Gerät über ein serielles RS232-Kabel
an den Extender an.
5. Bei den Systemeinstellungen des Host Computers unter „Netzwerk“ wird die neue serielle
Schnittstelle dann angezeigt.
6. Klicken Sie auf OK und wählen die Netzwerk-Port-Konfiguration aus der Dropdown-Liste aus. Der
neue Port kann hier aktiviert werden indem Sie auf “Anwenden” klicken. Sie können nun Ihr RS232-
Gerät über den virtuellen COM-Port verwenden.
Sollten Sie das RS232-Gerät als Modem für eine Internetverbindung verwenden wollen, wählen Sie bitte
den neuen Port aus der Dropdown-Liste (usbserial-XXXX) aus.
Beachten Sie bitte, dassdie folgenden Eingaben abhängig vomjeweiligen Internet Account sind,bezüglich
Details wenden Sie sich daher bitte an Ihren Internet Service Provider.
Deinstallation:
Starten Sie eine Terminalsitzung und geben Sie folgende Befehle ein:
i. cd /System/Library/Extensions
ii. rm -r FTDIUSBSerialDriver.kext
iii. cd /Library/Receipts
iv. rm -r FTDIUSBSerialDriver.kext
Daraufhin wird der Treiber vom System entfernt. Um den Port vom System zu löschen, gehen Sie unter
„Systemeinstellungen“ auf „Netzwerk“. Bei den Netzwerk-Port-Konfigurationen wird der Port dann grau
dargestellt. Wählen Sie diesen aus und löschen ihn.

Manuel Utilisateur Français
Introduction
Merci d’avoir choisi cet extender Cat.5 70m USB vers RS232, de la marque LINDY. Ce produit vous
permettra d’étendre vos périphériques RS232 sur jusqu’à 70m en utilisant un seul câble Cat.5 (ou
supérieur). Il offre un accès distant en full-duplex et le contrôle de tout périphérique compatible avec le
protocole RS232. L’extender se compose d’une unité locale/émetteur (Transmitter) et d’une unité
distante/récepteur (Receiver), qui sont connectées sur une liaison dédiée à l’aide d’un câble réseau (non
inclus), vous permettant ainsi de bénéficier d’une grande flexibilité lors de l’installation.
Contenu
•Extender LINDY RS232; unité locale et distante
•CD LINDY avec pilotes pour Windows/Mac/Linux
•Ce manuel
Caractéristiques
•Etend les périphériques RS232 sur jusqu’à 70 mètres
•Conforme aux spécifications USB 2.0 & 1.1
•Compatible avec les protocoles RS232
•Taux de transfert au-dessus de 230kbit/s
•Alimenté par le Bus, ne nécessite pas d’alimentation externe
•Systèmes d’exploitation pris en charge: Windows / Mac / Linux
Spécification
•Interface hôte USB
•OS pris en charge tous systèmes compatibles USB
•Chipset FTDI
•Connectique
oTransmitter (TX) - USB typeA femelle / RJ45 femelle
oReceiver (RX) - RJ45 femelle / DB9 mâle
•LEDs
oTransmitter 1 ( alimentation)
oReceiver 3 ( TX / alimentation / RX )
•Alimentation alimenté par le Bus
•Dimensions
(L x l x H )
66 x 39 x 20 mm
Installation
Assurez-vous que les pilotes requis sont installés avant d’utiliser ce produit !
Les pilotesWindows et Mac sont disponibles sur le CDfournis outéléchargeables sur le site internet FTDI:
www.ftdichip.com/Drivers/VCP.htm, supported device “FT232BL(M)”
Si une version précédente de ce produit LINDY a déjà été installée sur votre système, vous devrez
procéder à la désinstallation des pilotes avant d’installer cette version. Voir section ‘’Désinstallation’’.
Note: si plusieurs extenders sont utilisés sur un système unique, chaque extender devra être installé avec
un pilote individuel, il vous faudra répéter la procédure d’installation pour chaque extender utilisé.

Manuel Utilisateur Français
Windows
1. Connectez l’unité locale à l’ordinateur hôte en USB
2. Windows devrait automatiquement procéder à l’installation du pilote composite pour ce
périphérique. Une fois le pilote installé l’assistant nouveau matériel détecté devrait démarrer
3. Cliquez sur “suivant” pour procéder à l’installation
4. Le pilote d’émulation de port COM sera installé après la fin de cette installation
5. Connectez ensuite l’émetteur au récepteur avec un câble Cat.5 (ou supérieur) d’une longueur
maximale de 70m
6. Pour finir connectez le récepteur à votre équipement via un câble série RS232
7. Les LED d’alimentation indiqueront sur l’émetteur et le récepteur que l’extender est prêt à être
utilisé.
Instructions de désinstallation
Note: La désinstallation pourra se faire via le menu “désinstaller un programme’’.
1. Déconnectez tous les éléments de l’extender de votre ordinateur & équipement
2. Ouvrez le menu “désinstaller un programme” disponible sous “panneau de configuration /
désinstaller un programme’’
3. Sélectionnez "FTDI USB Serial Converter Drivers” dans la liste des programmes installés
4. Cliquez sur le bouton “Désinstaller”
5. Cliquez sur “Continuer” pour lancer l’utilitaire de désinstallation ou “Annuler” pour en sortir.
MAC OS X
1. Téléchargez les pilotes VCP requis sur le site internet FTDI (voir lien en début de section
installation), en les enregistrant sur votre disque dur
2. Les pilotes seront téléchargés sous forme d’un fichier ‘’.dmg’’. Double cliquez sur cet icone .dmg
pour démarrer le processus d’installation
3. Cliquez sur continuer pour procéder à l’installation, suivez les instructions à l’écran. A la fin de
l’installation, redémarrez votre ordinateur.
4. Une fois l’ordinateur redémarré:
a. Connectez l’émetteur en USB à l’ordinateur hôte
b. Connectez l’émetteur au récepteur via un câble Cat.5 (ou supérieur) d’une longueur
maximale de 70m
c. Pour finir connectez le récepteur à votre équipement via un câble série RS232

Manuel Utilisateur Français
5. Exécutez “Préférences Système” sur l’ordinateur hôte et sélectionnez ‘’Réseau’’, le nouveau port
sera détecté
6. Cliquez sur OK et sélectionnez Configuration port réseau dans le menu déroulant. Le nouveau
port peut être activé à partir de cette fenêtre en cochant ON et en cliquant sur ‘’Appliquer’’
7. Vous pouvez à présent quitter le menu ‘’Réseau” et utiliser le périphérique comme port COM
Si vous souhaitez utiliser le produit comme un modem pour une connexion Internet, sélectionnez le
nouveau port dans le menu déroulant, il s’affichera sous usbserial-XXXX.
Note: la configuration pour cette connexion est dépendante de votre compte internet, merci de vous
rapprocher de votre FAI pour plus de details.
Instructions de désinstallation
•Démarrer une session Terminal et entrez les commandes suivantes à l’invite de commande:
cd /System/Library/Extensions
rm -r FTDIUSBSerialDriver.kext
cd /Library/Receipts
rm -r FTDIUSBSerialDriver.kext
•Le pilote sera désinstallé du système
Pour retirer le port du système
•Démarrer “Préférences Systeme’’ et sélectionnez ‘’Réseau’’. Sélectionnez “Configurations port
réseau’’ dans le menu, celà affichera le port sous la forme grisée
•Sélectionnez le port et cliquez sur effacez
•Confirmez pour retirer le port

Manuale d’uso Italiano
Introduzione
Grazie per aver acquistato l’Extender
LINDY USB a RS232 Cat.5,
che vi permetterà di estendere il
controllo di qualsiasi periferica Seriale RS232 fino a 70m di distanza
utilizzando un unico cavo Cat.5
(o superiore)
. Questo dispositivo supporta trasmissioni full duplex e segnali handshake senza nessuna
complicata procedura di configurazione.
L'Extender è composto da un trasmettitore e un ricevitore remoto, collegati tramite cavo di rete
consentendo una molteplicità di installazioni.
Contenuto della confezione
•Extender LINDY RS232: Transmitter & Receiver
•CD LINDY con drivers for Windows/Mac/Linux
•Questo manuale
Caratteristiche
•Extends RS232 fino a 70 metri
•Compatibile con le specifiche USB 2.0 & 1.1
•Compatibile con I protocolli RS232
•Velocità di trasferimento 230kbps
•Bus alimentato, non è richiesto nessun alimentatore esterno
•Sistemi operativi supportati: Windows / Mac / Linux
Specifiche
•Host interface USB
•Sistemi supportati: tutti i sistemi operativi moderni
•Chipset FTDI
•Connettori
oTransmitter - USB Tipo A Femmina / RJ45 Femmina
oReceiver - RJ45 Femmina / D9 Maschio
•LEDs
oTransmitter 1 ( Power)
oReceiver 3 ( TX / Power / RX )
•Power Bus powered
•Dimensioni: (L x P x A) 39 x 66 x 20 mm
Installazione
Assicurarsi che I drivers siano installati prima dell’utilizzo del prodotto.
Windows e Mac Drivers sono inclusi nel CD or scaricabili dal sito FTDI:
www.ftdichip.com/Drivers/VCP.htm, device supportato “FT232BL(M)”
Se una versione precedente di questo prodotto LINDY è stata installata nel sistema, occore disinstallare i
driver precedentemente installati, prima di installare i nuovi drivers.
Nota: Utilizzando multipli Extenders su un singolo sistema, ciascun Extender deve essere installato con
una procedura separate, pertanto saà necessario installare I drivers per ciascun extender.

Manuale d’uso Italiano
Windows
1. Collegare il Transmitter alla porta USB del computer
2. Windows dovrebbe automaticamente installare il driver. Successivamente all’installazione dei
drivers, la maschera di Trovato Nuovo Hardware si aprirà
3. Premere "Avanti" per procedere all’installazione
4. Il driver della porta COM in emulazione dovrà esser installato successivamente a questa prima
installazione
5. Collegare quindi il Receiver al Transmitter con un cavo Cat.5 (o categoria superiore) fino ad
una distanza massima di 70m
6. Infine collegare la porta RS232 del Receiver alla periferica seriale
7. I LED di power si accenderanno e l’Extender sarà pronto per l’uso
Procedura di disinstallazione
Nota: La disinstallazione si deve eseguire dalla finestra di Aggiungi/Rimuovi Programmi.
1. Scollegare l’Extender dal computer e dalla periferica
2. Aprire la maschera di Aggiungi/Rimuovi Programmi dal pannello di controllo
3. Selezionare "FTDI USB Serial Converter Drivers” dalla lista di programmi installati
4. Premere su "Cambia/Rimuovi"
5. Premere "Continua" per eseguire la disinstallazione o “Cancella” per uscire
MAC OS X
1. Scaricare i driver dalla sezione VCP Drivers del sito FTDI, salvarli sull’hard disk
2. Il driver verrà scaricato con l’estensione .dmg. Doppio cliccare sull’esecutivo .dmg ed iniziare la
procedura di installazione
3. Premere su “Continua” eseguire le istruzioni guidata d’installazione, alla fine del processoriavviare
il computer.
4. Dopo il riavvio:
a. Collegare il Transmitter alla porta USB del computer
b. Collegare quindi il Receiver al Transmitter con un cavo Cat.5 (o categoria superiore) fino
ad una distanza massima di 70m
c. Infine collegare la porta RS232 del Receiver alla periferica seriale
d. I LED di power si accenderanno e l’Extender sarà pronto per l’uso

Manuale d’uso Italiano
5. Andare nella finestra delle Preferenze di Sistema del computer e selezionare Network, si dovrebbe
trovare "Nuova Porta Rilevata”
6. Premere OK e selezionare la Network Port Configurations. La nuova porta può essere attivata
spuntando l’ON e premendo su Applica
7. A questo punto il devide è pronto per l’uso
Procedura di disinstallazione
•Avviare una Terminal Session (Go > Applications > Utilities > Terminal) ed eseguire I seguenti
comandi:
cd /System/Library/Extensions
rm -r FTDIUSBSerialDriver.kext
cd /Library/Receipts
rm -r FTDIUSBSerialDriver.kext
•Il driver verrà rimosso dal sistema
Per la rimozione della Porta dal sistema
•Avviare le Preferenze di Sistema e selezionare Network. Selezionando la Configurazione delle
Porte Network apparirano le porte attive
•Selezionare la porta da eliminare, doppio cliccare ed eliminarla
•Confermare la rimozione della porta

CE/FCC Statement
CE Certification
This equipment complies with the requirements relating to Electromagnetic Compatibility Standards
EN55022/EN55024 and the further standards cited therein. It must be used with shielded cables only.
It has been manufactured under the scope of RoHS compliance.
CE Konformitätserklärung
Dieses Produkt entspricht den einschlägigen EMV Richtlinien der EU für IT-Equipment und darf nur
zusammen mit abgeschirmten Kabeln verwendet werden.
Diese Geräte wurden unter Berücksichtigung der RoHS Vorgaben hergestellt.
Die formelle Konformitätserklärung können wir Ihnen auf Anforderung zur Verfügung stellen
FCC Certification
This equipment has been tested and found to comply with the limits for a Class B digital device, pursuant
to part 15 of the FCC Rules. These limits are designed to provide reasonable protection against harmful
interference in a residential installation.
You are cautioned that changes or modification not expressly approved by the party responsible for
compliance could void your authority to operate the equipment.
This device complies with part 15 of the FCC Rules.
Operation is subject to the following two conditions:
1. This device may not cause harmful interference, and
2. This device must accept any interference received, including interference that may cause undesired
operation.
LINDY Herstellergarantie – Hinweis für Kunden in Deutschland
LINDY gewährt für dieses Produkt über die gesetzliche Regelung in Deutschland hinaus eine zweijährige Hersteller-
garantie ab Kaufdatum. Die detaillierten Bedingungen dieser Garantie finden Sie auf der LINDY Website aufgelistet
bei den AGBs.

Recycling Information
WEEE (Waste of Electrical and Electronic Equipment),
Recycling of Electronic Products
Europe, United Kingdom
In 2006 the European Union introduced regulations (WEEE) for the collection and recycling of all waste electrical
and electronic equipment. It is no longer allowable to simply throw away electrical and electronic equipment. Instead,
these products must enter the recycling process.
Each individual EU member state has implemented the WEEE regulations into national law in slightly different ways.
Please follow your national law when you want to dispose of any electrical or electronic products. More details can
be obtained from your national WEEE recycling agency.
Germany / Deutschland
Die Europäische Union hat mit derWEEE Direktive Regelungen für die Verschrottung und das Recycling von Elektro-
und Elektronikprodukten geschaffen. Diese wurden im Elektro- und Elektronikgerätegesetz – ElektroG in deutsches
Recht umgesetzt. Dieses Gesetz verbietet das Entsorgen von entsprechenden, auch alten, Elektro- und
Elektronikgeräten über die Hausmülltonne! Diese Geräte müssen den lokalen Sammelsystemen bzw. örtlichen
Sammelstellen zugeführt werden! Dort werden sie kostenlos entgegen genommen. Die Kosten für den weiteren
Recyclingprozess übernimmt die Gesamtheit der Gerätehersteller.
France
En 2006, l'union Européenne a introduit la nouvelle réglementation (DEEE) pour le recyclage de tout équipement
électrique et électronique.
Chaque Etat membre de l’ Union Européenne a mis en application la nouvelle réglementation DEEE de manières
légèrement différentes. Veuillez suivre le décret d’application correspondant à l’élimination des déchets électriques
ou électroniques de votre pays.
Italy
Nel 2006 l’unione europea ha introdotto regolamentazioni (WEEE) per la raccolta e il riciclo di apparecchi elettrici ed
elettronici. Non è più consentito semplicemente gettare queste apparecchiature, devono essere riciclate. Ogni stato
membro dell’ EU ha tramutato le direttive WEEE in leggi statali in varie misure. Fare riferimento alle leggi del proprio
Stato quando si dispone di un apparecchio elettrico o elettronico.
Per ulteriori dettagli fare riferimento alla direttiva WEEE sul riciclaggio del proprio Stato.
LINDY No 32157
1
st
Edition, December 2013
www.lindy.com
Tested to Comply with
FCC Standards
For Home
and Office Use!
Table of contents
Languages:
Other Lindy Extender manuals

Lindy
Lindy 39382 User manual

Lindy
Lindy 38105 User manual

Lindy
Lindy 38403 User manual

Lindy
Lindy HDMI & IR CAT6 Extender Pro User manual

Lindy
Lindy 382257 User manual

Lindy
Lindy 38126 User manual

Lindy
Lindy 42680 User manual

Lindy
Lindy 42674 User manual

Lindy
Lindy 32158 User manual

Lindy
Lindy 43365 User manual