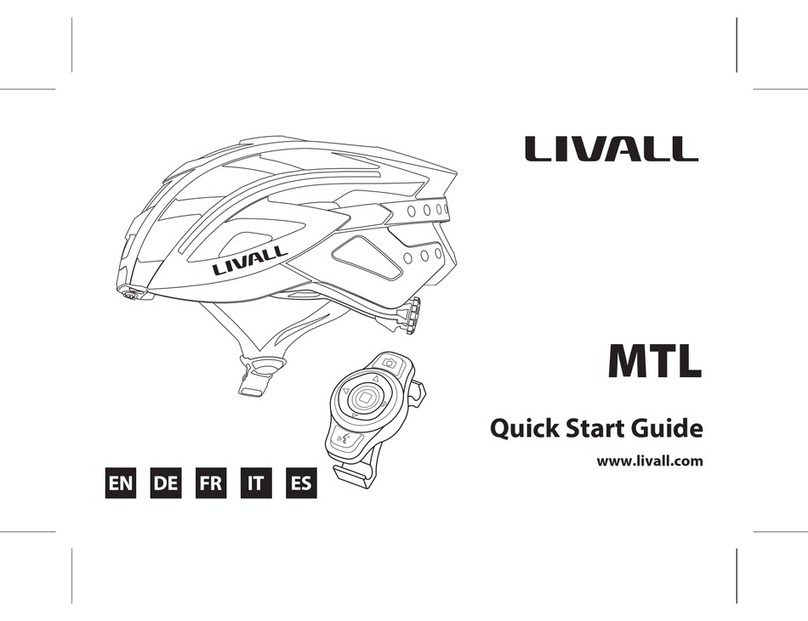
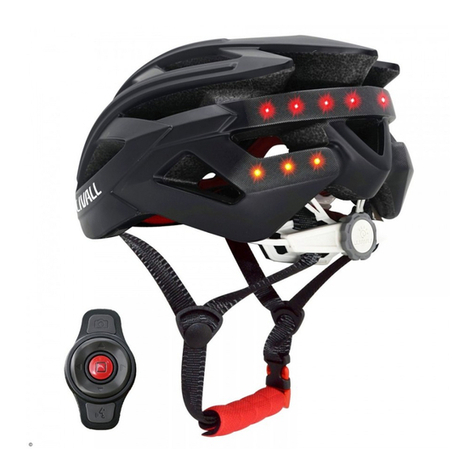
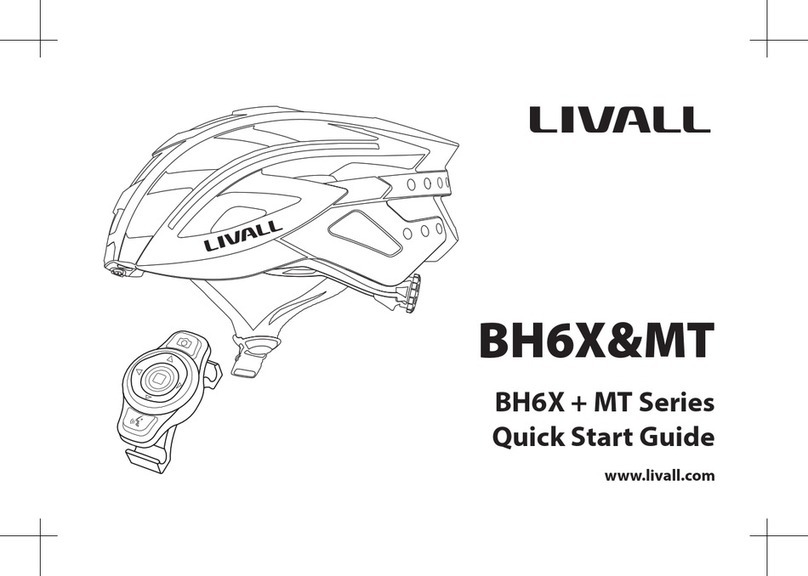
Livall BH6X Neo User manual

www.livall.com
BH6X&MT
BH6X&MT Neo
Smart cycling helmets
Quick Start Guide

1
I.Introduction
Welcome to the User Guide for LIVALL smart cycling helmets. This Guide will help you better use this product. With
continuous improvements of our products, this Guide will be updated from time to time. You can access the latest
version and learn more about the helmet on www.livall.com.
Note: 1.The picture is for reference only. If the actual product appears dierent from the picture, the real product shall prevail.
2. Due to dierent version, some control unit use "<"and ">" buttons, some may use "+" and "-" buttons, both represent the
same function.
(A few models are not equipped with remote controller due to dierent congurations of the products.)
" > "Button " > "Button
Microphone
"□"Button
" < "Button " < "Button
Charging port
Speaker
Speaker
Tail light
Front
Main control Front chinstrap
Rear chinstrap
Adjustment knob
Buckle
Back
II. Packing List
Helmet x 1 Quick Start Guide x 1 Bling remote controller x 1
Magnet USB charging cable x 1 Important Information and Warranty Card x 1

2
III. Wearing Instructions
IncorrectIncorrect Correct
Adjust the length of
the chinstrap Leave a gap as thick
as one nger Correctly position
the helmet Check whether the
buckle is properly
fastened

3
IV. Operating Instructions(Please charge the battery before use.Some models of helmets are not equipped with
Bluetooth speakers. The helmets without Bluetooth speakers could not take & make calls, listen to music and hear voice prompts.)
Start-Up
POWER ON"□" function button
" < " button " < " button " > " button
Press the " □" button for
3-to-5 seconds
First hold the "<" button Then press the ">" button to
switch between languages.
You will hear a voice saying
"POWER ON".
This device is successfully
powered up when the rear lights
come on.
Change the language of the voice
prompt
(the default language is English)
To switch the language of the voice
prompt, follow the procedure
below when in normal standby
mode and disconnected from a
phone(currently only English and
Chinese are supported).

4
Two "beeps"
"□" function button
Turn on the device, which should
be within 5 meters of the helmet.
It will automatically connect the
helmet.
Place a device that is already ON
near the helmet's main control.
After the connection is established, it
will be conrmed with two "beeps".
(The helmets without Bluetooth
speakers could not hear such voice
prompts. Please check the taillight to see
if the helmet is connected successfully.)
When the warming light flashes
and the helmet speakers emit two
"beeps", it indicates that there is a
device nearby requiring connection
to the helmet.(The helmets without
Bluetooth speakers could not hear
such voice prompts.)
Connecting for the rst time or switching devices(Please refer to specic functions of the helmet when using the
remote controller keys.)
≤5m
1. Connecting for the rst time
One helmet can be connected to up to three LIVALL-authorized devices at the same time. After the handlebar
remote control is connected, press the "left" or "right" button to control the helmet’s corresponding indicator light.
2. Replacing device
Press the " □" button on the helmet
within 10 seconds after you hear
the beeps and conrm connection
to the device.When pressing the
arrow left or right key on the bling
jet remote, the right or left turning
signal appears.
Two "beeps"

5
Connect to the phone (Tip: Once connected, it can control the music player as well as make and receive calls. To ensure
the stability of the connection, please try to position your mobile phone in front of you.)
Helmet Headset
"Click to
connect"
"Pairing..."
"□" function
button
When the device is o, press and
hold the " □" button until you
hear the "Pairing..." sound.
After the connection is completed, you can play music as well as make and answer calls as follows
To Play/Pause Music: Press the " □" button on the helmet or the handlebar remote control to play/pause music.
Adjust Volume: When calls are made or music is played, press the "</>" buttons on the helmet to adjust the
speaker volume.
Previous Song/Next Song: Press the "up/down" buttons on the handlebar remote control or press and hold "</>" buttons on
the helmet to cycle through the music.
Answer/Reject Calls: When there's an incoming call, press the " □" button to answer the call or press and hold to
hang up.
Dial Back: Two quick presses of the " □" button on the handlebar remote control or helmet to redial
the last outgoing call.
Swith on the Bluetooth on your
phone and scan for the "Helmet
Headset" device.
Click to connect. The speakers
on both sides will make the
"Connected" sound when the
connection is completed.
"Connected"

6
Power O
"POWER OFF"
"□" function button
Press and hold the " □" function
button for 3 seconds. You will hear "POWER OFF".(The
helmets without Bluetooth speakers
could not hear such voice prompts.)
This device is successfully
powered down when the rear
lights go o.
Charging
To charge
Plug the USB charging cable into
the USB port on the helmet. The
tail charging light is illuminated
in red, indicating that the helmet
is being charged.
Charging time
It is recommended that the
power of the charger is no less
than 0.5A. Charging time takes
about 3hours.
Charging complete
When the charging indicator
light turns o, it indicates that
charging is complete.
USB port Red light
0.5A 3 HRS

7
Tip:
To ensure signal stability for connection, please try not to place your mobile phone right against your body.
Instructions for Bling remote controller
Photo-shooting
Direction-Left
Confirm
Intercom
Direction-up
Direction-Right
Direction-bottom
Press photo-shooting button one time to pull up camera mode on your
smartphone. You will see the camera mode pop up. Press photo-shooting
button again to snap a photo. (Make sure to be connected to LIVALL App)
Press direction-up key one time to increase volume. Hold down direction-up
key to play previous song.
Press the direction-right key to signal turn right.
Press the conÞrmation key (middle key) to play/pause music and answer/
end incoming calls. Hold down the conÞrmation key to reject incoming calls.
Double click the conÞrmation key to make a phone call from the last dialing out
number on your smartphone.
Press direction-down key one time to decrease volume. Hold down direction-
down key to play next song.
Hold down the intercom key to communicate your message with team riders.
(Make sure to be connected to LIVALL App to enter the Grouping mode)
Press the direction-left key to signal turn left.
Connect LIVALL Riding phone App
(for use the Walkie-Talkie function and take photos) For Android: Start LIVALL Riding. The App
will automatically connect to the helmet;
For IOS: Follow LIVALL Riding guide to connect
to the helmet.
Only if the helmet is successfully connected
to LIVALL App, SOS alert feature and LED light
indicators can work.

8
Tip:
To ensure signal stability for connection, please try not to place your mobile phone right against your body.
V. Considerations
1. The helmet contains electronic parts inside. Please do not take a long ride in the rain although the helmet can
prevent the rain from splashing.
2. After the helmet gets wet in the rain, the water droplets might occur in the chimney of tail LED lights. The water
droplets will disappear when you put the helmet under the ventilation environment for 1-2 days.
3. The helmet contains the battery of 3.7V/450mAh. The battery capacity varies with temperature change. The
battery life can decay when the helmet is used at low temperatures or below Zero degrees Celsius.
Functions BH6X Neo MT1 Neo BH6X MT1 MTL
Smart Warning Lightings ●●●●●
LED Turn Signals ●●●●●
Make a Call Via Bluetooth ●●●●
Listen to Music Via Bluetooth ●●●●
PTT Walkie-Talkie ●●●●
SOS Alert ●●●●●
Brake warning lights ● ●
Auto-o ● ●
Anti-loss alarm ● ●
Kind Reminder: Please refer to the Quick Start Guide for more details about the functions.

9
LIVALL Riding App
LIVALL ON FACEBOOK
Temperature: Storage Temperature: -20°C ~45°C. Temperature for use: 0°C~40°C. Temperature while charging: 0°C~40°C.
Charging port : Magnet USB Charging cable Charging time : 3 hours
Electricity parameter : DC 5V/0.5A
Battery life : The max. battery life of the light is 10 hours. Listening time for music is 3-to-6 hours.
Notes: The above data is measured by LIVALL in a controlled environment, with room
temperature at 25°C, specic light patterns and smartphone volume at 60%. The data may vary
according to the environment.
VI. Technical Specications
1. Problems such as network anomalies, may result in the failure to successfully send or receive SOS
messages.
2. To maintain ecient battery life, it is recommended that the helmet be fully charged before any long-
term storage (six months to one year).
4. Trying to clean the golden colour contacts of the charging plug sheet with metal or hard tools such as blades or
tweezers is strictly forbidden. Please use cotton swabs with clean water or alcohol in case of cleaning. Please make sure
the charging plug is clean and try while charging the helmet.
5. If the electronic functions do not work, please charge the helmet for 3 hours and then check if it works normally.
6. The helmet contains impact detection devices. Only if you connect your helmet with LIVALL App, start ride mode
on the App and your helmet suers from the heavy impact, SOS alert feature can be triggered.Your emergency
contacts set on LIVALL App can accordingly receive your SOS messages.
Note:
Performance standards:
• USA: CPSC1203:1998, FCC Part 15 Rules
• Europe: EN 62479:2010, EN 301 489-1 V1.9.2 (2011-09), EN 301 489-17 V2.2.1 (2012-09),
EN 300 328 V1.8.1 2012-06, EN 60950-1:2006+A11:2009+A1:2010+A12:2011
• Australia: AS/NZS 2063:2008+A1:2009, AS/NZS CISPR 22:2009+A1:2010, AS/NZS 4268:
2012+A1:2013, Radiation Protection Series Publication No. 3
10
LIVALL's website : www.livall.com
• That the helmet can only protect if it ts well and that the buyer should try dierent sizes and choose the size
which feels secure and comfortable on the head.
• That the helmet should be adjusted to t the user e.g. the straps positioned so that they do not cover the ears,
the buckle positioned away from the jawbone and the straps and buckle adjusted to be both comfortable
and rm.
• How the helmet should be position on the head to ensure the intended protection is provided (e.g. that it
should be placed so as to protect the forehead and not be pushed too far over the back of the head.
• That a helmet cannot always protect against injury.
• That a helmet subjected to a severe impact should be discarded and destroyed.
• A statement of the danger of modifying or removing any of the original component parts of the helmet other
than as recommended by the manufacturer, and that helmets should not be adapted for the purpose of
tting accessories in a way not recommended by the manufacturer
During the usage, if the following troubles occur, please charge the product according to quick guide of the
model(the helmet can be reset during the charging). If the problems still can not be solved, please contact the
Faults:
1. Can not be charged or turn-o normally;
2. The helmet is turn on, but the lights, micphone, speakers etc can not work normally;
3. After power on, it turns o automatically in a short time.
Note: Please refer to the quick guide of the specic model for function details.
VII. Electronic functions troubleshooting

11
I. Einleitung
Willkommen zum Benutzerhandbuch für LIVALL Smart-Fahrradhelme. Dieses Handbuch hilft Ihnen bei der besseren
Verwendung dieses Produkts. Mit ständigen Verbesserungen unserer Produkte wird dieser Leitfaden von Zeit zu Zeit
aktualisiert. Sie können auf die neueste Version zugreifen und auf www.livall.com mehr über den Helm erfahren.
Hinweis: Das Bild dient nur als Referenz. Wenn das Produkt vom Bild abweicht, ist das Produkt maßgebend.
" > " Taste " > " Taste
Mikrofon
"□" Taste
" < " Taste " < " Taste
Ladeanschluss
Lautsprecher
Lautsprecher
Rückleuchte
Vorderseite
Hauptsteuerung
Vorderer Kinnriemen Hinterer Kinnriemen
EinstellknopfSchließe
Rückseite
II. Packungsinhalt(Einige Modelle sind aufgrund der unterschiedlichen Kongurationen der Produkte nicht mit einer
Fernbedienung ausgestattet.)
Helm x 1 Kurzanleitung x 1 Lenker-Fernbedienung x 1
Magnetisches USB Ladekabel x 1 Wichtige Informationen und Garantiekarte x 1

12
III. Trageanleitung
FalschFalsch Richtig
Helm richtig positionieren Überprüfen, ob die Schließe
richtig geschlossen ist
Länge des Kinnriemens
anpassen
Fingerbreiten Abstand
bestehen lassen

13
IV. Bedienungsanleitung(Bitte laden Sie die Batterie vor dem Gebrauch.Einige Modelle von Helmen sind nicht
mit Bluetooth-Lautsprechern ausgestattet. Mit diesem Helm können Sie keine Anrufe annehmen oder tätigen, Musik- und
Sprachansagen hören.)
Start
POWER ON"□" Funktionstaste
" < " Taste " < " Taste " > " Taste
Halten Sie die Taste " □ " 3
bis 5 Sekunden gedrückt.
Halten Sie zuerst die "<" Taste
gedrückt.
Drücken Sie anschließend die
Taste ">", um zwischen den
Sprachen zu wechseln.
Die Sprachansage "POWER ON"
ist zu hören.
Dieses Gerät wird erfolgreich
eingeschaltet, wenn die
Rückleuchten aueuchten.
Ändern der Sprache für die Ansage
(die Standardsprache ist Englisch)
Folgen Sie den nachfolgenden
Anweisungen, um die Sprache der
Ansage zu ändern, wenn der Helm
sich im normalen Standby-Modus
bendet und vom Smartphone
getrennt ist ((zurzeit werden
nur Englisch und Chinesisch
unterstützt).

14
Zwei "Signaltöne"
"□" Funktionstaste
Schalten Sie das Gerät ein, das sich
in einem Umkreis von 5 Metern
vom Helm benden muss. Es
wird automatisch mit dem Helm
verbunden.
Platzieren Sie ein Gerät, das bereits
eingeschaltet ist, in der Nähe der
Hauptsteuerung des Helms.
Nachdem die Verbindung hergestellt
ist, wird dies mit zwei "Signaltönen"
bestätigt.(Die Helme ohne Bluetooth-
Lautsprecher konnten solche Sprachansagen
nicht hören. Bitte überprüfen Sie das Rücklicht,
um zu sehen, ob der Helm erfolgreich
angeschlossen ist.)
Wenn die Kontrollleuchte blinkt und die
Helm-Lautsprecher zwei "Signaltöne"
abgeben, bedeutet dies, dass sich ein Gerät
in der Nähe bendet, für welches eine
Verbindung zum Helm hergestellt werden
muss.(Die Helme ohne Bluetooth-Lautsprecher
konnten solche Sprachansagen nicht hören. )
Erste Verbindung oder Wechsel der Geräte(Bitte beachten Sie die spezischen Funktionen des Helms, wenn Sie die Tasten
der Fernbedienung verwenden.)
≤5m
1. Erste Verbindung
Ein Helm kann gleichzeitig mit bis zu drei von LIVALL autorisierten Geräten verbunden werden. Nachdem die
Lenker-Fernbedienung verbunden wurde, drücken Sie die Taste "Pfeil links" oder "Pfeil rechts", um die entsprechende
Kontrollleuchte des Helms zu steuern.
2. Wechsel des verbundenen Geräts
Drücken Sie die Taste " □" auf dem Helm
innerhalb von 10 Sekunden nach dem
Erklingen der Signaltöne und bestätigen
Sie die Verbindung zum Gerät. Wenn Sie
die Pfeiltasten nach links oder rechts auf
der Bling-Jet-Fernbedienung drücken,
wird der Blinker angezeigt.
Zwei "Signaltöne"

15
Verbindung zum Smartphone (Tipp: Sobald eine Verbindung besteht, können Sie die Musikwiedergabe steuern und Anrufe tätigen
und entgegennehmen. Um die Stabilität der Verbindung zu gewährleisten, versuchen Sie, Ihr Mobiltelefon vor sich zu platzieren.)
Helmet Headset
"Click to
connect "
"Pairing…"
"□"
Funktionstaste
Wenn das Gerät ausgeschaltet ist,
halten Sie die Taste " □" gedrückt,
bis Sie den Ton "Pairing... " hören.
Nachdem die Verbindung hergestellt ist, können Sie Musik abspielen sowie auf folgende Weise Anrufe tätigen:
Wiedergabe von Musik/Pause: Drücken Sie die Taste " □" am Helm oder der Lenker-Fernbedienung, um Musik
wiederzugeben/zu unterbrechen.
Einstellung der Lautstärke: Wenn Anrufe getätigt werden oder Musik wiedergegeben wird, drücken Sie die
Tasten "</>" am Helm, um die Lautstärke anzupassen.
Vorheriger Titel/Nächster Titel: Halten Sie die "Auf/Abwärts"-Tasten der Lenker-Fernbedienung oder die Tasten
"</>" am Helm gedrückt, um zwischen Musikstücken zu wechseln.
Anrufe annehmen/ablehnen: Bei einem eingehenden Anruf drücken Sie die Taste " □", um den Anruf
anzunehmen oder halten Sie diese Taste gedrückt, um den Anruf abzulehnen.
Rückruf: Drücken Sie zweimal schnell die Taste " □" an der Lenker-Fernbedienung oder am
Helm, um die zuletzt gewählte Nummer erneut anzurufen.
Schalten Sie auf Ihrem
Smartphone Bluetooth ein und
suchen Sie nach dem Gerät
"Helm-Headset".
Für Verbindung klicken Die
Lautsprecher auf beiden Seiten
geben einen Ton für "Connected"
ab, wenn die Verbindung
hergestellt wurde.
"Connected"

16
Ausschalten
"POWER OFF"
"□" Funktionstaste
Halten Sie die Taste " □" 3
Sekunden gedrückt. Der Ton "POWER OFF" ist zu hören.
(Die Helme ohne Bluetooth-Lautsprecher
konnten solche Sprachansagen nicht
hören. )
Dieses Gerät wird erfolgreich
ausgeschaltet, wenn die
Rücklichter ausgehen.
Auaden
Auaden:
Verbinden Sie das USB-Ladekabel
mit dem USB-Anschluss am
Helm. Die Rück- und Ladeleuchte
leuchtet rot. Dies zeigt an, dass
der Helm aufgeladen wird.
Ladedauer:
Das Ladegerät sollte einen
Mindestladestrom von 0,5A
haben. Die Ladezeit beträgt etwa
3 Stunden.
Ladevorgang abgeschlossen:
Wenn die Rück- und Ladeleuchte
erlischt, zeigt dies an, dass der
Ladevorgang abgeschlossen ist.
USB-
Anschluss Rote
Leuchte
0.5A 3 HT

17
Verbinden Sie die LIVALL Riding Smartphone-App, um die Walkie-Talkie-Funktion zu verwenden und Fotos
aufzunehmen.
Für Android: Starten Sie die App LIVALL
Riding. Die App stellt die Verbindung zum
Helm automatisch her.
Für IOS: Folgen Sie den Anweisungen von
LIVALL Riding für die Verbindung zum Helm.
Der SOS-Alarm und die Richtungsanzeigen funktionieren nur bei einem korrekt, mit der Livall-App, verbundenem
Helm.
Tip: Um eine sichere Signalverbindung zu gewährleisten tragen Sie ihr Smartphone bitte nicht direkt an ihrem Körper.
Anleitung für die“Bling-Remote”Fernbedienung
Foto-aufnehmen
Taste Links
Taste Mitte
Walkie Talkie Taste
Taste nach oben
Taste Rechts
Taste nach unten
Drücken Sie einmal auf den Foto-Knopf der Fernbedienung. Dies schaltet den
Kamera-Modus ihres Smartphons ein. Ein erneuter Druck auf die Taste nimmt
das Bild auf (Hierzu müssen Sie mit der LIVALL App verbunden sein)
Ein kurzer Druck auf diese Taste erhöht die Lautstärke, ein langer Druck schaltet
weiter auf den vorherigen Song.
Blinker rechts.
Blinker links.
Ein Druck auf die mittlere Taste schaltet zwischen Play /Pause bei der
Musikwiedergabe oder zwischen annehmen /beenden eines Anrufes hin und
her. Langes Drücken des mittleren Knopfes führt zu einer Ablehnung eines
Anrufes, ein Doppelklick startet die Wahlwiederholug der letzten Nummer.
Ein kurzer Druck verringert die Lautstärke, ein langer Druck schaltet auf den
nächsten Song.
Halten Sie diese Taste gedrückt um mit ihren Gruppenmitgliedern zu sprechen.
(vergewissern Sie sich das Sie mit der LIVALL App verbunden sind)

18
V. Sicherheitshinweise
1. Der Helm enthält im Inneren elektronische Bauteile. Bitte unternehmen Sie keine lange Fahrt im Regen, obwohl
der Helm den Kopf vor Regen schützen kann.
2. Falls der Helm bei Regen nass geworden ist, können sich im Kanal der LED-Rückleuchten Wassertropfen
angesammelt haben. Die Wassertropfen verdundsten, wenn Sie den Helm für 1-2 Tage bei guter Belüftung trocknen
lassen.
Funktionen BH6X Neo MT1 Neo BH6X MT1 MTL
Intelligente Warnleuchten ●●●●●
LED-Blinker ●●●●●
Anrufe über Bluetooth ●●●●
Musik über Bluetooth hören ●●●●
PTT Walkie-Talkie ●●●●
SOS-Warnung ●●●●●
Bremswarnleuchten ● ●
Auto-o ● ●
Anti-Verlust-Alarm ● ●
Zur Erinnerung: Weitere Informationen zu den Funktionen nden Sie in der Kurzanleitung.

19
Elektrische Daten: DC 5V/0,5A
Ladeanschluss: Magnetische - USB
Ladedauer: 3 Stunden
Akku-Nutzungsdauer: Die max. Nutzungsdauer der Leuchtenbatterie beträgt 10 Stunden.
Die Musikwiedergabezeit beträgt 3 bis 6 Stunden.
Temperatur: Lagertemperatur: -20 ° C ~ 45 ° C. Einsatztemperatur: 0 ° C ~ 40 ° C.
Temperatur während des Ladevorgangs: 0 ° C ~ 40 ° C.
VI. Caractéristiques techniques
3. Der Helm enthält eine Batterie mit 3,7 V/450 mAh. Die Kapazität der Batterie ändert sich je nach
Umgebungstemperatur. Die Lebensdauer der Batterie kann sich verschlechtern, wenn der Helm bei niedrigen
Temperaturen oder unter 0°C verwendet wird.
4. Die goldfarbenen Kontakte des Ladesteckers mit Metall oder harten Werkzeugen wie Klingen oder Pinzetten zu
reinigen, ist strengstens verboten. Bitte benutzen Sie Wattestäbchen mit sauberem Wasser oder Alkohol sollte eine
Reinigung notwendig sein. Bitte vergewissern Sie sich, dass der Ladestecker sauber ist und versuchen Sie, den Helm
aufzuladen.
5. Falls die Elektronik nicht funktioniert, laden Sie den Helm bitte 3 Stunden lang und prüfen Sie dann, ob er
funktioniert.
6. Der Helm umfasst Aufprallerfassungsvorrichtungen. Die SOS-Warnfunktion ist nur aktiv, wenn der Helm mit der
LIVALL App verbunden ist, der Fahrmodus in der App gestartet wurde und der Helm starken Stößen ausgesetzt ist.
Ihre in der LIVALL App festgelegten Notfallkontakte erhalten sofort Ihre SOS-Meldung.
LIVALL ON FACEBOOK
Hinweis: 1. Probleme wie Netzwerk anomalien, können dazu führen, dass SOS-Nachrichten nicht erfolgreich
gesendet oder empfangen werden können.
2. Um eine eziente Akkulaufzeit zu gewährleisten, wird empfohlen, den Helm
vor einer längeren Lagerung (sechs Monate bis ein Jahr) vollständig aufzuladen.
LIVALL Riding App
This manual suits for next models
4
Table of contents
Languages:
Other Livall Motorcycle Accessories manuals

Livall
Livall BH User manual

Livall
Livall BH50T User manual

Livall
Livall EVO21 User manual

Livall
Livall BH&MT Series User manual

Livall
Livall EVO21 User manual

Livall
Livall BH50T User manual

Livall
Livall C20 User manual

Livall
Livall KS User manual

Livall
Livall NH51M NSO User manual

Livall
Livall Helmetphone RS1 User manual