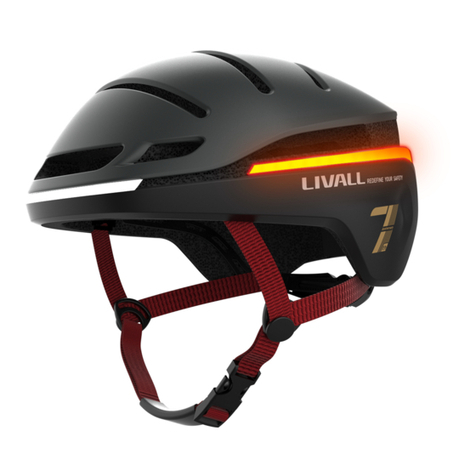
Livall EVO21 User manual


EN
1
I. Introduction
Welcome to the User Guide for LIVALL smart helmets. This Guide will help you better use this product. With
continuous improvements of our products, this Guide will be updated from time to time. You can access the latest
version and learn more about the helmet on www.livall.eu.
Note: The picture is for reference only. If the actual product appears different from the picture, the real product shall prevail.
II. Packing List
Smart Helmet x 1
Bling Remote Controller BR80 x 1
Quick Start Guide & Warranty Information x 1
Magnetic USB charging cable x 1
Front
Back
Taillight
Front Lights
Chinstrap
Tension adjuster
Power Switch
Magnetic USB charging port

2
III. Wearing Instructions
Incorrect
Incorrect
Correct
Adjust the length of
the chinstrap
Leave a gap as thick
as one finger
Correctly position
the helmet
Check whether the
buckle is properly
fastened

3
IV. Operation Instructions Turn
On Your Helmet
For the first time to use, press the power on
button located at the back of the helmet, once
the tail lights illuminate the smart helmet is on.
Note: If it cannot be activated successfully,
please charge it and try again.
Battery Status
Remaining battery level is shown by the number of light beads in the middle of the tail, that is displayed when a
helmet is initially turned on. Full battery is indicated when all of the light beads are on.
Connect the Remote Control BR80 (Control the Turning Signals)
1) First connection
Turn on theBR80.Withinthedistance
of 30cm between the BR80 and the
helmet
It will automatically connect to the helmet.
After connected successfully, the tail light of
the helmet will flash by default light mode
Hold the button
Within 30cm

4
2) Replacing device (When the original BR80 lost or damaged)
Put thepower-on BR80 close tothe
main control of the helmet, and the
warning light flashes three times
per second, indicating that there is
a BR80 that needs to beconnected
to the helmet.
Press the power button of the
helmet within 10s to confirm the
connection of the BR80.
Then the tail light of the helmet will
continue to flash in the light mode
before connection. After
connected successfully, the left
turn signal or right turn signal can
be controlled by the BR80.
Note:
A. The left and right turn signal of the helmet can be controlled by the BR80’s left (L) and right (R) buttons;
B. The product works mainly by the left (L) and right (R) buttons of BR80 ,and the red confirmation button
in the middle of BR80.Other buttons are applicable for other models of LIVALL helmets.
Automatic Standby
After the helmet powers on and stays stationary for a while, it will automatically begin saving power by going into
sleep mode. When the tail light is off,without user interaction, the helmet is in sleep mode.
Automatic Wake Up
To wake up the helmet, shake it several times until the tail lights illuminate.
Note: If the helmet does not wake up, make sure the battery levels are adequate.

5
Adaptive lighting(The feature is enabled by default and can be closed by the app.)
The helmet has a built-in light sensor, When the helmet is powered on during the day or in a bright environment,
only the central LED light of the tail will keep flashing, other LED lights will turn off automatically. During the night,
or in a dark environment, the whole taillight will continue to flash by the light mode set last time.
Lighting Mode
After the helmet is turned on, press the power button for a second to switch between the three lighting modes.
Brake warning light
When the helmet detects a smooth deceleration, the whole taillight will light up for several seconds to warn the
vehicles behind.
Note: When the helmet shakes too heavy, the built-in sensor detects obvious deceleration to trigger the
warning light always on, which is normal.
Connect With Your Phone
1) Download the LIVALL
Riding App on your
smartphone app store;
2) Turn on the Bluetooth on your
phone and turn on the helmet;
3) Click "Device" in the LIVALL Riding app,
then pair the helmet with your phone
through the app by clicking "Helmet." After a
successful connection, "Helmet" will display
"EVO21".
Helm etphone
Cycling
Bling Helmet
Group
Feed
Device
Me

6
Tips: In order to ensure a stable Bluetooth connection whilst riding, use a smartphone holder
and place the phone on your handlebars .
SOS Alert(need to be connected to LIVALL Riding APP)
The helmet has a fall detection sensorwhich sends a signal to the LIVALL Riding APP via Bluetooth technology
when a fall is detected. Then the APP will send an SOS message to a pre-arranged emergency contact.
Power off
Hold the power button at the back of the helmet for
several seconds until all the LED taillight tums off.
Charge
When the soft rubber lid with “ ” image is opened, the Magnetic charging port will be seen. Insert a USB cable into
the USB Charging cable interface of the helmet. Charging starts when the middle area LEDs light up.During charging,
when themiddle area LEDs stop blinking and turns off, charging is completed.
“ ”button
Open the soft rubber

7
EVO21 Product Feature List
NO
Function
NO
Function
1
Automatic Standby
6
Lighting Mode
2
Automatic Wake Up
7
Turn light
3
Battery Status
8
Brake warning light
4
Adaptive Lighting
9
SOS Alert
5
Front light
Kind Reminder: Please refer to the Quick Start Guide for more details about the functions.
V.Considerations
1. The helmet contains electronic parts inside. Please do not take a long ride in the rain although the helmet can
prevent the rain from splashing.
2. After the helmet gets wet in the rain, the water droplets might occur in the chimney of tail LED lights. The water
droplets will disappear when you put the helmet under the ventilation environment for 1-2 days.
3. The helmet contains the battery .The battery capacity varies with temperature change. The battery life can decay
when the helmet is used at low temperatures or below Zero degrees Celsius.
4. If the electronic functions do not work, please charge the helmet for 3 hours and then check if it works normally.
5. ★The helmet contains impact detection devices. Only if you connect your helmet with LIVALL Riding App and
start ride mode on the App, when your helmet suffers from the heavy impact, SOS alert feature can be triggered.
Your emergency contacts set on LIVALL Riding App can accordingly receive your SOS messages.

8
6. Trying to clean the golden colour contacts of the charging plug sheet with metal or hard tools such as blades or
tweezers is strictly forbidden. Please use cotton swabs with clean water or alcohol in case of cleaning. Please
make sure the charging plug is clean and dry while charging the helmet.
7. The built-in battery is forbidden to be disassembled, squeezed, heated or burned. It is also forbidden to use
screwdrivers and other sharp devices breaking down or prying apart the battery. The above operations may make
the battery caught fire.
8. Please do not place the helmet with sharp objects, avoiding to damage the helmet.
Note: 1. Problems such as network anomalies, may result in the failure to successfully send or receive SOS
messages.
2. To maintain efficient battery life, it is recommended that the helmet be fully charged before any
long-term storage (six months to one year).
VI.Technical Specifications
Charging port : Magnetic USB
Electricity parameter : DC 5V/1A
Battery : 3.7V/600mAh
Charging time : About 3hours
Waterproof class : IPX5
Battery life : about 10 hrs in the default Light Mode
Temperature: Storage Temperature: -20°C ~45°C. Temperature for use: 0°C~40°C. Temperature while charging:
0°C~40°C.
Notes: The above data is measured by LIVALL in a controlled environment, with room temperature at 25°C
and specific light patterns. The actual data might be different according to the environment.
9
VII. Electronic functions troubleshooting
During the usage, if the following troubles occur, please charge the product according to quick guide of the
model(the helmet can be reset during the charging). If the problems still can not be solved, please contact the after-
sales service center. (After-sales email: aftersales@livall.eu)
Faults:
1. Can not be charged or turn-off normally;
2. The helmet is turn on, but the lights and other functions can not work normally.
3. After power on, it turns off automatically in a short time without reason. Note: Please refer to the quick guide of
the specific model for function details.
Performance standards:
USA: CPSC1203:1998, FCC Part 15 Rules
Europe: EN 1078: 2012+A1:2012
VIII. Instructions for Use and Care
1. That the helmet can only protect if it fits well and that the buyer should try different sizes and choose the size
which feels secure and comfortable on the head.
2. That the helmet should be adjusted to fit the user e.g. the straps positioned so that they do not cover the ears,
the buckle positioned away from the jawbone and the straps and buckle adjusted to be both comfortable and firm.
3. How the helmet should be position on the head to ensure the intended protection is provided (e.g. that it should
be placed so as to protect the forehead and not be pushed too far over the back of the head.)
4. That a helmet cannot always protect against injury.
5. That a helmet subjected to a severe impact should be discarded and destroyed.
6. A statement of the danger of modifying or removing any of the original component parts of the helmet other than
as recommended by the manufacturer, and that helmets should not be adapted for the purpose of fitting
accessories in a way not recommended by the manufacturer.

10
7. This device complies with part 15 of the FCC Rules. Operation is subject to the following two conditions:(1) This
device may not cause harmful interference, and (2) this device must accept any interference received, including
interference that may cause undesired operation.
8. Take good care of the product, do not wash the surface of the helmet with corrosive solvent, do not strike the
helmet;
9. Validity: Valid for 2years without impact and under normal use.
This helmet is in conformity with the regulation (EU) 2016/425;
This helmet is in conformity with the Personal Protective Equipment (Enforcement) Regulations 2018;
LIVALL Tech Co., Ltd. declare that the full EU Declaration of conformity and UK Declaration of conformity
are available on the Internet at https://www.livall.com/english/tech/product_detail/id/14.html

11
NOTE: This equipment has been tested and found to comply with the limits for a Class B digital device, pursuant to
part 15 of the FCC Rules. These limits are designed to provide reasonable protection against harmful interference in
a residential installation. This equipment generates uses and can radiate radio frequency energy and, if not installed
and used in accordance with the instructions, may cause harmful interference to radio communications. However,
there is no guarantee that interference will not occur in a particular installation. If this equipment does cause harmful
interference to radio or television reception, which can be determined by turning the equipment off and on, the user
is encouraged to try to correct the interference by one or more of the following measures:
- Reorient or relocate the receiving antenna.
- Increase the separation between the equipment and receiver.
- Connect the equipment into an outlet on a circuit different from that to which the receiver is connected.
- Consult the dealer or an experienced radio/TV technician for help
Changes or modifications not expressly approved by the party responsible for compliance could
void the user's authority to operate the equipment.

FR
12
I.Introduction
Nous sommes très heureux que vous puissiez choisir d'utiliser le casque intelligent LIVALL, ce guide vous guidera
pour mieux utiliser ce produit. Avec l'amélioration continue des produits de notre entreprise, ce guide sera mis à jour
de temps en temps. Vous pouvez obtenir la dernière version et en savoir plus sur les casques sur le site officiel de
LIVALL (www.livall.eu).
Remarque : cette image est pour référence seulement, si la forme du produit réel est différente de l'image, veuillez vous référer au produit réel
II.Liste de colisage
Casque intelligent x1
Télécommande remote controller BR80 x 1
Guide de démarrage rapide & informations sur la garantie *1
Câble de charge USB magnétique x 1
Front
Derrière
Indicateur arrière
Indicateur avant
Mentonnière
réglage de tenstion
Interrupteur
Port de chargement
USB magnétique

13
III.Instructions de port
Incorret
Incorret
Correct
Ajustez la longueur de
la Mentonnière
Laissez un espace
aussi épais qu'un
doigt
Portez correctement
le casque
Vérifiez si la boucle
est en bon état

14
IV.Instructions d'utilisation
Activez votre casque
Lors de la première utilisation, appuyez sur
le bouton d'alimentation à l’arrière pour
l'activer et l’indicateur arrière est allumé pour
indiquer que l'activation a réussi
Remarque : si l'activation échoue, veuillez recharger et réessayer.
Affichage de la puissance
Lorsque vous allumez le casque, vous pouvez vérifier la puissance restante de la batterie du casque par le nombre
de lumières allumées au milieu de l'arrière du casque. Si toutes les lumières sont allumées, cela signifie que la
batterie est complètement chargée.
Connectez la télécommande BR80 (contrôlez les clignotants gauche et droit)
1) Première connexion
Allumez la télécommande BR80. Si la distance
entre le BR80 et le casque est inférieure à 30
cm, il se connectera automatiquement au
casque
Une fois la connexion établie, l’indicateur
arrière du casque clignotera par défaut en
mode d'éclairage.
Hold the button
Inférieure à 30 cm

15
2) Connectez la nouvelle télécommande (lorsque le BR80 d'origine est perdu ou endommagé)
Mettez le BR80 sous tension à
proximité de la commande
principale du casque, le témoin
lumineux clignotera trois fois par
seconde, indiquant qu'il y a un
BR80 qui doit être connecté au
casque.
Appuyez sur le bouton
d'alimentation du casque dans les
10 secondes pour confirmer la
connexion du BR80.
Ensuite, l’indicateur arrière du
casque continuera à clignoter en
mode d'éclairage précédemment
réglé. Une fois la connexion
établie, les clignotants gauche et
droit peuvent être contrôlés par le
BR80.
Remarque :
A. Les clignotants gauche et droit du casque peuvent être contrôlés par les boutons gauche (L) et droit (R)
du BR80;
B. Ce produit fonctionne principalement avec les boutons gauche (L) et droit (R) du BR80 et le bouton
rouge de confirmation au milieu du BR80. D'autres boutons sont applicables pour d'autres modèles de
casques LIVALL.
Veille automatique
Une fois que le casque est allumé et reste stationnaire pendant un certain temps, il entrera en mode veille
automatique. Lorsque l’indicateur arrière est éteint, et il n’y a aucune intervention de l'utilisateur, le casque est en
mode veille.

16
Réveil automatique
Pour réveiller le casque, secouez-le plusieurs fois jusqu'à ce que l’indicateur arrière s'allume.
Remarque : si le casque ne se réveille pas, assurez-vous que la batterie est complètement chargée.
Éclairage adaptatif (la fonction est activée par défaut et peut être fermée par
l'application.)
Le casque a un capteur de lumière intégré, lorsque le casque est allumé pendant la journée ou dans un
environnement lumineux, seule la lumière LED centrale à l’arrière continuera à clignoter, les autres lumières LED
s'éteindront automatiquement. Pendant la nuit ou dans un environnement sombre, l'ensemble de l’indicateur arrière
continuera à clignoter selon le mode d'éclairage réglé la dernière fois.
Mode d'éclairage
Une fois le casque allumé, appuyez sur le bouton d'alimentation pendant une seconde pour basculer entre les trois
modes d'éclairage.
Indicateur d'avertissement de frein
Lorsque le casque détecte une décélération en douceur, l'ensemble de l’indicateur arrière s'allume pendant plusieurs
secondes pour avertir les véhicules derrière.
Remarque : lorsque le casque tremble trop, le capteur intégré détecte également la décélération évidente, ce qui peut déclencher
les voyants et les rend rester allumés, ce qui est un phénomène normal.

17
Connectez-vous avec votre téléphone
1) Téléchargez l'application
LIVALL Riding App sur la
boutique d'applications de
votre smartphone ;
2) Activez le Bluetooth sur votre
téléphone et allumez le casque ;
3) Cliquez sur "Device" dans l'application
LIVALL Riding, puis associez le casque
avec votre téléphone via l'application en
cliquant sur "Helmet". Après une
connexion réussie, " Helmet " affichera
"EVO21".
Conseils : afin d'assurer une connexion Bluetooth stable pendant la conduite, utilisez un support pour
smartphone et placez le téléphone sur votre guidon.
Alerte SOS (doit être connecté à l'application LIVALL Riding)
Le casque dispose d'un capteur de détection de chute, il enverra un signal à l'application LIVALL Riding via le
Bluetooth lorsqu'une chute est détectée. Ensuite, l'APP enverra un message SOS à un contact d'urgence pré-
arrangé.
Éteindre
Maintenez le bouton d'alimentation à l'arrière
du casque pendant plusieurs secondes jusqu'à ce
que tous les lumières arrière s'éteignent.
Helm etphone
Cycling
Bling Helmet
Group
Feed
Device
Me
“ ”button

18
Charger
Ouvrez le couvercle en plastique souple avec le logo “ ” et vous pouvez voir le port de charge. Utilisez un câble de
chargement USB magnétique pour connecter le port de chargement du casque. L’indicateur arrière dans la zone
centrale s'allume pour indiquer qu'il est en cours de charge et s'éteint pour indiquer que la charge est terminée.
Liste des fonctionnalités du produit EVO21
NO
Function
NO
Function
1
Veille automatique
6
Mode d'éclairage
2
Réveil automatique
7
Allumer la lumière
3
Affichage de la puissance
8
Indicateur d'avertissement de frein
4
Éclairage adaptatif
9
Alerte SOS
5
Lumière de devant
Rappel aimable : veuillez vous référer au guide de démarrage rapide pour plus de détails sur les fonctions.
Open the soft rubber
Other manuals for EVO21
1
Table of contents
Languages:
Other Livall Motorcycle Accessories manuals

Livall
Livall KS User manual

Livall
Livall EVO21 User manual

Livall
Livall BH User manual

Livall
Livall BH50T User manual

Livall
Livall Helmetphone RS1 User manual

Livall
Livall BH6X Series User manual

Livall
Livall Helmetphone RS1 User manual

Livall
Livall BH50T User manual

Livall
Livall C20 User manual

Livall
Livall BH6X Series User manual