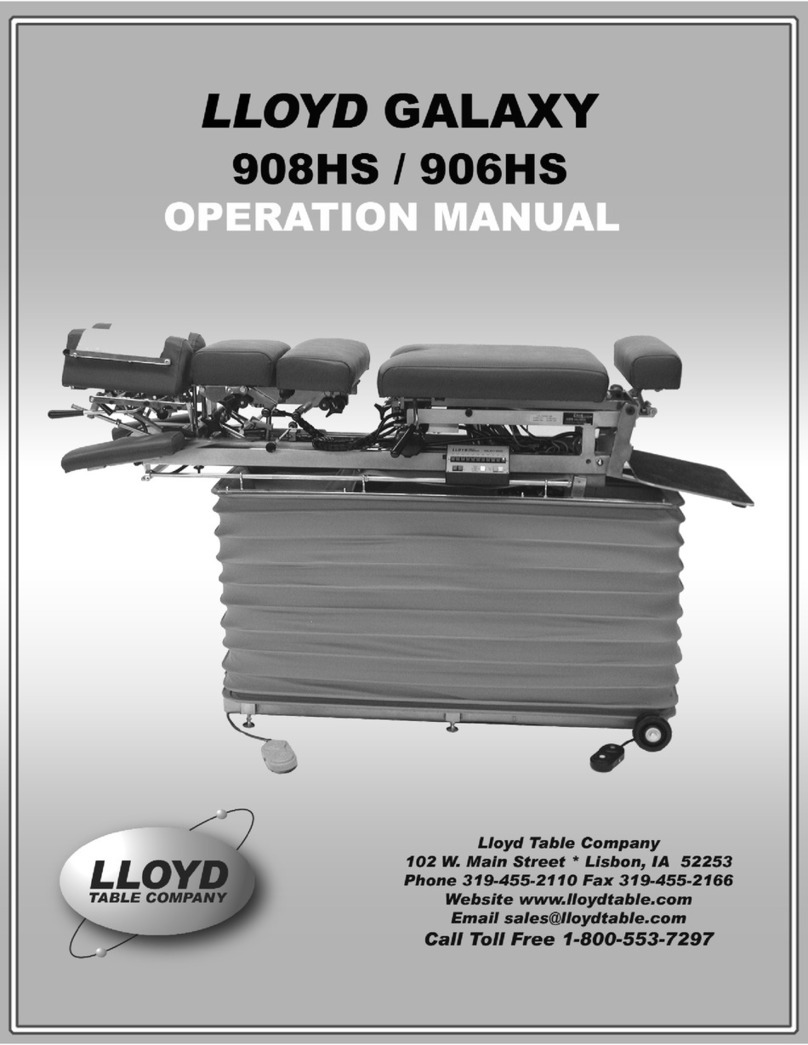
Lloyd GALAXY 900HS User manual


CONTENTS
OPERATIONS PAGE
Safety and Maintenance.......................... 1 - 2
Head Rest Cushion................................. 3 - 5
Chest Cushion......................................... 6
Manual & Automatic Drops...................... 7 - 9
Head & Chest Extension / Retraction..... 9
Ankle Rest............................................... 10
Tilt Safeguard.......................................... 11
Foot Pedal Control.................................. 12
Height Select Panel................................. 13
PARTS / ASSEMBLY PAGE
Tilt Frame................................................. 4
Base Frame............................................. 15
Scissor Yoke Frame................................ 16
Scissor Frame......................................... 17
Deluxe Head Frame................................ 18
Deluxe Head Cushions........................... 19
Deluxe Head I-Frame............................. 20 - 21
Chest Cushion Assembly........................ 22 - 23
Pelvic Cushion........................................ 24
PARTS / ASSEMBLY PAGE
Ankle Rest .............................................. 25
Foot Stand .............................................. 26
Plastic Covers........................................ 27
Hydraulics............................................... 28 - 29
Electrical.................................................. 30 - 31
Straight Drop Head................................. 32 - 33
Forward Motion Drop Head..................... 34 - 35
Flexion Head Cushion Assembly............ 36 - 37
Flexion Head - Shuttle Assembly............ 38 - 39
Flexion Head - Slide Frame.................... 40 - 41
Flexion Head Rotation Block................... 42 - 43
Drop Chest & Lumbar............................. 44 - 45
Drop Chest Full Cushion......................... 46 - 47
Rotation Chest......................................... 48 - 49
Rotation Chest with Drops...................... 50 - 51
T-Drop Pelvic.............................................. 52 - 53
Drop Pelvic ................................................ 54 -55
Hydraulics - Auto Drops.......................... 56 - 57
Electronic Diagrams................................ 58 - 64
Table Maintenance Schedule................. 65
Table Serial Number

WELCOME!!
Lloyd Table Company, a proud supporter of today’s chiropractors, has established the finest line of chiropractic tables in the world.
Table products unique in versatility and function, designed to meet your needs.
Concerned for a safe working and treatment environment, Lloyd Table Company asks that you follow the safety tips below.
*Be aware of Caution and Warning labels posted throughout the table before operating any functions.
*Everyone operating the table needs to read the manual and familiarize themselves with all its functions before
operating the table with patient on it.
*A patient should never be unattended, when lying on the table.
NEVER LEAVE A PATIENT ON THE TABLE UNATTENDED!
*The patient should be positioned at or near the center of the table with arms on the armrest cushions.
*There should be no more than one operator at the controls.
*Check the tension on all drops before adjusting the patient. (See Page 7)
SAFETY
Page 1

MAINTENANCE
The following steps should be performed on a regular basis to maintain your Lloyd table in a smooth operating condition and to
assure its long life and top quality appearance.
*An initial inspection and periodic future inspections should be made to insure that nuts and bolts have not loosened
in shipping or during daily operations.
*Your Lloyd table should be lubricated every six months. Parts to be lubricated are all
pivot points, and metal to metal sliding mechanisms.
(DO NOT LUBRICATE FRICTION LOCKS)
*The cushions should be cleaned daily with a mild soap & warm water solution to
remove body oils. Risnsed & dried
*Chrome parts should be cleaned on a weekly basis for appearance.
*The hydraulic fluid recommended for the pump, is a lubriplate HO1 hydraulic oil, and should be checked
on a yearly basis.
*Perform periodic inspections for oil leaks or drips.
Page 2

The following sections provide explanations on the operation of your Lloyd table. All references to right and left, will be in relation-
ship to your view, as you face table from the foot end. All references to the front will refer to the head end of the table. Those to the
rear will refer to the foot end.
Head Cushion
The head cushion is designed to provide a multitude of positions & operations though our standard Deluxe Headpiece and optional
Total Dimension FlexionTM Headpieces.
Standard Deluxe Headpiece
#5 Center Bar
#4 Paper Hanger
#2 Elevation Knob
#3 Face Opening
Lever
#1 Tilting Lock Handle
#6 Paper Cutting Bar
To Raise the tilting feature on the Deluxe Headpiece:
1. Lift on the bottom front edges of the cushion
2. Release at the desired height, the cushion will
automatically lock into position.
To Lower the tilting feature on the Deluxe Headpiece:
1. Support the front corner edge of the cushion.
2. Lift the Locking Handle (No. 1) to release.
3. Gently lower the cushion to the desired height.
4. Release the lock handle first and then the cushion to lock.
WARNING: TO AVOID INJURIES WHEN RAISING OR LOWERING HEAD
CUSHIONS, BE SURE TO HAVE A PROPER HOLD ON THE CUSHION BEFORE RELEASING THE
ELEVATING HANDLE (NO. 2).
Page 3

Standard - Deluxe Head
To Elevate the Head Cushion
1. The head cushion is assisted by a gas shock in raising the cushion. With a hand
supporting the head cushion, turn the Elevation Knob (No. 2) on either side of the table
upward to unlock. When the desired height is determined simply release the Elevation Knob
(No. 2) to lock.
To Lower the Head Cushion
1. Turn the Elevation Knob upward to unlock. While unlocked push down on the cushion to
lower. When the desired height is determined simply rotate the Elevation Knob (No. 2)
down to lock.
Face Opening Adjustment
1. The Head Cushion’s face opening can be opened or closed to adjust for comfort with the Face
Opening Lever (No. 3). By Pushing slightly down on the Face Opening Lever, slide cushions
to adjust opening. The Face Opening Lever must be released in one of eight positions to lock
the cushions in place.
Paper Roll
The paper roll mounts conveniently inside the right-hand cushion.
Replacing the Paper Roll
1. Remove the paper hanger tension rod (No. 4) by compressing ends of the rod horizontally.
This will allow you to slide one end out, to remove the paper roll tube.
2. Slide a new paper roll on the tension rod so that it rolls off the bottom side. Compress the rod
ends horizontally and set inside the head cushion.
3. Swing the Center Bar (No. 5, Page 3) and Outside Cutting Bar (No. 6, Page 3) up. Route
paper over the cushions and down between the two outside cutting bars. Return both bars to
their original position.
4. Trim the paper by supporting the paper cutting bar with one hand and pulling the paper up
along the bar’s edge.
Page 4

Optional - Deluxe Head with Drops
#7 Cocking Handle
#8 Tension Knob
#9 Selector Knob
(Right Side of Table)
Operating the Straight / Toggle Drop:
CAUTION: THE DROP CUSHION TENSION SHOULD BE CHECKED AND TESTED
BEFORE ADJUSTING A PATIENT.
NOTE - DROP SHOULD BE IN DOWN / DEACTIVATED POSITION BEFORE MOVING
SELECTOR KNOB (NO. 9) IN OR OUT.
1. To engage the Straight / Toggle Drop head, pull the selector knob (No. 9) out about
half an inch.
2. Push down on the Cocking Handle (No. 7) until the head cushion toggle drop is activated .
3. Once cocked, test the drop by pushing down on the cushion. If the cushion drops easily or too
hard, adjust the tension with the Tension Knob (No. 8).
Operating The Tension Knob:
1. The tension is adjusted by turning the tension knob (No. 8) in a clockwise and counterclock-
wise direction.
A. Clockwise - Increases tension
B. Counterclockwise - Decreases tension
Operating the Forward Motion Drop:
CAUTION: THE DROP CUSHION TENSION SHOULD BE CHECKED AND TESTED
BEFORE ADJUSTING A PATIENT.
NOTE - DROP SHOULD BE IN DOWN / DEACTIVATED POSITION BEFORE MOVING
SELECTOR KNOB (NO. 9) IN OR OUT.
1. The Selector Knob (No. 9) is to be pushed in, to engage the forward motion drop.
2. Push down on the Cocking Handle (No. 7) until the head cushion forward motion drop is
activated.
3. Once cocked, test the drop by pushing down on the cushion, and adjust the tension.
Page 5

Chest Cushion
The chest cushion is designed to accommodate patients with large or small abdomens and has the versatility of being a
stationary or floating cushion.
#1 Adjustable Chest
Handle
#2 Spring Breakaway
Knob
Standard - Adjustable Tilting Chest
Height Adjustment of Chest Cushion
1. Lift the rear corners of the cushion.
2. Release the cushion when the desired angle is reached and the cushion will automatically lock
into place.
Tilting Chest Cushion Down
1. Support the cushion at the rear corners.
2. Lift on the Adjustable Chest Handle (No. 1) to release the cushion.
3. Slide the cushion to desired angle.
4. Release the Adjustable Chest Handle (No. 1) first and then the cushion to lock into desired
height.
Spring Breakaway Chest
To Engage Spring Breakaway Chest Cushion
1. Pull on Spring Breakaway Knob (No. 2) (facing the right side of the table) to unlock.
2. The resulting floating effect will allow the cushion to gently drop under pressure and spring
back when released.
To Lock the Spring Breakaway Cushion
1. Push on Spring Breakaway Knob (No. 2) (facing the right side of the table) to lock.
To Increase or Decrease the Tension for Spring Breakaway
1. Rotate the Spring Breakaway Tension Knob (No. 3).
A. Left Side: Clockwise - Increase Tension Counterclockwise - Decrease Tension
B. Right Side: Clockwise - Decrease Tension Counterclockwise - Increase Tension
#3 Spring Breakaway
Tension Knob
Page 6

Chest Cushion - Manual Drops
#1 Cocking Handle
#2 Tension Control
Knob
Chest & Lumbar Drop - Manual
Cocking the Drop Chest or Lumbar Cushion
1. Pull up on the Cocking Handle (No. 1) to cock the desired drop cushion.
2. Adjust the tension on either by turning the Tension Control Knob (No. 2)
Right side: Clockwise - Decreases Tension Counterclockwise - Increase Tension
Left Side: Clockwise - Increase Tension Counterclockwise - Decrease Tension
CAUTION: THE DROP CUSHION TENSION SHOULD BE CHECKED AND TESTED BEFORE
ADJUSTING PATIENT. KEEP FINGERS AWAY FROM BOTTOM OF CUSHION TO AVOID
PINCHING
#1 Cocking Handle
#2 Tension Control
Knob
Pelvic Drop - Manual
Cocking the Drop Pelvic Cushion
1. Pull up on the Cocking Handle (No. 1) to cock the cushion.
2. Adjust the tension by turning the Tension Control Knob (No. 2)
Right side: Clockwise - Decreases Tension Counterclockwise - Increase Tension
Left Side: Clockwise - Increase Tension Counterclockwise - Decrease Tension
CAUTION: THE DROP CUSHION TENSION SHOULD BE CHECKED AND TESTED BEFORE
ADJUSTING PATIENT. KEEP FINGERS AWAY FROM BOTTOM OF CUSHION TO AVOID
PINCHING
Pelvic Drop
Page 7
#2 Tension Control
Knob

Automatic Cocking Drops
#1 Automatic Drop
Selector Knob
Cervical (Head Cushion) Drop - Automatic
To Cock the Cervical (Head Cushion) Drop:
1. Rotate the selector knob (No. 1) to “C” to select the Cervical (Head Cushion) drop.
2. Step on the white strip to activate the auto cocking drop.
CAUTION: THE DROP CUSHION TENSION SHOULD BE CHECKED AND TESTED BEFORE
ADJUSTING PATIENT. KEEP FINGERS AWAY FROM BOTTOM OF CUSHION TO AVOID
PINCHING.
3. Adjust the tension on the drop by turning the Tension Control Knob (Refer to Page 7 for
Instructions).
To Cock the Dorsal (Chest Cushion) Drop:
1. Rotate the selector knob (No. 1) to “D” to select the Dorsal (Chest Cushion) drop.
2. Step on the white strip to activate the auto cocking drop.
CAUTION: THE DROP CUSHION TENSION SHOULD BE CHECKED AND TESTED BEFORE
ADJUSTING PATIENT. KEEP FINGERS AWAY FROM BOTTOM OF CUSHION TO AVOID
PINCHING.
3. Adjust the tension on the drop by turning the Tension Control Knob (Refer to Page 7 for
Instructions).
To Cock the Lumber Cushion Drop:
1. Rotate the selector knob (No. 1) to “L” to select the Lumbar drop.
2. Step on the white strip to activate the auto cocking drop.
CAUTION: THE DROP CUSHION TENSION SHOULD BE CHECKED AND TESTED BEFORE
ADJUSTING PATIENT. KEEP FINGERS AWAY FROM BOTTOM OF CUSHION TO AVOID
PINCHING
.
3. Adjust the tension on the drop by turning the Tension Control Knob (Refer to Page 7 for Instructions)
Page 8

Automatic Cocking Drops
To Cock the Pelvic Cushion Drop:
1. Rotate the selector knob (No. 1) to “P” to select the Pelvic drop.
2. Step on the white strip to activate the auto cocking drop.
CAUTION: THE DROP CUSHION TENSION SHOULD BE CHECKED AND TESTED BEFORE
ADJUSTING PATIENT. KEEP FINGERS AWAY FROM BOTTOM OF CUSHION TO AVOID
PINCHING.
3. Adjust the tension on the drop by turning the Tension Control Knob (Refer to Page 7 for Instructions)
Note - Table is capable of performing a combination of drops - See Selector Knob Letter
Reference Chart Below.
Selector Knob Reference Chart
C - Cervical Drop DC - Dorsal & Cervical Drops
D - Dorsal Drop LD - Lumbar & Dorsal Drops
L - Lumbar Drop PL - Pelvic & Lumbar Drops
P - Pelvic Drop CP - Cervical & Pelvic Drops
Head & Chest Extension - Retraction Switch
#1 Head/Chest/Pelvic
Extension - Retraction
Switch
To Adjust the Height of Table:
The table must be in Hylo (Tilt) position, while the patient is standing on the foot plate. Locate the Head/ Chest/Pelvic
Extension - Retraction Switch (No. 1).
1. To extend the head/chest/pelvic cushions toggle switch towards the head end of the table.
2. To retract (shorten) the head/chest/pelvic cushion toggle switch towards the foot end of the
table.
Page 9

Page 10
Ankle Rest
#1 Lock Knob
#2 Adjustment
Lever
Ankle Rest Adjustment
To Adjust Height of Ankle Rest
1. Loosen the Lock Knob (No. 1)
2. Simply lift on the sides of the Ankle Rest Cushion.
3. Once the desired height is obtained the cushion will automatically lock into position when
released.
To Lower the Ankle Rest
1. From the back end of the table, support the center of the Ankle Rest Cushion with the righthand.
2. With left hand,lift Adjustment Lever (No. 2) upward release lock.
3. Lower the cushion to desired height, and release the Adjustment Lever to lock into place.
4. To secure the height position tighten the Lock Knob (No. 1).

Tilt Safeguard
Tilt Safety Switch
The tilt safety switch is designed to prevent unauthorized operators from lowering the table from a Vertical position.
The table cannot be lowered until the tilt Safety Switch is activated.
The switch is located (shown above) on the left side, behind the arm rest cushion. By toggling the switch for just a sec-
ond, the operator will have an estimated thirty seconds to lower the table with a directional foot pedal.
When the table has reached its vertical position it can be lowered, within a period of thirty seconds, without activating
the tilt safety switch a second time. Just depress the directional foot pedal (within the thirty
second time frame) to lower table.
Tilt Safety Switch
Left Arm Rest
Page 11
Master Power Switch
Master Power Switch
The Master Power Switch is located on the front left corner of the base frame. The switch allows easy access for turning the table’s
power on or off.
WARNING: WHEN TABLE IS NOT IN USE OR DOCTOR IS AWAY FROM THE TABLE, THE
POWER SWITCH SHOULD BE TURNED OFF.
Power Switch Fuses
WARNING: UNPLUG THE POWER CORD FROM THE ELECTRICAL WALL OUTLET BEFORE
REMOVING THE FUSE HOLDER TO AVOID INJURY.
The fuse holders are located with the power switch and can be removed by pushing and turning counterclockwise.
Replace fuses with the same size and rating.

Foot Pedal Control
Page 12
Directional Pedal
The directional pedals have the dual function of raising and lowering table in elevation and hylo.
The directional pedals can be operated in manual and auto mode as described on page 13 under
auto / manual.
Hylo
Corded Side - Lowers the table from Vertical to horizontal.
Non - Corded Side - Raises table from horizontal to Vertical.
Elevation
Corded Side - Elevates the table horizontally.
Non - Corded Side - Lowers the table.
#1 Pelvic Lock Knob
#3 Adjustment Handle
#2 Cushion Handle
Pelvic Height Adjustment
Raising - Lift the cushion by it’s front corners to the desired height. The Cushion will lock in place once released.
Lowering - Support the cushion by slightly lifting up on a front corner. Next, lift the Adjustment Handle (No. 3) up and
allow the cushion to slide down to desired height. Once adjusted to a desired height, release the lock handle and then
the cushion to secure the height position.
Pelvic Separation
The pelvic Cushion can be separated from the head and chest section at eight different lengths. To separate, secure the
pelvic cushion by holding the Cushion Handle (No. 2) and pulling the Pelvic Lock Knob (No. 1) out to unlock. Once
the desired adjustment is reached release the Pelvic Lock Knob (No. 1) to Lock.

Height Select Panel
Height Select (No. 1)
The height select panel consists of nine height select buttons whereby the operator can preselect a desired height. The
buttons range from 19 to 36 inches, at two inch increments. A button is activated when depressed, emitting a green
light, and will only operate in the automatic mode.
Auto / Manual (No. 2)
Manual Mode - The table is set in the manual mode whenever the electrical power is turned on.
In the manual mode; the height of the table can be adjusted with the foot pedal or with
the directional switch on the console. The table will stop when the pedal or panel
switch is released. If the Auto / Manual (No. 2) green light is on, it must be depressed
to operate in manual mode.
Auto Mode - Pressing the auto / manual switch (No. 2), illuminates the green light and activates the
table in the auto mode. The directional switch or pedal can be released and the table
will continue to run.
Horz. Down / Tilt Up Switch (No. 3)
The Lower (Elev.) / Tilt Switch (No. 3) lowers the table from a horizontal position and
raises it to a hylo Vertical position.
Horz. Up / Tilt Down Switch (No. 4)
The Lower (Tilt) / Elevate Switch (No. 4) lowers the table from a Vertical position to the
horizontal position.
Beeper / Mute Switch (No. 5)
Used for turning the beeper sound on or off.
#1 Height Select
#3 Horz. Down / Tilt
Up Switch
#4 Horz. up /
Tilt Down Switch
#5 Beeper / Mute
Switch
#2 Auto / Manual
Page 13

GALAXY 900HS
Parts & Assembly Section

Page 14
ITEM PART N0. DESCRIPTION QTY.
1 54090 Z - FRAME ASSEMBLY, 19” 1
2 21630 WASHER, STAR, 1/4 ID X 1/2 OD 2
3 20052 BOLT, HEX HD, 1/4 - 20 NC X 1 3/4 (CUT OFF) 2
4 21010 NUT, HEX, 1/4 - 20 NC 2
5 40030 CUSHION, ARM REST (LH) 1
6 40010 CUSHION, ARM REST (RH) 1
7 21110 NUT, JAM, 5/16 - 18 NC 1
8 22240 SET SCREW, SQUARE HD, 5/16 - 18 NC X 1 1
9 22085 SCREW, HEX HD, LAG, 1/4 X 3 6
10 24417 END CAP 3
11 22031 SCREW, MACH, SOC HD, FLAT, 1/4 - 20 NC X 2 5
12 50610 SLIDE ROD, 23/32 RD X 22 13/16 1
13 54077 SEPARATION ROD, 1/2 RD X 25 9/16 1
14 20022 BOLT, HEX HD, 1/4 - 20 NC X 1 1
15 55644 SEPARATION ROD ASSEMBLY, 19” 1
16 50670 LINKAGE BAR, 1/8 X 1/2 X 5 2
17 55572 GUIDE RAIL, 3/8 X 1 X 21 1
18 21710 WASHER, FLAT, 5/16 ID X 0.688 OD 1
19 22012 SCREW, MACHINE, TRUSS HD, 1/4 - 20 NC X 1/2 1
316
4
10
14
2
5
8
7
13
18
19
11
10
12
9
1
Z - FRAME ASSEMBLY
GALAXY 900HS
15
6
17

BASE FRAME ASSEMBLY
Page 15
5
15
4
12
14
13
2
6
6
7
16 14
13
6
12
15 4
5
8
89
10
11
ITEM PART N0. DESCRIPTION QTY.
1 55110 FRAME, BASE, 900 1
2 58026 WHEEL PLATE ASSEMBLY (RH), 19” 900 1
3 58027 WHEEL PLATE ASSEMBLY (LH), 19” 900 1
4 21910 WASHER, FLAT, 1/2 ID X 1 OD X 0.095 2
5 20542 BOLT, HEX HD, 1/2 - 20 NF X 2 1/4 (CHROMED) 2
6 20115 BOLT, HEX HD, 1/4 - 28 NF X 3/4 6
7 21020 NUT, HEX, 1/4 - 28 NF 6
8 20112 BOLT, HEX HD, 1/4 - 28 NF X 5/8 4
9 50170 GUIDE BAR, 7/16 X 5/8 X 15 1/2 2
10 20373 BOLT, WELDING, 3/8 - 16 NC X 1 1/2 (PLASTIC) 2
11 21210 NUT, HEX, 3/8 - 16 NC 2
12 50050 WHEEL, 900 2
13 21110 NUT, JAM, 5/16 - 18 NC 2
14 20230 BOLT, WELDING, 5/16 - 18 NC X 1 1/4 2
15 58460 BUSHING, WHEEL, 0.506 ID X 5/8 OD X 1.562 2
16 21320 NUT, JAM, 1/2 - 20 NF 2

SCISSORS YOKE ASSEMBLY
GALAXY 900 HS
14
14
4
3
2
10
11
4
3
2
7
23
4
12
13
16
9
8
7
15
6
5
ITEM PART N0. DESCRIPTION QTY.
1 55210 YOKE FRAME ASS’Y 1
2 22900 BUSHING, BRASS, 7/8ID X 1 ¼ OD 4
3 30610 SLEEVE, STEEL, ½ ID X 7/8 OD X 1 ¼ 4
4 21910 WASHER, FLAT, ½ ID X 1 OD 4
5 20510 BOLT, HEX HD, ½-20 UNF X 1 ¼ 2
6 22820 BEARING , ½ ID 2
7 21310 NUT, CAP, ½-20 UNF 2
8 22830 BEARING, ½ ID 2
9 50539 BOLT, HEX HD, 5/8-11 UNC X 1 ¾ 2
10 20230 BOLT, WELDING, 5/8-18 UNC X 1 ¼ 2
11 21110 NUT, JAM, 5/16-18 UNC 2
12 50356 BOLT, HEX HD, ½-20 UNF X 2 (SHAVED HEAD) 2
13 21953 WASHER, FLAT, 5/8 ID X 2 OD X ¼ 4
14 20542 BOLT, HEX HD, ½-20 UNF X 2 ¼ (CHROMED) 2
15 21912 WASHER, FLAT, ½ ID X 1 ¼ OD (PLASTIC) 2
16 24283 SHIM, 0.032 4
1
Page 16
Table of contents
Other Lloyd Medical Equipment manuals
Popular Medical Equipment manuals by other brands

OPED
OPED VADOplex user manual

3Disc
3Disc FireCR Flash user manual

Mirage
Mirage Propulse II user manual

PODOBLOCK
PODOBLOCK Stat-X 2023 User instruction manual

Partial Hand Solutions
Partial Hand Solutions Partial M-Finger Technical instructions

Johnson & Johnson
Johnson & Johnson DePuy Mitek ExpresSew II manual