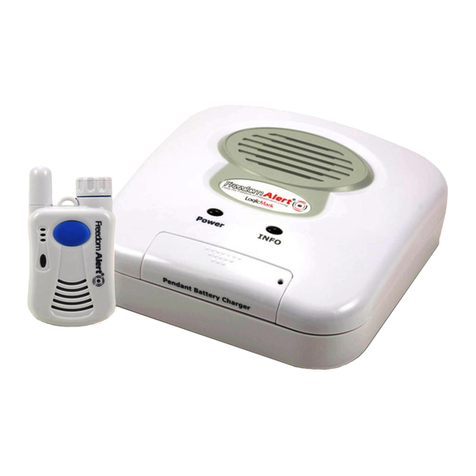
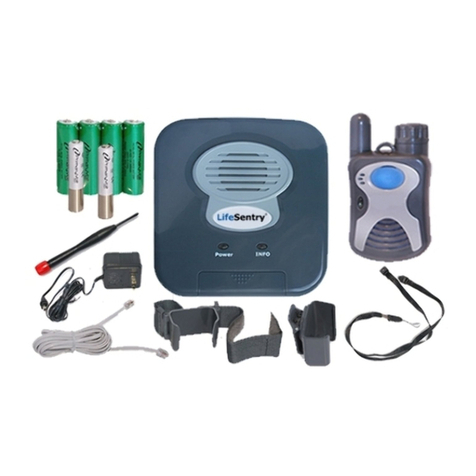
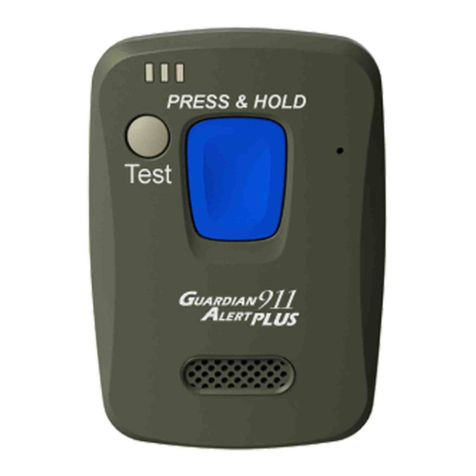
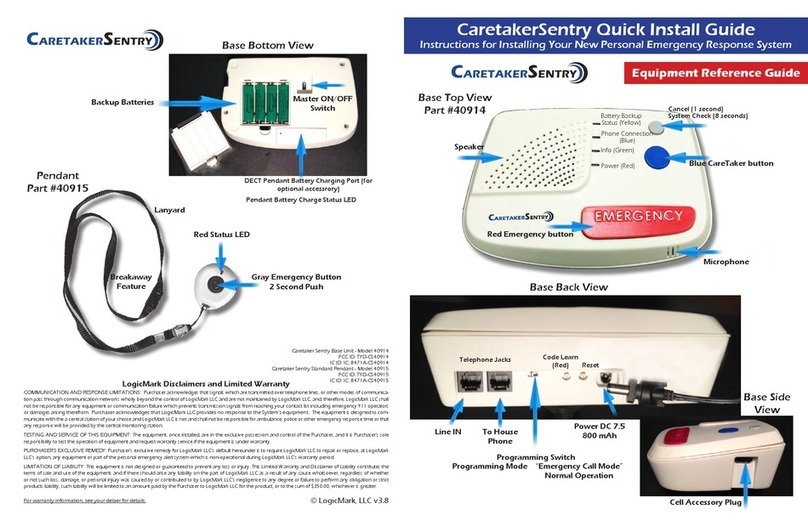
LogicMark Freedom Alert 35911 Installation instructions

v1.1-F5
Guardian Alert
English
INSTALLATION & OPERATION INSTRUCTIONS
Model #35911
With DECT Technology

2FreedomAlert® v1.1-F5
PLEASE READ THIS MANUAL COMPLETELY AND SAVE IT FOR REF-
ERENCE.
Thank you for choosing FreedomAlert®– the most unique Personal Emergency
Response System in the world, and covered by both US and Canadian patents.
FreedomAlert is your personal link to Family, Friends, or Emergency Personnel
when needed. FreedomAlert allows you to program up to 4 numbers to be reached
at the push of a button.
With FreedomAlert - there are:
No Activation Costs
No Contracts
No Monthly Fees
Up to 4 user programmable contacts to call anytime. You can personalize the system
with a ick of a slide switch on the Base unit to:
Call up to 4 custom contacts
Call up to 4 custom contacts & then the 911 emergency operator
Or just the 911 emergency operator.
Because you are speaking through the pendant, FreedomAlert allows you to person-
ally communicate your emergency from anywhere in your home or yard. Emergen-
cies can happen anyplace. And just one button activation.
Traveling? Whether you are moving across town or going to visit the grand kids
across the country - just unplug your FreedomAlert from the phone jack, unplug
the power adaptor and throw it in your suitcase. When you get to your destination,
simply plug it into the local phone jack and power outlet. No additional program-
ming needed. And if you call 911, they will automatically have the local ‘caller
ID’ of that location.
Voice prompts provide easy set-up and testing.
Base unit comes with 4 rechargeable batteries to provide up to 24 hours of standby
power in the event of a power outage.
Need others to share the system in your home. No problem, you can add a total of
up to 4 Pendants and Emergency Wall Communicators to one Base unit as you wish.
Note: Spanish and French instructions can be downloaded from our website.

v1.1-F5 FreedomAlert®3
TABLE OF CONTENTS
Overview of the FreedomAlert ................................................................2
Contents of FreedomAlert kit ..................................................................4
Limitation of Liability ..............................................................................5
Installing the Batteries..............................................................................6
Connecting the Base Unit
Power & Telephone Connections....................................................8
Key to LEDs on the Product ...........................................................8
How to Handle VoIP & DSL...........................................................9
Location of Base Unit ...................................................................10
Base Unit Options & Features
Friends List and Emergency Operator ..........................................10
Programming the Unit
Programming Telephone Numbers .............................................. 11
Telephone Number Programming Worksheet...............................12
Programming Special Features .....................................................14
Adding Additional Pendants to the System ..................................16
Operating the FreedomAlert
Operating the Pendant...................................................................17
Answering an Incoming Call with the Pendant ............................18
Holding the Pendant......................................................................18
Hanging Up...................................................................................18
Lanyard, Belt Clip or Wrist-Strap.................................................19
Battery Check................................................................................19
System Check................................................................................20
Emergency Dialing Using the Panic Button .................................22
Operating Range ...........................................................................22
Water Resistance...........................................................................22
Periodic Testing / Maintenance
Replacing Batteries .......................................................................23
Out of Service Storage or Transportation .....................................23
Troubleshooting Guide ...........................................................................24
Disclaimer / General Warnings & Precautions / Safety ......................28
Warranty..................................................................................................30
Replacement Parts / Additional Accessories Available ........................33
Product Specications ............................................................................34

4FreedomAlert® v1.1-F5
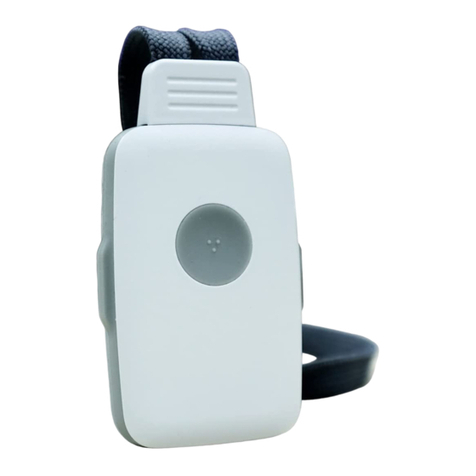
Pendant
Rechargeable Li-Ion Special
Pendant Batteries - 2 Pieces
Base Unit
AC Adapter
Phone Cord
Wrist / Walker / Wheelchair
strap
Belt Clip
Lanyard
Rechargeable AA Batteries - 4 Pieces
Contents of the FreedomAlert Kit:
The items below are included with your FreedomAlert .

v1.1-F5 FreedomAlert®5
Limitation of Liability
This page is a summary of the Disclaimer and Limited Warranty disclosed
in full at the end of this instruction manual. Read them.
The purchaser agrees by using this product to the terms and conditions
below and in the Disclaimer and Limited Warranty. The purchaser also
agrees to read and follow all instructions and warnings on the product
and contained within these Installation and Operation Instructions.
It will be the sole responsibility of the purchaser and any user to assure that
the FreedomAlert product is installed and programmed properly, and that
the unit is used and maintained correctly. This includes, but is not limited
to, periodic use to assure that the FreedomAlert, including batteries, are in
proper working order, that the unit is located in an appropriate location in
the home, that the electrical outlet is supplying power, and that the user has
been educated as to the operation and functionality of the product as a whole.
The FreedomAlert equipment is not designed or guaranteed to prevent any
loss or injury. This Limited Warranty and Disclaimer of Liability set forth in
full at the end of this instruction manual constitutes the terms of sale and use
of the FreedomAlert (and accessories) equipment, and if, notwithstanding
these terms of sale and use of the product, there should arise any liability on
the part of LogicMark LLC as a result of any cause whatsoever, regardless
of whether or not such loss, damage, or personal injury was caused by or
contributed to by LogicMark’s negligence to any degree or failure to perform
any obligation or strict products liability, such liability will be limited to an
amount paid by the Purchaser for the product or $300, whichever is greater.
Further, LogicMark has no obligation to assure that calls are made, received
or responded to, nor is LogicMark responsible for acts, or consequences of
the acts, of those responding.
LogicMark provides no monitoring service for this product. It is up to
the persons at the numbers called to respond in an appropriate manner.


6FreedomAlert® v1.1-F5
Installing the Batteries
Pendant - small white batteries. The Pendant requires one of the white/
Li-Ion (Lithium Ion) batteries at any given time. The pendant should be able
to run up to 4 months on a fully charged battery. The second battery is to be
charging in the Base unit when not being used in the Pendant. There is no
problem of over charging while in the base charger.
To install the battery - unscrew the battery cap of the Pendant. Install the
battery with the negative side up facing the cap. Screw the cap back down
snuggly on the Pendant.
The Pendant Batteries are shipped from the factory with a partial charge – and
will only standby a short period of time. Your unit has 2 pendant batteries
and it is recommended to exchange the battery that is in the base charger
with the battery in the pendant after the rst day of use. This will assure the
battery in the pendant is fully charged and will standby several months before
needing to be exchanged/charged again.
You can check the battery status at any time by simply pushing the gray bat-
tery test button on the back of the Pendant for a second.
Place the extra Pendant battery into the front charging area of the Base
unit so that it will charge and be ready when its time to swap the batteries
around. The LED on the right side will glow red when charging and green
when fully charged.
NOTE: These white batteries are very special batteries that are not available
at your local store. See Specication on page 34 for more details, or contact
LogicMark to purchase replacement batteries. You can also purchase them
on-line at www.PrimaryVolt.com
LED

v1.1-F5 FreedomAlert®7
Base - Larger AA Rechargeable Batteries: The Base unit requires 4
rechargeable NiMH batteries. Unlike the Pendant battery - these are readily
available in many retail stores. Any value of 2400 or higher mAh capacity is
ne. These are to provide you with 24 hours of battery back-up protection
in the event of a power failure. They will not be damaged by continually
charging in the base unit.
When you rst get your unit - these batteries will probably be low, or even
fully discharged - and will need to be charged for 24 hours before being able
to provide you the 24 hour battery back-up protection.
Remove the cover on the bottom of
the Base unit. Install the 4 batteries
as shown in the plastic engraving
in the battery compartment area. A
few seconds after you install these,
you might hear “Running on battery
power”. When the unit is operating on
the backup batteries, it will announce
“Running On Battery Power” twice
and the RED Power LED will continue
to ash. If power is not restored with
in an 8 hour period, the unit will start to announce “Running On Battery
Power” once every 30 minutes until power is restored or the back up batter-
ies are depleted. (If you do not hear this announcement, and the Power LED
is on solid, that means that you have already plugged in the power adaptor).
NOTE: the voice prompts of “battery is OK” etc only apply to the pendant bat-
tery - not to the status of the base unit’s batteries. It is recommended that you
replace the base unit batteries with a new set of similar batteries every 2 years.
Master ON/OFF switch:
FreedomAlert has a Master ON/OFF switch on the bottom of the base unit –
just left of the rechargeable batteries for the base unit. This switch controls
all power – back up batteries and power from the AC adapter. This switch
should be ON at all times while the unit is in use. This switch should only
be turned OFF if the FreedomAlert unit is taken out of service – during
transportation or no longer needed.

8FreedomAlert® v1.1-F5
Connecting the Base Unit
Power Connection. Simply plug in the AC Adapter in to the nearest elec-
trical outlet. Plug the other end of the AC power adapter into the Base unit.
You need to push the plug into the opening in the Base unit and twist 90’
clockwise to lock in place. To remove in the future, simply rotate 90’ coun-
ter-clockwise and pull outward.
Caution: Do not plug the AC Adapter into an outlet which is controlled
by a switch. The switch could accidentally be turned off, thus rendering
the Base unit inoperable after approximately 24 hours when the back
up batteries become discharged.
Telephone Connection. No special phone line or special service is required
to use your FreedomAlert. It works the same way as any cordless phone.
(Touch Tone service is required). Simply plug one end of the telephone
cord into your telephone jack in the wall, and the other end into either one of
the telephone jacks at the back of the Base unit. Note - you will feel a ‘click’
when the jacks are rmly seated in the wall and the Base unit jack receptacles.
If you need to plug a conventional telephone into same outlet used by the
FreedomAlert, simply plug the telephone into the spare jack at the back of
the Base unit.
Key to LEDs on Product:
Here is the key for the LEDs on the Base unit and the Pendant:
BASE RED LED functions:
Off: No AC power/No Back-up Battery Power
Solid: AC power
Flashing: Running on Battery Back-up

v1.1-F5 FreedomAlert®9
BASE GREEN LED functions:
Off: Standby
Solid: Dialing/Talking or Learn Mode
Flashing: Pendant Learning or Low Pendant battery
PENDANT LED (single RED LED) Functions:
Off: Standby
Solid: Dialing or Talking
Flashing: Pendant Learning
How to Handle VoIP & DSL
If Your Phone System is VoIP: Voice-over-Internet Protocol (VoIP) is a
telephone service that sends your call over the Internet instead of through the
regular telephone system. FreedomAlert will work well on most VoIP systems.
It is important (if you haven’t already done so) that you register your physi-
cal address with your VoIP provider and check to insure that 911 service is
available to you.
If you are unsure if your phone system uses VoIP, or to nd if your VoIP system
is capable of calling 911, please contact your telephone service provider.
To install FreedomAlert, simply plug the product into the telephone jack (or
adaptor jack) that you would normally plug a regular telephone into.. Note, if
you have both a working traditional phone line AND a VoIP phone system we
recommend connecting the FreedomAlert system to the traditional phone line.
For more information on using the FreedomAlert product with your VoIP
system, visit our website at www.LogicMark.com and view the FAQ under
the OUR PRODUCTS tab.
How to Handle DSL: If your home has DSL
service for your computer, you will need to use
a DSL lter in line with the FreedomAlert OR IT
WILL NOT WORK. This lter can be obtained
from a local electronics supplier or your DSL
service provider. See illustration to the right.
To FreedomAlert

10 FreedomAlert® v1.1-F5
Locating the Base Unit: For best results and longest range, locate the Base
unit in an area away from household appliances which could present electri-
cal interference. These include microwave ovens, refrigerators, televisions,
electric mixers or blenders, hair dryers, wi routers or other cordless phones.
Do not place on a metal surface.
If more than one FreedomAlert is to be used in one home, it is recommended
that the Base units be located at least 10’ apart.
Base Unit Options and Features:
The FreedomAlert can work right out of the box with no programming. To
avoid programming any telephone numbers, simply slide the slide switch
at the back of the Base unit to the “911 Only” mode. Then, when you push
the blue button on the Pendant - you will be immediately connected to 911
emergency services. Note: If no Friend’s list phone numbers are entered
or a mistake was made while programming the Freedom Alert, it will
automatically default to 911 for each of the 3 slide switch settings.
If you choose not to program any Friends numbers, simply skip these next
steps on Programming Telephone Numbers and jump to page 14.
Friend’s List and Emergency Operator.
In addition to being able to call 911, you can also program up to 4 telephone
numbers of your choosing. You need not program all 4 - just one if you
like. Typically, you might have it programmed for 2 numbers - to call your
neighbor and if they are not available, to call a family member. Even if you
do program a number or more into the Base unit - you can still at any time
choose to call “911 Only” by just sliding the switch at the back of the Base
unit. Your numbers remain in memory and will be ready for use when you
slide the slide switch back to one of the “Friends” position. Note: Discon-
necting power or changing batteries does not erase the numbers.

v1.1-F5 FreedomAlert®11
How does the Base unit know when to go to the next number? The base
unit will rst dial the rst number in the “Friends” list. About 10 seconds
into the conversation, the Base unit will interrupt the call and announce
“This is an emergency call. If you want to continue this call - Press 5 now.
Otherwise, we will hang up and call the next contact or emergency opera-
tor”. At this point - the person that is being called must press the “5” key
on their telephone if they want to continue the call. If they don’t press “5”,
then the Base unit will assume they do not want to talk, or that it may be an
answering machine or a child - at which point it hangs up and goes on to the
next number. It is important to instruct the people you have programmed
into your “Friends” list to press “5” when they get this call, and when they
hear this message. NOTE: the “Press 5” message is NOT played anytime
the FreedomAlert unit is calling 911.
Programming the Base Unit
Programming Telephone Numbers:
If you choose to only contact 911 - and not a custom telephone number - skip
these next steps (and go to page 14) - and make sure your slide switch on the
back of the Base unit is set to “911 only”.
NOTES:
• As you program the system using your telephone, you will hear the base
unit speak each number as it is pushed.
• Dial slowly and listen for each number to be announced. If you did not
hear the announcement - the number was not recorded.
• The FreedomAlert can learn telephone numbers up to 32 digits long, and
you do not have to program all 4 numbers
• Need to add a pause in your number sequence......simply insert a “”
where ever you need a 1 second pause. Insert “” if you need a 2
second pause.
• Remember to program a 1before any long distance numbers.
• Remember to program any AREA CODE numbers if needed.
• Remember to program any PREFIX NUMBERS (like 9 to get an outside
line) if needed.
• If a new number is programmed into the system, all old numbers will
be erased.

12 FreedomAlert® v1.1-F5
Step 1: Write out the numbers - use the worksheet on page 13. Below we
will refer to Number 1 as the rst number, Number 2 as the second number
etc. Include area-codes and a 1 or 9 if they are needed for dialing.
Step 2: Establish a phone connection with a friend or family member - or
with your cell phone. This is done as follows. From your home phone (on
the same line as the FreedomAlert is hooked-up to) call your cell phone (or
a friend or neighbor if you don’t have a cellphone). Answer the phone (or
wait until your neighbor answers the phone and tell them just to wait a minute
while you program your system).
Note: If you don’t do this step, then as you begin to program the unit with
your telephone - the phone company will think you are trying to dial an outline
number and will try to complete the call. By having the phone line already
in use with your cell phone or friend or family member - you are now ready
to program the FreedomAlert.
Step 3: With the phone connection established in Step 2, slide the slide switch
at the back of the Base unit to “Learn Mode”. You will hear an audible
announcement of this position.
Step 4:
Telephone Number Programming Worksheet:
Note: You will be using your telephone keypad on an open telephone line to
program the emergency call telephone numbers. The base will speak each
number that is pushed on the telephones keypad.
Dial Slowly – listen for each number to be announced, if you did not hear
the voice announcement – the number was not recorded.
After sliding the swtich to LEARN MODE - you must enter the
programming password “1 2 3 4 #” before the unit will enter the
programming mode.

v1.1-F5 FreedomAlert®13
1. Call a friend or family member on your telephone.
2. Slide switch to LEARN MODE [voice prompt – Learn Mode]
3. Enter: “1 2 3 4 #” [voice prompt – one, two, three, four, “#” - Enter 1st
phone number followed by # ]
4. (Enter the 1st phone number then “#”) :
__ __ __ __ __ __ __ __ __ __ __ __ __ __ __ #
[voice prompt – numbers as you enter them then “Enter 2nd phone number
followed by #]
Press # again to skip remaining numbers, or
5. (Enter the 2nd phone number then “#”)
__ __ __ __ __ __ __ __ __ __ __ __ __ __ __ __ #
[voice prompt – numbers as you enter them then “Enter 3rd phone number
followed by #]
Press # again to skip remaining numbers, or
6. (Enter the 3rd phone number then “#”) :
__ __ __ __ __ __ __ __ __ __ __ __ __ __ __ __ #
[voice prompt – numbers as you enter them then “Enter 4th phone number
followed by #]
Press # again to skip remaining 4th number, or
7. (Enter the 4th phone number then “#”) :
__ __ __ __ __ __ __ __ __ __ __ __ __ __ __ __ #
[voice prompt – numbers as you enter them]
8. [voice prompt – “End of programming”]
9. Slide switch back to Friends & 911, Friends Only or 911 Only
10. Programming complete!

14 FreedomAlert® v1.1-F5
Programming Special Features
There are a few features you can program into the System. A typical user
will not need these features - and may skip to the next page. If you choose
to change any of these features - use the same programming set-up as before
- i.e. rst establish a phone connection with another phone such as. your cell
phone. Then slide the switch at the back of the Base to “Learn Mode” - then
use these directions for any option you choose to change:
Option #1 – Dial 9 Before Number (important if your phone system requires
a 9 before getting an outside line - particularly when it calls 911)
1. Enter 1234** [Voice prompt – Option Mode]
2. Enter – 1 [Voice prompt – Dial 9 before number, 1 for YES – 3 for NO
3. Enter either 1or 3
[Voice prompt 1 – YES]
or, [Voice prompt 3 – NO] – FACTORY SETTING
4. Enter #(to exit programming mode) Voice prompt – Programming
complete]
5. Slide Programming Switch to “Friend, 911 – Friends Only – 911 Only”
Option #4 – DEMO/Tradeshow Mode – THIS MODE IS FOR DEMO
MODE ONLY FOR SALESPERSONS. This feature is used to DEMO the
unit without having access to a telephone line. We use this feature with a
Viking DLE-200 test box. NEVER LEAVE THE UNIT IN THIS MODE
FOR NORMAL OPERATION.
1. Enter 1234**
[Voice prompt – Option Mode]
2. Enter – 4 [Voice prompt – DEMO Tradeshow Mode],
1 for YES
3 for NO– FACTORY SETTING
3. Enter either 1 or 3
[Voice prompt 1 – YES]
[Voice prompt 3 – NO]
4. Enter “#” (to exit programming mode)
[Voice prompt – Programming complete]
5. Slide Programming Switch to “Normal Operation”
[Voice prompt – “Emergency Call Mode”]

v1.1-F5 FreedomAlert®15
Option #5– Delete - “This is an Emergency, Press 5” message (This option
is only for special cases. We do not recommend that you change this option
without careful thought.)
1. Enter 1234** [Voice prompt – Option Mode]
2. Enter – 5 [Voice prompt – Play message, This is an emergency, press
5 message, 1 for YES – 3 for NO]
3. Enter either 1or 3
[Voice prompt 1 – YES] – FACTORY SETTING
or, [Voice prompt 3 – NO]
4. Enter # (to exit programming mode) [Voice prompt – Programming
complete]
5. Slide Programming Switch to “Friend, 911 – Friends Only – 911 Only”
Option #9 – Reset To Factory Settings (This option will ERASE all pro-
grammed friend numbers and reset all options.)
1. Enter 1234** [Voice prompt – Option Mode]
2.
Enter – 9 [Voice prompt – Reset to factory settings, 1 for YES – 3 for NO
3. Enter either 1or 3
[Voice prompt 1 – YES] or [Voice prompt 2 – NO]
4. Enter # (to exit programming mode)
[Voice prompt – Programming complete]
5. Slide Programming Switch to “Friend, 911 – Friends Only – 911 Only”
Note: phone numbers are erased so regardless of the switch setting, the unit
will call 911 if the emergency button is pushed.
Changing 3-Digit Emergency Contact Number. (This is primarily used
when a person is living in another country other than North America where
the emergency number is different than 911).
1.
Enter 1234*#*# [Voice prompt – Enter New 3 Digit Emergency number]
2. Enter XXX (new emergency number)
[Voice prompt – Programming complete]

16 FreedomAlert® v1.1-F5
Adding Additional Pendants to the System.
FreedomAlert comes with one Pendant. If you want to add additional pen-
dants to your system - follow the directions here. If not, skip this section.
The Pendant’s unique ID code should already be learned into the Base unit
when it came from the factory. You can add a total of 4 Pendants and Emer-
gency Wall Communicators (see available accessories on page 33) to the
system by simply learning each pendant’s ID code to the Base unit.
To program a new Pendant to the Base unit:
On the Base Unit:
1. Push and release the RED Code Learn button on the back of the base
unit. You will hear a voice prompt “Pendant Learning”
On the Pendant:
2. PUSH the Gray Battery Test button and then IMMEDIATELY push
the Blue Panic button –HOLD both buttons until you hear “Pendant
Learning” from the pendant - then release both buttons on the pendant.
• If “Base and Pendant out of Range” or “Pendant Learning Failed”
is heard from the pendant, stop - wait 30 seconds and start at step
#1 again. (Note: For the Emergency Wall Communicator, push and
hold the Red “Help” and gray test button).
3. When Pendant learning has been successful you will hear “All Systems
are OK” and then it will announce the call setting that the base is set
to – Friends 911 Mode, Friends Only or 911 Only.
• If “Base and Pendant out of Range” or “Pendant Learning Failed” is
heard from the Base or Pendant, STOP - wait 30 seconds and start
at step #1 again.
Notes:
• You have up to 45 seconds after pushing the RED Code Learn button
on the base unit to get the pendant to enter “Pendant Learning” Mode.
• Teaching additional pendants does not erase previously learned pen-
dants.
• The base unit will automatically exit the pendant learning mode after
several seconds or if Pendant Learning Failed.
• If you hear the voice prompt “Base and Pendant Out of Range” or
“Pendant Learning Failed” an error has occurred, wait 30 seconds for

v1.1-F5 FreedomAlert®17
the base to reset and repeat steps 1 & 2.
• When more than 1 pendant is learned to the base, the base unit will
announce the pendant number when doing testing like the battery test.
At a later point in time, you might want to erase your previously learned
Pendants. You can erase all previously learned Pendants by simply holding
down the red Code Learn button at the back of the Base unit for 8 seconds.
You will hear the conrmation of “Previous Pendant Codes Erased” from
the Base unit. After that, you can program a new Pendant to the base unit
following the steps above as desired.
Operating the FreedomAlert:
Operating the Pendant. The Pendant is simple in operation - having one
main Blue button - and a smaller Gray button on the back.
The Blue button on the front is the
main button to push for a full 2 seconds
to initiate a call. Once this button is
pushed the call proceeds forward to the
‘Friends’ list and or 911 depending on
the slide switch setting on the back of
the Base unit.

18 FreedomAlert® v1.1-F5
Holding the Pendant. At this
point - you simply hold the Pen-
dant as you would any normal
telephone receiver - close to the
head so that you can hear the
other person being called - and
they can hear you speaking.
Hanging -Up. If you choose to
cancel the call once initiated - you
can simply push the Gray button on the back for a second to cancel the call
and you will hear “Hanging up”. If at the end of the conversation, the other
side can force a hang up by pushing “9”, or the just hang up their end, and
the system will hang-up automatically over the next 1 to 3 minutes, or you
can push the gray button on the Pendant to end the call immediately. The
unit will automatically reset and be ready for the next call.
Answering an Incoming Call with the Pendant:
The FreedomAlert has the ability to answer incoming calls through the pen-
dant or the Emergency Wall Communicator accessory Once the customer
hears the phone ring (the pendant will NOT ring), they simply push the Blue
Emergency button or Red “HELP” button on the Emergency Wall Commu-
nicator to answer the call. Example:
1. Incoming call to customers home
2. Base unit rings
3. Push the Blue Emergency button on pendant for 2 seconds to activate
the pendant
4. FreedomAlert will answer the incoming call – talk using pendant
5. To end the call
a. User pushes the Gray test button on pendant to hang-up.
b. Or, the calling person pushes #9 to end call and reset unit
c. Or, the unit listens for 3 minutes of silence and then hangs-up and
resets

v1.1-F5 FreedomAlert®19
Lanyard, Belt Clip or Wrist Strap.
FreedomAlert comes with 3 accessories for carrying the pendant . You can
carry the Pendant using the Lanyard. You can slide the Pendant in the Belt
Clip, or you can use the Wrist-strap as a means to carry the Pendant. Note
that the Wrist-Strap can also be used as a way to attach the Pendant to a wheel
chair. Choose the method that suits you best.
The drawing at the right shows
the method of attaching the
lanyard to the Pendant.
NOTE: This lanyard has a
‘break-away’ feature in the
event it gets tangled on some-
thing in a fall.
Battery Check:
The FreedomAlert has a built-in battery tester. When you press and release
the Gray button at the back of the Pendant, a voice announcement will inform
you of the battery condition. One of the following messages will be heard:
“Battery is ok.”
Check the battery condition twice a month.
“Battery is low.”
The battery should be replaced within the next week.
“Replace battery now.”
The battery should be replaced now.
To replace the battery - simply exchange the battery in the Pendant with the
battery that has been charging in the Base unit.
Please note: If there is no response after pressing the button for one second
or more, the battery is dead and must be replaced immediately.

20 FreedomAlert® v1.1-F5
The battery should be tested at least twice a month along
with the System Check outlined on the this page.
When it gets to the point after a few years that the pendant battery only lasts
4 weeks before needing to be charged - it is then time to replace both the
Pendant batteries. Note: This is a very unusual battery not available at most
outlets. Order replacement batteries from LogicMark as directed on page 33.
NOTE: The pendants are monitored by the base unit. The pendant reports to
the base every 13 hours. If the battery condition is “Replace Battery Now”,
the base unit will call the rst ‘Friend’ number and play the voice prompt
[Pendant number X, Replace Battery Now]. The voice prompt is played 10
times, then hangs up and resets.
And, if the base unit misses 4 reports from the pendant in a row (52 hours),
the base unit will call the rst ‘Friend’ number and play the voice prompt
[Pendant Number X, Not in communication]. The voice prompt is played
10 times, then hangs up and resets.
Pressing the 9 on the phone keypad on either of these messages will stop the
announcement and cause the unit to reset.
If the rst ‘Friend’ gets either of these announcements, please make arrange-
ments as soon as possible to service or replace the pendant.
The unit will not call 911 to report a Replace Battery Now or Pendant Failed
condition. A ‘Friend’ number must be programmed for this feature to work.
System Check:
The gray button on the back of the pendant case which is used to perform the
BATTERY CHECK, will also perform a SYSTEM CHECK. Press and hold
this button for more than four (4) seconds. One of the following announce-
ments will be made.
“All systems are ok.”
This conrms the following:
Battery status.
The Pendant is working.
The Base unit is working.
Other manuals for Freedom Alert 35911
1
Table of contents
Other LogicMark Emergency Phone manuals

LogicMark
LogicMark GUARDIAN 911 ALERT PLUS User manual

LogicMark
LogicMark CaretakerSentry 40914 User manual

LogicMark
LogicMark FreedomAlert 35911 Installation instructions

LogicMark
LogicMark CaretakerSentry 40911 Installation manual

LogicMark
LogicMark CaretakerSentry User manual

LogicMark
LogicMark FreedomAlert 35911 Installation instructions

LogicMark
LogicMark 37911 Operating instructions

LogicMark
LogicMark 30911 User manual

LogicMark
LogicMark CaretakeSentry 40914 User manual

LogicMark
LogicMark GUARDIAN ALERT 911 User manual