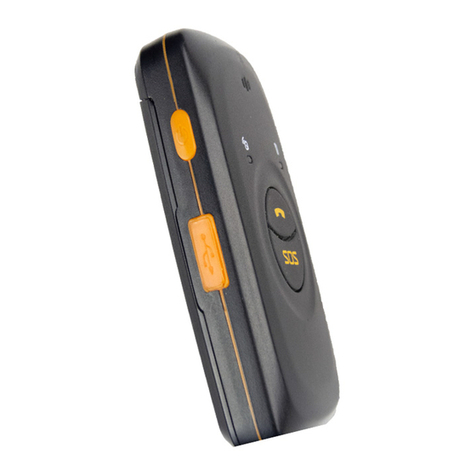
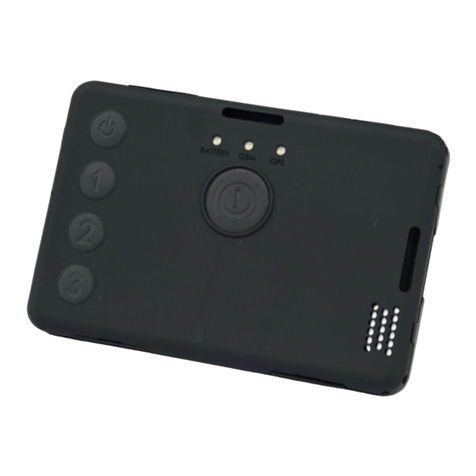
LONEALERT Twig One Atex User manual

xxx |xxx
Product Manual
Twig One
Atex.

TWIG ONE ATEX
QUICK START.
Speaker
Display
Call/Answer
Set Timer Check
Call Service
Microphone
Strap Hole
SOS Button
Power/End Call
Cancel Timer
Turn Man Down
Function on/off
(Disabled by de-
fault)
Familiarise yourself with your Twig One Atex
device.
Create default
timers
These are on existing
instructions but not sure
where they need to point

Custom Timer
To create a Custom
Timer press and hold
button 3
Default Timer
To create a Default Timer,
press and hold button
1 until 5 arrows appear
on screen. Continue to
hold button 1 until the
TWIG ONE beeps and an
envelope appears on the
screen.
To cancel any Active
Timers, press and hold
button 2
Cancel Timer
Press the red end call
button to end a call.
Ending a call
Press and hold the SOS
button. You will see 6 ar-
rows appear on screen,
continue to hold until 6
arrows are filled
Raising an alarm
How to use the
Twig One Atex.
To turn the device on press and
hold the power button until you
see TWIG ONE appear on the
screen and the device beeps.
To Power Off press and hold the
power button until you hear the
device beep twice and you see
the screen display an hour glass
Power On/Off

A Custom Timer creates a Timer for
a period set by the user. To create a
Custom Timer press and hold button
3. This will ring through to our check
call service, at which point you can do
the following options:
Start - function to set a deafult length
timer (described in The OWL Portal)
Custom function to create custom
timers
Cancel function to cancel current set
timers
Custom Timers
A Default Timer creates a Timer for a
fixed duration. The duration is set in
The OWL Portal.
To create a Default Timer on the de-
vice, press and hold the 1 until 6 arrows
appear on screen. Continue to hold
button 1 until the device beeps and
you see an envelope on screen. To
acknowledge this message, press the
red down arrow button once.
Default Timers
To Cancel a Timer, press
and hold button 2 until all 6
arrows appear on screen.
Continue to hold until the
device beeps and an en-
velope appears on screen.
An on screen message will
appear that reads ‘timer
cancelled’. to acknowledge
this press the red end call
button once.
Cancelling Timers
Timers
When your Timer expires, the device will start ringing. This is to
remind you that your Timer has expired and you need to take
action.
With a push of a button a lone worker can create and set
Timers. When a set Timer elapses before you are able to
take action, The OWL will create an alert.
If your Timer expires be-
fore you have been able to
update it, you will receive a
call on your TWIG One device
or to the phone number you
have registered with us. In
this event, you need to take
action to let people know you
are ok.
If the call is received via your
mobile phone, you will need
to enter your PIN code when
prompted via the keypad.
Your Timer will be restarted
if you had a periodic Timer
set, or cancelled if you set a
standard Timer.
If no mobile is set up, the call
will come to your device. You
can’t enter a pin, but just end
the call and either Create or
Cancel a Timer within 5 min-
utes to prevent an Alert.
Expired Timers
You can also leave
a voice message
once you have set
your custom timer.
This can be listened
to within the user
section in The OWL.
Custom Timers
continued:

The Man Down function provides the lone worker
with added protection. Man Down is a tilt-switch
inside the Twig One Atex that automatically sends
an alert signal if the device is tipped on its side for
longer than the chosen preset period.
This feature increases situational awareness,
enhances worker safety and improves response
time.
If the device is tilted over approx
45 degrees for 30 seconds, it
will begin beeping - to stop this,
simply tilt the Twig One back
upright and after XX seconds it
will stop beeping.
If the device is not put upright,
it will continue to beep for 30
seconds and the countdown will
show on the screen. If this elaps-
es, the device will trigger the
man down alert in accordance
to your company’s escalation
procedure.
Lone worker
trips, falls or has
an accident.
The fall will
activate the Man
Down function.
This alerts The
OWL which will
then contact your
nominated contacts.
Your contact will try
to make contact via
the device to check
you are OK and send
help if needed.
1.
2.
3.
4.
Functionality
The sequence
of events.
What is
Man Down?

Knowing how to raise an alert quickly is essen-
tial. The Panic Alert button on the Twig One Atex
is located on the front of the device, designed for
quickness and ease of use in an emergency.
To raise an alert press and
hold the SOS button until the
5 arrows are the screen are
filled. A tick within a triangle
will appear on the screen
to let you know it has been
pressed.
The Panic Alert
Firstly, do not panic! If the alert is a false alert you
simple need to let the Alarm Receiving Centre
know, they will ask you for your PIN to verify your
identity.
What’s
my PIN?
You will be provided with a
memorable PIN by either your
manager, or your organisation’s
LONEALERT Champion.
In an alert, a brief loud
beep and vibration
indicates that the
SOS button has been
pressed, the device will
then raise a panic in
accordance with your
company procedure.
If you have our Alarm
Receiving centre set
as your first point of
contact the device will
raise a 2 way call with
them.
What happens
with alerts?
What happens if you raise
a false alert?
The
Panic Alarm
Alerts are dealt with by the Alarm Receiving Centre or
your nominated contacts, usually colleagues. Your de-
vice will connect you directly with a Responder oper-
ator who will provide assistance and reassurance. If
required, they can direct emergency services to you.
Nominated contacts will be automatically notified by call,
text message and email.

Step 1) Locate the SIM card slot
Ensure that the Twig One is
powered off and lat it face up in
front of you. At the bottom right
side of the device, there is ann
open slot for the sim card holder
to slide into.
Step 2) Insert the SIM card
Pop out the Nano (Smallest) SIM card
found wihtin the box and peel off the
small dot sticker before sticking the
sim in the black sim tray, ensuring
it is in the correct way and slide this
into the device with the sim facing
down.
Step 3) Closing the SIM card slot
Using the screwsdriver and the 2
small screws from the product box,
fasten the sim holder to the device
until the screws tighten.
Step 4) Check the Twig One
Power on the Twig One using the red
down arrow button. After a short while,
a mobile network should appear on-
screen. If an image of a SIM may be
installed correctly. Once you have a
mobile network on screen check that
the timer function works on the device
by pressing button 3.
Inserting a
SIM card

TWIG One Atex
Accessories
In the box
TWIG One Atex
Accessories
Also available to order
In the box together with your device, you
will find the following:
> Leather case
> USB Lead
> 3-pin mains charger
> Screwdriver
445-0002 |
Charger Adaptor
445-0004 |
Belt Clip
445-0004 |
Charge Pack 445 - 0006 |
Charge Cradle
405-0003 |
Door Tg
505 -0001 |
Beacon 445-0006 |
NFC Tag
Accessories for
indoor locating
545 - 0003 |
Leather Case

Indoor
Locating.
Need help with your device?
Speak to us.
In many buildings the
GNSS (Global Navigation
Satellite System) signals
are blocked, so the loca-
tion of your lone worker is
not known.
The Twig One allows indoor
locating through the SRD3
option which enables
accurate location through
using necessary bolt-ons
such as RF Door tags to
record when rooms are
entered and left. Beacons
allow large areas to be
subdivided. Both of which
help you locate lone work-
ers in need of assistance
more quickly.
Laboratory
Primary
processing
area
Cooking Area
Chemicals
Store
Packaging Area
Showers &
Toilets
Showers &
Toilets
High Care Area
(Pressurised)
405-0003 |
Door Tg
505 -0001 |
Beacon
445-0006 |
NFC Tag
Accessories for
indoor locating

Basic Characteristics
Module
Name | Twig One Atex
Technology | GSM, GPRS, EDGE
Size and weight:
Height | 102.2 mm
Width | 49.2 mm
Depth | 19.7 mm
Battery Spec:
Rechargable 1350 mAh Li-ion battery
Power saving mode |
Normal mode |
Operating temp | -20°c to +50°c
Power
Charging Voltage |
Battery | 1350 mAh/Li-ion battery
Charging Connector |
GSM:
Quad band GSM ( B2/B3/B5/B8)
4G network (850/900/1800/1900 MHz)
Features:
Sensors | Tilt /Man Down
Scenario | Panic Alert, Custom &
Default Timers
Ingress Protection | IP65
Interface
Configurable Buttons |
USB |
LED Indication |
SIM |
Memory |
Sales Package contents:
Twig One Atex device
Leather case
Mains adapter
Screw driver
USB cable
Product Manual
SIM Card

Safety Information
This message contains information on how to operate
the Twig One Atex safely. By following these require-
ments and recommendations, you will avoid dangerous
situations. You must read these instructions carefully
and follow them strictly before operating the device!
• Use only original batteries specified by manufac-
tuer and chargers exclusively designed for your
device.
• Incompatible batteries and chargers may cause
serious injuries or damage to your device.
• Use batteries safely. Protect batteries from mois-
ture, place them in a cool and dry place when
storing. Avoid extensive operation at high tempera-
tures. Do not attempt charging battery directly from
the electrical mains.
• Power supply circuits used to charge the device
connection must have safeguards, which prevent
power leakage, short circuits, or incorrect electrical
grounding. Any used switches ought to be installed
in a readily accessible location. Power must be
uninterrupted.
• Remove device safely. Device must be discon-
nected from computer or charger by unplugging
the USB cable from the device.
Battery Disposal
(Waste Electrical and Electronic Equipment Directive
– Applicable in European Union and other European
countries
with separate battery return system.)
This product and its accessories (such as chargers,
batteries and the USB cable) cannot be disposed of
with other household waste when they reach the end
of their life. If batteries are not
properly disposed of, these waste may cause harm
to human health and the environment. To prevent
the harm,
please dispose of or recycle them separately from
other waste so as to boost resource recycling and
reuse.
Operate the device in suitable conditions. Do not use
the device where mobile connectivity is forbidden.

Unlimited remote support and
training.
Group or one to one sessions
Videos, digital guides & training
modules to The OWL Portal.
Personal one to one support with
our friendly team.
Tailor made training designed for
your needs.
LONEALERT. Designed to
support you.
Once you are part of the
LONEALERT family, we offer
unlimited support and
training.
To us, the aftercare support
is crucial to ensure that
your lone working solution
is consistently delivering for
you and your organisation.
You can contact us on:
0330 999 8484
It’s what
we do

© All rights reserved 2022. Advance IT Solutions Ltd.
Lone working is
about people.
This manual suits for next models
1
Table of contents
Other LONEALERT Security System manuals
Popular Security System manuals by other brands

Grandstream Networks
Grandstream Networks GDS3705 user manual

dallmeier
dallmeier VMC-1 quick start guide

ERNITEC
ERNITEC 225 Stries Installation and Adjustment Instruction

Newton Security
Newton Security T-DAR T2010MT Installation and operation manual

Hochiki
Hochiki VoiceNET Training manual

Interlogix
Interlogix xgen Installation & programming guide