LS ELECTRIC XGT Series User manual

LS ELECTRIC strives to maximize your profits in gratitude for choosing us as your partner.
Programmable Logic Control
Rnet I/F Module
XGL-RMEA
XGL-RMEB
GOL-RR8T
XGT Series

Safety Instruction
1
Before using the product …
Foryoursafetyandeffective operation,pleasereadthesafetyinstructionsthoroughlybeforeusingthe product.
►Safety Instructions should always be observed in order to prevent accident or risk by using the product
properlyandsafely.
►Precautious measures can be categorized as “Warning”and “Caution”, and each of the meanings is as
follows.
This symbol indicates the possibility of serious injury or death if some applicable
instruction is violated
This symbol indicates the possibility of severe or slight injury, and damages in
productsif some applicable instruction is violated
Moreover, even classified events under its caution category may developinto serious accidents depending on
situations.Therefore we strongly advise users to observeallprecautions in aproper way just like warnings.
►The marks displayed on the product and in the user’s manual have the following meanings.
Be careful! Dangermaybe expected.
Be careful! Electricshock mayoccur.
After readingthisuser’s manual, it shouldbe storedin a place that is visible toproductusers.
Warning
Caution

Safety Instruction
2
Safety Instructions for design process
Please install a protection circuit on the exterior of PLC so that the
whole system mayoperate safelyregardless of failures from
external power or PLC. Any abnormal output or operation from PLC may cause serious problems
to safetyin whole system.
- Install protection units on the exterior of PLC like an interlock circuit that deals with opposite
operations such as emergencystop,protection circuit, and forward/reverse rotation or install an
interlock circuit that deals with high/lowlimitunder itspositioncontrols.
- If any system error (watch-dog timer error, module installation error, etc.) is detected during
CPU operation in PLC, all output signals are designed to be turned off and stopped for safety.
However, there are cases when output signals remain active due to device failures in Relay and
TR which can’t be detected. Thus, you are recommended to install an addition circuit to monitor
theoutputstatusfor thosecriticaloutputs whichmaycause significant problems.
Never overload more than rated current of output module nor
allow to have a short circuit.Overcurrentforalongperiodtimemay
cause a fire.
Never let the external power of the output circuit to be on earlier
than PLC power, which maycauseaccidentsfrom abnormaloutputor
operation.
Please install interlock circuits in the sequence program for safe operations in the system
when exchange data with PLC or modify operation modes using a computer or other
external equipments Read specific instructions thoroughly when conducting control operations
with PLC.
Warning

Safety Instruction
3
Safety Instructions for design process
Safety Instructions on installation process
I/O signal or communication line shall be wired at least 100mm away from a high-voltage
cable or power line. Fail to follow this instruction maycause malfunctionsfrom noise
Caution
Use PLC only in the environment specified in PLC manual or general standard of data
sheet. If not, electric shock, fire, abnormal operation of the product maybe caused.
Before install or remove the module, be sure PLC power is off. If not, electric shock or damage
on theproduct maybe caused.
Be sure that every module is securely attached after adding a module or an extension
connector. If the product is installed loosely or incorrectly, abnormal operation, error or dropping
may be caused. In addition, contact failures under poor cable installation will be causing
malfunctions aswell.
Be sure that screws get tighten securely under vibrating environments. Fail to do so will put
the product underdirect vibrations which will cause electric shock, fire andabnormal operation.
Do not come in contact with conducting parts in each module, which may cause electric
shock,malfunctionsorabnormal operation.
Caution

Safety Instruction
4
Safety Instructions for wiring process
Prior to wiring works, make sure that every power is turned off. If not, electric shock or damage
on theproduct maybe caused.
After wiring process is done, make sure that terminal covers are installed properly before its
use.Failtoinstallthecovermaycauseelectricshocks.
Warning
Check rated voltages and terminal arrangements in each product prior to its wiring
process. Applying incorrect voltages other than rated voltages and misarrangement among
terminalsmaycausefire ormalfunctions.
Secure terminal screws tightly applying with specified torque. If the screws get loose, short
circuit,fireorabnormal operation may be caused.Securing screws too tightly will cause damages to
themoduleormalfunctions, shortcircuit,anddropping.
*
Be sure to earth to the ground using Class 3 wires for FG terminals which is exclusively
used for PLC. If the terminals notgrounded correctly, abnormal operation or electric shock may be
caused.
Don’t let any foreign materials such as wiring waste inside the module while wiring, which
maycause fire, damageon the product orabnormaloperation.
Make sure that pressed terminals get tighten following the specified torque. External
connector type shall be pressedor soldered using proper equipments.
Caution

Safety Instruction
5
Safety Instructions for test-operation and maintenance
Don’t touch the terminal when powered.Electricshockorabnormaloperation mayoccur.
Prior to cleaning or tightening the terminal screws, let all the external power off including
PLC power. If not, electric shock or abnormaloperation mayoccur.
Don’t let the battery recharged, disassembled, heated, short or soldered. Heat, explosion or
ignition maycause injuriesorfire.
Warning
Do not make modifications or disassemble each module. Fire, electric shock or abnormal
operation mayoccur.
Prior to installing or disassembling the module, let all the external power off including PLC
power. If not, electric shock or abnormal operation mayoccur.
Keep any wireless equipment such as walkie-talkie or cell phones at least 30cm away from
PLC. If not,abnormal operation maybecaused.
When making a modification on programs or using run to modify functions under PLC
operations, read and comprehend all contents in the manual fully. Mismanagement will cause
damages to productsandaccidents.
Avoid any physical impact to the battery and prevent it from dropping as well. Damages to
battery may cause leakage from its fluid. When battery was dropped or exposed under strong
impact, never reuse the battery again. Moreover skilled workers are needed when exchanging
batteries.
Caution

Safety Instruction
6
Safety Instructions for waste disposal
Product or battery waste shall be processed as industrial waste. The waste may discharge
toxic materialsorexplode itself.
Caution

Revision History
7
Revision History
Version
Data
Remark
Page
V1.0
’05.03
FirstEdition.
V1.1
’05.05
Description of functionadded(Page:A-1).
A-1
V1.2
’06.06
Terminologies areedited.
V2.0
’07.03
1.Addedseparateresetfunction
2. Versionup aboutXG-PDsoftware
V2.1
’09.06
Contentaddedand revision
1-1~1-4, 5-1
V2.2
’11.05
Howtoenablelink through flag added
CH 5.2
V2.3
’14.11
XG5000 V4.0ToolUI Updated
-
V2.4
’17.09
XGL-RMEBModule added
-
V2.5
’19.06
GOL-RR8TModule added
CH1, 2, 4,A.3
V2.6
’20.05
Formatandcontentsmodificationaccordingtothe change of
company name(LSIS->LSELECTRIC)

About User’s Manual
8
Thank youforpurchasingPLCofLSELECTRIC Co.,Ltd.
Before use, make sure to carefully read and understand the User’s Manual about the functions, performances, installation and
programming of the product you purchased in order for correct use and importantly, let the end user and maintenance
administrator to be provided with the User’s Manual.
The User’s Manual describes the product. If necessary, you may refer to the following description and order accordingly. In
addition, youmayconnectourwebsite(http://www.lselectric.co.kr/)anddownloadtheinformationasaPDFfile.
RelevantUser’s Manuals
Title
Description
No. of User’s
Manual
XGK-CPUA/CPUE/CPUH/CPUS
User’sManual
Itdescribesspecifications,systemstructureandEMCspec.
correspondenceofCPUmodule,powermodule,base,I/O
module andincreasecable
10310000508
XG5000 User’s Manual
Itdescribes howtouse XG5000softwareespeciallyabout
online functions suchasprogramming,printing,monitoring
anddebuggingbyusingXGKseries products.
10310000512
XGKSeries
Instructions &Programming
It isthe user’smanualforprogrammingtoexplainhowtouse
commands that areused PLCsystem withXGKCPU.
10310000510
CurrentlyusermanualofXGL-RMEAmodule is writtenbased on thefollowingversion.
RelatedOSversionlist
Item
OSversion
XGK-CPUU,CPUH, CPUS, CPUA,CPUE
V4.55
XGI-CPUU/D,CPUU, CPUH,CPUS, CPUE
V4.06
XGK-CPUSN,CPUHN,CPUUN
V1.05
XGI-CPUUN
V1.12
XGR-CPUH/F,CPUH/T,CPUH/S
V2.72
XG5000
V4.22

Table of Content
9
◎Table of Contents ◎
Chapter 1 Overview ---------------------------------------------------------------------------------------------------- 1-1 ~ 1-4
1.1 Introduction ----------------------------------------------------------------------------------------------------- 1-1
1.2 Characteristics ------------------------------------------------------------------------------------------------- 1-2
1.3 Product Information ------------------------------------------------------------------------------------------- 1-3
1.3.1 Components List -------------------------------------------------------------------------------------- 1-3
1.3.2 Max. Installation number of modules ------------------------------------------------------------ 1-4
Chapter 2 Specifications --------------------------------------------------------------------------------------------- 2-1 ~ 2-9
2.1 General Specifications --------------------------------------------------------------------------------------- 2-1
2.2 Performance Specifications --------------------------------------------------------------------------------- 2-2
2.3 Structure and Characteristics ------------------------------------------------------------------------------- 2-5
2.4 Terminating Resistor ------------------------------------------------------------------------------------------ 2-9
Chapter 3 Installation and Test Operation of the Product ------------------------------------------------------3-1
3.1 Precautions for Installation ---------------------------------------------------------------------------------- 3-1
3.1.1 Precautions for installation ------------------------------------------------------------------------ 3-1
3.2 From Setting to Operation ----------------------------------------------------------------------------------- 3-1
Chapter 4 System Configuration --------------------------------------------------------------------------------- 4-1 ~ 4-2
4.1 System Configuration of Network---------------------------------------------------------------------4-1
4.1.1 XGL-RMEA/B + Smart I/O ------------------------------------------------------------------------ 4-1
4.1.2 Mixed configuration1 between XGL-RMEA/B + repeater + slave modules------------ 4-1
4.1.3 Mixed configuration2 between XGL-RMEA/B + repeater + slave modules------------ 4-2
Chapter 5 High-speed Link Setting ---------------------------------------------------------------------------- 5-1 ~ 5-20
5.1 Introduction ----------------------------------------------------------------------------------------------------- 5-1
5.2 How to use XG5000 ------------------------------------------------------------------------------------------ 5-2
5.3 High-speed link editing ------------------------------------------------------------------------------------- 5-6
5.4 Read and write of High-speed Link -------------------------------------------------------------------- 5-11
5.5 System diagnosis ------------------------------------------------------------------------------------------- 5-12
5.6 High-speed link information ------------------------------------------------------------------------------- 5-17
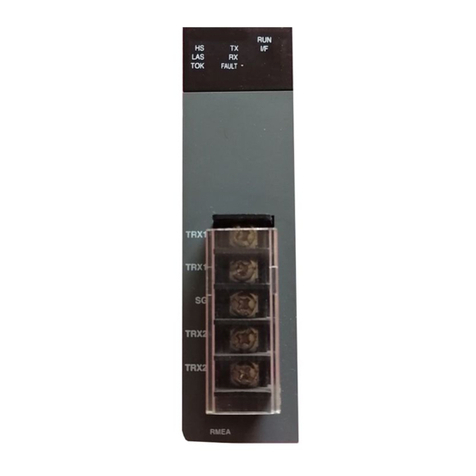
Table of Content
10
Chapter 6 Program Example --------------------------------------------------------------------------------------- 6-1 ~ 6-3
6.1 XG5000 program -------------------------------------------------------------------------------------------- 6-1
Appendix ----------------------------------------------------------------------------------------------------------------- A-1 ~ A-4
A.1 Terminology ----------------------------------------------------------------------------------------------- A-1
A.2 List of HS link flags ------------------------------------------------------------------------------------------- A-2
A.3 External Dimensions ----------------------------------------------------------------------------------------- A-4

Chapter 1 Overview
1-1
Chapter 1 Overview
1.1 Introduction
This manual of Rnet I/F module is prepared to describe XGT series of dedicated remote net
(hereinafter referred to as Rnet I/F module). XGT Rnet I/F module is composed of data link layer
and physical layer in OSI 7 layers. Rnet system controls I/O data from the sensor of field level and
manages the data conveniently for monitoring, troubleshooting and maintenance through LS HMI of
PMU unit. Rnet I/F module supports a speed of 1Mbps and provides convenience of data Tx/Rx for
users by means of XG5000 parameters setting, through LS dedicated network. In addition, various
system configurations (8-port branching) are possible through the Rnet Repeater Hub Module, and up
to 63 slave modules can be controlled from one master module.
To create a program, refer to the following manuals together.
XG5000 user manual
XGK instruction
XGK user manual
XGI/XGR instruction
XGI/XGR user manual
The current user’s manual of XGT Rnet I/F Module is prepared, based on the following
versions.
XGT PLC XG5000 Programming Tool: V4.22 or above
XGT Rnet I/F Module O/S
- XGL-RMEA: V1.1 or above
- XGL-RMEB: V5.0 or above
(Max. station communication via GOL-RR8T is only possible with XGL-RMEB V5.1
or later.)

Chapter 1 Overview
1-2
1.2 Characteristics
XGT Rnet I/F module has the following characteristics;
Rnet I/F module :
▶LS dedicated network
▶Convenient with High-speed link parameters setting is available
▶Reduced wiring, easy installation
▶Up to 12 units can be installed on 1 basic base
▶Various system configurations are available through basic parameters changes
▶Smart I/O + Rnet system configuration is available
Rnet Repeater Hub module has the following characteristics;
Rnet Repeater Hub module :
▶LS dedicated network
▶Reduced wiring, easy installation
▶Various system configuration by network separation
▶Long distance communication possible
▶Maximum station (64 stations including master) Communication possible

Chapter 1 Overview
1-3
1.3 Product information
1.3.1 Components List
Classific-
ation
Connection
cable
Model
Product code
Description
Remarks
Master
module
Twisted pair
(electric)
XGL-RMEB
47200185
-
XGT Rnet master
module
Master
module
Twisted pair
(electric)
XBL-RMEA
47230204
-
XGB Rnet master
module
Slave
Module
Twisted pair
(electric)
G6L-RREA
46640104
Installed on GM6/K200S CPU position
Rack type
Remote system
GRL-D22C
47060133
DC input 16 points
Smart I/O Rnet series
- Fixed terminal block
- 5-pin communication
connector
Smart I/O Rnet
GRL-D24C
47060134
DC input 32 points
GRL-TR2C
47060135
TR output 16 points
GRL-TR2C1
47060138
TR output 16 points
GRL-TR4C
47060137
TR output 32 points
GRL-TR4C1
47060138
TR output 32 points
GRL-DT4C
47060139
DC input16 points/ TR output 16
points
GRL-DT4C1
47060140
DC input16 points/ TR output 16
points
GRL-RY2C
47060141
Relay output 16 points
iS7 Rnet
64110007
iS7dedicated Rnet I/F adaptor
XRL-BSSA
47060158
Digital input/ouput 512point
Extendable
Smart I/O Rnet
Repeater
module
Twisted pair
(electric)
GOL-RR8T
47060192
-
Rnet repeater hub 8
ports module

Chapter 1 Overview
1-4
1.3.2 Max. Installation number of modules
The maximum installation number of modules is 12 regardless of base type (basic base and extension).
For maximum performance of communication module, it is recommended to equip the module on
basic base. The following table indicates available service type per each CPU. After due consideration
of the number of communication modules, apply to the system configuration.
Classification
XGK
XGI
XGR
CPUH
CPUU
CPUA
CPUS
CPUE
CPUSN
CPUHN
CPUUN
CPUU
CPUH
CPUS
CPUE
CPUU/D
CPUUN
CPUH/T
CPUH/F
CPUH/F
No. of module
using High
Speed Link
(Max.)
12 modules
No. of module
using P2P (Max.)
P2P is not used
No. of module
using dedicated
service (Max.)
Dedicated service is not used

Chapter 2 Specifications
2-1
Chapter 2 Specifications
2.1 General Specifications
General specifications of XGT series are as below.
No.
Item
Specification
Related specifications
1
Operating
temperature
0℃∼ +55℃
-
2
Storage
temperature
-25℃∼ +70℃
-
3
Operating
humidity
5~95%RH, Non-condensing
-
4
Storage
humidity
5~95%RH, Non-condensing
-
5
Vibration
For discontinuous vibration
-
Frequency
Acceleration
Amplitude
Number
IEC 61131-2
5≤f< 8.4 ㎐
-
3.5mm
Each 10 times in
X, Y, Z directions
8.4≤f≤150 ㎐
9.8 ㎨(1G)
-
Continuous vibration
Frequency
Acceleration
Pulse width
5≤f< 8.4 ㎐
-
1.75mm
8.4≤f≤150 ㎐
4.9 ㎨(0.5G)
-
6
Shock
* Maximum impact acceleration:147 m/s2(15G)
* Authorized time: 11 m/s
* Pulse wave : Signal half-wave pulse (Each 3 times in X,Y,Z directions)
IEC 61131-2
7
Noise
Immunity
Square wave impulse noise
AC : ±1,500V
DC : ±900V
Test specification
LS ELECTRIC
Electrostatic discharging
Voltage: 4kV (Contact discharge)
IEC 61131-2,
IEC 61000-4-2
Radiated electromagnetic
27 ~ 500 MHz, 10 V/m
IEC 61131-2,
IEC 61000-4-3
Fast
Transient
/burst
noise
Class
Power
module
Digital/Analog I/O
communication interface
IEC 61131-2,
IEC 61000-4-4
Voltage
2 kV
1 kV
8
Ambient
conditions
No corrosive gas or dust
-
9
Operating
height
2,000 m or less
-
10
Pollution
degree
2 or less
-
11
Cooling type
Natural air cooling
-
1) IEC (International Electrotechnical Commission)
: An international nongovernmental organization which promotes internationally cooperated standardization in
electric/electronic fields, publishes international standards and manages applicable estimation system related
with.
2) Pollution degree
: An index indicating pollution degree of the operating environment which decides insulation performance of the
devices. For instance, Pollution degree 2 indicates the state generally that only non-conductive pollution
occurs. However, this state contains temporary conduction due to dew produced.
Notes

Chapter 2 Specifications
2-2
2.2 Performance Specifications
Specifications for system configuration of Rnet I/F module are as described below.
Please refer to the table below for system configuration.
1) XGL-RMEA/B Performance Specifications
Item
Specifications
Transmission Speed
1Mbps
(Rnet I/F modules common)
Max. Tx distance
Max. 750m
Connection Cable
Twisted pair shielded cable
- Standard: LIREV-AMESB 1Px22AWG (7/0.254):LS Cables
- Moving: CAN Bus Drag Chain, UL (1x2x0.34mm²): Helukable
Maximum stations
connected
Network
Master station 1[station no:0(fixed)] +
Slave station 31[station no:1~63]
= Max. 32 stations
(In case of 32 stations, you have to use repeater.)
- Only 1 master is available in the network.
Diagnostic function
XG5000 : High Speed Link Monitoring
System characteristic
Available detachment and attachment of slave
module during communication
Terminating resistor()
110(5%,1/2W)
Master/Slave operation
Only available as Master
XG5000
(HS Link)
Data Processing unit
Byte
Tx/Rx cycle
Selection among 20ms, 50ms, 100ms, 200ms,
500ms, 1s, 5s, 10s(default :200ms)
Max. Communication
points.
3,720bytes(slave 31stations * 120bytes/station)
Max. Block number
63(setting range : 0~62)
Max. points by Block
120 Byte(60words)
Max. Tx. Block number
32 Blocks
HS Link number
Max. 12
Specification
Max. module mounted
12 modules(Main Base + Extension Base)
Internal current
consumption
410mA
Weight
115g

Chapter 2 Specifications
2-3
2) GOL-RR8T Performance Specifications
- Communication Specifications
Item
GOL-RR8T
Communication method
Rnet
Communication ports (Master : Slave)
1 : 8
Max. Slave stations / All repeaters
32 Stations
Number of Max. slaves when using repeater /a Network
XGL-RMEB
XBL-RMEA
63 Stations
31 Stations
Max. repeaters /a Network
(Repeaters can be connected to trunk line only)
2 Modules
Communication speed
1Mbps
Max. transmission distance /
Each repeater port
LIREV-AMESB 1Px22AWG
(7/0.254)_LS Cable
300m
CAN Bus Drag Chain, UL
(1x2x0.34mm²)_Helukable
600m
Master Max. transmission distance
(Master + Slave or Master + Repeater)
750m
Network max. transmission distance
(Master + Repeater + Slave)
- LIREV-AMESB 1Px22AWG: 1.05km
- CAN Bus Drag Chain: 1.35km
Weight
580g
<Network configuration using repeaters >
3)
1) In order to minimize the reflected wave, the line connecting with the repeater should
Use more than 1m cable.
2) Repeater hub 8port module in the user's manual is called a repeater module for
convenience.
Note

Chapter 2 Specifications
2-4
- Power Specifications
Items
Specifications
reference
Input
Input voltage range
DC20.4~28.8V(-15%, +20%)
-
Rated voltage
DC24V
-
Input current
1A or less
Input +DC28.8V, Max.load
Inrush current
70A peak or less
Input +DC28.8V, Max.load
Efficiency
60% or more
Input +DC28.8V, Max.load
Permitted
momentary
power failure
10ms or less
Input +DC28.8V, Max.load
Output
Output voltage
DC5V(±2%)
-
Output current
Max. 2.0A
-
Power supply status indication
LED On when power supply is normal
-
Cable specification
0.75 ~ 2mm2
-

Chapter 2 Specifications
2-5
2.3 Structure and Characteristics
1) LED display
- XGL-RMEA
*Reference: TOK, TX, RX blink quickly. Those seems like "On".
SILK display
LED Description
RUN
On
Normal
Normal
Off
Error
Serious defect, Contact Customer Service Center
I/F
Blinks
Normal
Normal
On/Off
Error
Serious defect, Contact Customer Service Center
H/S
On
Normal
Normal
Blinks
Standby
Downloading parameters while High-speed Link enabled
Off
Error
Fatal link failure occurs in high speed link service when high speed
link is enabled
LAS
On
Normal
Normal
Blinks/Off
Failure
Master Module, Contact Customer Service Center
TOK
Blinks
Normal
Normal
Off
Failure
Master Module, Contact Customer Service Center
TX
Blinks
Normal
Normal
Off
Error
Check High-speed link parameters
RX
Blinks
Normal
Normal
Off
Error
Check High-speed link parameters
FAULT
On/Blinks
Error
Check cable connection and wiring
OFF
Normal
Normal
◀LED display
◀Cable connection part
Other manuals for XGT Series
8
This manual suits for next models
3
Table of contents
Other LS ELECTRIC Control Unit manuals

LS ELECTRIC
LS ELECTRIC XGT Series User manual

LS ELECTRIC
LS ELECTRIC XGT Series User manual

LS ELECTRIC
LS ELECTRIC XGT Series User manual

LS ELECTRIC
LS ELECTRIC SV-iS7 Series User manual

LS ELECTRIC
LS ELECTRIC LSLV-S100 Series User manual

LS ELECTRIC
LS ELECTRIC XGT Series User manual

LS ELECTRIC
LS ELECTRIC CANopen LSLV-G100 Series User manual

LS ELECTRIC
LS ELECTRIC CANopen LSLV-G100 Series User manual

LS ELECTRIC
LS ELECTRIC S100 User manual

LS ELECTRIC
LS ELECTRIC XGT Series User manual