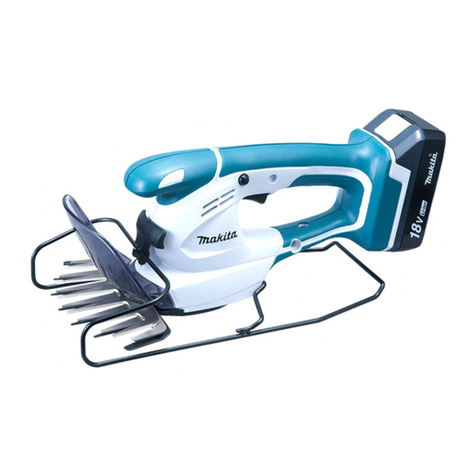
Makita UM164D Series User manual

GB Cordless Grass Shear Instruction manual
ID Gunting Rumput Nirkabel Petunjuk penggunaan
VI Maùy caét coû Khoâng daây Taøi lieäu höôùng daãn
TH -
UM164D
010865

2
1010866 2010868
3010867 4010871
5010869 6010870
7010872 8010873
1
2
3
4
5
6
78
9
8
10
11 8
6
7
8

3
9010887 10 010888
11 010889 12 010895
13 010896 14 010897
10
12 13
14
15
12
16
17
17 12 9
10
9
18 19

4
15 010898 16 010899
17 010900 18 010901
19 010902 20 010903
21 010874 22 010875
20
19
17
21
22
23
24
12 13
25
13

5
23 010876 24 010971
25 010972
26 011044
27 010904 28 010905
26
27
28
29 30
17 12
9
18 19

6
29 015809 30 010907
31 010908 32 010909
33 010910 34 010911
35 010912 36 010913
20
17
21
19
24
23
22
10
31
32
13
12
25
13

7
37 010890 38 010891
39 010892 40 010893
41 010894 42 011045
43 010878 44 010879
10
12 13
14
15
12
32
17
9
33 34
30

8
45 010880 46 010881
47 010966 48 010967
49 010968 50 010877
51 010914
35 36
37
38
39 40
41
42
43

9
ENGLISH (Original Instructions)
Explanation of general view
SPECIFICATIONS
• Due to our continuing program of research and development, the specifications herein are su ject to change without
notice.
• Specifications and attery cartridge may differ from country to country.
• The weight may differ depending on the attachment(s), including the attery cartridge. The lightest and heaviest
com ination, according to EPTA-Procedure 01/2014, are shown in the ta le.
Applicable battery cartridge and charger
• Some of the attery cartridges and chargers listed a ove may not e availa le depending on your region of residence.
WARNING:
•Only use the battery cartridges and chargers listed above. Use of any other attery cartridges and chargers may
cause injury and/or fire.
Symbols END010-5
The following show the sym ols used for the equipment.
Be sure that you understand their meaning efore use.
.......Take particular care and attention.
.......Read instruction manual.
.......Danger; e aware of thrown o jects.
.......Keep ystanders away.
.......Cutting means continues to run after the motor
is switched off.
...... Do not expose to moisture.
Intended use ENE015-1
The tool is intended for cutting lawn edges or sprouts.
Cordless Grass Shear Safety
Warnings GEB070-6
General instructions
1. To ensure correct o eration, user has to read this
instruction manual to make himself familiar with
the handling of the equi ment. Users insufficiently
informed will risk danger to themselves as well as
others due to improper handling.
2. Never allow children, ersons with reduced
hysical, sensory or mental ca abilities or lack of
1. Battery cartridge
2. Button
3. Lock-off utton
4. Switch trigger
5. Indication lamp
6. Change lever
7. Protrusion on ase frame
8. Base frame
9. Shear lades
10. Blade cover
11. Groove
12. Undercover
13. Locking lever
14. Press
15. Turn
16. Shear lade
17. Crank
18. Basic alignment line on the tool
housing
19. Pins
20. Recessed part of crank
21. Apply grease
22. Base plate
23. Hole in the ase plate of shear
lades
24. Oval holes that are overlapped
25. Groove in the undercover
26. Brush
27. Machine oil
28. Hedge shear lade
29. Hedge shear lade cover
30. Storage case
31. Bent part of the ase plate of
shear lades
32. Screws
33. Grass shear lade cover
34. Grass shear lade
35. Trimming direction
36. Tilt the lades
37. Hedge surface to e trimmed
38. String
39. Clamping nuts
40. Chip receiver
41. Screws on the shear lades
42. Blade cover to e always installed
efore installing the chip receiver
43. Hook hole
Model UM164D
Effective cutting width 160 mm
Stroke per minute (min-1) 1,250
Dimensions (L x W x H) 292 mm x 178 mm x 130 mm
Net weight 1.1 - 1.2 kg
Rated voltage D.C. 10.8 V
Battery cartridge BL1013
Charger DC10WA

10
ex erience and knowledge or eo le unfamiliar
with these instructions to use the machine, local
regulations may restrict the age of the o erator.
3. Use the equi ment with the utmost care and
attention.
4. O erate the equi ment only if you are in good
hysical condition. Perform all work calmly and
carefully. Use common sense and kee in mind
that the o erator or user is res onsible for
accidents or hazards occurring to other eo le or
their ro erty.
5. Never o erate the machine while eo le,
es ecially children, or ets are nearby.
6. The motor is to be switched off immediately in
case that the equi ment shows any roblem or
abnormal sign.
7. Switch off and remove the battery cartridge when
resting and when leaving the equi ment
unattended, and lace it in a safe location to
revent danger to others or damage to the
equi ment.
8. Avoid using the machine in bad weather
conditions es ecially when there is a risk of
lightning.
Personal rotective equi ment
1. Wear eye rotection and stout shoes at all times
while o erating the machine.
2. Always wear substantial footwear and long
trousers while o erating the machine.
Starting u the equi ment
1. Make sure that there are no children or other
eo le nearby, also ay attention to any animals
in the working vicinity. Otherwise stop using the
equipment.
2. Before use always check that the equi ment is
safe for o eration. Check the security of the
cutting tool and the guard and the switch trigger/
lever for easy and ro er action. Check for clean
and dry handles and test the function of the start/
sto .
3. Check damaged arts before further use of the
equi ment. A guard or other art that is damaged
should be carefully checked to determine that it
will o erate ro erly and erform its intended
function. Check for alignment of moving arts,
binding of moving arts, breakage of arts,
mounting, and any other condition that may affect
its o eration. A guard or other art that is
damaged should be ro erly re aired or re laced
by our authorized service center unless indicated
elsewhere in this manual.
4. Switch on the motor only when the hands and feet
are away from the cutting tool.
5. Before starting make sure that the cutting tool has
no contact with any objects.
Method of o eration
1. Only use the equi ment in good light and
visibility. During the winter season beware of
sli ery or wet areas, ice and snow (risk of
sli ing). Always ensure a safe footing on slo es
and be sure to walk and never run.
2. Take care against injury to feet and hands from
the cutting tool.
3. Never stand on a ladder and run the equi ment.
4. Never climb u into trees to erform cutting
o eration with the equi ment.
5. Never work on unstable surfaces.
6. Remove sand, stones, nails etc. found within the
working range. Foreign particles may damage the
cutting tool and can cause dangerous kick- acks.
7. Should the cutting tool hit stones or other hard
objects, immediately switch off the motor and
ins ect the cutting tool.
8. Ins ect the cutting tool at short regular intervals
for damage (detection of hairline cracks by means
of ta ing-noise test).
9. Before commencing cutting, the cutting tool must
have reached full working s eed.
10. The cutting tool has to be equi ed with the
a ro riate guard. Never run the equi ment with
damaged guards or without guards in lace!
11. All rotective installations and guards su lied
with the equi ment must be used during
o eration.
12.Always remove the battery cartridge from the
equi ment:
- whenever leaving the equi ment unattended;
- before clearing a blockage;
- before checking, cleaning or working on the
equi ment;
- after striking a foreign object;
- whenever the equi ment starts vibrating
abnormally.
13. Always ensure that the ventilation o enings are
ke t clear of debris.
14. Cutting means continues to run after the motor is
switched off.
15. If the blades sto moving due to the stuck of
foreign objects between the blades during
o eration, switch off the tool and remove the
battery cartridge, and then remove the foreign
objects using tools such as liers. Removing the
foreign o jects y hand may cause an injury for the
reason that the lades may move in reaction to
removing the foreign o jects.
Cutting Tools
Em loy only the correct cutting tool for the job in
hand.
Maintenance instructions
1. The condition of the equi ment, in articular of
the cutting tool of the rotective devices must be
checked before commencing work.
2. Turn off the motor and remove the battery
cartridge before carrying out maintenance,
re lacing cutting tools or cleaning the equi ment
or cutting tool.
3. When not in use, store the equi ment indoors in
dry and high or locked-u lace - out of the reach
of children. Clean and maintain before storage.
SA E THESE INSTRUCTIONS.
WARNING:
DO NOT let comfort or familiarity with roduct (gained
from re eated use) re lace strict adherence to safety
rules for the subject roduct. MISUSE or failure to


11
follow the safety rules stated in this instruction
manual may cause serious ersonal injury.
General Power Tool Safety
Warnings GEA006-2
WARNING Read all safety warnings and all
instructions. Failure to follow the warnings and
instructions may result in electric shock, fire and/or
serious injury.
Save all warnings and
instructions for future reference.
The term “power tool” in the warnings refers to your
mains-operated (corded) power tool or attery-operated
(cordless) power tool.
Work area safety
1. Kee work area clean and well lit. Cluttered or dark
areas invite accidents.
2. Do not o erate ower tools in ex losive
atmos heres, such as in the resence of
flammable liquids, gases or dust. Power tools
create sparks which may ignite the dust or fumes.
3. Kee children and bystanders away while
o erating a ower tool. Distractions can cause you
to lose control.
Electrical safety
4. Power tool lugs must match the outlet. Never
modify the lug in any way. Do not use any
ada ter lugs with earthed (grounded) ower
tools. Unmodified plugs and matching outlets will
reduce risk of electric shock.
5. Avoid body contact with earthed or grounded
surfaces such as i es, radiators, ranges and
refrigerators. There is an increased risk of electric
shock if your ody is earthed or grounded.
6. Do not ex ose ower tools to rain or wet
conditions. Water entering a power tool will increase
the risk of electric shock.
7. Do not abuse the cord. Never use the cord for
carrying, ulling or un lugging the ower tool.
Kee cord away from heat, oil, shar edges or
moving arts. Damaged or entangled cords increase
the risk of electric shock.
8. When o erating a ower tool outdoors, use an
extension cord suitable for outdoor use. Use of a
cord suita le for outdoor use reduces the risk of
electric shock.
9. If o erating a ower tool in a dam location is
unavoidable, use a ground fault circuit interru ter
(GFCI) rotected su ly. Use of an GFCI reduces
the risk of electric shock.
Personal safety
10. Stay alert, watch what you are doing and use
common sense when o erating a ower tool. Do
not use a ower tool while you are tired or under
the influence of drugs, alcohol or medication. A
moment of inattention while operating power tools
may result in serious personal injury.
11. Use ersonal rotective equi ment. Always wear
eye rotection. Protective equipment such as dust
mask, non-skid safety shoes, hard hat, or hearing
protection used for appropriate conditions will reduce
personal injuries.
12. Prevent unintentional starting. Ensure the switch
is in the off- osition before connecting to ower
source and/or battery ack, icking u or carrying
the tool. Carrying power tools with your finger on the
switch or energising power tools that have the switch
on invites accidents.
13. Remove any adjusting key or wrench before
turning the ower tool on. A wrench or a key left
attached to a rotating part of the power tool may result
in personal injury.
14. Do not overreach. Kee ro er footing and
balance at all times. This ena les etter control of
the power tool in unexpected situations.
15. Dress ro erly. Do not wear loose clothing or
jewellery. Kee your hair, clothing, and gloves
away from moving arts. Loose clothes, jewellery or
long hair can e caught in moving parts.
16. If devices are rovided for the connection of dust
extraction and collection facilities, ensure these
are connected and ro erly used. Use of dust
collection can reduce dust-related hazards.
Power tool use and care
17.Do not force the ower tool. Use the correct ower
tool for your a lication. The correct power tool will
do the jo etter and safer at the rate for which it was
designed.
18. Do not use the ower tool if the switch does not
turn it on and off. Any power tool that cannot e
controlled with the switch is dangerous and must e
repaired.
19. Disconnect the lug from the ower source and/or
the battery ack from the ower tool before
making any adjustments, changing accessories,
or storing ower tools. Such preventive safety
measures reduce the risk of starting the power tool
accidentally.
20. Store idle ower tools out of the reach of children
and do not allow ersons unfamiliar with the
ower tool or these instructions to o erate the
ower tool. Power tools are dangerous in the hands
of untrained users.
21. Maintain ower tools. Check for misalignment or
binding of moving arts, breakage of arts and
any other condition that may affect the ower
tool's o eration. If damaged, have the ower tool
re aired before use. Many accidents are caused y
poorly maintained power tools.
22. Kee cutting tools shar and clean. Properly
maintained cutting tools with sharp cutting edges are
less likely to ind and are easier to control.
23. Use the ower tool, accessories and tool bits etc.
in accordance with these instructions, taking into
account the working conditions and the work to
be erformed. Use of the power tool for operations
different from those intended could result in a
hazardous situation.
Battery tool use and care
24. Recharge only with the charger s ecified by the
manufacturer. A charger that is suita le for one type

12
of attery pack may create a risk of fire when used
with another attery pack.
25. Use ower tools only with s ecifically designated
battery acks. Use of any other attery packs may
create a risk of injury and fire.
26. When battery ack is not in use, kee it away from
other metal objects, like a er cli s, coins, keys,
nails, screws or other small metal objects, that
can make a connection from one terminal to
another. Shorting the attery terminals together may
cause urns or a fire.
27. Under abusive conditions, liquid may be ejected
from the battery; avoid contact. If contact
accidentally occurs, flush with water. If liquid
contacts eyes, additionally seek medical hel .
Liquid ejected from the attery may cause irritation or
urns.
Service
28. Have your ower tool serviced by a qualified
re air erson using only identical re lacement
arts. This will ensure that the safety of the power tool
is maintained.
29. Follow instruction for lubricating and changing
accessories.
30. Kee handles dry, clean and free from oil and
grease.
Cordless Hedge Trimmer Safety
Warnings GEB062-9
1. Kee all arts of the body away from the cutter
blade. Do not remove cut material or hold material
to be cut when blades are moving. Make sure the
switch is off when clearing jammed material. A
moment of inattention while operating the hedge
trimmer may result in serious personal injury.
2. Carry the hedge trimmer by the handle with the
cutter blade sto ed. When trans orting or
storing the hedge trimmer always fit the cutting
device cover. Proper handling of the hedge trimmer
will reduce possi le personal injury from the cutter
lades.
3. Hold the ower tool by insulated gri ing surfaces
only, because the cutter blade may contact hidden
wiring. Cutter lades contacting a “live” wire may
make exposed metal parts of the power tool “live” and
could give the operator an electric shock.
4. DANGER - Kee hands away from blade. Contact
with lade will result in serious personal injury.
5. Do not use the hedge trimmer in the rain or in wet
or very dam conditions. The electric motor is not
waterproof.
6. First-time users should have an ex erienced
hedge trimmer user show them how to use the
trimmer.
7. The hedge trimmer must not be used by children
or young ersons under 18 years of age. Young
persons over 16 years of age may e exempted from
this restriction if they are undergoing training under
the supervision of an expert.
8. Use the hedge trimmer only if you are in good
hysical condition. If you are tired, your attention
will be reduced. Be es ecially careful at the end of
a working day. Perform all work calmly and
carefully. The user is res onsible for all damages
to third arties.
9. Never use the trimmer when under the influence of
alcohol, drugs or medication.
10. Work gloves of stout leather are art of the basic
equi ment of the hedge trimmer and must always
be worn when working with it. Also wear sturdy
shoes with anti-skid soles.
11. Before starting work check to make sure that the
trimmer is in good and safe working order. Ensure
guards are fitted ro erly. The hedge trimmer
must not be used unless fully assembled.
12. Make sure you have a secure footing before
starting o eration.
13. Hold the tool firmly when using the tool.
14. Do not o erate the tool at no-load unnecessarily.
15. Immediately switch off the motor and remove the
battery cartridge if the cutter should come into
contact with a fence or other hard object. Check
the cutter for damage, and if damaged re air
immediately.
16. Before checking the cutter, taking care of faults,
or removing material caught in the cutter, always
switch off the trimmer and remove the battery
cartridge.
17. Switch off the trimmer and remove the battery
cartridge before doing any maintenance work.
18. When moving the hedge trimmer to another
location, including during work, always remove
the battery cartridge and ut the blade cover on
the cutter blades. Never carry or trans ort the
trimmer with the cutter running. Never gras the
cutter with your hands.
19. Clean the hedge trimmer and es ecially the cutter
after use, and before utting the trimmer into
storage for extended eriods. Lightly oil the cutter
and ut on the cover. The cover supplied with the
unit can e hung on the wall, providing a safe and
practical way to store the hedge trimmer.
20. Store the hedge trimmer with the cover on, in a dry
room. Kee it out of reach of children. Never store
the trimmer outdoors.
21. Never oint the shear blades to yourself or others.
22. If the blades sto moving due to the stuck of
foreign objects between the blades during
o eration, switch off the tool and remove the
battery cartridge, and then remove the foreign
objects using tools such as liers. Removing the
foreign o jects y hand may cause an injury for the
reason that the lades may move in reaction to
removing the foreign o jects.
23. Avoid dangerous environment. Don’t use the tool
in dam or wet locations or ex ose it to rain.
Water entering the tool will increase the risk of
electric shock.
24. Do not dis ose of the battery(ies) in a fire. The cell
may ex lode. Check with local codes for ossible
s ecial dis osal instructions.
25. Do not o en or mutilate the battery(ies).
Released electrolyte is corrosive and may cause
damage to the eyes or skin. It may be toxic if
swallowed.
26. Do not charge battery in rain, or in wet locations.

13
27. Check the hedges and bushes for foreign objects,
such as wire fences or hidden wiring before
o erating the tool.
SA E THESE INSTRUCTIONS.
WARNING:
DO NOT let comfort or familiarity with roduct (gained
from re eated use) re lace strict adherence to safety
rules for the subject roduct. MISUSE or failure to
follow the safety rules stated in this instruction
manual may cause serious ersonal injury.
IMPORTANT SAFETY
INSTRUCTIONS FOR BATTERY
CARTRIDGE ENC009-5
1. Before using battery cartridge, read all
instructions and cautionary markings on (1)
battery charger, (2) battery, and (3) roduct using
battery.
2. Do not disassemble battery cartridge.
3. If o erating time has become excessively shorter,
sto o erating immediately. It may result in a risk
of overheating, ossible burns and even an
ex losion.
4. If electrolyte gets into your eyes, rinse them out
with clear water and seek medical attention right
away. It may result in loss of your eyesight.
5. Do not short the battery cartridge:
(1) Do not touch the terminals with any
conductive material.
(2) Avoid storing battery cartridge in a container
with other metal objects such as nails, coins,
etc.
(3) Do not ex ose battery cartridge to water or
rain.
A battery short can cause a large current flow,
overheating, ossible burns and even a
breakdown.
6. Do not store the tool and battery cartridge in
locations where the tem erature may reach or
exceed 50 °C (122 °F).
7. Do not incinerate the battery cartridge even if it is
severely damaged or is com letely worn out. The
battery cartridge can ex lode in a fire.
8. Be careful not to dro or strike battery.
9. Do not use a damaged battery.
10. The contained lithium-ion batteries are subject to
the Dangerous Goods Legislation requirements.
For commercial transports e.g. y third parties,
forwarding agents, special requirement on packaging
and la eling must e o served.
For preparation of the item eing shipped, consulting
an expert for hazardous material is required. Please
also o serve possi ly more detailed national
regulations.
Tape or mask off open contacts and pack up the
attery in such a manner that it cannot move around in
the packaging.
11. Follow your local regulations relating to dis osal
of battery.
12. Use the batteries only with the roducts s ecified
by Makita. Installing the atteries to non-compliant
products may result in a fire, excessive heat,
explosion, or leak of electrolyte.
SA E THESE INSTRUCTIONS.
CAUTION: Only use genuine Makita batteries. Use
of non-genuine Makita atteries, or atteries that have
een altered, may result in the attery ursting causing
fires, personal injury and damage. It will also void the
Makita warranty for the Makita tool and charger.
Tips for maintaining maximum battery life
1. Charge the battery cartridge before com letely
discharged. Always sto tool o eration and
charge the battery cartridge when you notice less
tool ower.
2. Never recharge a fully charged battery cartridge.
Overcharging shortens the battery service life.
3. Charge the battery cartridge with room
tem erature at 10 °C - 40 °C (50 °F - 104 °F). Let a
hot battery cartridge cool down before charging it.
FUNCTIONAL DESCRIPTION
CAUTION:
• Always e sure that the tool is switched off and the
attery cartridge is removed efore adjusting or
checking function on the tool.
Installing or remo ing battery cartridge
(Fig. 1)
• Always switch off the tool efore insertion or removal of
the attery cartridge.
• To remove the attery cartridge, withdraw it from the
tool while pressing the uttons on oth sides of the
cartridge.
• To insert the attery cartridge, hold it so that the attery
cartridge front shape fits to that of the attery
installment opening and slip it into place. Always insert
it all the way until it locks in place with a little click. If
not, it may accidentally fall out of the tool, causing
injury to you or someone around you.
• Do not use force when inserting the attery cartridge. If
the cartridge does not slide in easily, it is not eing
inserted correctly.
Switch action (Fig. 2)
CAUTION:
• Before inserting the attery cartridge into the tool,
always check to see that the switch trigger actuates
properly and returns to the “OFF” position when
released.
To prevent the switch trigger from eing accidentally
pulled, a lock-off utton is provided.
To start the tool, depress the lock-off utton and pull the
switch trigger. Release the switch trigger to stop. The
lock-off utton can e pressed from either right or left
side.
Indication lamp (Fig. 3)
Running the tool allows the indication lamp to show the
attery cartridge capacity status.

14
When the tool is also overloaded and has stopped during
operation, the lamp lights up in red.
Refer to the following ta le for the status and action to e
taken for the indication lamp.
Note 1: The time at which the indication lamp lights up varies y the temperature around the work area and the attery
cartridge conditions.
Adjusting the shearing height (Fig. 4)
Changing the position of holding the change lever allows
three-stepped setting for sheared grass height (10 mm,
15 mm, 25 mm).
To change setting, tilt the change lever for the ase frame
position and with the change lever tilted move it up or
down along the tool surface until the protrusion on ase
frame fits in one of the holes in the tool and release it.
ASSEMBLY
CAUTION:
• Always e sure that the tool is switched off and the
attery cartridge is removed efore carrying out any
work on the tool.
Installing or remo ing blade co er
CAUTION:
• Be careful not to contact the shear lade when
installing or removing the lade cover. Contacting the
shear lade may cause personal injuries. (Fig. 5 & 6)
Slide the lade cover from the tool’s side until the shear
lade completely hides itself and then push in it lightly
towards the tool from the front.
To remove the lade cover, take the a ove installation
procedure in reverse.
Installing or remo ing base frame
CAUTION:
• Before installing or removing ase frame, e sure to
install the lade cover.
• When installing or removing ase frame, take care that
your fingers are not e pinched etween the tool and
ase frame. (Fig. 7)
To remove the ase frame, upset the tool and take it out
of the groove gra ing its ottom. (Fig. 8)
To install the ase frame, fit the protrusion of ase frame
near the change lever into the hole for the sheared grass
height setting. With the ase frame so fitted, pull the lower
part of ase frame and fit the other part of the ase frame
in the groove in the tool.
Installing or remo ing grass shear blades
CAUTION:
• Always e sure that the tool is switched off and the
attery cartridge is removed efore installing or
removing shear lades. Failure to switch off and

remove the attery cartridge from the tool may result in
serious injury from accidental start-up.
• When replacing the shear lade, always wear gloves
without removing lade cover so that hands and face
does not directly contact the lade. Failure to do so

may cause personal injury.
NOTE:
• Do not wipe off grease from the gear and crank. Failure
to do so may cause damage to the tool.
• For specific way of removing and installing shear
lades refer to the reverse of a package for accessory
shear lades.
NOTICE:
If the arts other than the shear blades such as the
crank are worn out, ask Makita Authorized Service
Centers for arts re lacement or re airs. (Fig. 9)
Remove the ase frame and place the tool upside down.
CAUTION:
• Before placing the tool upside down, e sure to remove

the ase frame. (Fig. 10)
To remove the shear lade, press the locking lever and
with the locking lever pressed turn the undercover
counterclockwise until the sym ol on the undercover is
aligned with the sym ol on the locking lever. (Fig. 11)
Take out the undercover, shear lade and crank in order
from the tool. (Fig. 12)
To install the grass shear lade, prepare the crank,
undercover and new grass shear lade. (Fig. 13)
Take out the lade cover from the old shear lades and fit
it onto the new ones for easy handling during the
replacement of lades. (Fig. 14)
Adjust the three pin position so that these pins are lined
up at right angle in relation to the asic alignment line on
the tool housing. (Fig. 15)
Fit the crank with its recessed part facing upwards onto
the pins. At this time, apply a small amount of grease to
the periphery of the crank using grease that the shear
lades as optional accessory are provided with or that
remains inside gear housing. (Fig. 16)
Overlap the oval hole in the upper lade with that in the
lower one. Move the shear lades so that the hole in the
ase plate of shear lades are positioned in the center of
these overlapped oval holes. (Fig. 17)
Turn the shear lades upside down and install it so that
the pins on the tool fit in the hole in the shear lades.
Make sure that the shear lades are set in place securely
as far as they reach the ase plate. (Fig. 18)
Indication lamp Status Action to e taken
The lamp links in red. This indicates the appropriate time to
replace the attery cartridge when the
attery power ecomes low.
Recharge the attery cartridge as soon
as possi le.
The lamp lights up in red. (Note 1) This function works when the attery
power is almost used up. At this time,
tool stops immediately.
Recharge the attery cartridge.
The lamp lights up in red. (Note 1) Autostop due to overload. Turn off the tool.

15
Place the undercover so that the sym ol on the
undercover is aligned with the sym ol on the locking
lever. (Fig. 19)
Press the undercover down and turn the undercover
clockwise while pressing it down until the sym ol on the
la el is aligned with the sym ol on the locking lever
(the undercover is completely locked.). (Fig. 20)
At this time, make sure that the locking lever fits in the
groove in the undercover.
Remove the lade cover and then turn on the tool to
check it for proper movement.
NOTE:
• When the shear lades does not operate properly,
there is a poor fit etween the lades and crank. Redo
from the eginning.
OPERATION
WARNING:
• Keep hands away from lades.
CAUTION:
• Smear the lade efore and once per hour during
operation using machine oil or similars.
• Avoid operating the tool under the scorching sunlight
as much as practica le. When operating the tool, e
careful of your physical conditions. (Fig. 21)
Turn the tool on after adjusting the shearing height and
hold it so that the foot of the tool rest on the ground. Then
gently move the tool forward into the area to e cut.
(Fig. 22)
When trimming around cur , fence or trees, move the tool
along them. Be careful for the lade not to contact them.
(Fig. 23)
When trimming sprouts or foliage of a small tree, remove
the ase frame from the tool and cut little y little.
Shear ig ranches to your desired height eforehand
using ranch scissors efore using this tool.
CAUTION:
• When trimming twigs and foliage, do not attempt to trim
too much at a time. Proceed gently. Also do not
attempt to cut thick ranches.
• Do not let the shear lades contact the grounds during
operation. The lades will e dulled, causing poor
performance.
• Do not trim wet grass or foliage of small trees.
MAINTENANCE
CAUTION:
• Always e sure that the tool is switched off and the
attery cartridge is removed efore attempting to
perform inspection or maintenance.
Cleaning the tool
Clean out the tool y wiping off dust with a dry or soap-
dipped rag.
CAUTION:
• Never use gasoline, enzine, thinner, alcohol or the
like. Discoloration, deformation or cracks may result.
Shear blade maintenance (Fig. 24 & 25)
After operation, remove dust from oth sides of the lade
with wired rush, wipe off it with a rag and then apply
enough low-viscosity oil, such as machine oil etc. and
spray-type lu ricating oil.
CAUTION:
• Do not wash the lades in water. Failure to do so may
cause rust or damage on the tool.
• Dirt and corrosion cause excessive lade friction and
shorten the operating time per attery charge.
After use
• To clean off the exterior of the tool, dampen a soft cloth
in a soapy water and wipe gently. Never use thinner or
enzine.
• Do not store the tool in a place where volatile materials
are stored.
To maintain product SAFETY and RELIABILITY, repairs,
any other maintenance or adjustment should e
performed y Makita Authorized Service Centers, always
using Makita replacement parts.
ACCESSORIES
CAUTION:
• These accessories or attachments are recommended
for use with your Makita tool specified in this manual.
The use of any other accessories or attachments might
present a risk of injury to persons. Only use accessory
or attachment for its stated purpose.
If you need any assistance for more details regarding
these accessories, ask your local Makita Service Center.
• Grass shear lade assem ly
• Grass shear lade cover
• Base frame
• Battery cartridge BL1013
• Battery charger DC10WA
• Long handle attachment
For cordless hedge trimmer use (Fig. 26)
This tool can e used as a hedge trimmer y using the
hedge shear lade (optional accessory) and 2-way
change set (optional accessory).
To use this tool as a hedge trimmer, replacing the grass
shear lades with the hedge shear lades is required.
For removing the grass shear lades, refer to the
aforementioned section titled “Installing or removing grass
shear lades”. For installing the hedge shear lades, refer
to the section elow titled “Installing or removing hedge
shear lades”.
• Hedge shear lade assem ly (for Hedge Trimmer)
• 2-way change set consisting of the following two
accessories
• Hedge shear lade cover (for Hedge Trimmer)
• Storage case (for lade ottom section)
• Chip receiver for hedge trimming (for Hedge Trimmer)
Installing or remo ing hedge shear
blades
CAUTION:
• Before installing or removing shear lades, always e
sure that the tool is switched off and the attery
cartridge is removed.
• When replacing the shear lades, always wear gloves
without removing lade cover so that hands and face
do not directly contact the lade. Failure to do so may

cause personal injury.

16
NOTE:
• Do not wipe off grease from the gear and crank. Failure
to do so may cause damage to the tool.
• For specific way of removing and installing shear
lades refer to the reverse of a package for accessory
shear lades.
NOTICE:
If the arts other than the shear blades such as the
crank are worn out, ask Makita Authorized Service
Centers for arts re lacement or re airs.
Installing the hedge shear blades (Fig. 27)
Prepare the crank, the undercover and new shear lades.
(Fig. 28)
Adjust the three pin position so that these three pins are
aligned with the asic alignment line on the tool housing.
(Fig. 29)
Fit the crank with its recessed part facing downward onto
the pins. At this time, apply a small amount of grease to
the periphery of the crank using grease that the shear
lades as optional accessory are provided with or that
remains inside gear housing. (Fig. 30)
Overlap the oval hole in the upper lade with that in the
lower one. Move the shear lades so that the hole in the
ase plate of shear lades are positioned in the center of
these overlapped oval holes. (Fig. 31)
Take out the lade cover from the old shear lades and fit
it onto the new ones for easy handling during the
replacement of lades. (Fig. 32)
Turn the shear lades upside down and install it so that
pin on the tool fit in the hole in the shear lades. Fit the
ent part of the ase plate of the shear lades to the
groove in the tool housing. Then make sure that the ase
plate of the shear lades is set in place. (Fig. 33)
Tighten two screws with a coin or similars firmly. (Fig. 34)
Place the undercover so that the sym ol on the
undercover is aligned with the sym ol on the locking
lever. (Fig. 35)
Press the undercover down and with the undercover
pressed down turn the undercover clockwise until the
sym ol on the la el is aligned with the sym ol on the
locking lever (the undercover is completely locked.).
(Fig. 36)
At this time, make sure that the locking lever fits in the
groove in the undercover.
CAUTION:
• Never use the tool without installing the undercover on
it.
Remove the lade cover and then turn on the tool to
check it for proper movement.
NOTE:
• When the shear lades does not operate properly,
there is a poor fit etween the lades and crank. Redo
from the eginning.
Removing the hedge shear blades (Fig. 37)
CAUTION:
• Install the lade cover efore removing or installing the
shear lades.
Reverse the tool. (Fig. 38)
To remove the shear lades, press the locking lever and
with the locking lever pressed turn the undercover
counterclockwise until the sym ol on the undercover is
aligned with the sym ol on the locking lever. (Fig. 39)
Take out the undercover from the tool. (Fig. 40)
Loosen two screws with a coin and similars and remove
the shear lades.
NOTE:
• Do not remove the screws. Without removing the
screws loosened, shear lades can e removed.
(Fig. 41)
Remove the crank from the shear lades.
NOTE:
• The crank may remain in the tool. (Fig. 42)
NOTE:
• In the 2-way usage, the removed grass shear lades
need to e sheared in the lade storage case and
stored for future use.
OPERATION
Refer to the Im ortant Safety Instructions before
o eration.
CAUTION:
• Be careful not to accidentally contact a metal fence or
other hard o jects while trimming. The lade will reak
and may cause serious injury.
• Also, e careful for the shear lade not to contact the
ground.
• Overreaching with a hedge trimmer, particularly from a
ladder, is extremely dangerous. Do not work from
anything wo ly or infirm. (Fig. 43)
Do not attempt to cut ranches thicker than 10 mm
diameter with this trimmer. These should first e cut with
shears down to the hedge trimming level.
CAUTION:
• Do not cut off dead trees or similar hard o jects.
Failure to do so may damage the tool.
• Do not trim the grass or weeds while using hedge
shear lade. The shear lade may entangle the grass
or weeds. (Fig. 44)
Hold the trimmer with one hand, depress the lock-off
utton and pull the switch trigger and then move it in front
of your ody. (Fig. 45)
As a asic operation, tilt the lades towards the trimming
direction and move it calmly and slowly at the speed rate
of 3 - 4 seconds per meter. (Fig. 46)
To cut a hedge top evenly, it helps to tie a string at the
desired hedge height and to trim along it, using it as a
reference line. (Fig. 47)
Attaching the chip receiver (accessory) on the tool when
trimming the hedge straight can avoid cut off leaves' eing
thrown away. (Fig. 48)
To cut a hedge side evenly, it helps to cut from the ottom
upwards. (Fig. 49)
Trim oxwood or rhododendron from the ase toward the
top for a nice appearance and good jo .
Installing or remo ing chip recei er
(accessory)
CAUTION:
• Always e sure that the tool is switched off and the
attery cartridge is removed efore installing or
removing chip receiver.

17
NOTE:
• When replacing the chip receiver, always wear gloves
so that hands and face does not directly contact the
lade. Failure to do so may cause personal injury.
• When replacing the chip receiver, always e careful not
to contact the shear lades.
• The chip receiver receives cut-off leaves and alleviates
collecting thrown-away leaves. This can e installed on
either side of the tool. (Fig. 50)
Place the chip receiver on the shear lades so that its slits
overlap with the screws on the shear lades and secure it
using two clamping nuts.
To remove the chip receiver, loosen and remove the two
clamping nuts and then take it out.
Storage (Fig. 51)
The hook hole in the tool ottom is convenient for hanging
the tool from a nail or screw on the wall.
Put the lade cover on the shear lades so that the lades
are not exposed. Store the tool out of the reach of children
carefully.
Store the tool in the place not exposed to water and rain.

18
BAHASA INDONESIA (Petunjuk Asli)
Penjelasan tampilan keseluruhan
SPESIFIKASI
• Karena kesinam ungan program penelitian dan pengem angan kami, spesifikasi yang dise utkan di sini dapat
eru ah tanpa pem eritahuan.
• Spesifikasi dan kartrid aterai dapat er eda dari satu negara ke negara lainnya.
• Berat dapat er eda- eda tergantung pada alat tam ahan, termasuk kartrid aterai. Ga ungan yang paling ringan dan
paling erat, menurut Prosedur EPTA 01/2014, ditampilkan dalam ta el.
Kartrid baterai dan pengisi baterai yang sesuai
• Be erapa kartrid aterai dan pengisi aterai yang dise utkan di atas mungkin tidak tersedia tergantung pada kawasan
tempat tinggal Anda.
PERINGATAN:
•Hanya gunakan kartrid baterai dan engisi baterai yang disebutkan di atas. Penggunaan kartrid aterai dan
pengisi aterai yang lain dapat menye a kan cedera/atau ke akaran.
Simbol-simbol END010-5
Berikut ini adalah sim ol-sim ol yang digunakan pada
peralatan ini. Pastikan Anda mengerti makna masing-
masing sim ol se elum menggunakan alat.
.......Perhatikan dan erhati-hatilah.
.......Baca petunjuk penggunaan.
.......Bahaya; waspadalah terhadap enda
eter angan.
...... Jauhkan orang yang tak erkepentingan.
...... Alat pemotong masih akan terus erjalan
setelah motor dimatikan.
...... Jangan iarkan terkena kelengasan (kondisi
asah).
Maksud enggunaan ENE015-1
Alat ini dimaksudkan untuk memotong tepian atau tunas
rumput.
1. Kartrid aterai
2. Tom ol
3. Tom ol kunci-mati
4. Picu sakelar
5. Lampu indikasi
6. Tuas pengu ah
7. Tonjolan pada rangka alas
8. Rangka alas
9. Bilah gunting
10. Penutup ilah
11. A lur
12. Penutup awah
13. Tuas pengunci
14. Tekan
15. Putar
16. Bilah gunting
17. Engkol
18. Garis pelurusan dasar pada
rumah mesin
19. Pasak
20. Bagian erceruk pada engkol
21. Oleskan gemuk
22. Pelat alas
23. Lu ang di pelat alas ilah gunting
24. Lu ang-lu ang oval yang
ertumpang-tindih
25. Alur di penutup awah
26. Sikat
27. Oli mesin
28. Bilah gunting tanaman pagar
29. Penutup ilah gunting tanaman
pagar
30. Kotak penyimpanan
31. Bagian melengkung pelat alas
ilah gunting
32. Sekrup
33. Penutup ilah gunting rumput
34. Bilah gunting rumput
35. Arah pemangkasan
36. Miringkan ilah
37. Permukaan tanaman pagar yang
akan dipangkas
38. Benang
39. Mur klem
40. Penampung potongan
41. Sekrup pada ilah gunting
42. Penutup ilah harus selalu sudah
dipasang se elum memasang
penampung potongan
43. Lu ang kait
Model UM164D
Le ar pemotongan efektif 160 mm
Guntingan per menit (men-1) 1.250
Dimensi (P x L x T) 292 mm x 178 mm x 130 mm
Berat ersih 1,1 - 1,2 kg
Tegangan yang sesuai D.C. 10,8 V
Kartrid aterai BL1013
Pengisi aterai DC10WA

19
Peringatan Keselamatan Gunting
Rumput Nirkabel GEB070-6
Petunjuk umum
1. Untuk memastikan engo erasian yang benar,
engguna harus membaca etunjuk enggunaan
ini untuk memahami enanganan alat dengan
baik. Pengguna yang pemahamannya kurang akan
menghadapi risiko ahaya agi dirinya dan juga orang
lain aki at penanganan yang tidak enar.
2. Jangan sekali-kali membiarkan anak-anak, orang
dengan kemam uan fisik, indera, atau mental
kurang, atau yang kurang engalaman dan
engetahuan atau orang yang tidak memahami
etunjuk ini menggunakan mesin ini; eraturan
setem at mungkin membatasi usia o erator.
3. Gunakan alat dengan kehati-hatian dan erhatian
maksimal.
4. O erasikan alat hanya jika Anda berada dalam
kondisi fisik yang baik. Lakukan semua ekerjaan
dengan tenang dan hati-hati. Gunakan akal sehat
dan selalu ingat bahwa o erator atau engguna
bertanggung jawab atas kecelakaan atau bahaya
yang terjadi ada orang lain atau harta benda
mereka.
5. Jangan mengo erasikan mesin sementara orang
lain, terutama anak-anak, atau hewan eliharaan
berada di dekat Anda.
6. Motor harus segera dimatikan a abila alat
mem erlihatkan tanda adanya masalah atau
ketidaknormalan.
7. Matikan dan le askan kartrid baterai saat
beristirahat dan saat meninggalkan alat tan a
dijaga, dan tem atkanlah di lokasi yang aman
demi mencegah timbulnya bahaya bagi orang lain
atau kerusakan ada alat.
8. Hindari menggunakan mesin ini dalam kondisi
cuaca buruk, khususnya bila ada risiko halilintar.
Alat elindung diri
1. Kenakan elindung mata dan se atu yang kuat
setia saat selama mengo erasikan mesin.
2. Selalu kenakan alas kaki yang kuat dan celana
anjang selama mengo erasikan mesin.
Menghidu kan alat
1. Pastikan tidak ada anak-anak atau orang lain di
dekat Anda, juga erhatikan binatang yang ada di
dekat tem at kerja. Bila ada, hentikan penggunaan
alat.
2. Sebelum menggunakan, selalu astikan bahwa
alat aman untuk dio erasikan. Periksa keamanan
alat emotong dan elindung serta icu/tuas
sakelar, a akah mudah dio erasikan dan bekerja
dengan baik. Pastikan gagang bersih dan kering
dan uji fungsinya untuk memulai/menghentikan
mesin.
3. Periksa bagian yang rusak sebelum menggunakan
alat lebih lanjut. Pelindung atau bagian lain yang
rusak harus di eriksa dengan teliti untuk
menentukan a akah mesin da at bekerja normal
dan menjalankan fungsinya dengan baik. Periksa
kelurusan bagian bergerak, kemacetan bagian
bergerak, adanya bagian yang ecah,
emasangan, dan kondisi lain yang mungkin
da at mem engaruhi engo erasian. Pelindung
atau bagian lain yang rusak harus di erbaiki atau
diganti oleh usat servis resmi kami kecuali jika
dinyatakan boleh di erbaiki di tem at lain dalam
etunjuk enggunaan ini.
4. Hidu kan motor hanya bila tangan dan kaki jauh
dari alat emotong.
5. Sebelum menghidu kan, astikan bahwa mesin
emotong tidak bersentuhan dengan benda a a
un.
Metode engo erasian
1. Gunakan alat hanya dalam kondisi enerangan
dan andangan yang baik. Dalam musim dingin,
awaslah terhada tem at-tem at yang licin atau
basah, es, dan salju (risiko ter eleset). Selalu
astikan ijakan yang aman di atas medan miring
dan astikan untuk berjalan dan jangan berlari.
2. Hati-hatilah terhada cedera ada kaki dan tangan
akibat alat emotong.
3. Jangan sekali-kali berdiri di tangga sambil
menjalankan alat.
4. Jangan sekali-kali memanjat ohon untuk
melakukan emotongan dengan alat ini.
5. Jangan sekali-kali bekerja di atas ermukaan yang
tidak stabil.
6. Bersihkan asir, batu, aku, dll. yang ditemukan di
lingku tem at kerja. Benda asing dapat merusak
alat pemotong dan dapat menye a kan tendang- alik
yang er ahaya.
7. Jika alat emotong mengenai batu atau benda
keras lainnya, segera matikan motornya dan
eriksa alat emotong.
8. Periksa alat emotong sering-sering secara rutin
dari kerusakan (deteksi retak rambut dengan cara
uji suara-ketukan).
9. Sebelum memulai emotongan, alat emotong
harus sudah menca ai kece atan kerja enuh.
10. Alat emotong harus dilengka i dengan
elindung yang sesuai. Jangan sekali-kali
menjalankan alat dengan elindung yang rusak
atau tan a di asangi elindung!
11. Seluruh instalasi dan elindung yang di asok
bersama alat harus digunakan selama
engo erasian.
12. Selalu le askan kartrid baterai dari alat:
- setia kali meninggalkan alat tan a
engawasan;
- sebelum membersihkan kemacetan;
- sebelum memeriksa, membersihkan, atau
mengerjakan sesuatu ada alat;
- setelah menghantam benda asing;
- setia kali alat mulai bergetar secara tidak
normal.
13. Selalu astikan bahwa lubang-lubang ventilasi
terjaga kebersihannya.
14. Alat emotong masih akan terus berjalan setelah
motor dimatikan.
15. Jika bilah berhenti bergerak karena adanya benda
asing yang macet di antara bilah selama
engo erasian, matikan mesin dan le askan
kartrid baterai, lalu singkirkan benda asing itu
menggunakan alat se erti tang. Menyingkirkan
enda asing menggunakan tangan isa menye a kan

20
cedera karena ilah dapat ergerak se agai reaksi
terhadap pengam ilan enda asing itu.
Alat Pemotong
Gunakan hanya alat emotong yang te at untuk
ekerjaan yang akan dilakukan.
Petunjuk erawatan
1. Kondisi alat, khususnya mesin emotong eranti
elindung harus di eriksa sebelum memulai
ekerjaan.
2. Matikan motor dan le askan kartrid baterai
sebelum melakukan ekerjaan emeliharaan,
mengganti mesin emotong, atau membersihkan
alat atau mesin emotong.
3. Bila tidak digunakan, sim an alat di dalam
ruangan, di tem at yang kering, tinggi atau
terkunci - jauh dari jangkauan anak-anak.
Bersihkan dan rawatlah alat sebelum disim an.
SIMPAN PETUNJUK INI.
PERINGATAN:
JANGAN biarkan kenyamanan atau terbiasanya Anda
dengan roduk (karena enggunaan berulang)
menggantikan ke atuhan yang ketat terhada aturan
keselamatan untuk roduk yang terkait.
PENYALAHGUNAAN atau kelalaian mematuhi kaidah
keselamatan yang tertera dalam etunjuk
enggunaan ini da at menyebabkan cedera badan
serius.
Peringatan Keselamatan Umum
Mesin Listrik GEA006-2
PERINGATAN Bacalah semua eringatan
keselamatan dan semua etunjuk. Kelalaian mematuhi
peringatan dan petunjuk dapat menye a kan sengatan
listrik, ke akaran dan/atau cedera serius.
Simpanlah semua peringatan dan
petunjuk untuk acuan di masa
depan.
Istilah “mesin listrik” dalam semua peringatan mengacu
pada mesin listrik yang dijalankan dengan sum er listrik
jala-jala ( erka el) atau aterai (tanpa ka el).
Keselamatan tem at kerja
1. Jagalah tem at kerja selalu bersih dan
ber enerangan cuku . Tempat yang erantakan
atau gelap mengundang kecelakaan.
2. Jangan mengo erasikan mesin listrik dalam
atmosfer yang mudah meledak, se erti bila ada
cairan, gas, atau debu mudah menyala. Mesin listrik
menim ulkan percikan api yang dapat menyalakan
de u atau uap terse ut.
3. Jauhkan anak-anak dan mereka yang tidak
berke entingan saat menggunakan mesin listrik.
Bila perhatian terpecah, Anda dapat kehilangan
kendali.
Keamanan kelistrikan
4. Steker mesin listrik harus cocok dengan
sto kontak. Jangan sekali-kali mengubah steker
dengan cara a a un. Jangan menggunakan
steker ada tor dengan mesin listrik berarde
(dibumikan). Steker yang tidak diu ah dan
stopkontak yang cocok akan mengurangi risiko
sengatan listrik.
5. Hindari sentuhan tubuh dengan ermukaan
berarde atau yang dibumikan se erti i a,
radiator, kom or, dan kulkas. Risiko sengatan listrik
ertam ah jika tu uh Anda ter umikan atau erarde.
6. Jangan membiarkan mesin listrik kehujanan atau
kebasahan. Air yang masuk ke dalam mesin listrik
akan meningkatkan risiko sengatan listrik.
7. Jangan menyalahgunakan kabel. Jangan sekali-
kali menggunakan kabel untuk membawa,
menarik, atau mencabut mesin listrik dari
sto kontak. Jauhkan kabel dari anas, minyak,
te ian tajam, atau bagian yang bergerak. Ka el
yang rusak atau kusut memper esar risiko sengatan
listrik.
8. Bila menggunakan mesin listrik di luar ruangan,
gunakan kabel ekstensi yang sesuai untuk
enggunaan di luar ruangan. Penggunaan ka el
yang sesuai untuk penggunaan luar ruangan
mengurangi risiko sengatan listrik.
9. Jika mengo erasikan mesin listrik di lokasi
lemba tidak da at dihindari, gunakan asokan
daya yang dilindungi iranti emutus arus
kegagalan arde (ground fault circuit interru ter -
GFCI). Penggunaan GFCI mengurangi risiko
sengatan listrik.
Keselamatan diri
10. Jaga kewas adaan, erhatikan ekerjaan Anda
dan gunakan akal sehat bila menggunakan mesin
listrik. Jangan menggunakan mesin listrik saat
Anda lelah atau di bawah engaruh obat bius,
alkohol, atau obat. Sekejap saja lalai saat
menggunakan mesin listrik dapat menye a kan
cedera diri yang serius.
11. Gunakan alat elindung diri. Selalu kenakan
elindung mata. Peralatan pelindung seperti masker
de u, sepatu pengaman anti-selip, helm pengaman,
atau pelindung telinga yang digunakan untuk kondisi
yang sesuai akan mengurangi risiko cedera diri.
12. Cegah enyalaan yang tidak disengaja. Pastikan
bahwa sakelar berada dalam osisi mati (off)
sebelum menghubungkan mesin ke sumber daya
dan/atau baterai, atau mengangkat atau
membawanya. Mem awa mesin listrik dengan jari
Anda pada sakelarnya atau mengalirkan arus listrik
pada mesin listrik yang sakelarnya hidup (on) akan
mengundang kecelakaan.
13. Le askan kunci-kunci enyetel sebelum
menghidu kan mesin listrik. Kunci-kunci yang
masih terpasang pada agian mesin listrik yang
erputar dapat menye a kan cedera.
14. Jangan meraih terlalu jauh. Jagalah ijakan dan
keseimbangan se anjang waktu. Hal ini
memungkinkan kendali yang le ih aik atas mesin
listrik dalam situasi yang tidak diharapkan.
15. Kenakan akaian yang sesuai. Jangan memakai
akaian yang kedodoran atau erhiasan. Jauhkan
rambut, akaian, dan sarung tangan dari bagian
mesin yang bergerak. Pakaian kedodoran,
perhiasan, atau ram ut panjang dapat tersangkut
pada agian yang ergerak.
Other manuals for UM164D Series
8
Table of contents
Languages:
Other Makita Lawn And Garden Equipment manuals

Makita
Makita PE3450H User manual

Makita
Makita EM4250CA Quick start guide

Makita
Makita XMU05 User manual

Makita
Makita UM104D User manual

Makita
Makita DDG460 User manual

Makita
Makita DUM166 User manual

Makita
Makita DUM168 User manual

Makita
Makita BR400MP User guide

Makita
Makita UV3200 User guide

Makita
Makita UB401MP User guide

Makita
Makita DUM604 User manual

Makita
Makita UM110D User manual

Makita
Makita UM603D User manual

Makita
Makita DUM604 User manual

Makita
Makita UV001GM201 User manual

Makita
Makita UM165D User manual

Makita
Makita DG001G User manual

Makita
Makita DCU603 User manual

Makita
Makita GVU01SM User manual

Makita
Makita UM167D User manual