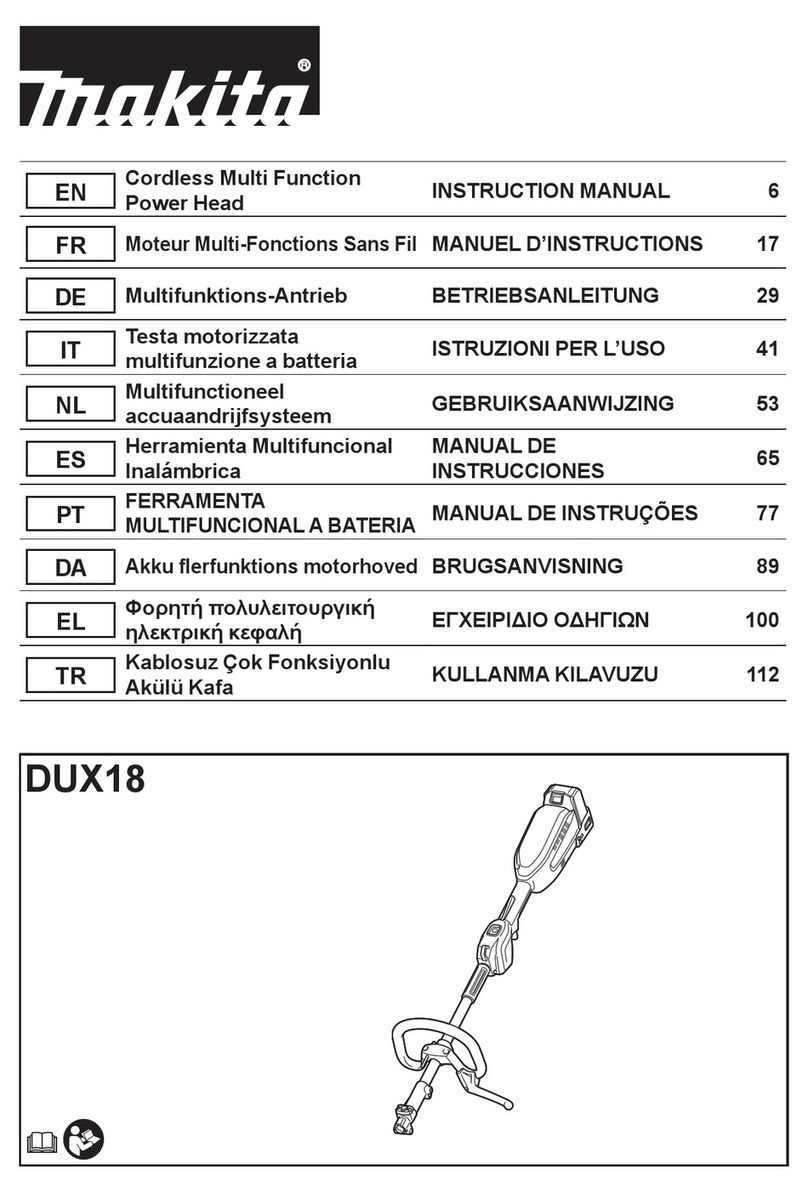
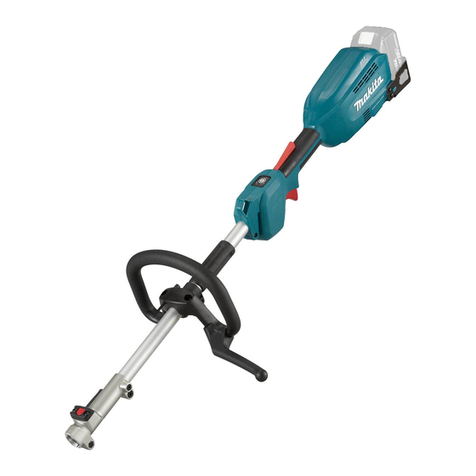
Makita DUX60 User manual

DUX60
EN Cordless Multi Function
Power Head INSTRUCTION MANUAL 5
FR
Moteur Multi-Fonctions Sans Fil
MANUEL D’INSTRUCTIONS 14
DE Multifunktions-Antrieb BETRIEBSANLEITUNG 24
IT Testa motorizzata
multifunzione a batteria ISTRUZIONI PER L’USO 34
NL Multifunctioneel
accuaandrijfsysteem GEBRUIKSAANWIJZING 44
ES Herramienta Multifuncional
Inalámbrica
MANUAL DE
INSTRUCCIONES 54
PT
FERRAMENTA
MULTIFUNCIONAL A BATERIA
MANUAL DE INSTRUÇÕES 65
DA
BRUGSANVISNING 75
EL
84
TR
Akülü Kafa KULLANMA KILAVUZU 95

2
1
89
10 11
3
4
5
6
7
12
Fig.1
2
1
3
Fig.2
1
2
Fig.3
1
Fig.4
2
1
Fig.5
1
Fig.6
1
Fig.7
2

4
2
3
1
3
5
Fig.8
1
2
Fig.9
1
Fig.10
1
2
3
Fig.11
1
Fig.12
Fig.12
3
1
2
Fig.13
1
2
Fig.14
21
Fig.15
3

1
2
Fig.16
1
Fig.17
1
2
Fig.18
1
Fig.19
4

5ENGLISH
ENGLISH (Original instructions)
SPECIFICATIONS
Model: DUX60
No load speed
(without attachment)
Low 0 - 5,700 min-1
Medium 0 - 8,200 min-1
High 0 - 9,700 min-1
Overall length 1,011 mm
Rated voltage D.C. 36 V
Net weight 5.1 kg - 11.7 kg
without notice.
-
Charger
DC18SH
residence.
WARNING:
Recommended battery adapter and cord connected battery pack
them.
Model Rotation speed
Low Medium
-1 0 - 6,000 min-1 0 - 7,100 min-1
0 - 3,500 min-1 0 - 5,000 min-1 0 - 6,000 min-1
-1 0 - 6,000 min-1 0 - 7,100 min-1
(Strokes per minute)
-1 -1 -1
0 - 160 min-1 0 - 230 min-1 0 - 280 min-1
0 - 130 min-1 0 - 190 min-1 0 - 230 min-1
0 - 2,800 min-1 -1 -1
0 - 1,600 min-1 0 - 2,300 min-1 0 - 2,800 min-1
0 - 130 min-1 0 - 190 min-1 0 - 230 min-1
0 - 5,700 min-1 0 - 7,850 min-1 0 - 8,250 min-1

6ENGLISH
Type Model
Brushcutter attachment
String trimmer attachment
Grass trimmer attachment
Hedge trimmer attachment
Ground trimmer attachment
Cultivator attachment
Shaft extension attachment
Blower attachment
Symbols
Read instruction manual.
Take particular care and attention.
Do not expose to moisture.
Ni-MH
Li-ion
Do not dispose of electric equipment or
in accordance with national laws, electric
pack(s) that have reached the end of
Intended use
This cordless multi function power head is intended for
driving an approved attachment listed in the section
use the unit for the other purpose.
WARNING:
before using.

7ENGLISH
Noise
Applicable
standard
LpA (dB (A))
Uncer-
tainty K
(dB (A))
LWA (dB (A))
Uncer-
tainty K
(dB (A))
78.5 1.0 90.2 1.5
0.6 93.3 1.6
77.0 1.7 88.5 1.8
82.5 2.2 93.3 2.9
2.3 92.8 1.6
76.0 1.8 87.7 1.5
2.5 93.5 2.2
77.0 1.9 85.6 2.0
79.9 2.6 2.0
ISO11806-1
79.0 2.6 91.8 1.7
ISO11806-1
80.1 0.7 91.0 1.6
ISO11806-1
79.9 2.3 92.7 0.9
ISO11806-1
80.3 0.9 91.2 2.2
ISO11806-1
82 393 3
82 393 3
77 388 3
77 388 3
83 3 3
92.5 101.9 ISO11680
86.6 1.0 101.2 1.0 ISO11680
76.7 2.2 1.0
73.1 1.8
1.5 88.2 2.6 ISO11789
1.3 ISO10517
85.6 1.0 95.5 1.3 ISO10517
79.5 0.9 89.0 0.7
80.1 1.8 88.8 0.7
89.8 0.8
NOTE:
NOTE:

8ENGLISH
Vibration
Applicable
standard
2)
Uncertainty K
2)
2)
Uncertainty K
2)
3.0 1.5 2.5 1.5
5.0 1.5 2.5 1.5
2.5 1.5 2.5 1.5
3.0 1.5 2.5 1.5
3.0 1.5 2.5 1.5
2.5 1.5 2.5 1.5
2.5 1.5 2.5 1.5
1.5 2.5 1.5
2.5 1.5 2.5 1.5
ISO11806-1
2.5 1.5 2.5 1.5
ISO11806-1
2.5 1.5 2.5 1.5
ISO11806-1
2.5 1.5 2.5 1.5
ISO11806-1
2.5 1.5 2.5 1.5
ISO11806-1
5.5 1.5 3.5 1.5
5.5 1.5 1.5
1.5 2.5 1.5
1.5 2.5 1.5
6.5 1.5 1.5
2.5 1.5 2.5 1.5 ISO11680
5.5 1.5 2.5 1.5 ISO11680
2.5 1.5 2.5 1.5
2.5 1.5 2.5 1.5
2.5 1.5 2.5 1.5 ISO11789
1.5 3.0 1.5 ISO10517
2.5 1.5 2.5 1.5
2.6 1.5 2.6 1.5
2.0 2.5 1.5
NOTE:
NOTE:
WARNING:
WARNING:

9ENGLISH
EC Declaration of Conformity
For European countries only
to this instruction manual.
SAFETY WARNINGS
General power tool safety warnings
WARNING: Read all safety warnings, instruc-
-
tions for future reference.
(cordless) power tool.
Important safety instructions for
battery cartridge
1.
Before using battery cartridge, read all instruc-
tions and cautionary markings on (1) battery
2.
cartridge.
or explosion.
3.
5.
(1) -
(2) -
nails, coins, etc.
(3) Do not expose battery cartridge to water
or rain.
breakdown.
6. -
7.
8.
battery cartridge.
9. Do not use a damaged battery.
10.
-
ments.
forwarding agents, special requirement on pack-
-
ing an expert for hazardous material is required.
national regulations.
around in the packaging.
11.
place. Follow your local regulations relating to
disposal of battery.
12.
-
13.
-
15. -
cause burns.
16.
cartridge.
17.
-
cal power lines.
18.
SAVE THESE INSTRUCTIONS.
CAUTION: Only use genuine Makita batteries.
charger.
Tips for maintaining maximum
battery life
1.
less tool power.
2.
3.
-
5.
10 ENGLISH
PARTS DESCRIPTION
Fig.1
1 2 3Switch trigger Hanger
5Handle 6 7 8Speed indicator
9 10 11 12 Shoulder harness
FUNCTIONAL
DESCRIPTION
WARNING:
start-up.
cartridge
CAUTION:
CAUTION: -
cartridge.
Fig.2: 1. Red indicator 2. Button 3.
CAUTION:
If not,
CAUTION:
forcibly.
-
-
placed under one of the following conditions:
Status Indicator lamps
On Blinking
Overload
Overheat
Over
discharge
the tool on to restart.
battery
tool on again.
If the tool does not operate even when the switches are
capacity
Only for battery cartridges with the indicator
Fig.3: 1. Indicator lamps 2.
-
light up for a few seconds.

11 ENGLISH
Indicator lamps Remaining
capacity
Blinking
75% to 100%
50% to 75%
25% to 50%
0% to 25%
Charge the
malfunctioned.
NOTE: Depending on the conditions of use and the
NOTE:
WARNING:
Fig.4: 1.
NOTE:
NOTE:
To avoid unintentional start up, the main power switch
is not pulled for a certain period after the main power
switch is turned on.
WARNING:
WARNING: NEVER tape down or defeat pur-
CAUTION: -
NOTICE: -
Fig.5: 1.2. Switch trigger
To start the tool, turn on the main power switch and
grasp) and then pull the switch trigger. Tool speed is
trigger. To stop the tool, release the switch trigger.
Speed adjusting
speed will change.
Fig.6: 1.
Indicator Mode
High
Medium
Low
WARNING:
-
-
gled in the tool.
the trigger when the tool’s head is stopped. The power
To return to regular rotation, release the trigger and wait
Fig.7: 1.
NOTE: During the reverse rotation, the tool operates
stops.
NOTE: Once the tool is stopped, the rotation returns
NOTE:

12 ENGLISH
rotation of cutting tool. To restart the tool, release the
switch trigger. Clear the cause of sudden drop in the
rotation speed and then turn the tool on.
NOTE: This function is not a preventive measure for
ASSEMBLY
WARNING:
WARNING:
completely assembled. Operation of the tool in a
-
the arrow mark. Do not remove or shrink the spacer.
Fig.8: 1. Handle 2.3. Clamp
4. Spacer 5.
Fig.9: 1. Barrier 2. Screw
CAUTION:
pipe is secured after installation. Improper instal-
Mount the attachment pipe to the power unit.
1. Turn the lever of the power unit toward the attach-
ment side.
Fig.10: 1. Lever
2.
with the arrow mark and insert the attachment pipe until
Fig.11: 1.2.3.
3. Turn the lever toward the power unit side.
Fig.12: 1. Lever
Make sure that the surface of the lever is parallel to the
pipe.
To remove the pipe, turn the lever toward the attach-
ment side and pull the pipe out while pressing down the
Fig.13: 1.2. Lever 3.
-
Fig.14: 1. Handle 2.
Fig.15: 1.2. Hanger
WARNING: Be extremely careful to maintain
operator.
CAUTION:
fatigue.
CAUTION: -
-
-
Fig.16: 1. Hanger 2. Hook
Fig.17: 1. Buckle
CAUTION:
When not in use, store the hex wrench as illustrated to
Fig.18: 1. Handle 2. Hex wrench

13 ENGLISH
MAINTENANCE
WARNING:
before attempting to perform inspection or main-
NOTICE:
cracks may result.
Battery guard
WARNING:
for repairs.
Fig.19: 1.
TROUBLESHOOTING
-
ment parts for repairs.
State of abnormality Probable cause (malfunction) Remedy
Motor does not run.
Motor stops running after a little use. Rotation is in reverse. Change the direction of rotation with the reversing
switch.
Overheating. Stop using of tool to allow it to cool down.
manual.
OPTIONAL
ACCESSORIES
CAUTION:
accessories or attachments might present a risk of
for its stated purpose.
-
Center.
-
• Brushcutter attachment
• String trimmer attachment
• Grass trimmer attachment
• Hedge trimmer attachment
• Ground trimmer attachment
• Cultivator attachment
• Shaft extension attachment
• Blower attachment
NOTE:

14 FRANÇAIS
FRANÇAIS (Instructions originales)
SPÉCIFICATIONS
Modèle : DUX60
Vitesse à vide
(sans accessoire)
0 - 5 700 min-1
0 - 8 200 min-1
Élevé 0 - 9 700 min-1
Longueur totale 1 011 mm
Tension nominale 36 V CC
5,1 kg - 11,7 kg
Batterie
Chargeur
DC18SH
résidez.
AVERTISSEMENT : L’utilisation
Batterie connectée par cordon
-
sements inscrits dessus.
Modèle Vitesse de rotation
Faible Moyen
-1 0 - 6 000 min-1 0 - 7 100 min-1
0 - 3 500 min-1 0 - 5 000 min-1 0 - 6 000 min-1
-1 0 - 6 000 min-1 0 - 7 100 min-1
-1 -1 -1
0 - 160 min-1 0 - 230 min-1 0 - 280 min-1
0 - 130 min-1 0 - 190 min-1 0 - 230 min-1
0 - 2 800 min-1 -1 -1
0 - 1 600 min-1 0 - 2 300 min-1 0 - 2 800 min-1
0 - 130 min-1 0 - 190 min-1 0 - 230 min-1
0 - 5 700 min-1 0 - 7 850 min-1 0 - 8 250 min-1

15 FRANÇAIS
Type Modèle
Tête Moto-Bineuse
Tête Dresse-Bordures
Outil Balai Brosse
Outil Balai Racleur
Symboles
d’être utilisés pour l’appareil. Veillez à comprendre leur
Lire le mode d’emploi.
Veuillez être prudent et rester attentif.
Ne pas exposer à l’eau.
Ni-MH
Li-ion
Conformément aux directives européennes
relatives aux déchets d’équipements
électriques et électroniques et aux piles
et accumulateurs ainsi qu’aux déchets de
piles et d’accumulateurs et leur mise en
œuvre conformément aux lois nationales,
les équipements électriques et les piles et
l’environnement.
Utilisations
AVERTISSEMENT : Lire le manuel d’instruc-
-
Le non-respect

16 FRANÇAIS
Bruit
Accessoire
sonore moyenne
sonore moyenne
Norme
applicable
LpA (dB (A))
Incertitude K
(dB (A))
LWA (dB (A))
Incertitude K
(dB (A))
78,5 1,0 90,2 1,5
0,6 93,3 1,6
Lame en plastique 77,0 1,7 88,5 1,8
82,5 2,2 93,3 2,9
2,3 92,8 1,6
Lame en plastique 76,0 1,8 87,7 1,5
2,5 93,5 2,2
Lame en plastique 77,0 1,9 85,6 2,0
79,9 2,6 2,0
ISO11806-1
79,0 2,6 91,8 1,7
ISO11806-1
Lame en plastique 80,1 0,7 91,0 1,6
ISO11806-1
79,9 2,3 92,7 0,9
ISO11806-1
Lame en plastique 80,3 0,9 91,2 2,2
ISO11806-1
82 393 3
82 393 3
77 388 3
77 388 3
83 3 3
92,5 101,9 ISO11680
86,6 1,0 101,2 1,0 ISO11680
76,7 2,2 1,0
73,1 1,8
1,5 88,2 2,6 ISO11789
1,3 ISO10517
85,6 1,0 95,5 1,3 ISO10517
79,5 0,9 89,0 0,7
80,1 1,8 88,8 0,7
89,8 0,8
-
NOTE :
standard et peuvent être utilisées pour comparer les outils entre eux.
NOTE :
de l’exposition.

17 FRANÇAIS
Vibration
Accessoire
Norme
applicable
2)
Incertitude K
2)
2)
Incertitude K
2)
3,0 1,5 2,5 1,5
5,0 1,5 2,5 1,5
Lame en plastique 2,5 1,5 2,5 1,5
3,0 1,5 2,5 1,5
3,0 1,5 2,5 1,5
Lame en plastique 2,5 1,5 2,5 1,5
2,5 1,5 2,5 1,5
Lame en plastique 1,5 2,5 1,5
2,5 1,5 2,5 1,5
ISO11806-1
2,5 1,5 2,5 1,5
ISO11806-1
Lame en plastique 2,5 1,5 2,5 1,5
ISO11806-1
2,5 1,5 2,5 1,5
ISO11806-1
Lame en plastique 2,5 1,5 2,5 1,5
ISO11806-1
5,5 1,5 3,5 1,5
5,5 1,5 1,5
1,5 2,5 1,5
1,5 2,5 1,5
6,5 1,5 1,5
2,5 1,5 2,5 1,5 ISO11680
5,5 1,5 2,5 1,5 ISO11680
2,5 1,5 2,5 1,5
2,5 1,5 2,5 1,5
2,5 1,5 2,5 1,5 ISO11789
1,5 3,0 1,5 ISO10517
2,5 1,5 2,5 1,5
2,6 1,5 2,6 1,5
2,0 2,5 1,5
NOTE :
standard et peuvent être utilisées pour comparer les outils entre eux.
NOTE :
de l’exposition.
AVERTISSEMENT : -
AVERTISSEMENT :

18 FRANÇAIS
Pour les pays européens uniquement
CONSIGNES DE SÉCURITÉ
AVERTISSEMENT : Veuillez lire les
Le non-respect de toutes les instructions
-
-
fait référence à l’outil électrique alimenté par le secteur
(avec cordon d’alimentation) ou à l’outil électrique fonc-
pour la batterie
1.
produit utilisant la batterie.
2.
batterie.
chaleur excessive ou une explosion.
3.
5. Ne court-circuitez pas la batterie :
(1) -
riau conducteur.
(2)
-
de monnaie, etc.
(3) N’exposez pas la batterie à l’eau ou à la
pluie.
-
panne.
6. Ne rangez ni n’utilisez l’outil et la batterie dans
7.
-
8.
contre un objet dur.
incendie, une chaleur excessive ou une explosion.
9.
10.
Lors du transport commercial par des tierces
parties ou des transitaires par exemple, des exi-
nécessaire de consulter un expert en matériau
dangereux. Veuillez également respecter les
plus détaillées.
11. Lors de la mise au rebut de la batterie, reti-
rebut des batteries.
12.
L’insertion de
provoquer un incendie, une chaleur excessive,
13.
de l’outil.
Pendant et après l’utilisation, la batterie peut
15. -
16.
rainures de la batterie. Cela pourrait réduire les
17.
Cela pourrait
18.
enfants.
CONSERVEZ CES
INSTRUCTIONS.
ATTENTION :
Makita d’origine.
-
risque d’incendie, de dommages matériels et corpo-
rels. Cela annulera également la garantie Makita pour
l’outil et le chargeur Makita.

19 FRANÇAIS
1. -
2. -
3.
refroidir.
-
5. -
six mois).
DESCRIPTION DES PIÈCES
Fig.1
1Batterie 2Levier de sécurité 3Gâchette Dispositif de suspension
5 6Bouton de dégagement 7Barre de protection
8Indicateur de vitesse
9Témoin d’alimentation 10 Bouton d’alimentation
principale
11 Bouton de marche
12
DESCRIPTION DU
FONCTIONNEMENT
AVERTISSEMENT :
-
ment de l’outil.
Insertion ou retrait de la batterie
ATTENTION :
de mettre en place ou de retirer la batterie.
ATTENTION : Tenez fermement l’outil et la
batterie lors de la mise en place ou du retrait de
la batterie. Si vous ne tenez pas fermement l’outil
Fig.2: 1. Indicateur rouge 2. Bouton 3. Batterie
ATTENTION :
-
ATTENTION :
force. Si elle ne glisse pas facilement, c’est que vous
ne l’insérez pas correctement.
batterie
-
tation vers le moteur pour prolonger la durée de vie de
dans l’une des situations suivantes, l’outil cessera
automatiquement de fonctionner.
État
Éteint Clignotant
Surcharge
Décharge
excessive
Si l’outil est surchargé par un enchevêtrement de mau-
et
intermédiaires se mettent à clignoter et l’outil s’arrête
automatiquement.
pour reprendre la tâche.

20 FRANÇAIS
l’outil ou de la batterie
clignotent.
l’outil.
de la batterie
-
teur clignote.
Si l’outil ne fonctionne pas même en actionnant
chargez-les.
la batterie
Uniquement pour les batteries avec voyant
lumineux
Fig.3: 1. Témoins 2.
témoins s’allument pendant quelques secondes.
restante
Éteint Clignotant
75 % à 100 %
50 % à 75 %
25 % à 50 %
0 % à 25 %
Chargez la
NOTE : Selon les conditions d’utilisation et la tem-
NOTE :
Interrupteur d’alimentation
principale
AVERTISSEMENT :
l’interrupteur d’alimentation principale.
-
-
mentation principale.
Fig.4: 1. Bouton d’alimentation principale
NOTE : La lampe d’alimentation principale clignote
si la gâchette est actionnée dans des conditions de
non-exploitation. La lampe clignote si vous actionnez
l’interrupteur d’alimentation principale tout en mainte-
NOTE : Cet outil dispose d’une fonction de mise hors
intempestif, l’interrupteur d’alimentation principale
lorsque la gâchette n’est pas enclenchée pendant un
d’alimentation principale.
AVERTISSEMENT :
AVERTISSEMENT : NE FIXEZ JAMAIS le
-
-
ATTENTION :
-
REMARQUE :
Un levier de sécurité est fourni pour prévenir l’activation
accidentelle de la gâchette.
Fig.5: 1. Levier de sécurité 2. Gâchette
-
tation principale et saisissez la poignée (le levier de
sécurité est alors relâché), puis enclenchez la gâchette.
-
gâchette.
Other manuals for DUX60
10
This manual suits for next models
4
Table of contents
Languages:
Other Makita Power Tools manuals

Makita
Makita BTM40 User manual

Makita
Makita RP1800 User manual

Makita
Makita DHR241ZJ User manual

Makita
Makita WR100D User manual

Makita
Makita RP0900 User manual

Makita
Makita DHR242 User manual

Makita
Makita M9800 Series User manual

Makita
Makita DHR242 User manual

Makita
Makita DHR242RTEW User manual

Makita
Makita HM1400 User manual

Makita
Makita GS5000 Manual

Makita
Makita BST220 User manual

Makita
Makita DWR180Z User manual

Makita
Makita JS3200 User manual

Makita
Makita GWT07 User manual

Makita
Makita HM0860C User manual

Makita
Makita 6907DW User manual

Makita
Makita DTM41 User manual

Makita
Makita 6907D User manual

Makita
Makita 4304T User manual