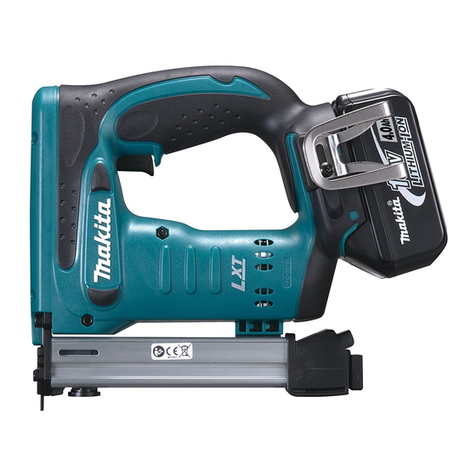
Makita t221d User manual

GB
Cordless Stapler Instruction Manual
F
Agrafeuse sans fil Manuel d’instructions
D
Akku-Tacker Betriebsanleitung
I
Graffatrice a batteria Istruzioni per l’uso
NL
Snoerloze nietmachine Gebruiksaanwijzing
E
Grapadora a bateria Manual de instrucciones
P
Agrafadora a bateria Manual de instruções
DK
Akku hæftepistol Brugsanvisning
S
Sladdlös häftapparat Bruksanvisning
N
Batteridrevet stiftemaskin Bruksanvisning
SF
Akkukäyttöinen nitoja Käyttöohje
GR Φορητ ςυρραπτικ Οδηγίες χρήσεως
T221D

2
12
34
56
78
12
14
13
10
11
5
9
7
7
8
7
75
6
4
3
2
1

3
910
15

4
ENGLISH
Explanation of general view
1 Battery cartridge
2 Set plate
3 Trigger
4 Safety lever
5 Plate spring
6 Slide backward
7 Press
8 Staples
9Push
10 Nut
11 Turn
12 tool end (A)
13 Less than 2 mm
14 Material
15 Sight window
SPECIFICATIONS
Model T221D
Staple width ...........................................................10 mm
Applicable staples length ............... 10, 13, 16, 19, 22 mm
Staple magazine capacity ................................. 100 pcs.
Dimensions (L x W x H) ....................... 199 x 58 x 193 mm
Net weight ..............................................................1.7 kg
Rated voltage ...................................................D.C. 9.6 V
• Due to our continuing program of research and devel-
opment, the specifications herein are subject to change
without notice.
• Note: Specifications may differ from country to country.
Intended use
The tool is intended for pressing staples into construction
materials such as timbers.
Safety hints
For your own safety, please refer to the enclosed safety
instructions.
IMPORTANT SAFETY INSTRUCTIONS
FOR CHARGER & BATTERY CARTRIDGE
ENC004-1
1. Before using battery cartridge, read all instruc-
tions and cautionary markings on (1) battery
charger, (2) battery, and (3) product using battery.
2. Do not disassemble battery cartridge.
3. If operating time has become excessively
shorter, stop operating immediately. It may
result in a risk of overheating, possible burns
and even an explosion.
4. If electrolyte gets into your eyes, rinse them out
with clear water and seek medical attention right
away. It may result in loss of your eyesight.
5. Always cover the battery terminals with the bat-
tery cover when the battery cartridge is not
used.
6. Do not short the battery cartridge:
(1) Do not touch the terminals with any conduc-
tive material.
(2) Avoid storing battery cartridge in a container
with other metal objects such as nails, coins,
etc.
(3) Do not expose battery cartridge to water or
rain.
A battery short can cause a large current flow,
overheating, possible burns and even a break-
down.
7. Do not store the tool and battery cartridge in
locations where the temperature may reach or
exceed 50°C (122°F).
8. Do not incinerate the battery cartridge even if it
is severely damaged or is completely worn out.
The battery cartridge can explode in a fire.
9. Be careful not to drop or strike battery.
SAVE THESE INSTRUCTIONS.
Tips for maintaining maximum battery life
1. Charge the battery cartridge before completely
discharged.
Always stop tool operation and charge the bat-
tery cartridge when you notice less tool power.
2. Never recharge a fully charged battery cartridge.
Overcharging shortens the battery service life.
3. Charge the battery cartridge with room tempera-
ture at 10°C – 40°C (50°F – 104°F). Let a hot bat-
tery cartridge cool down before charging it.
4. Charge the Nickel Metal Hydride battery car-
tridge when you do not use it for more than six
months.
ADDITIONAL SAFETY RULES FOR TOOL
1. Always wear safety goggles or safety glasses
with side shield, and a full face shield when
needed.
2. Do not point the ejection port at anyone in the
vicinity (especially his face). Keep hands and
feet away from the ejection port area.
3. Always remove the battery cartridge before load-
ing the staples, adjustment, inspection, mainte-
nance or after operation is over.
4. Make sure no one is nearby before operation.
Never attempt to drive staples from both the
inside and outside of wall at the same time. Sta-
ples may rip through and/or fly off, presenting a
grave danger.
5. Watch your footing and maintain your balance
with the tool. Make sure there is no one below
when working in high locations.
6. Check walls, ceilings, floors, roofing and the like
carefully to avoid possible electrical shock, gas
leakage, explosions, etc. caused by stapling into
live wires, conduits or gas pipes.
7. Use only staples specified in this manual. The
use of any other staples may cause malfunction
of the tool.
8. Do not tamper with the tool or attempt to use it
for other than driving staples.
9. Do not operate the tool without staples. It short-
ens the service life of the tool.
10. Stop driving operations immediately if you
notice something wrong or out of the ordinary
with the tool.
11. Never staple into any materials which may allow
the staple to puncture and fly through as a pro-
jectile.

5
12. Never actuate the switch trigger and safety lever
at the same time until you are prepared to staple
workpieces. Allow the workpiece to depress the
safety lever. Never defeat its purpose by secur-
ing the safety lever back or by depressing it by
hand.
13. Never tamper with the safety lever. Check the
safety lever frequently for proper operations.
SAVE THESE INSTRUCTIONS.
OPERATING INSTRUCTIONS
Installing or removing battery cartridge (Fig.1)
• Always switch off the tool before insertion or removal of
the battery cartridge.
• To remove the battery cartridge, pull out the set plate
on the tool and grasp both sides of the cartridge while
withdrawing it from the tool.
• To insert the battery cartridge, align the tongue on the
battery cartridge with the groove in the housing and slip
it into place. Snap the set plate back into place. Be sure
to close the set plate fully before using the tool.
• Do not use force when inserting the battery cartridge. If
the cartridge does not slide in easily, it is not being
inserted correctly.
Safety system (Fig. 2)
Make sure all safety systems are in working order before
operation. The tool must not operate if only the trigger is
pulled or if only the safety lever is pressed against the
wood. It must work only when both actions are per-
formed. Test for possible faulty operation with a tool
unloaded and pointed well away from yourself or any
bystanders.
NOTE:
There is a possibility that the tool may operate for an
instant when only the trigger is pulled. This does not indi-
cate a problem. If this occurs, point the tool well away
from yourself or any bystanders. Release and pull the
trigger again to make sure the safety systems are in
working order.
Loading staples (Fig. 3, 4 & 5)
Important:
Always remove the battery cartridge before loading the
staples into the tool.
Press the plate spring on the rear of the sub-magazine
and slide the sub-magazine backward.
Load staples into the main magazine with staple ends
facing up as illustrated in Fig. 4. Slide the sub-magazine
forward.
To secure the sub-magazine in place, push the sub-mag-
azine while pressing the plate spring on the rear of the
sub-magazine.
CAUTION:
• Always secure the sub-magazine in place, or the sta-
ples can drop out and cause problems.
• With the magazine loaded, if the tool is held downward
and the sub-magazine is opened, the staples can fall
out and present a danger to anyone or anything below.
Keep this in mind especially when working in high loca-
tions.
Depth adjustment (Fig. 6 & 7)
If the staples are driven too deep or too shallow, adjust
the driving depth by turning the nut on the bottom of the
tool. For deeper driving of staples, turn the nut clockwise.
For shallower driving, turn the nut counterclockwise.
Please note the nut must be turned in increments of 180°
(1/2 turn) so that the groove on the nut runs parallel to
the magazine.
NOTE:
If the distance between the tool end (A) and the material
to be fastened is more than 2 mm, the tool will not oper-
ate because the safety lever is not pressed enough to
operate the tool.
Driving staples (Fig.8 & 9)
Place the tool on the material to be fastened so that the
front and the rear of the tool contact the material flat. Do
not tip the tool to the right or left side. Hold the tool firmly
against the material. Then pull the trigger to drive the sta-
ples.
If the staples are driven too shallow, press the tool head
as shown in Fig. 9 and drive the staples.
If the staples are still driven too shallow, adjust the driv-
ing depth by turning the nut clockwise. Refer to “Depth
adjustment”.
CAUTION:
Do not operate the tool without staples. It shortens the
service life of the tool.
If the tool becomes jammed, do as follows. First, remove
the battery cartridge. Open the sub-magazine and
remove the stuck staple using a screwdriver or the like.
Sight window (Fig. 10)
There is a convenient sight window on the left side of the
tool (when viewing the tool from the front). Use this sight
window to check if there are staples in the magazine.
When staples are not visible through the window, load
staples into the magazine.
Staples
• Handle the staples and their box carefully. If the staples
have been handled roughly, they may be bent out of
shape, causing poor staple feed or jamming.
• Avoid storing the staples in a very humid or hot place or
place exposed to direct sunlight.
• Do not attempt to use staples that appear to be dam-
aged, bent, rusty or corroded.
MAINTENANCE
CAUTION:
Always be sure that the tool is switched off and the bat-
tery cartridge is removed before carrying out any work on
the tool.
To maintain product safety and reliability, repairs, mainte-
nance or adjustment should be carried out by a Makita
Authorized Service Center.

15
NEDERLANDS
Verklaring van algemene gegevens
1 Batterij
2 Sluitplaat
3 Trekschakelaar
4 Veiligheidshendel
5 Veerplaat
6 Naar achter schuiven
7 Indrukken
8 Nietjes
9 Naar voren drukken
10 Moer
11 Omdraaien
12 Uiteinde (A)
13 Minder dan 2 mm
14 Materiaal
15 Controleglaasje
TECHNISCHE GEGEVENS
Model T221D
Niet-breedte .......................................................... 10 mm
Bruikbare niet-lengte ...................... 10, 13, 16, 19, 22 mm
Capaciteit van magazijn ........................................100 st.
Afmetingen (L x B x H) ......................... 199 x 58 x 193 mm
Netto gewicht ..........................................................1,7 kg
Nominale spanning ............................................ DC 9,6 V
• In verband met ononderbroken research en ontwikke-
ling behouden wij ons het recht voor bovenstaande
technische gegevens te wijzigen zonder voorafgaande
kennisgeving.
• Opmerking: De technische gegevens kunnen van land
tot land verschillen.
Doeleinden van gebruik
Het gereedschap is bedoeld voor het indrijven van kram-
men in bouwmaterialen zoals timmerhout.
Veiligheidswenken
Voor uw veiligheid dient u de bijgevoegde veiligheids-
voorschriften nauwkeurig op te volgen.
BELANGRIJKE
VEILIGHEIDSVOORSCHRIFTEN
VOOR ACCULADER EN ACCU
1. Lees alle voorschriften en waarschuwingen op
(1) de acculader, (2) de accu, en (3) het product
waarvoor de accu wordt gebruikt, aandachtig
door alvorens de acculader in gebruik te nemen.
2. Neem de accu niet uit elkaar.
3. Als de gebruikstijd van een opgeladen accu aan-
zienlijk korter is geworden, moet u het gebruik
ervan onmiddellijk stopzetten. Voortgezet
gebruik kan oververhitting, brandwonden en
zelfs een ontploffing veroorzaken.
4. Als er elektrolyt in uw ogen is terechtgekomen,
spoel dan uw ogen met schoon water en roep
onmiddellijk de hulp van een dokter in. Elektrolyt
in de ogen kan blindheid veroorzaken.
5. Bedek de accuklemmen altijd met de accukap
wanneer u de accu niet gebruikt.
6. Voorkom kortsluiting van de accu:
(1) Raak de accuklemmen nooit aan met een
geleidend materiaal.
(2) Bewaar de accu niet in een bak waarin
andere metalen voorwerpen zoals spijkers,
munten e.d. worden bewaard.
(3) Stel de accu niet bloot aan water of regen.
Kortsluiting van de accu kan oorzaak zijn van
een grote stroomafgifte, oververhitting, brand-
wonden, en zelfs defecten.
7. Bewaar het gereedschap en de accu niet op
plaatsen waar de temperatuur kan oplopen tot
50°C of hoger.
8. Werp de accu nooit in het vuur, ook niet wanneer
hij zwaar beschadigd of volledig versleten is. De
accu kan namelijk ontploffen in het vuur.
9. Wees voorzichtig dat u de accu niet laat vallen
en hem niet blootstelt aan schokken of stoten.
BEWAAR DEZE VOORSCHRIFTEN.
Tips voor een maximale levensduur van de accu
1. Laad de accu op voordat hij volledig ontladen is.
Stop het gebruik van het gereedschap en laad de
accu op telkens wanneer u vaststelt dat het ver-
mogen van het gereedschap is afgenomen.
2. Laad een volledig opgeladen accu nooit opnieuw
op. Als u de accu te veel oplaadt, zal hij minder
lang meegaan.
3. Laad de accu op bij een kamertemperatuur tus-
sen 10°C en 40°C. Laat een warme accu afkoelen
alvorens hem op te laden.
4. Laad de nikkel-metaalhydride accu op telkens
wanneer u hem langer dan zes maanden niet
hebt gebruikt.
BIJGEVOEGDE
VEILIGHEIDSVOORSCHRIFTEN
VOOR DE MACHINE
1. Gebruik altijd een aan de zijkanten afge-
schermde veiligheidsbril, en indien nodig een
volledige gezichtsbescherming.
2. Richt de uitwerpopening nooit op iemand in uw
omgeving (speciaal het gezicht). Houd uw han-
den en voeten flink uit de buurt van de uitwerpo-
pening.
3. Verwijder altijd de accu alvorens de nietjes te
laden, bijstellingen en inspecties te verrichten,
onderhoudsbeurten te geven, of als u met het
werk klaar bent.
4. Kontroleer alvorens te beginnen dat niemand in
de buurt is. Probeer nooit de nietjes van beide
kanten van de wand in te drijven. De nietjes kun-
nen er door heen schieten of uitgestoten wor-
den, hetgeen hoogst gevaarlijk is.
5. Zorg ervoor dat u op vaste grond staat en met de
machine in handen in evenwicht bent. Wanneer
u op hooggelegen plaatsen werkt, zorg dan dat
beneden niemand aanwezig is.
6. Controleer zorgvuldig of er in de muur, plafond,
vloer, dakbedekking en dergelijke onder span-
ning staande elektrische draden, leidingen of
gaspijpen aanwezig zijn. U dient te voorkomen
dat er nietjes ingedreven worden, hetgeen een
elektrische schok, gaslekkage, explosie of iets
dergelijks kan veroorzaken.
7. Gebruik uitsluitend de in deze gebruiksaanwij-
zing voorgeschreven nietjes, aangezien anders
storingen kunnen optreden.

16
8. Probeer geen wijzigingen aan te brengen of de
machine voor andere doeleinden te gebruiken.
9. Stel de machine nooit in werking zonder nietjes,
aangezien anders de gebruiksduur kan worden
verkort.
10. Stop onmiddellijk de machine, wanneer u merkt
dat er iets niet in orde is of iets ongewoons
optreedt.
11. Drijf geen nietjes in materiaal waar de nietjes er
doorheen kunnen schieten.
12. Stel nooit de trekschakelaar en de veilighei-
deshendel gelijktijdig in werking, tenzij u met het
eigenlijke werk wilt beginnen. Laat alleen het
werkstuk de nodige druk op de veiligheidshen-
del uitoefenen. De functje van de veiligheidshen-
del wordt ongedaan gemaakt, wanneer de
hendel in de ingedrukte stand wordt vastgezet of
met de hand wordt ingedrukt.
13. Breng geen wijzigingen aan de veiligheidshen-
del. Controleer de veiligheidshendel dikwijls op
mankementen.
BEWAAR DEZE VOORSCHRIFTEN.
BEDIENINGSVOORSCHRIFTEN
Plaatsen en uithalen van batterij (Fig. 1)
• Schakel de machine altijd uit voordat een batterij
geplaatst of verwijdert wordt.
• Om het batterijpak te verwijderen, trek eerst de sluit-
plaat uit de machine, pak dan het batterijpak aan beide
zijden vast en verwijder het uit de machine.
• Voor het plaatsen van de batterij zorgt u ervoor dat de
rug op de batterij in de groef van het batterijkomparti-
ment komt, waarna u de batterij naar binnen schuift.
Klap alvorens het gereedschap te gebruiken de stel-
plaat oftewel deksel weer dicht, kontroleer of de stel-
plaat goed vast geklemd zit en niet gemakkelijk
opengaat.
• Als het batterijpak moeilijk in de houder komt, probeer
het dan niet met geweld in te duwen. Indien het batterij-
pak er niet gemakkelijk ingaat, dan houdt u het ver-
keerd.
Veiligheidssysteem (Fig. 2)
Controleer of het veiligheidssysteem in orde is, alvorens
de machine in werking te stellen. De machine mag niet in
bedrijf worden gesteld, wanneer alleen de trekschakelaar
wordt ingedrukt, of alleen de veiligheidshendel tegen het
werkstuk wordt gedrukt. De machine dient alleen in wer-
king te worden gesteld, wanneer beide handelingen wor-
den verricht. Veiligheidshalve dient u een proefje te
nemen met de machine (deze mag dan niet geladen wor-
den) ver van u of van eventuele omstanders af gericht.
OPMERKING:
De mogelijkheid bestaat dat de machine een ogenblikje
in werking treedt, wanneer alleen op de trekschakelaar
wordt gedrukt. Dit is echter geen defect. Wanneer dit
gebeurt, richt dan de machine ver van u of van de
omstanders af en laat de trekschakelaar los. Druk
daarna weer op de schakelaar om te controleren of het
veiligheidssysteem in orde is.
Laden van nietjes (Fig. 3, 4 en 5)
Belangrijk:
Verwijder altijd de accu alvorens nietjes in de machine te
laden.
Druk de plaatveer op de achterkant in en schuif de beu-
gel naar achter.
Laad de nietjes in het magazijn met de uiteinden naar
boven, zoals afgebeeld in Fig. 4. Schuif de beugel naar
voren.
Voor het vastzetten van de beugel, drukt u deze naar
voren terwijl u daarbij de veerplaat op de achterkant
indrukt.
LET OP:
• Zet de beugel altijd vast, aangezien de nietjes anders
eruit kunnen vallen en moeilijkheden kunnen veroorza-
ken.
• Wanneer het magazijn is geladen en u houdt de
machine naar beneden gericht met loszittende beugel,
dan kunnen de nietjes eruit vallen en gevaar opleveren
voor de aanwezigen beneden. Denk hier speciaal aan,
wanneer u op hooggelegen plaatsen werkt.
Diepte-instelling (Fig. 6 en 7)
Ingeval de nietjes te diep of niet diep genoeg worden
ingedreven, dient de diepteinstelmoer op de bodem van
de machine te worden bijgesteld. Draai de moer naar
rechts om voor dieper indrijven van de nietjes en naar
links voor minder diep indrijven van de nietjes. Gelieve op
te merken dat de moer telkens een halve slag (180°)
dient te worden omgedraaid, zodat de groef op de moer
parallel blijft lopen met het magazijn.
OPMERKING:
Wanneer de afstand tussen het uiteinde van de machine
(A) en het vast te hechten materiaal meer dan 2 mm
bedraagt, kan de machine niet in werking worden
gesteld, aangezien de veiligheidshendel dan niet vol-
doende wordt ingedrukt.
Indrijven van de nietjes (Fig. 8 en 9)
Plaats de machine zodanig op het vast te hechten mate-
riaal, dat ze vlak op het materiaal rust. Zorg dat de
machine niet naar rechts of naar links helt. Houd de
machine stevig tegen het materiaal aangedrukt en druk
vervolgens de trekschakelaar in voor het indrijven van de
nietjes.
Wanneer de nietjes niet diep genoeg worden ingedreven
dient u op de voorkant van de machine te drukken, zoals
in Fig. 9 is afgebeeld, om vervolgens de nietjes in te drij-
ven.
Leidt dit nog niet tot het gewenste resultaat, dan dient de
instelmoer naar rechts to worden omgedraaid. Zie “Diep-
teinstelling”.
LET OP:
Stel de machine niet in werking zonder nietjes. Dit ver-
kort de gebruiksduur van de machine.
Raakt een nietje klem, doe dan als volgt. Verwijder eerst
de accu. Schuif de beugel naar achter en verwijder het
klemgeraakte nietje met een schroevedraaier of iets der-
gelijks.

17
Controleglaasje (Fig. 10)
Op de linker zijkant van de machine (gezien vanaf de
voorkant van de machine) is een controlevenstertje aan-
gebracht. Kijk in dit venstertje om te controleren of er nog
nietjes in het magazijn zitten. Indien er door dit venstertje
geen nietjes zichtbaar zijn, dient u nietjes in het magazijn
te plaatsen.
Nietjes
• Wees voorzichtig met de nietjes en de verpakking, aan-
gezien de nietjes anders verbogen worden, hetgeen
vastklemmen of slechte toevoer van de nietjes ten
gevolge kan hebben.
• Bewaar de nietjes niet op vochtige of hete plaatsen en
stel ze niet bloot aan direct zonlicht.
• Gebruik geen nietjes die beschadigt, verbogen, ver-
roest of gecorrodeerd zijn.
ONDERHOUD
LET OP:
Controleer altijd of de machine is uitgeschakeld en de
accu is losgekoppeld vooraleer onderhoud uit te voeren
aan de machine.
Opdat het gereedschap veilig en betrouwbaar blijft, die-
nen alle reparaties, onderhoud of afstellingen te worden
uitgevoerd bij een erkend Makita service centrum.

35
ENH002-1
EC-DECLARATION OF CONFORMITY
We declare under our sole responsibility that this product is in com-
pliance with the following standards of standardized documents,
EN50260, EN55014
in accordance with Council Directives, 89/336/EEC and 98/37/EC.
DÉCLARATION DE CONFORMITÉ CE
Nous déclarons sous notre entière responsabilité que ce produit
est conforme aux normes des documents standardisés suivants,
EN50260, EN55014
conformément aux Directives du Conseil, 89/336/CEE et
98/37/EG.
CE-KONFORMITÄTSERKLÄRUNG
Hiermit erklärt wir unter unserer alleinigen Verantwortung, daß
dieses Produkt gemäß den Ratsdirektiven 89/336/EWG und 98/37/
EG mit den folgenden Normen von Normendokumenten überein-
stimmen:
EN50260, EN55014.
DICHIARAZIONE DI CONFORMITÀ
CON LE NORME DELLA COMUNITÀ EUROPEA
Dichiariamo sotto la nostra sola responsabilità che questo prodotto
è conforme agli standard di documenti standardizzati seguenti:
EN50260, EN55014
secondo le direttive del Consiglio 89/336/CEE e 98/37/CE.
EG-VERKLARING VAN CONFORMITEIT
Wij verklaren hierbij uitsluitend op eigen verantwoordelijkheid dat
dit produkt voldoet aan de volgende normen van genormaliseerde
documenten,
EN50260, EN55014
in overeenstemming met de richtlijnen van de Raad 89/336/EEC
en 98/37/EC.
DECLARACIÓN DE CONFORMIDAD DE LA CE
Declaramos bajo nuestra sola responsabilidad que este producto
cumple con las siguientes normas de documentos normalizados,
EN50260, EN55014
de acuerdo con las directivas comunitarias, 89/336/EEC y
98/37/CE.
DECLARAÇÃO DE CONFORMIDADE DA CE
Declaramos sob inteira responsabilidade que este produto obe-
dece às seguintes normas de documentos normalizados,
EN50260, EN55014
de acordo com as directivas 89/336/CEE e 98/37/CE do Conselho.
EU-DEKLARATION OM KONFORMITET
Vi erklærer hermed på eget ansvar, at dette produkt er i overens-
stemmelse med de følgende standarder i de normsættende doku-
menter,
EN50260, EN55014
i overensstemmelse med Rådets Direktiver 89/336/EEC og
98/37/EC.
EG-DEKLARATION OM ÖVERENSSTÄMMELSE
Under eget ansvar deklarerar vi härmed att denna produkt över-
ensstämmer med följande standardiseringar för standardiserade
dokument,
EN50260, EN55014
i enlighet med EG-direktiven 89/336/EEC och 98/37/EC.
EUs SAMSVARS-ERKLÆRING
Vi erklærer på eget ansvar at dette produktet er i overensstem-
melse med følgende standard i de standardiserte dokumenter:
EN50260, EN55014,
i samsvar med Råds-direktivene, 89/336/EEC og 98/37/EC.
VAKUUTUS EC-VASTAAVUUDESTA
Yksinomaisesti vastuullisina ilmoitamme, että tämä tuote on
seuraavien standardoitujen dokumenttien standardien mukainen,
EN50260, EN55014
neuvoston direktiivien 89/336/EEC ja 98/37/EC mukaisesti.
∆ΗΛΩΣΗ ΣΥΜΜΟΡΦΩΣΗΣ ΕΚ
∆ηλώνουµ υπ την µοναδική µας υθύνη τι αυτ το προιν
βρίσκ ται σ Συµφωνία µ τα ακλουθα πρτυπα
τυποποιηµένων γγράφων,
EN50260, EN55014
σύµφωνα µ τις Οδηγί ς του Συµβουλίου, 89/336/EEC και
98/37/ΚE.
Yasuhiko Kanzaki
CE 2003
Director Director
Directeur Direktør
Direktor Direktör
Amministratore Direktor
Directeur Johtaja
Director ∆ι υθυντής
MAKITA INTERNATIONAL EUROPE LTD.
Michigan Drive, Tongwell, Milton Keynes,
Bucks MK15 8JD, ENGLAND
ENGLISH
FRANÇAISE
DEUTSCH
ITALIANO
NEDERLANDS
ESPAÑOL
PORTUGUÊS
DANSK
SVENSKA
NORSK
SUOMI
ΕΛΛΗΝΙΚΑ

Makita Corporation
883849E998
Other manuals for t221d
1
Table of contents
Languages:
Other Makita Power Tools manuals

Makita
Makita 5621D User manual

Makita
Makita AN901 User manual

Makita
Makita JN3201 User manual

Makita
Makita BHR261 User manual

Makita
Makita HM1111C User manual

Makita
Makita JN3201J User manual

Makita
Makita BTW200 User manual

Makita
Makita BTW070 User manual

Makita
Makita 4350T User manual

Makita
Makita DUP362 User manual

Makita
Makita HM1317C Manual

Makita
Makita BUX360 User manual

Makita
Makita JN1601 User manual

Makita
Makita HM1802 User manual

Makita
Makita JV001G User manual

Makita
Makita HK1800 User manual

Makita
Makita DHG181 User manual

Makita
Makita 6918D User manual

Makita
Makita DF330D User manual

Makita
Makita DHS660 User manual