Makita M9203 User manual

M9203
EN Finishing Sander INSTRUCTION MANUAL 3
FR Ponceuse orbitale MANUEL D’INSTRUCTIONS 6
DE Schwingschleifer BETRIEBSANLEITUNG 9
IT Levigatrice di nitura ISTRUZIONI PER L’USO 12
NL Afwerkschuurmachine GEBRUIKSAANWIJZING 15
ES Lijadora de Acabado MANUAL DE
INSTRUCCIONES 18
PT Lixadeira Orbital MANUAL DE INSTRUÇÕES 21
DA Svingsliber BRUGSANVISNING 24
EL Παλμικό τριβείο ΕΓΧΕΙΡΙΔΙΟ ΟΔΗΓΙΩΝ 27
TR Titreşim Zımpara KULLANMA KILAVUZU 30

1
Fig.1
1
2
3
Fig.2
1
Fig.3
12
Fig.4
Fig.5
2

3ENGLISH
ENGLISH (Original instructions)
SPECIFICATIONS
Model: M9203
Pad size 92 mm x 185 mm
Abrasive paper size 93 mm x 228 mm
Orbits per minute 12,000 min-1
Overall length 252 mm
Net weight 1.4 kg
Safety class /II
• Duetoourcontinuingprogramofresearchanddevelopment,thespecicationshereinaresubjecttochange
without notice.
• Specicationsmaydifferfromcountrytocountry.
• Weight according to EPTA-Procedure 01/2003
Intended use
The tool is intended for the sanding of large surface of
wood, plastic and metal materials as well as painted
surfaces.
Power supply
The tool should be connected only to a power supply of
the same voltage as indicated on the nameplate, and
can only be operated on single-phase AC supply. They
are double-insulated and can, therefore, also be used
from sockets without earth wire.
Noise
The typical A-weighted noise level determined accord-
ing to EN60745:
Sound pressure level (LpA) : 75 dB(A)
Uncertainty (K) : 3 dB(A)
The noise level under working may exceed 80 dB (A).
WARNING: Wear ear protection.
Vibration
The vibration total value (tri-axial vector sum) deter-
mined according to EN60745:
Work mode: sanding metal plate
Vibration emission (ah) : 5.0 m/s2
Uncertainty (K) : 1.5 m/s2
NOTE: The declared vibration emission value has
been measured in accordance with the standard test
method and may be used for comparing one tool with
another.
NOTE: The declared vibration emission value
may also be used in a preliminary assessment of
exposure.
WARNING: The vibration emission during actual
use of the power tool can differ from the declared
emission value depending on the ways in which the
tool is used.
WARNING: Be sure to identify safety measures
to protect the operator that are based on an estima-
tion of exposure in the actual conditions of use (taking
account of all parts of the operating cycle such as
the times when the tool is switched off and when it is
running idle in addition to the trigger time).
EC Declaration of Conformity
For European countries only
Makita declares that the following Machine(s):
Designation of Machine: Finishing Sander
Model No./ Type: M9203
Conforms to the following European Directives:
2006/42/EC
They are manufactured in accordance with the following
standard or standardized documents: EN60745
Thetechnicalleinaccordancewith2006/42/ECis
available from:
Makita, Jan-Baptist Vinkstraat 2, 3070, Belgium
21.8.2015
Yasushi Fukaya
Director
Makita, Jan-Baptist Vinkstraat 2, 3070, Belgium
General power tool safety warnings
WARNING: Read all safety warnings and
all instructions. Failure to follow the warnings and
instructionsmayresultinelectricshock,reand/or
seriousinjury.

4ENGLISH
Save all warnings and instruc-
tions for future reference.
The term "power tool" in the warnings refers to your
mains-operated (corded) power tool or battery-operated
(cordless) power tool.
Sander safety warnings
1. Always use safety glasses or goggles.
Ordinary eye or sun glasses are NOT safety
glasses.
2. Hold the tool rmly.
3. Do not leave the tool running. Operate the tool
only when hand-held.
4. This tool has not been waterproofed, so do not
use water on the workpiece surface.
5. Ventilate your work area adequately when you
perform sanding operations.
6. Some material contains chemicals which may
be toxic. Take caution to prevent dust inhala-
tion and skin contact. Follow material supplier
safety data.
7. Use of this tool to sand some products, paints
and wood could expose user to dust contain-
ing hazardous substances. Use appropriate
respiratory protection.
8. Be sure that there are no cracks or breakage
on the pad before use. Cracks or breakage
may cause a personal injury.
SAVE THESE INSTRUCTIONS.
WARNING: DO NOT let comfort or familiarity
with product (gained from repeated use) replace
strict adherence to safety rules for the subject
product. MISUSE or failure to follow the safety
rules stated in this instruction manual may cause
serious personal injury.
FUNCTIONAL
DESCRIPTION
CAUTION: Always be sure that the tool is
switched off and unplugged before adjusting or
checking function on the tool.
Switch action
CAUTION: Before plugging in the tool, always
be sure that the tool is switched off.
►Fig.1: 1. Switch
To start the tool, press the “I (ON)” side of the switch. To
stop the tool, press the “O (OFF)” side of the switch.
ASSEMBLY
CAUTION: Always be sure that the tool is
switched off and unplugged before carrying out
any work on the tool.
Installing or removing abrasive
paper
Open the paper clamp by raising on the lever to release
from the locking port and then Insert the paper end into
the clamping part, aligning the paper edges even and
parallel with the sides of the base. (Bending the paper
beforehand makes attachment easier). Once the paper
is in place, return the lever to its original position.
►Fig.2: 1. Clamping part 2. Abrasive paper 3. Clamp
lever
Repeat the same process for the other end of the base,
maintaining the proper paper tension.
After inserting the paper, make sure the clamping part
hold it securely. Otherwise the paper will be loose and
subjecttoslippage,resultinginunevensandingoperation.
When you use an abrasive paper without dust-suction holes,
punch holes with the punch plate (optional accessory).
Place the punch plate over the paper so that the guide
ofthepunchplateisushwiththesidesofthebase.
Then press the punch plate to make holes in the paper.
►Fig.3: 1. Punch plate
To remove the paper, release the paper clamp as stated
above.
Dust bag
►Fig.4: 1. Dust spout 2. Dust bag
Attach the dust bag onto the dust spout. The dust spout
is tapered. When attaching the dust bag, push it onto
thedustspoutrmlyasfarasitwillgotopreventitfrom
coming off during operation.
For the best results, empty the dust bag when it
becomes approximately half full, tapping it lightly to
remove as much dust as possible.
OPERATION
Sanding operation
CAUTION: Never run the tool without the
abrasive paper. You may seriously damage the pad.
CAUTION: Never force the tool. Excessive
pressuremaydecreasethesandingefciency,dam-
age the abrasive paper and/or shorten tool life.
►Fig.5
Holdthetoolrmly.Turnthetoolonandwaituntilit
attains full speed. Then gently place the tool on the
workpiecesurface.Anishingsanderisgenerallyused
to remove only a small amount of material at a time.
Since the quality of the surface is more important than
the amount of stock removed, do not bear down on the
tool.Keepthebaseushwiththeworkpieceatalltimes.

5ENGLISH
MAINTENANCE
CAUTION: Always be sure that the tool is
switched off and unplugged before attempting to
perform inspection or maintenance.
NOTICE: Never use gasoline, benzine, thinner,
alcohol or the like. Discoloration, deformation or
cracks may result.
To maintain product SAFETY and RELIABILITY, repairs,
carbon brush inspection and replacement, any other
maintenanceoradjustmentshouldbeperformedby
Makita Authorized or Factory Service Centers, always
using Makita replacement parts.

6FRANÇAIS
FRANÇAIS (Instructions originales)
SPÉCIFICATIONS
Modèle : M9203
Dimensions du plateau 92 mm x 185 mm
Dimensions du papier abrasif 93 mm x 228 mm
Nombre d’oscillations par minute 12 000 min-1
Longueur totale 252 mm
Poids net 1,4 kg
Catégorie de sécurité /II
• Étantdonnél’évolutionconstantedenotreprogrammederechercheetdedéveloppement,lesspécications
contenuesdanscemanuelsontsujettesàmodicationsanspréavis.
• Lesspécicationspeuventvariersuivantlespays.
• Poids selon la procédure EPTA 01/2003
Utilisations
L’outil est conçu pour le ponçage des grandes surfaces
de bois, de plastique et de métal, ainsi que des sur-
faces peintes.
Alimentation
L’outilnedevraêtreraccordéqu’àunealimentation
delamêmetensionquecellequiguresurlaplaque
signalétique, et il ne pourra fonctionner que sur un
courant secteur monophasé. Réalisé avec une double
isolation, il peut de ce fait être alimenté par une prise
sansmiseàlaterre.
Bruit
Niveau de bruit pondéré A typique, déterminé selon
EN60745 :
Niveau de pression sonore (LpA) : 75 dB (A)
Incertitude (K) : 3 dB (A)
Le niveau de bruit en fonctionnement peut dépasser 80
dB (A).
AVERTISSEMENT : Portez un serre-tête
antibruit.
Vibrations
Valeur totale de vibrations (somme de vecteur triaxial)
déterminée selon EN60745 :
Mode de travail : ponçage de la tôle
Émission de vibrations (ah) : 5,0 m/s2
Incertitude (K) : 1,5 m/s2
NOTE : La valeur d’émission de vibrations déclarée
aétémesuréeconformémentàlaméthodedetest
standard et peut être utilisée pour comparer les outils
entre eux.
NOTE : La valeur d’émission de vibrations déclarée
peut aussi être utilisée pour l’évaluation préliminaire
de l’exposition.
AVERTISSEMENT : L’émission de vibrations
lors de l’usage réel de l’outil électrique peut être
différente de la valeur d’émission déclarée, suivant la
façon dont l’outil est utilisé.
AVERTISSEMENT :Lesmesuresdesécuritéà
prendre pour protéger l’utilisateur doivent être basées
sur une estimation de l’exposition dans des condi-
tions réelles d’utilisation (en tenant compte de toutes
les composantes du cycle d’utilisation, comme par
exemple le moment de sa mise hors tension, lorsqu’il
tourneàvideetlemomentdesondéclenchement).
Déclaration de conformité CE
Pour les pays européens uniquement
Makita déclare que la ou les machines suivantes :
Désignation de la machine : Ponceuse orbitale
N° de modèle/Type : M9203
sont conformes aux Directives européennes suivantes :
2006/42/CE
et sont fabriquées conformément aux normes ou aux
documents normalisés suivants : EN60745
Ladocumentationtechniqueconformeàlanorme
2006/42/CE est disponible auprès de :
Makita, Jan-Baptist Vinkstraat 2, 3070, Belgique
21.8.2015
Yasushi Fukaya
Directeur
Makita, Jan-Baptist Vinkstraat 2, 3070, Belgique
Consignes de sécurité générales
pour outils électriques
AVERTISSEMENT : Lisez toutes les
consignes de sécurité et toutes les instructions. Il
y a risque d’électrocution, d’incendie et/ou de graves
blessures si les mises en garde et les instructions ne
sont pas respectées.

7FRANÇAIS
Conservez toutes les mises en
garde et instructions pour réfé-
rence ultérieure.
Le terme « outil électrique » dans les avertissements
faitréférenceàl’outilélectriquealimentéparlesecteur
(aveccordond’alimentation)ouàl’outilélectriquefonc-
tionnant sur batterie (sans cordon d’alimentation).
Consignes de sécurité pour
ponceuse
1. Utilisez toujours des lunettes de protection ou
des lunettes à coques. Des lunettes ordinaires
ou de soleil NE sont PAS des lunettes de
protection.
2. Tenez l’outil fermement.
3. Ne vous éloignez pas de l’outil quand il fonc-
tionne. Ne faites fonctionner l’outil que lorsque
vous le tenez en main.
4. L’outil n’étant pas étanche, n’utilisez pas d’eau
sur la surface de travail.
5. Ventilez bien l’aire de travail quand vous effec-
tuez un ponçage.
6. Certains matériaux contiennent des produits
chimiques qui peuvent être toxiques. Prenez
les précautions nécessaires pour ne pas
inhaler les poussières qu’ils dégagent et pour
éviter tout contact avec la peau. Conformez-
vous aux consignes de sécurité du fournisseur
du matériau.
7. L’utilisation de cet outil pour poncer certains
types de produit, peinture et bois peut exposer
l’utilisateur à des poussières contenant des
substances dangereuses. Utilisez une protec-
tion des voies respiratoires adéquate.
8. Avant l’utilisation, assurez-vous que le plateau
n’est ni ssuré ni cassé. Il y a risque de bles-
sure s’il est ssuré ou cassé.
CONSERVEZ CES
INSTRUCTIONS.
AVERTISSEMENT : NE vous laissez PAS
tromper (au l d’une utilisation répétée) par un
sentiment d’aisance et de familiarité avec le
produit, en négligeant le respect rigoureux des
consignes de sécurité qui accompagnent le pro-
duit en question. La MAUVAISE UTILISATION de
l’outil ou l’ignorance des consignes de sécurité
indiquées dans ce mode d’emploi peut entraîner
de graves blessures.
DESCRIPTION DU
FONCTIONNEMENT
ATTENTION : Assurez-vous toujours que
l’outil est hors tension et débranché avant de
l’ajuster ou de vérier son fonctionnement.
Fonctionnement de la gâchette
ATTENTION : Avant de brancher l’outil, assu-
rez-vous toujours que son interrupteur est en
position d’arrêt.
►Fig.1: 1. Interrupteur
Pour démarrer l’outil, appuyez sur le côté « I (marche) »
de l’interrupteur. Pour arrêter l’outil, appuyez sur le côté
« O (arrêt) » de l’interrupteur.
ASSEMBLAGE
ATTENTION : Avant d’effectuer toute inter-
vention sur l’outil, assurez-vous toujours qu’il est
hors tension et débranché.
Pose ou dépose du papier abrasif
Ouvrez le serre-papier en soulevant le levier pour déga-
ger le verrou, puis insérez l’extrémité du papier dans
la pièce de serrage, en alignant les bords du papier de
manière égale et parallèle avec les côtés de la base. (Il
est plus facile d’accrocher le papier en le pliant au pré-
alable).Unefoislepapierenplace,ramenezlelevierà
sa position initiale.
►Fig.2: 1. Pièce de serrage 2. Papier abrasif
3. Levier de serrage
Répétezlamêmeprocédureàl’autreextrémitédela
base, en maintenant le papier bien tendu.
Une fois le papier inséré, assurez-vous que la pièce de
serrage le retient solidement. Autrement, le papier pour-
rait bouger et glisser, provoquant un ponçage inégal.
Si vous utilisez du papier abrasif sans perforations
d’aspiration de la poussière, percez des trous avec le
porte-poinçon (accessoire en option).
Placezleporte-poinçonsurlepapierdefaçonàceque
le guide du porte-poinçon se trouve au ras des côtés de
la base. Puis appuyez sur le porte-poinçon pour perfo-
rer le papier.
►Fig.3: 1. Porte-poinçon
Pour retirer le papier, libérez le serre-papier comme
expliqué ci-dessus.
Sac à poussière
►Fig.4: 1.Becàpoussière2.Sacàpoussière
Fixezlesacàpoussièresurlebecàpoussière.Lebec
àpoussièreestenformedecône.Lorsquevousxezle
sacàpoussière,poussez-lefermementcontrelebecà
poussière aussi loin que possible pour éviter qu’il ne se
détache en cours de fonctionnement.
Pourdemeilleursrésultats,videzlesacàpoussière
unefoisqu’ilestàmoitiéplein,enletapotantlégère-
ment pour retirer autant de poussière que possible.

8FRANÇAIS
UTILISATION
Opération de ponçage
ATTENTION : Ne faites jamais fonctionner
l’outil sans papier abrasif. Vous risqueriez de gra-
vement endommager le plateau.
ATTENTION : Ne forcez jamais sur l’outil. Une
pressiontropimportantepeutdiminuerl’efcacitédu
ponçage, endommager le papier abrasif et/ou réduire
la durée de service de l’outil.
►Fig.5
Tenez l’outil fermement. Mettez l’outil sous tension et
attendez qu’il atteigne sa pleine vitesse. Puis placez
délicatement l’outil sur la surface de la pièce. Une
ponceuseorbitalesertgénéralementàretirerseule-
mentunepetitequantitédematériauàlafois.Étant
donné que la qualité de la surface prime sur la quantité
de matériau retiré, n’appuyez pas sur l’outil. Tenez
constamment la base au ras de la pièce.
ENTRETIEN
ATTENTION : Assurez-vous toujours que
l’outil est hors tension et débranché avant d’y
effectuer tout travail d’inspection ou d’entretien.
REMARQUE : N’utilisez jamais d’essence, ben-
zine, diluant, alcool ou autre produit similaire.
Cela risquerait de provoquer la décoloration, la
déformation ou la ssuration de l’outil.
Pour maintenir la SÉCURITÉ et la FIABILITÉ du pro-
duit, les réparations, l’inspection et le remplacement
des balais en carbone, ainsi que tout autre travail
d’entretien ou de réglage doivent être effectués par un
centre d’entretien Makita agréé, avec des pièces de
rechange Makita.

9DEUTSCH
DEUTSCH (Original-Anleitung)
TECHNISCHE DATEN
Modell: M9203
Schleiftellergröße 92 mm x 185 mm
Schleifpapiergröße 93 mm x 228 mm
Umdrehungen pro Minute 12.000 min-1
Gesamtlänge 252 mm
Nettogewicht 1,4 kg
Sicherheitsklasse /II
• Wir behalten uns vor, Änderungen der technischen Daten im Zuge der Entwicklung und des technischen
Fortschritts ohne vorherige Ankündigung vorzunehmen.
• Die technischen Daten können von Land zu Land unterschiedlich sein.
• Gewicht nach EPTA-Verfahren 01/2003
Vorgesehene Verwendung
Das Werkzeug ist für das Schleifen großer Flächen von
Holz, Kunststoff und Metallmaterial sowie von lackierten
Oberächenvorgesehen.
Stromversorgung
Das Werkzeug sollte nur an eine Stromquelle ange-
schlossen werden, deren Spannung mit der Angabe
auf dem Typenschild übereinstimmt, und kann nur mit
Einphasen-Wechselstrom betrieben werden. Diese
sind doppelt schutzisoliert und können daher auch an
Steckdosen ohne Erdleiter verwendet werden.
Geräusch
Typischer A-bewerteter Geräuschpegel ermittelt gemäß
EN60745:
Schalldruckpegel (LpA): 75 dB (A)
Messunsicherheit (K): 3 dB (A)
Der Geräuschpegel kann während des Betriebs 80 dB
(A) überschreiten.
WARNUNG: Einen Gehörschutz tragen.
Schwingungen
Schwingungsgesamtwert (Drei-Achsen-Vektorsumme)
ermittelt gemäß EN60745:
Arbeitsmodus: Schleifen von Metallplatten
Schwingungsemission (ah): 5,0 m/s2
Messunsicherheit (K): 1,5 m/s2
HINWEIS: Der angegebene
Schwingungsemissionswert wurde im Einklang mit
der Standardprüfmethode gemessen und kann für
den Vergleich zwischen Werkzeugen herangezogen
werden.
HINWEIS: Der angegebene
Schwingungsemissionswert kann auch für eine
Vorbewertung des Gefährdungsgrads verwendet
werden.
WARNUNG: Die Schwingungsemission während
der tatsächlichen Benutzung des Elektrowerkzeugs
kannjenachderBenutzungsweisedesWerkzeugs
vom angegebenen Emissionswert abweichen.
WARNUNG:IdentizierenSie
Sicherheitsmaßnahmen zum Schutz des Benutzers
anhand einer Schätzung des Gefährdungsgrads unter
den tatsächlichen Benutzungsbedingungen (unter
Berücksichtigung aller Phasen des Arbeitszyklus, wie
z. B. Ausschalt- und Leerlaufzeiten des Werkzeugs
zusätzlich zur Betriebszeit).
EG-Konformitätserklärung
Nur für europäische Länder
Makita erklärt, dass die folgende(n) Maschine(n):
Bezeichnung der Maschine: Schwingschleifer
Modell-Nr./Typ: M9203
Entspricht den folgenden europäischen Richtlinien:
2006/42/EG
Sie werden gemäß den folgenden Standards oder stan-
dardisierten Dokumenten hergestellt: EN60745
Die technische Akte in Übereinstimmung mit 2006/42/
EG ist erhältlich von:
Makita, Jan-Baptist Vinkstraat 2, 3070, Belgien
21.8.2015
Yasushi Fukaya
Direktor
Makita, Jan-Baptist Vinkstraat 2, 3070, Belgien
Allgemeine Sicherheitswarnungen
für Elektrowerkzeuge
WARNUNG: Lesen Sie alle
Sicherheitswarnungen und Anweisungen durch.
Eine Missachtung der unten aufgeführten Warnungen
und Anweisungen kann zu einem elektrischen
Schlag, Brand und/oder schweren Verletzungen
führen.

10 DEUTSCH
Bewahren Sie alle Warnungen
und Anweisungen für spätere
Bezugnahme auf.
Der Ausdruck „Elektrowerkzeug“ in den Warnhinweisen
bezieht sich auf Ihr mit Netzstrom (mit Kabel) oder Akku
(ohne Kabel) betriebenes Elektrowerkzeug.
Sicherheitswarnungen für Schleifer
1. Tragen Sie stets eine Sicherheits- oder
Schutzbrille. Eine gewöhnliche Brille
oder Sonnenbrille ist KEIN Ersatz für eine
Sicherheitsbrille.
2. Halten Sie das Werkzeug mit festem Griff.
3. Lassen Sie das Werkzeug nicht unbeaufsich-
tigt laufen. Benutzen Sie das Werkzeug nur im
handgeführten Einsatz.
4. Dieses Werkzeug ist nicht wasserdicht.
Benetzen Sie daher die Bearbeitungsäche
nicht mit Wasser.
5. Sorgen Sie für ausreichende Belüftung des
Arbeitsplatzes beim Schleifen.
6. Manche Materialien können giftige
Chemikalien enthalten. Treffen Sie
Vorsichtsmaßnahmen, um das Einatmen
von Arbeitsstaub und Hautkontakt zu verhü-
ten. Befolgen Sie die Sicherheitsdaten des
Materialherstellers.
7. Der Gebrauch dieses Werkzeugs zum
Schleifen bestimmter Produkte, Lacke und
Holz kann den Benutzer Staub aussetzen, der
gefährliche Substanzen enthält. Verwenden
Sie einen geeigneten Atemschutz.
8. Vergewissern Sie sich vor dem Gebrauch,
dass der Schleifteller keine Risse oder
Brüche aufweist. Risse oder Brüche können
Personenschäden verursachen.
DIESE ANWEISUNGEN
AUFBEWAHREN.
WARNUNG: Lassen Sie sich NICHT durch
Bequemlichkeit oder Vertrautheit mit dem Produkt
(durch wiederholten Gebrauch erworben) von der
strikten Einhaltung der Sicherheitsregeln für das
vorliegende Produkt abhalten. MISSBRAUCH oder
Missachtung der Sicherheitsvorschriften in dieser
Anleitung können schwere Personenschäden
verursachen.
FUNKTIONSBESCHREIBUNG
VORSICHT: Vergewissern Sie sich vor
jeder Einstellung oder Funktionsprüfung des
Werkzeugs stets, dass es ausgeschaltet und vom
Stromnetz getrennt ist.
Schalterfunktion
VORSICHT: Vergewissern Sie sich vor dem
Anschließen des Werkzeugs an das Stromnetz
stets, dass das Werkzeug ausgeschaltet ist.
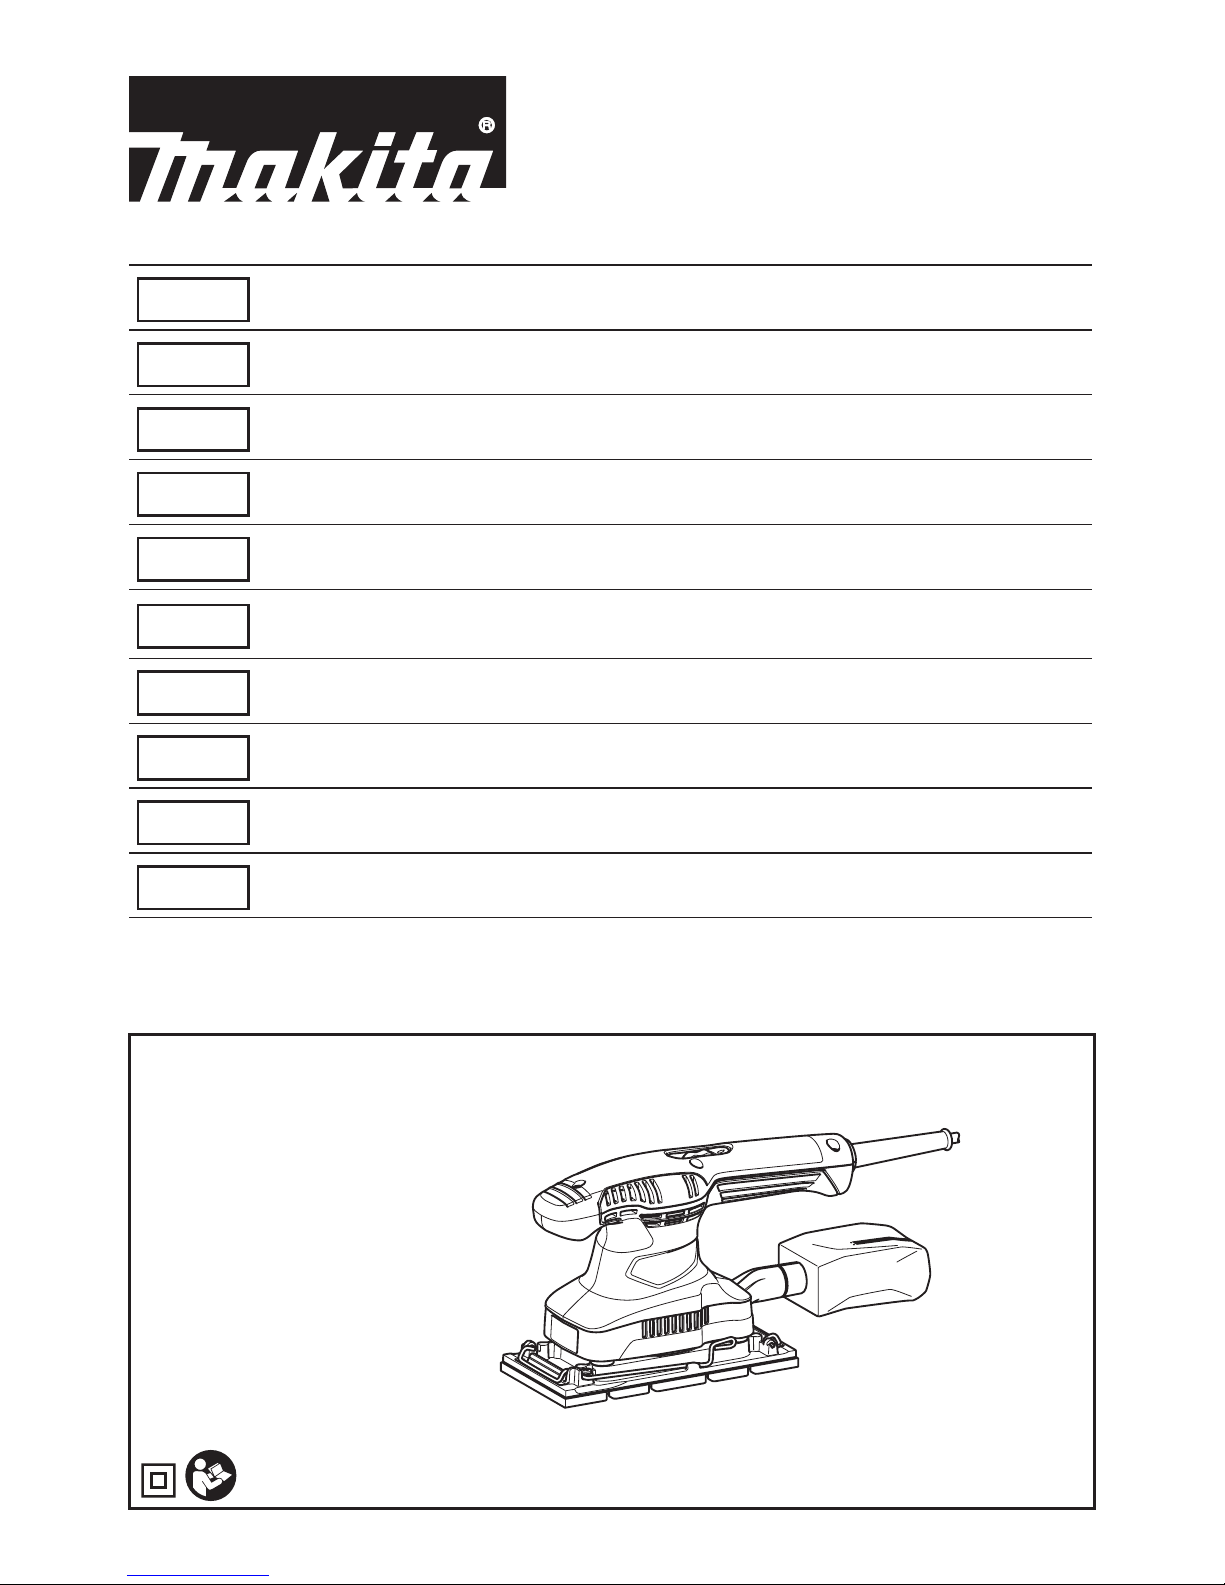
►Abb.1: 1. Schalter
Zum Einschalten des Werkzeugs drücken Sie die
Seite „I“ (Ein) des Schalters. Zum Ausschalten des
Werkzeugs drücken Sie die Seite „O“ (Aus) des
Schalters.
MONTAGE
VORSICHT: Vergewissern Sie sich vor der
Ausführung von Arbeiten am Werkzeug stets,
dass es ausgeschaltet und vom Stromnetz
getrennt ist.
Anbringen oder Abnehmen des
Schleifpapiers
Öffnen Sie die Papierklemme durch Anheben des
Hebels, um ihn aus der Verriegelungsöffnung zu lösen,
und führen Sie dann das Papierende in den Klemmteil
ein,wobeiSiediePapierkantenachundparallelzu
den Seiten der Grundplatte ausrichten. (Vorheriges
Biegen des Schleifpapiers erleichtert die Anbringung.)
Stellen Sie den Hebel nach der Anbringung des
Schleifpapiers wieder auf seine Ausgangsstellung
zurück.
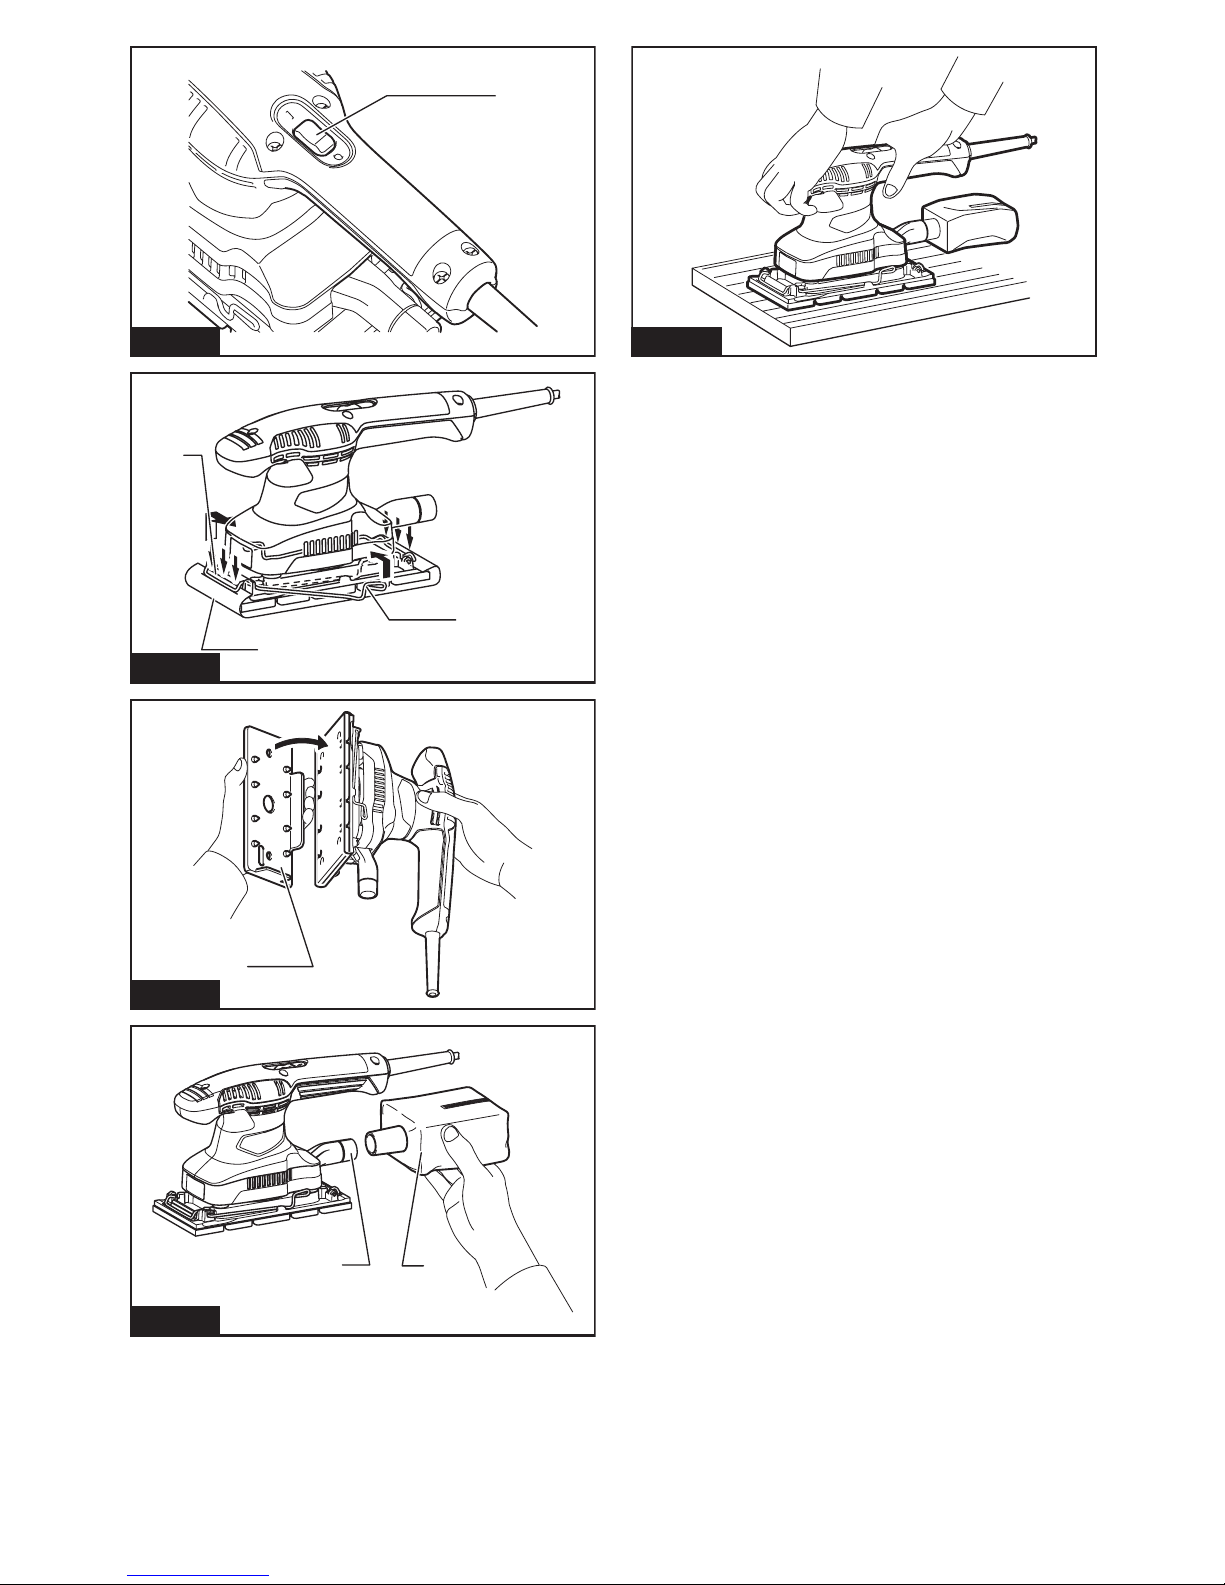
►Abb.2: 1. Klemmteil 2. Schleifpapier 3. Spannhebel
Wiederholen Sie den gleichen Vorgang auf der anderen
Seite der Grundplatte, und achten Sie auf angemes-
sene Spannung des Schleifpapiers.
Vergewissern Sie sich nach dem Einführen des
Schleifpapiers, dass es vom Klemmteil sicher gehalten
wird. Anderenfalls kann das Schleifpapier sich lösen
und verrutschen, was ungleichmäßige Schleifwirkung
zur Folge haben kann.
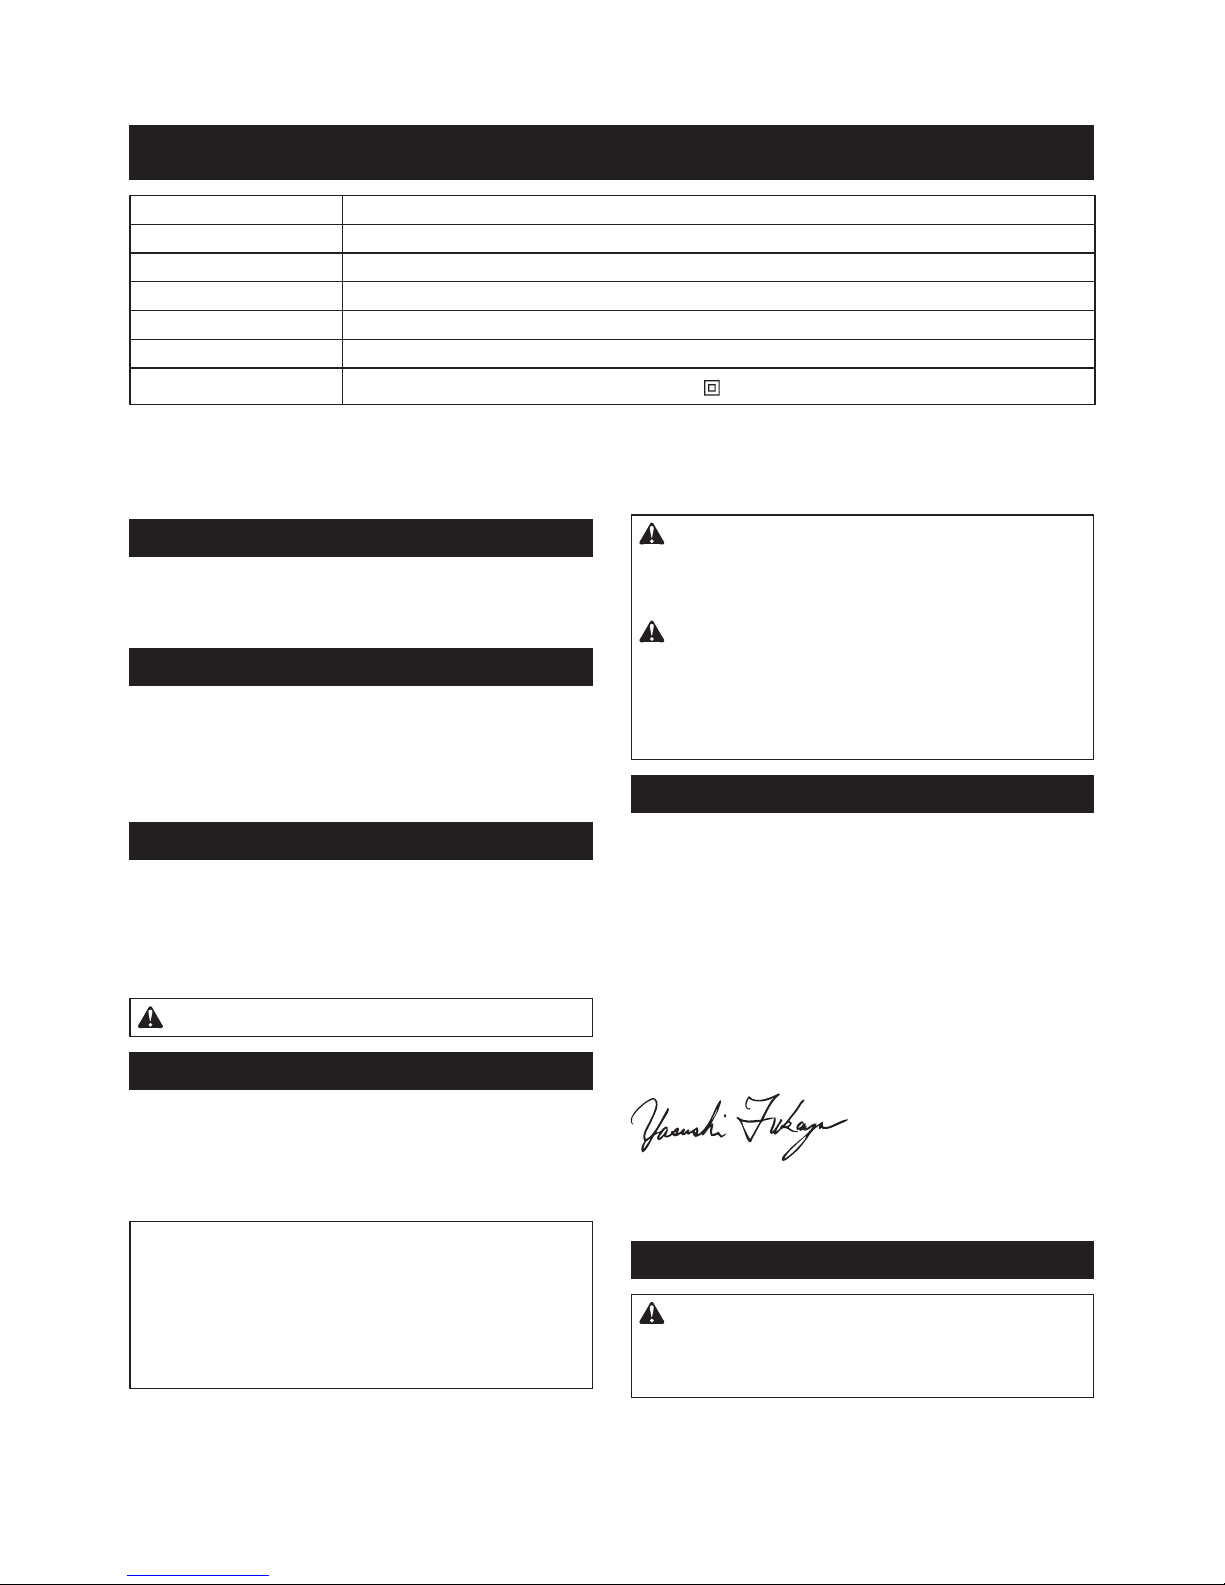
Wenn Sie Schleifpapier ohne Staubabsauglöcher ver-
wenden, stanzen Sie Löcher mit der Lochungsplatte
(Sonderzubehör) aus.
Setzen Sie die Lochungsplatte so auf das Papier, dass
ihre Führung bündig mit den Seiten der Grundplatte
abschließt. Drücken Sie dann die Lochungsplatte an,
um Löcher in das Schleifpapier zu stanzen.
►Abb.3: 1. Lochungsplatte
Zum Entfernen des Papiers lösen Sie die
Papierklemme, wie oben beschrieben.
Staubsack
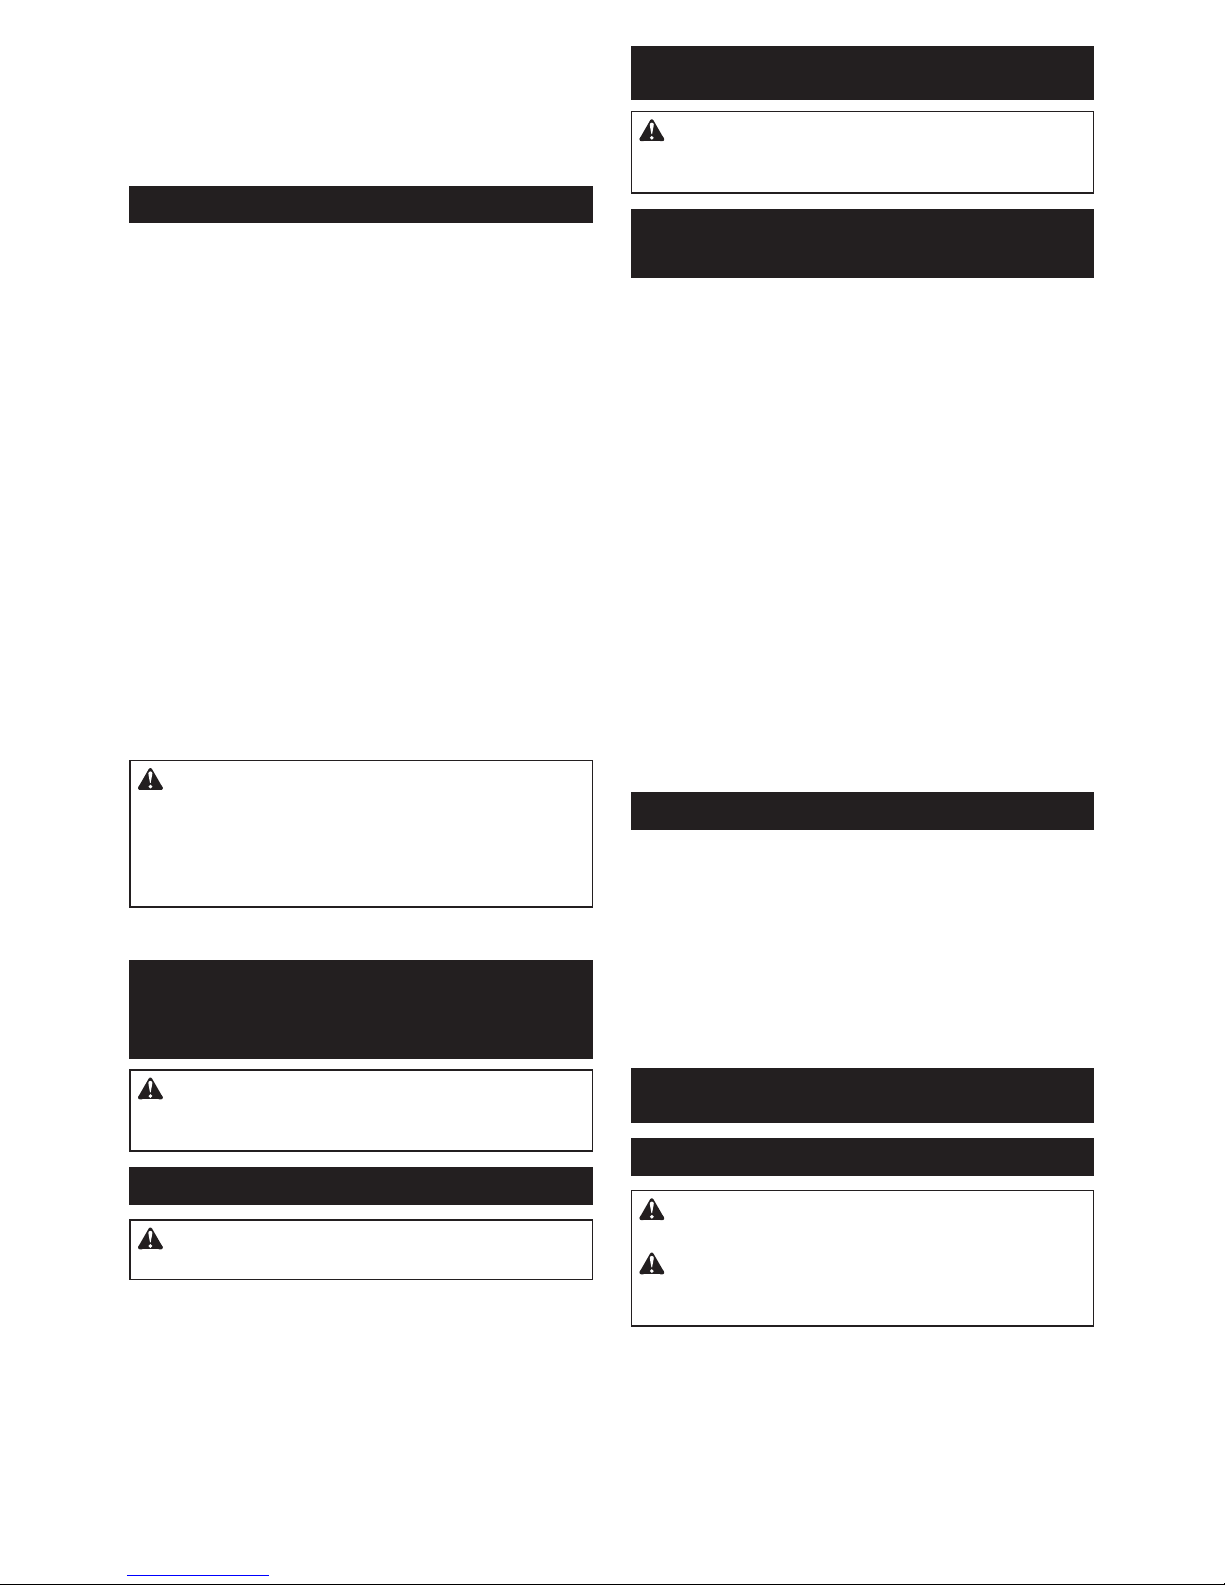
►Abb.4: 1. Absaugstutzen 2. Staubsack
Befestigen Sie den Staubsack am Absaugstutzen. Der
Absaugstutzen ist konisch. Schieben Sie den Staubsack zum
Anbringen bis zum Anschlag fest auf den Absaugstutzen,
damit er sich während des Betriebs nicht löst.
UmbesteErgebnissezuerzielen,empehltessich,
den Staubsack zu entleeren, wenn er etwa halb voll ist,
wobei durch leichtes Abklopfen möglichst viel Staub
gelöst werden sollte.

www.makita.com
Makita
Jan-Baptist Vinkstraat 2, 3070, Belgium
Makita Corporation Anjo, Aichi, Japan 885481-994
EN, FR, DE, IT,
NL, ES, PT, DA,
EL, TR
20151002
Other manuals for M9203
5
Table of contents
Languages:
Other Makita Sander manuals

Makita
Makita BO5030 User manual

Makita
Makita 9207SPB User manual

Makita
Makita BO5031K User manual

Makita
Makita M9201 User manual

Makita
Makita PO5000C User manual

Makita
Makita BO4555 User manual

Makita
Makita BO4555 User manual

Makita
Makita M9400 User manual

Makita
Makita BO4900V Quick start guide

Makita
Makita DSL801Z User manual

Makita
Makita BO5010 User manual

Makita
Makita M9204 User manual

Makita
Makita SA5040C User manual

Makita
Makita GV5010 User manual

Makita
Makita BO6040 User manual

Makita
Makita M9204 User manual

Makita
Makita BO5012 User manual

Makita
Makita BO4552 User manual

Makita
Makita 9032 User manual

Makita
Makita BO6030 User manual