3. Use of this Product
A. Do not modify the Product and do not use this
Product for purposes that it was not designed for.
B. Never exceed the rated maximum load capacity
(see the detailed load limit on page 7). Distribute
weight evenly inside the Product.
C. Be aware of the danger of “dynamic loading”.
This situation arises when a load is dropped onto the
Product, resulting in a short term excessive load. Dy-
namic loading can result in damage and failure of the
Product, damage to the vehicle and personal injury to
the person loading the Product.
D. Never load people or animals onto the Product.
Keep children and spectators away when loading,
unloading and using this Product.
E. Adhere to all Department of Transportation (D.O.T.)
requirements when using this Product. USE ROPES
AND TIE DOWNS TO SECURELY HLD ALL CARGO
IN PLACE.
F. For the vehicle that will support the Product, read
all pertinent vehicle instructions and warnings pro-
vided in the owner’s manual. Make sure that the
vehicle has the appropriate crossbar needed to
securely and safely mount the Product’s Brackets.
Make sure the vehicle’s engine is OFF, with parking
brake set, before loading or unloading the Product.
G. This product requires complete
assembly and set-up on the vehicle. Depending on
the size of the vehicle, use of a stool or ladder may
be required. Use extreme caution when using a stool
or ladder to prevent accidents. If you are not experi-
enced or capable of doing this type of assembly and
set-up work, the Product should be assembled and
set-up by a qualied service technician.
H. Make sure the vehicle’s engine is OFF, with park-
ing brake set, before loading or unloading the Prod-
uct. Never attempt to carry a load that is wider that the
vehicle.
I. Obey all speed limits and trac laws. Adhere to all
state and local regulations regarding roof mounted
loads that extend beyond the conguration of the
vehicle.
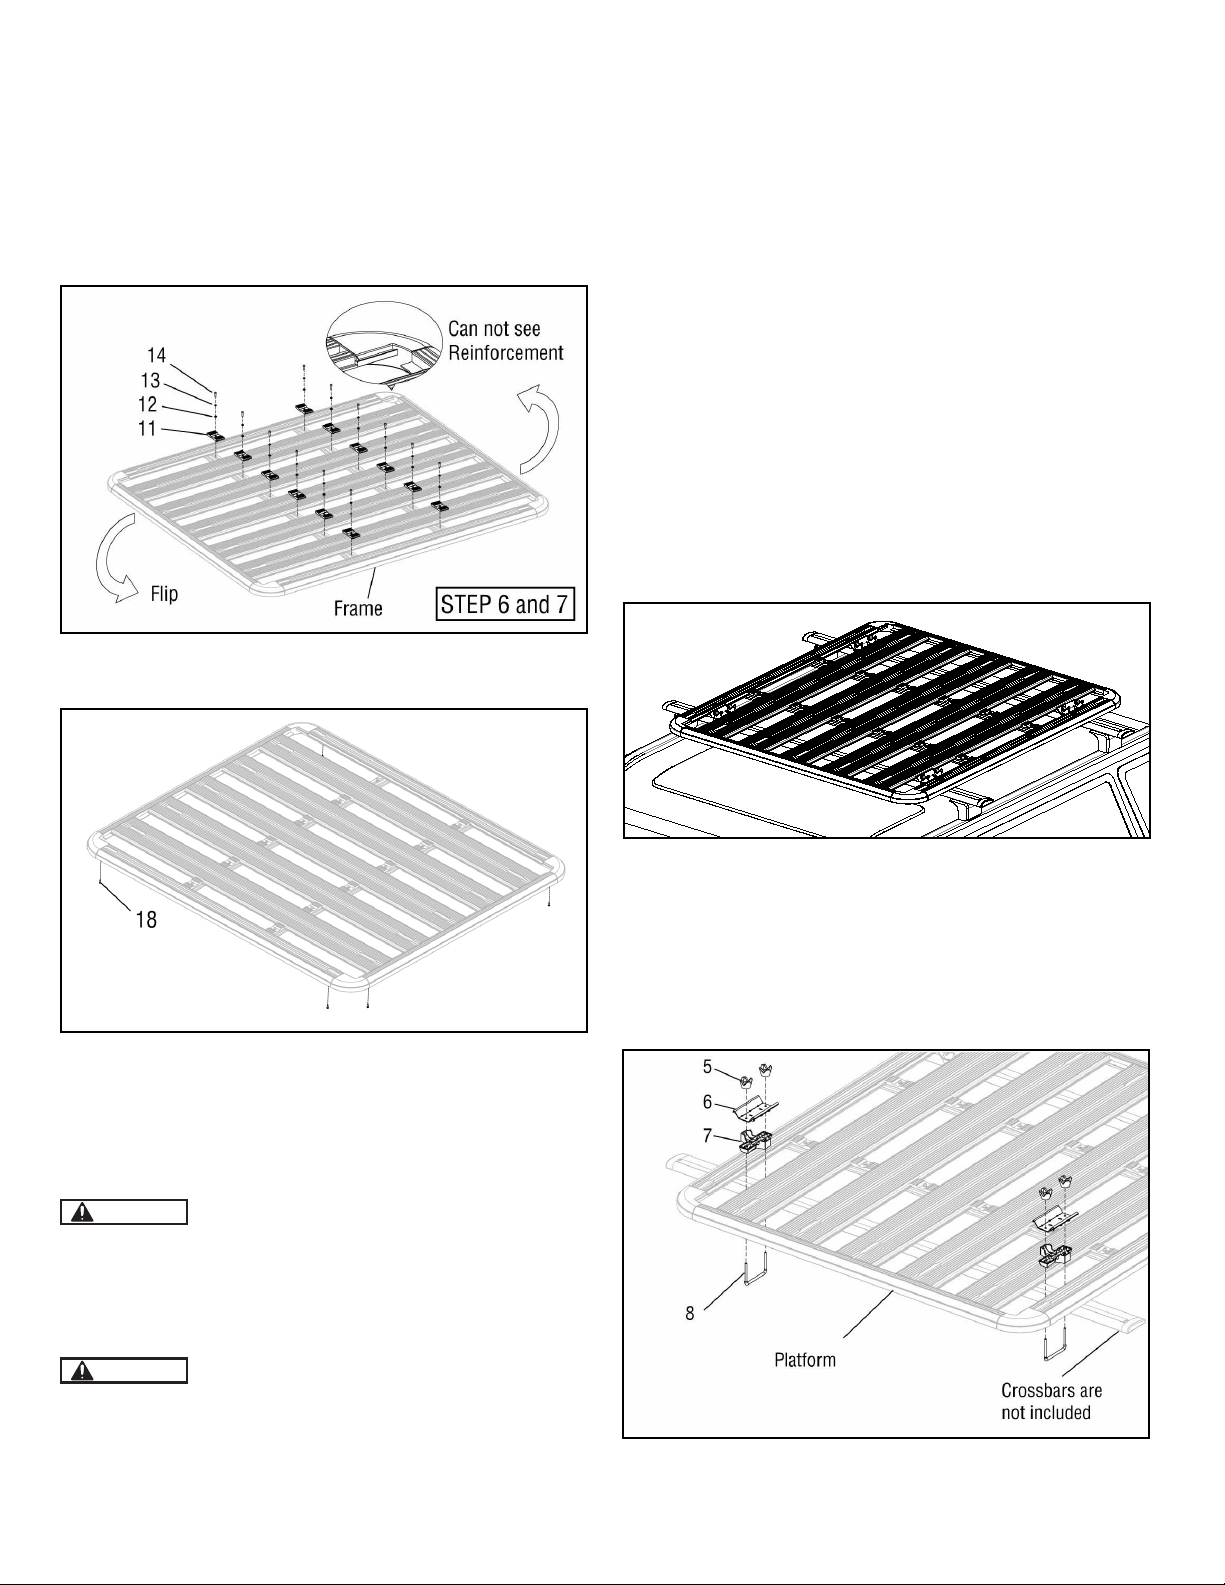
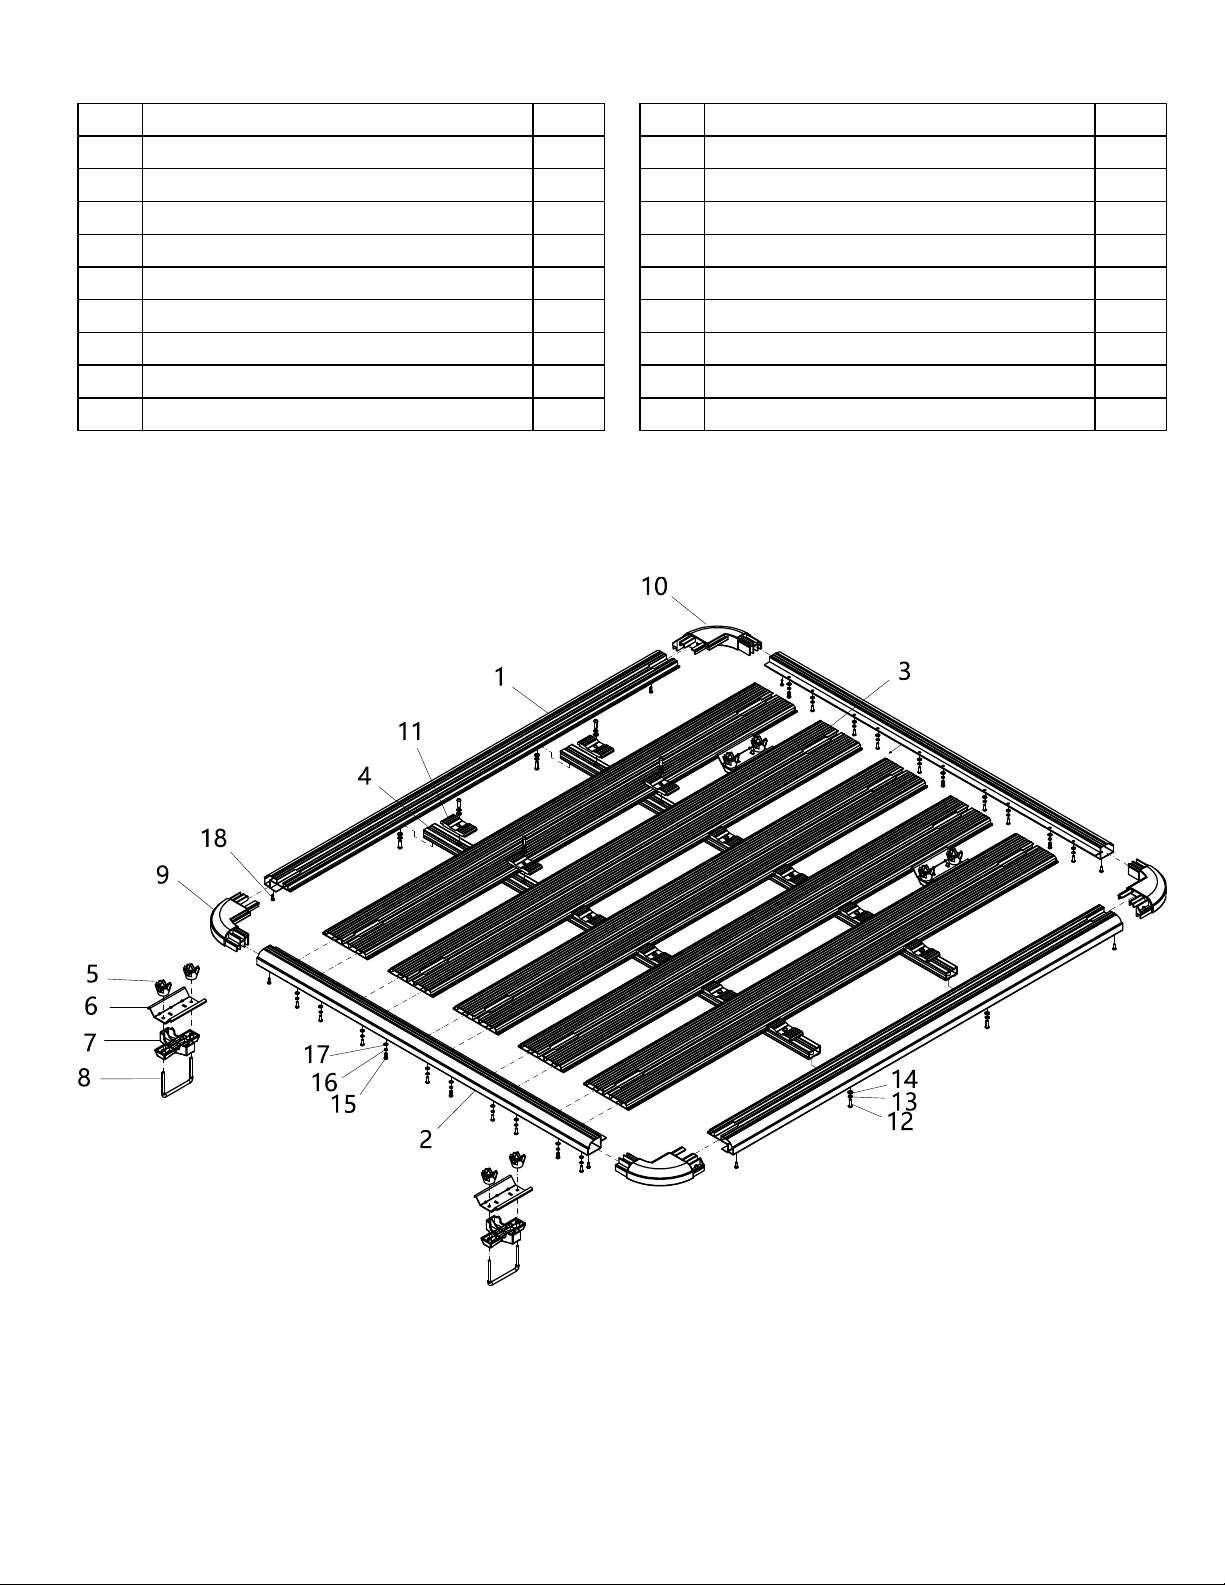
J. Before each trip make sure that all hardware
is tight and secure. Tighten all Knobs (5) to secure
the Product to the vehicle’s crossbars. Replace
ropes and straps used to hold cargo at rst sign of
wear.
K. Use caution when driving near low clearance park-
ing structures, tree branches and any other obstruc-
tion which could interfere with the Product and its
contents.
L. Do not attempt to mount the Product on RV’s (Rec-
reational Vehicles), trailers or towed vehicles. Do not
use the Product on o-road vehicles.
M. Maintain labels and nameplates on the Product.
They contain important information and must always
remain readable. Contact MAXXHAUL for replace-
ments.
Keep in mind that the warnings previously dis-
cussed cannot cover all possible conditions or
situations that could occur. It is important that
the person setting up and using this Product
understands that common sense and caution are
factors which cannot be built into this Product,
and must be supplied by the person(s) using this
Product.
MAXXHAUL is not responsible for the attachment
or the installation of this Product. The attachment
of this Product is critical and beyond the control
of MAXXHAUL. It neither guarantees, nor will it be
liable for any damage resulting from the attach-
ment or improper use of the Product.
4. Limited Warranty
MAXXHAUL warrants to the original retail purchaser
that the Product is free of defects in material and
workmanship at the time of shipment. This Product
is warranteed for 90 days from the date of purchase.
This warranty is expressly in lieu of all other warran-
ties, express or implied.
Proof of purchase is required for warranty transac-
tions; a copy of the original invoice or sales receipt is
required.
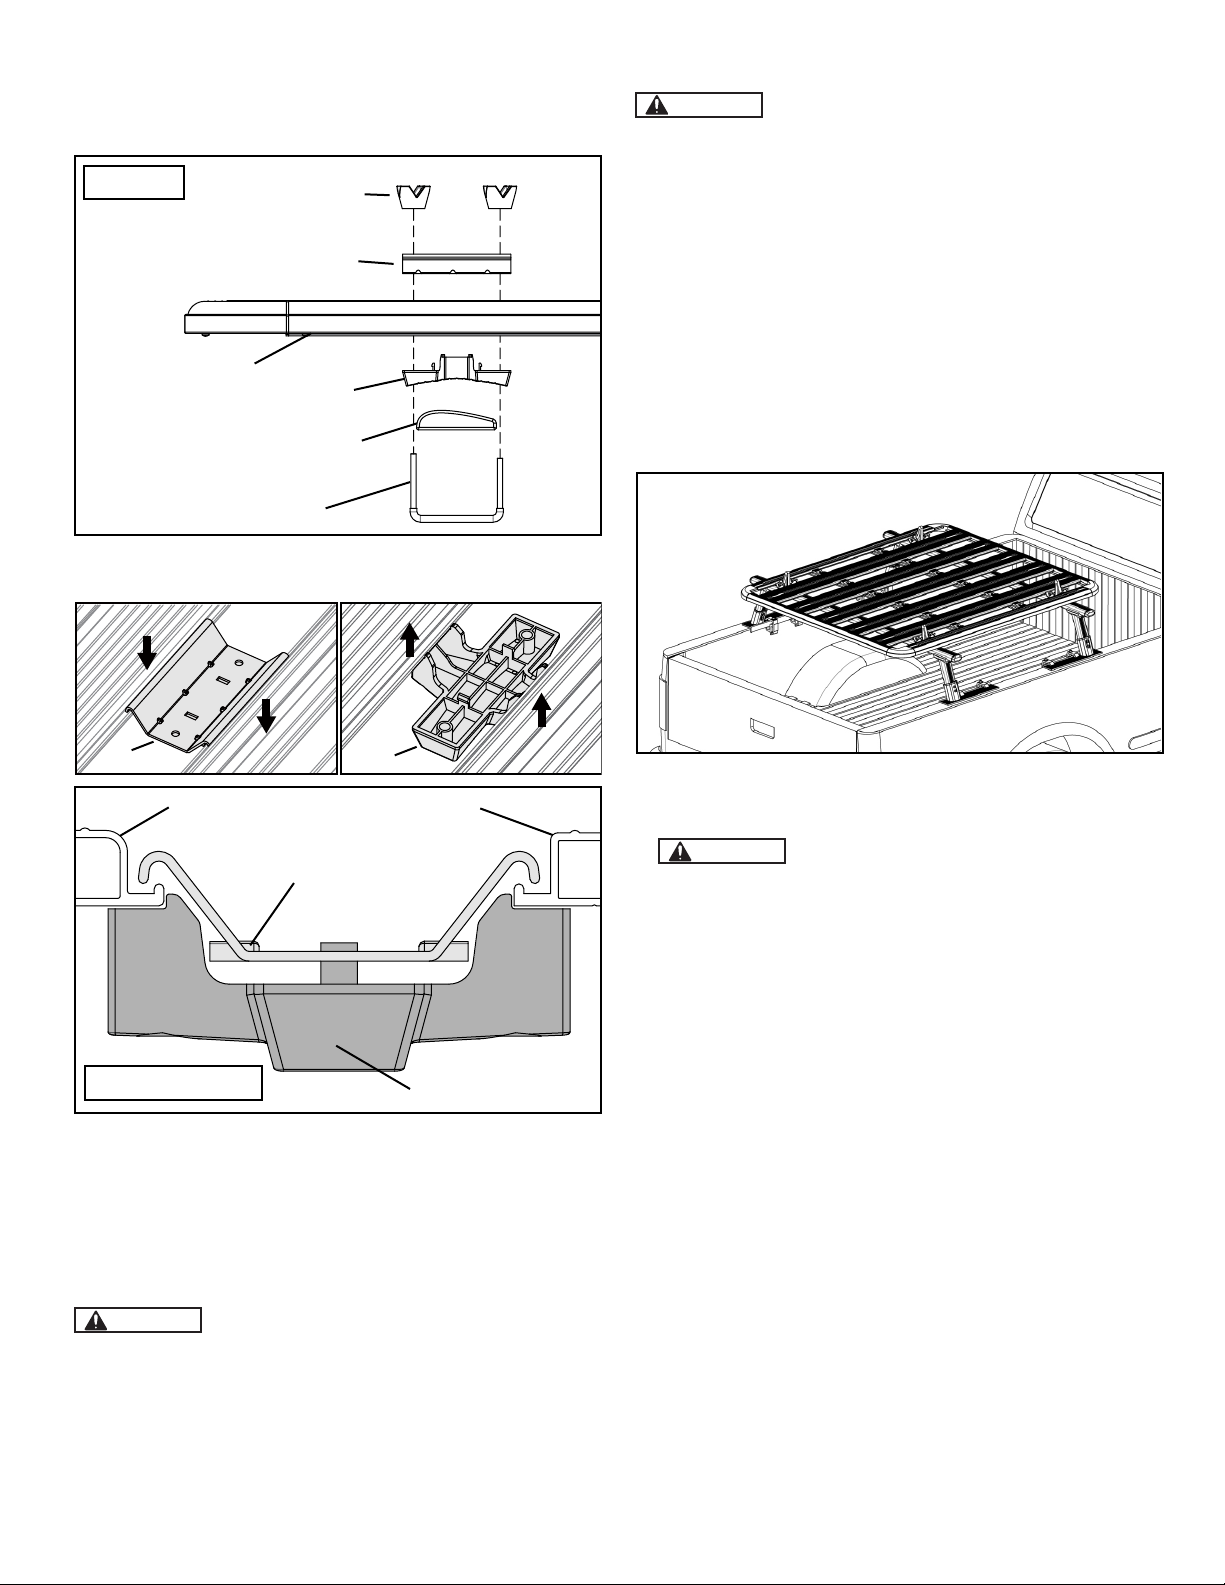
5. Optional Use
This Product can be used together
with Pick-up Truck Rack (SKU#50613, 50614,
50620, or 50621) which is produced by MAXX-
HAUL.
Model 50616 Page 3
NOTICE
WARNING