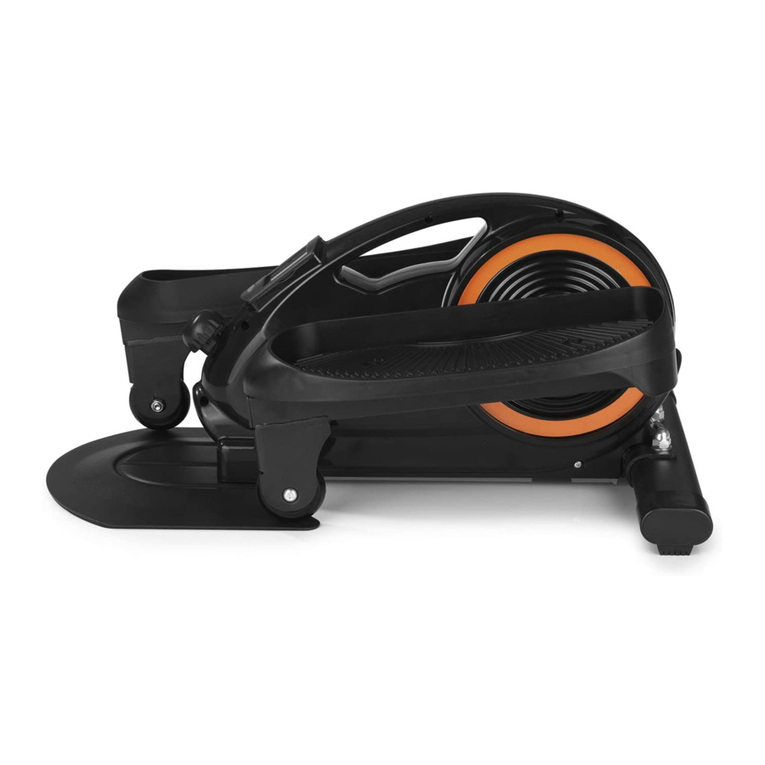
MAXXMEE Mini-Trainer User manual

Mini-Trainer DE
1
INHALTSVERZEICHNIS
Lieferumfang 1
Auf einen Blick 1
Symbole 2
Signalwörter 2
Bestimmungsgemäßer Gebrauch 2
Sicherheitshinweise 3
Montage 4
Batterie in den Trainingscomputer einlegen / wechseln 4
Vor dem Training 4
Gerät aufstellen 5
Benutzung 5
Nach dem Training 7
Reinigung und Aufbewahrung 8
Entsorgung 8
Technische Daten 8
Hinweise zur Konformitätserklärung 8
LIEFERUMFANG
(Bild A)
1 Hinterer Standfuß (1 x)
2 Unterlegscheibe (4 x)
3 Federring (4 x)
4 Schraube (4 x)
5 Haupteinheit mit Trainingscomputer
(1 x)
6 Rechtes Pedal (1 x)
7 Vorderer Standfuß (1 x)
8 Sechskantschlüssel (1 x)
9 Maulschlüssel (1 x)
10 Linkes Pedal (1 x)
1,5 V-Batterie, Typ AAA (1 x)
Gebrauchsanleitung (1 x)
Den Lieferumfang auf Vollständigkeit
und die Bestandteile auf Transport-
schäden überprüfen. Bei Schäden nicht
verwenden, sondern den Kundenservice
kontaktieren.
Eventuelle Folien, Aufkleber oder
Transportschutz vom Gerät abnehmen.
Niemals das Typenschild und eventuel-
le Warnhinweise entfernen!
AUF EINEN BLICK
(Bild B)
11 Tragegriff
12 Einstellknopf (Drehwiderstand ein-
stellen)
13 Trainingscomputer

DE
2
SYMBOLE
Gefahrenzeichen: Dieses Symbol
zeigt mögliche Gefahren an. Die
dazugehörenden Sicherheits-
hinweise aufmerksam lesen und
befolgen.
Ergänzende Informationen
Gebrauchsanleitung vor Benut-
zung lesen!
Schaltzeichen für Gleichstrom
SIGNALWÖRTER
Signalwörter bezeichnen Gefährdungen
bei Nichtbeachtung der dazugehörigen
Hinweise.
WARNUNG – mittleres Risiko, kann
schwere Verletzung oder Tod zur Folge
haben
HINWEIS – kann Risiko von Sachschäden
zur Folge haben
BESTIMMUNGSGEMÄßER
GEBRAUCH
■Dieses stationäre Trainingsgerät ist
zum Konditionstraining und zum Trai-
nieren der Muskulatur bestimmt. Es
ist ausschließlich für eine Benutzung
im Sitzen vorgesehen. Nie mit den
Füßen auf das Gerät stellen.
■Das Gerät ist nicht für medizinische
oder therapeutische Zwecke konzi-
piert.
■Das Gerät darf nicht von mehreren
Personen gleichzeitig verwendet
werden.
■Achtung – die Trainingsdaten
dieses Gerätes haben eine geringe
Genauigkeit. Das Gerät ist nicht für
präzise Messungen geeignet.
■Das Gerät ist bis maximal 100kg
belastbar.
■Dieses Gerät ist ausschließlich für die
Verwendung im Heimbereich konzi-
piert.
■Das Gerät ist für den privaten Ge-
brauch, nicht für eine gewerbliche
Nutzung bestimmt.
■Das Gerät nur für den angegebenen
Zweck und nur wie in der Gebrauchs-
anleitung beschrieben nutzen. Jede
weitere Verwendung gilt als bestim-
mungswidrig.
■Von der Gewährleistung ausge-
schlossen sind alle Mängel, die
durch unsachgemäße Behandlung,
Beschädigung oder Reparaturversu-
che entstehen. Dies gilt auch für den
normalen Verschleiß.
Liebe Kundin, lieber Kunde,
wir freuen uns, dass du dich für den MAXXMEE Mini-Trainer entschieden hast.
Lies vor dem ersten Gebrauch des Gerätes diese Gebrauchsanleitung sorgfältig
durch und bewahre sie für spätere Fragen und weitere Nutzer auf. Sie ist ein Be-
standteil des Gerätes. Hersteller und Importeur übernehmen keine Haftung, wenn
die Angaben in dieser Gebrauchsanleitung nicht beachtet werden.
Solltest du Fragen zum Gerät sowie zu Ersatz- / Zubehörteilen haben, kontaktiere
den Kundenservice über unsere Website: www.dspro.de/kundenservice
Wir wünschen dir viel Freude an deinem MAXXMEE Mini-Trainer.

Mini-Trainer DE
3
SICHERHEITSHINWEISE
■Das Sicherheitsniveau des Gerätes
kann nur dann gehalten werden,
wenn es regelmäßig auf Schäden
kontrolliert wird. Daher das Gerät
vor jeder Inbetriebnahme auf Be-
schädigungen (lockere Schrauben,
verschlissene Teile, etc.) überprüfen.
Sollten während der Benutzung un-
gewöhnliche Geräusche des Gerätes
wahrgenommen werden, das Training
sofort abbrechen. Defekte Teile
sofort austauschen lassen und das
Gerät bis zur Instandsetzung nicht
benutzen! In Schadensfällen den Kun-
denservice oder eine Fachwerkstatt
kontaktieren.
WARNUNG – Verletzungs-
gefahr
■Dieses Gerät kann von Kindern
ab 8 Jahren und darüber sowie
von Personen mit verringerten
physischen,sensorischen oder men-
talen Fähigkeiten oder Mangel an Er-
fahrung und Wissen benutzt werden,
wenn sie beaufsichtigt oder bezüglich
des sicheren Gebrauchs des Gerätes
unterwiesen wurden und die daraus
resultierenden Gefahren verstehen.
■Kinder dürfen nicht mit dem Gerät
spielen.
■Reinigung und Benutzer-Wartung
dürfen nicht von Kindern ohne Beauf-
sichtigung durchgeführt werden.
■Das Gerät ist kein Spielzeug! Eltern
und andere Aufsichtspersonen soll-
ten sich ihrer Verantwortung bewusst
sein, dass aufgrund des natürlichen
Spieltriebes und der Experimentier-
freudigkeit der Kinder mit Situationen
und Verhaltensweisen zu rechnen
ist, für die das Trainingsgerät nicht
gebaut ist.
■Das Gerät in der Gegenwart von Kin-
dern und Tieren nicht unbeaufsichtigt
lassen.
■Bei Unsicherheiten bezüglich der
Gesundheit (Risikogruppe), vor der
Benutzung des Gerätes einen Arzt
konsultieren. Gegebenenfalls das Trai-
ningsprogramm mit ihm abstimmen.
■Schwangere sollten das Gerät nicht
bzw. nur nach Rücksprache mit ihrem
Arzt benutzen.
■Das Befestigungs- und Verpackungs-
material von Kindern und Tieren fern-
halten. Es besteht Erstickungsgefahr.
■Batterien können bei Verschlucken
lebensgefährlich sein. Batterie und
Gerät für junge Kinder und Tiere
unerreichbar aufbewahren. Wurde
eine Batterie verschluckt, muss sofort
medizinische Hilfe in Anspruch ge-
nommen werden. Es besteht Verät-
zungsgefahr durch Batteriesäure.
■Sollte eine Batterie ausgelaufen sein,
den Kontakt von Haut, Augen und
Schleimhäuten mit der Batteriesäure
vermeiden. Bei Kontakt mit Batterie-
säure die betroffenen Stellen sofort
mit reichlich klarem Wasser spülen
und umgehend medizinische Hilfe
holen. Es besteht Verätzungsgefahr
durch Batteriesäure.
■Das Gerät auf einem standsiche-
ren und waagerechten Untergrund
aufstellen.
■Falls Verstellvorrichtungen vorstehen
gelassen werden, können diese die
Bewegung des Benutzers behindern.
■Vor jeder Benutzung alle Teile, be-
sonders die Pedale, auf festen Sitz
und Verschleiß prüfen.
HINWEIS – Risiko von Material- und
Sachschäden
■Nur den in den technischen Daten
angegebenen Batterietyp verwen-
den.
■Die Batterien dürfen nicht geladen
oder mit anderen Mitteln reaktiviert,
nicht auseinandergenommen, ins
DE
4
Feuer geworfen, in Flüssigkeiten ge-
taucht oder kurzgeschlossen werden.
■Die Batterien immer herausnehmen,
wenn diese verbraucht sind oder das
Gerät längere Zeit nicht benutzt wird.
So werden Schäden durch Auslaufen
vermieden.
■Ausgelaufene Batterien sofort aus
dem Gerät nehmen und die Kontakte
im Gerät reinigen.
■Sicherstellen, dass der Trainingscom-
puter nicht mit Wasser in Berührung
kommen kann!
■Das Gerät schützen vor: extremen
Temperaturen, starken Tempera-
turschwankungen, langanhaltender
Feuchtigkeit, Nässe, direkter Sonnen-
einstrahlung und Stößen.
■Zum Reinigen des Gerätes keine
scheuernden oder ätzenden Reini-
gungsmittel oder -pads verwenden.
Diese können die Oberfläche beschä-
digen.
MONTAGE
Diese Montageanleitung Schritt für
Schritt folgen, um Fehler beim Aufbau
und der späteren Anwendung zu vermei-
den.
1. Alle Teile vorsichtig auf den Boden
legen. Vorsichtshalber eine Schutzfo-
lie oder Decke unterlegen, um evtl.
Beschädigungen von empfindlichen
Bodenbelägen zu vermeiden.
2. Die Standfüße(1, 7) an die Unterseite
der Haupteinheit(5) schrauben. Dazu
die mitgelieferten Unterlegschei-
ben(2), Federringe(3) und Schrau-
ben(4) sowie den Sechskantschlüs-
sel(8) verwenden. (Bild D)
3. Die Pedale(6, 10) mithilfe des mit-
gelieferten Maulschlüssels(9) an den
Pedalhalterungen festdrehen. Dabei
darauf achten, dass die Markierun-
gen L(links) und R(rechts) auf den
Pedalen und Halterungen überein-
stimmen. (Bild E)
Das rechte Pedal (Rechtsgewinde)
wird im Uhrzeigersinn festgedreht.
Das linke Pedal (Linksgewinde) wird
gegen den Uhrzeigersinn festgedreht.
Pedalschlaufen einstellen
Die Schlaufengröße am Pedal kann
verändert werden. Dazu die Schrauben
an den Schlaufen lösen, die gewünsch-
te Größe einstellen und die Schrauben
wieder handfest eindrehen. (Bild F)
BATTERIE IN DEN
TRAININGSCOMPUTER
EINLEGEN / WECHSELN
1. Den Trainingscomputer(13) aus der
Haupteinheit(5) herausziehen.
2. Eine 1,5 V-Batterie, Typ AAA in das
Batteriefach auf der Rückseite des
Trainingscomputers einlegen. Dabei
auf die richtige Polarität (+/–) achten.
(Bild G)
L Vor dem Einlegen der Batterie
prüfen, ob die Kontakte im Gerät
und an der Batterie sauber sind
und ggf. reinigen.
3. Den Trainingscomputer vorsichtig in
die Haupteinheit einsetzen.
Sollte der Trainingscomputer nicht mehr
funktionieren, müssen die Batterien aus-
gewechselt werden.
VOR DEM TRAINING
Aufwärmen sollte grundsätzlich zu jeder
sportlichen Tätigkeit gehören. Dadurch
werden alle physischen und psychischen
Komponenten der Leistungsfähigkeit an-
geregt und verbessert. Außerdem wird
das Verletzungsrisiko minimiert.

Mini-Trainer DE
5
Mit den folgenden Übungen werden
große Muskelgruppen durch Bewegung
erwärmt.
• Joggen: Einige Minuten locker am
Platz oder durch den Raum laufen.
• Kniebeugen: Schulterbreit hinstellen,
Oberkörper gerade halten und die
Knie beugen und wieder strecken.
Ca. 5 – 10 Wiederholungen.
• Oberkörper-Twist: Schulterbreit
hinstellen, Oberkörper gerade halten,
Arme seitlich auf Schulterhöhe anhe-
ben und beugen, so dass die Hände
vor der Brust sind. Den Oberkörper so
weit wie möglich nach rechts und links
drehen. Ca. 10Wiederholungen.
• Seitenbeuger: Schulterbreit hin-
stellen, Oberkörper gerade halten.
Dann den Oberkörper langsam zu
den Seiten neigen. Den Arm auf der
gestreckten Körperseite dabei über
den Kopf strecken. Ca. 10Wiederho-
lungen.
• Armkreisen: Aufrecht stehen, rech-
ten Arm strecken und nach vorne
kreisen. Nach 5 – 10 Kreiseln die
Richtung wechseln. Anschließend mit
dem linken Arm kreisen.
GERÄT AUFSTELLEN
Beachten!
■Der Freibereich muss den Bereich
für den Notfall-Abstieg einschließen.
Sollten Trainingsgeräte zueinander
in direkter Nachbarschaft aufgestellt
sein, können sie sich einen Freibe-
reich teilen.
■Der Freibereich in der Richtung, aus
der der Zugang zum Trainingsgerät
erfolgt, muss mindest 0,6m größer
sein als der Übungsbereich.
Das Gerät auf den Boden stellen. Emp-
findliche Oberflächen (Laminat, Parkett
etc.) ggf. mit einer Schutzmatte vor
Kratzern etc. schützen.
Je nach Körpergröße, genügend Platz zu
allen Seiten lassen (mindestens 0,6Me-
ter zu den Seiten und nach hinten, mind.
1 Meter nach vorne und 1,5Meter nach
oben), damit beim Training genügend
Spielraum vorhanden ist. (Bild H)
BENUTZUNG
Beachten!
■Bei den Übungen gut sitzende,
lockere, bequeme Kleidung und
rutschfeste Sportschuhe tragen.
Darauf achten, dass sich nichts in
den beweglichen Teilen des Gerätes
verfangen kann.
■ACHTUNG! Das Training sofort
unterbrechen, wenn Schwächegefühl,
Schwindel o. Ä. auftritt. Bei Übelkeit,
Brust- oder Gliederschmerzen, Herz-
klopfen oder anderen Symptomen
sofort an einen Arzt wenden.
■Wir weisen ausdrücklich darauf hin,
dass bei unsachgemäßem Gebrauch
des Gerätes und übermäßigem Trai-
ning Gesundheitsschäden möglich
sind.

DE
6
Tipps für ein gesundes Training
L Bei Müdigkeit und Erschöpfung
nicht trainieren.
Nie mit vollem Magen trainieren.
Etwa eine Stunde vor und nach
dem Training keine Mahlzeiten zu
sich nehmen.
Immer daran denken, dass der
Körper bei einer sportlichen Betä-
tigung viel Flüssigkeit braucht.
Es geht nicht darum, auf die Schnelle ein
paar Übungen zu machen, sondern lang-
fristig und regelmäßig zu trainieren.
Es hängt von der jeweiligen physischen
Verfassung ab, wie schnell Fortschritte
erzielt werden. Man sollte langsam und
mit kürzeren Einheiten beginnen und
dem Körper Zeit geben, sich anzupas-
sen. Je dauerhafter und regelmäßiger
man trainiert, umso länger kann man die
Einheiten gestalten. Wir empfehlen eine
Trainingszeit von ca. 20 bis 30Minuten
am Gerät. Dabei mit einem geringen
Drehwiderstand starten und allmählich
die Intensität bis zur gewünschten und
noch beherrschbaren Leistungsstufe
steigern.
Das Training mit einem geringen Tempo
und Drehwiderstand ausklingen lassen.
Drehwiderstand einstellen
Der Drehwiderstand wird mit dem Ein-
stellknopf(12) eingestellt:
• Widerstand erhöhen: Schraube in
Richtung +drehen
• Widerstand verringern: Schraube in
Richtung -drehen
Training
Mit dem Gerät kann sowohl die Bein-
als auch die Armmuskulatur trainiert
werden.
Beine (Bild I):
1. Das Gerät auf den Boden stellen.
2. Davor auf einen Stuhl oder in einen
Sessel sitzen.
3. Die Füße in die Pedalschlaufen ste-
cken und gleichmäßig treten.
Arme (Bild J):
1. Das Gerät auf einen Tisch stellen.
2. Davor auf einen Stuhl oder in einen
Sessel sitzen.
3. Die Pedale mit den Händen festhal-
ten und gleichmäßig drehen.
Sobald die Pedale bewegt werden,
schaltet sich der Trainingscomputer(13)
ein. Wenn die Pedale ca. 4Minuten lang
stillstehen, schaltet sich der Trainings-
computer automatisch aus.
Funktionen des Traingscomputers
(Bild C)
Durch Drehen der Pedale oder Drücken
der Taste auf dem Trainingscompu-
ter(13) wird dieser eingeschaltet.
Auf dem Display werden je zwei Wer-
te angezeigt: Oben steht (neben K)
die Geschwindigkeit in km/h, darunter
erscheinen nacheinander die folgenden
Angaben:
TIME Trainingsdauer in Minuten und
Sekunden
ODO Insgesamt zurückgelegte
Strecke in km (HINWEIS: Durch
Herausnehmen und Wiedereinle-
gen der Batterien wird die Anzei-
ge auf Null zurückgesetzt.)
DIST Zurückgelegte Strecke der Trai-
ningseinheit in km
CAL Verbrauchte Kalorien (ungefährer
Wert)
• Nach dem Einschalten blinkt am
Rand der unteren Zeile SCAN und
die o.a. Werte laufen nacheinander
durch. Um einen gerade angezeigten
Wert dauerhaft auszuwählen, die
Taste drücken. Zum Wechseln der

Mini-Trainer DE
7
Anzeige die Taste erneut drücken
und der Trainingscomputer kehrt in
den SCAN-Modus zurück.
• Die Taste einige Sekunden lang ge-
drückt halten, um alle Daten (bis auf
die ODO-Anzeige) auf Null zurückzu-
setzen.
• Wenn ca. 4 Minuten lang keine Aktion
erfolgt, schaltet sich der Trainings-
computer automatisch aus.
NACH DEM TRAINING
Nach dem Training immer Dehnübungen
durchführen, um den Kreislauf langsam
auf normales Niveau zu bringen. Im Fol-
genden ein paar Beispielübungen:
Oberkörper: Aufrecht
hinstellen, Arme über
dem Kopf verschränken
und mit der rechten Hand
den linken Ellbogen nach
rechts ziehen. Der Ober-
köper geht leicht mit.
15 – 20 Sekunden lang
halten. Seitenwechsel.
Waden: Hinstellen. Das
rechte Bein nach vorne
stellen und etwas anwin-
keln, während das linke
Bein gestreckt bleibt.
Die linke Ferse auf den
Boden drücken. 15 – 20
Sekunden lang halten.
Seitenwechsel.
Vorderseite Oberschen-
kel: Auf einem Bein
stehen, das andere an-
winkeln und mit der Hand
den Fuß umfassen. Zum
Gesäß ziehen und 15 – 20
Sekunden lang halten.
Seitenwechsel.
Rücken: Flach auf den Rücken legen.
Das rechte Bein anwinkeln und über das
ausgestreckte linke Bein legen. Hüfte
dreht sich, beide Schultern müssen auf
dem Boden bleiben. 15 – 20Sekunden
lang halten. Seitenwechsel.
Innenseite Oberschenkel:
Auf den Boden setzen,
Knie nach außen drehen,
Fußsohlen zusammen-
legen und zum Körper
ziehen. Hände um die
Fußgelenke legen und
die Knie mit den Ellbogen
leicht zum Boden drü-
cken. Den Rücken dabei
durchstrecken. 15 – 20
Sekunden lang halten.
Gesamtes Bein: In die Hocke gehen,
Hände neben den Füßen auf dem Boden
abstützen und ein Bein nach hinten
durchstrecken. Ober- und Unterschen-
kel des vorderen Beines bilden einen
rechten Winkel, der Fuß liegt ganz auf
dem Boden auf. 15 – 20 Sekunden lang
halten. Seitenwechsel.
Schultern/Rücken: Im
Schneidersitz mit gera-
dem Rücken auf dem
Boden sitzen. Hände fal-
ten/ umfassen und Arme
über dem Kopf ausstre-
cken. Rücken strecken.
15 – 20 Sekunden lang
halten.

DE
8
REINIGUNG UND
AUFBEWAHRUNG
Beachten!
■Es darf keine Flüssigkeit in den Trai-
ningscomputer eindringen. Das Gerät
niemals in Wasser tauchen!
■Zum Reinigen keine scharfen oder
scheuernden Reinigungsmittel oder
Reinigungspads verwenden. Diese
können die Oberflächen beschädi-
gen.
• Das Gerät bei Bedarf mit einem
feuchten Tuch und ggf. einem milden
Reinigungsmittel abwischen.
• Das Gerät außer Reichweite von Kin-
dern und Tieren an einem trockenen,
vor direkter Sonneneinstrahlung
geschützten Ort aufbewahren.
ENTSORGUNG
Das Verpackungsmaterial um-
weltgerecht entsorgen und der
Wertstoffsammlung zuführen.
Batterien sind vor der Entsorgung
des Gerätes zu entnehmen und
getrennt vom Gerät an ent-
sprechenden Sammelstellen zu
entsorgen.
Dieses Gerät unterliegt der euro-
päischen Richtlinie 2012/19/EU für
Elektro- und Elektronik-Altgeräte
(WEEE). Dieses Gerät nicht als
normalen Hausmüll, sondern um-
weltgerecht über einen behördlich
zugelassenen Entsorgungsbetrieb
entsorgen.
TECHNISCHE DATEN
Artikelnummer: 05032
ID Gebrauchsanleitung: Z 05032 M DS V2 1120 md
Gerät
Modellnummer: JHK-20562
Klasse: HC (Verwendung im Heimbereich, Trainingsdaten mit
geringer Genauigkeit)
Max. Belastbarkeit: 100 kg
Standfläche: 50cm2Standfläche
Gewicht: 5kg
Bremssystem: Geschwindigkeitsunabhängig
Entspricht den Normen: EN ISO 20957-1:2013, EN ISO 20957-5:2016
Trainingscomputer
Modellnummer: Ms001
Spannungsversorgung: 1,5 V DC (1x AAA-Batterie, 1,5V)
Alle Rechte vorbehalten.
HINWEISE ZUR KONFORMITÄTSERKLÄRUNG
Die Konformitätserklärung für dieses Gerät kann angefordert werden bei:
DS Produkte GmbH, Kundenservice
Am Heisterbusch 1
19258 Gallin

Mini Trainer EN
9
LIST OF CONTENTS
Items Supplied 9
At A Glance 9
Symbols 10
Signal Words 10
Intended Use 10
Safety Notices 11
Assembly 12
Inserting / Changing the Battery in the Training Computer 12
Before Training 12
Setting Up the Device 13
Use 13
After Training 14
Cleaning and Storage 15
Disposal 16
Technical Data 16
Notes on the declaration of conformity 16
ITEMS SUPPLIED
(Picture A)
1 Rear foot (1 x)
2 Washer (4 x)
3 Spring washer (4 x)
4 Screw (4 x)
5 Main unit with training computer (1 x)
6 Right pedal (1 x)
7 Front foot (1 x)
8 Hexagon key (1 x)
9 Spanner (1 x)
10 Left pedal (1 x)
1.5 V battery, AAA type (1 x)
Operating instructions (1x)
Check the items supplied for complete-
ness and the components for transport
damage. If you find any damage, do not
use the device but contact our customer
service department.
Remove any possible films, stickers or
transport protection from the device.
Never remove the rating plate and any
possible warnings!
AT A GLANCE
(Picture B)
11 Carrying handle
12 Adjusting knob (set torque resistance)
13 Training computer

EN
10
SYMBOLS
Danger symbol: This symbol indi-
cates possible dangers. Read the
associated safety notices carefully
and follow them.
Supplementary information
Read the operating instructions
before use!
Symbol for direct current
SIGNAL WORDS
Signal words indicate hazards if the asso-
ciated notices are not followed.
WARNING – medium risk, may result in
serious injury or death
NOTICE – may result in risk of damage to
material
INTENDED USE
■This fixed training device is intended
to be used for fitness training and a
workout of the muscles. It is intended
to be used exclusively while sitting
down. Never stand on the device.
■The device is not designed for medi-
cal or therapeutic purposes.
■The device must not be used by sev-
eral people at the same time.
■Caution – the training data of this
device have a low level of accuracy.
The device is not suitable for high
accuracy purposes.
■The device is designed for a maxi-
mum load of 100kg.
■This device is designed exclusively for
use in the home.
■The device is for personal use only
and is not intended for commercial
applications.
■Use the device only for the specified
purpose and as described in the
operating instructions. Any other use
is deemed to be improper.
■The warranty does not cover faults
caused by incorrect handling, damage
or attempted repairs. The same ap-
plies to normal wear and tear.
Dear Customer,
We are delighted that you have chosen the MAXXMEE mini trainer.
Before using the device for the first time, please read through these operating in-
structions carefully and keep them for future reference and other users. They form an
integral part of the device. The manufacturer and importer do not accept any liability if
the information in these operating instructions is not complied with.
If you have any questions about the device and about spare parts/accessories, contact
the customer service department via our website: www.dspro.de/kundenservice
We hope you have a lot of fun with your MAXXMEE mini trainer.

Mini Trainer EN
11
SAFETY NOTICES
■The safety level of the device can
only be maintained if it is regular-
ly checked for damage. Each time
before you use the device, it should
therefore be inspected for any signs
of damage (loose screws, worn parts,
etc.). If you hear unusual noises from
the device during use, stop exercising
immediately. Have defective parts
replaced immediately and do not use
the device until it has been repaired!
In the event of any damage, please
contact the customer service depart-
ment or a specialist workshop.
WARNING – Danger of Injury
■This device may be used by children
aged 8 and over and by people with
reduced physical, sensory or mental
abilities or a lack of experience and /
or knowledge if they are supervised
or have received instruction on how
to use the device safely and have un-
derstood the dangers resulting from
failure to comply with the relevant
safety precautions.
■Children must not play with the
device.
■Cleaning and user maintenance must
not be carried out by children, unless
they are supervised.
■The device is not a toy! Parents and
other people in supervisory capacities
should be aware of their responsibil-
ity because, due to children’s natural
instinct for play and desire to experi-
ment, it is foreseeable that situations
and behaviour will occur for which the
training device is not constructed.
■Do not leave the device unattend-
ed in the presence of children and
animals.
■If you have any health concerns (risk
group), consult a doctor before using
the device. If necessary, coordinate
the training programme with your
doctor.
■Pregnant women should not use the
device or only after consulting their
doctor.
■Keep the fastening and packaging
materials away from children and ani-
mals. There is a danger of suffocation.
■Batteries can be deadly if swallowed.
The battery and the device should be
kept out of the reach of young chil-
dren and animals. If a battery is swal-
lowed, immediate medical attention
must be sought. There is a danger of
burns from battery acid.
■If a battery leaks, do not allow your
skin, eyes and mucous membranes
to come into contact with the battery
acid. If you touch battery acid, rinse
the affected areas with abundant clear
water straight away and seek medical
assistance immediately. There is a
danger of burns from battery acid.
■Place the device down on a secure
and horizontal surface.
■If adjusting devices are left protrud-
ing, they may impede the movement
of the user.
■Before each use, check all parts,
especially the pedals, for tightness
and wear.
NOTICE – Risk of Damage to
Material and Property
■Use only the battery type specified in
the technical data.
■The batteries must not be charged or
reactivated in any way, disassembled,
thrown into a fire, immersed in liquids
or short-circuited.
■Always take the batteries out if they
are dead or if you will not be using
the device for a prolonged period.
This will prevent any damage caused
by leaks.

EN
12
■Remove batteries that have leaked
from the device immediately and
clean the contacts in the device.
■Ensure that the training computer
cannot come into contact with water!
■Protect the device from: extreme
temperatures, strong temperature
fluctuations, persistent moisture,
wet conditions, direct sunlight and
impacts.
■Do not use any caustic or abrasive
cleaning agents or pads to clean
the device. These may damage the
surface.
ASSEMBLY
Follow these assembly instructions step
by step to prevent any errors during set-
up and subsequent use.
1. Place all parts carefully on the floor. To
be on the safe side, place a protective
film or blanket underneath the parts
to prevent any damage to delicate
floor coverings.
2. Screw the feet (1, 7) onto the bottom
of the main unit(5). To do this, use
the washers(2), spring washers(3)
and screws(4) as well as the hexagon
key(8) supplied. (Picture D)
3. Turn the pedals(6, 10) tight on the
pedal mounts using the spanner(9)
which is supplied. Make sure that the
markings L(left) and R(right) on the
pedals and mounts match. (Picture E)
The right pedal (right-hand thread) is
tightened in the clockwise direction.
The left pedal (left-hand thread) is
tightened in the anticlockwise direc-
tion.
Adjusting the Pedal Straps
The size of the strap on the pedal can be
changed. To do this, loosen the screws
on the straps, adjust them to the size
you want and then turn them hand-tight
again. (Picture F)
INSERTING / CHANGING
THE BATTERY IN THE
TRAINING COMPUTER
1. Pull the training computer(13) out of
the main unit(5).
2. Insert a 1.5 V battery, AAA type into
the battery compartment on the back
of the training computer. Pay atten-
tion to the correct polarity (+ / –).
(Picture G)
L Before inserting the battery,
check whether the contacts in
the device and on the battery are
clean, and clean them if neces-
sary.
3. Carefully insert the training computer
into the main unit.
If the training computer stops working,
the batteries need to be replaced.
BEFORE TRAINING
A warm-up is an essential part of any
sporting activity. All physical and mental
aspects of your performance are thereby
stimulated and enhanced. It also greatly
reduces the risk of injury.
The following exercises warm up large
muscle groups through movement.
• Jogging: Jog slowly on the spot or
around the room for a few minutes.
• Knee bends: Stand with your legs the
width of your shoulders apart, keep
your upper body straight and bend
and then stretch your knees. Repeat
approx. 5 – 10 times.
• Upper body twist: Stand with your
legs the width of your shoulders apart,
keep your upper body straight, raise
your arms to shoulder height at the
sides and bend so that your hands are
in front of your chest. Twist your upper
body as far as possible to the right and
left. Repeat approx. 10 times.

Mini Trainer EN
13
• Side bends: Stand with your legs the
width of your shoulders apart, keep
your upper body straight. Then slowly
tilt your upper body to the sides.
Stretch the arm on the stretched side
of the body over your head as you do
this. Repeat approx. 10 times.
• Arm circles: Stand upright, stretch out
your right arm and swing it forwards.
Change direction after 5 – 10 swings.
Then swing with your left arm.
SETTING UP THE DEVICE
Please Note!
■The free area must include the space
required for an emergency dismount.
If training devices are set up in the
immediate vicinity of one another,
they can share one free area.
■The free area in the direction from
which you access the training device
must be at least 0.6 m greater than
the exercise area.
Place the device on the floor. Protect any
delicate surfaces (laminate, parquet floor,
etc.) from scratches etc. with a protective
mat.
Depending on your body size, leave
plenty of space on all sides (at least 0.6
metres at the sides and rear, at least 1
metre at the front and 1.5 metre above)
so that you have enough room to move
about in during a workout. (Picture H)
USE
Please Note!
■When doing the exercises, wear
well-fitting, loose, comfortable cloth-
ing and non-slip trainers. Make sure
that nothing can get caught in the
moving parts of the device.
■CAUTION! Stop the training immedi-
ately if you start to feel weak, dizzy or
unwell in some other way. If you feel
sick, have pain in your chest or arms,
an irregular heartbeat or other unusu-
al symptoms, seek medical attention
immediately.
■We explicitly point out that improper
use of the device and excessive train-
ing can be detrimental to your health.
Tips For Healthy Training
L Do not train if you are feeling
tired or exhausted.
Never work out on a full stomach.
Do not eat anything for approx.
one hour before and after training.
Always remember that the body
needs a lot of fluid during sport-
ing activity.
It is not about doing a few exercises
quickly, but about training regularly over
a long period of time.
How quickly progress is made depends
on a person’s particular physical condi-
tion. You should start slowly and start with
shorter sessions and give the body time
to adjust. The more consistently and reg-
ularly you train, the longer you can make
the sessions. We recommend a training
time of approx. 20 to 30minutes on the
device. Start with a low torque resistance
and increase the intensity gradually until
you reach the desired performance level
that you are still capable of maintaining.
Allow the training to fade out with a slow
pace and low torque resistance.

EN
14
Setting the Torque Resistance
The torque resistance is adjusted using
the adjusting knob (12):
• Increase resistance: Turn screw
towards +
• Reduce resistance: Turn screw
towards-
Training
The device can be used to train both the
leg muscles and the arm muscles.
Legs (Picture I):
1. Place the device on the floor.
2. Sit down in front of it on a chair or
stool.
3. Place your feet in the pedal straps and
pedal at an even pace.
Arms (Picture J):
1. Place the device on a table.
2. Sit down in front of it on a chair or
stool.
3. Hold the pedals firmly with your
hands and turn them at an even pace.
As soon as the pedals are moved, the
training computer(13) switches on.
Functions of the Training Computer
(Picture C)
By turning the pedals or pressing the
button on the training computer(13), it is
switched on.
Two values are shown on the display in
each case: At the top (next to K) is the
speed in km/h, with the following values
displayed below one after the other:
TIME Training time in minutes and
seconds
ODO Total distance covered in km
(NOTICE: The display is reset to
zero by taking out and reinserting
the batteries.)
DIST Distance covered in the single
workout in km
CAL Calories consumed (approximate
value)
• After it is switched on, SCAN flashes
at the edge of the bottom row and
the values mentioned above are run
through one after the other. To per-
manently select a value that has just
been displayed, press the button. To
change the display, press the button
again and the training computer will
revert to SCAN mode.
• Keep the button pressed down for a
few seconds to reset all data to zero
(apart from the ODO display).
• If there is no activity for approx. 4
minutes, the training computer will
automatically switch off.
AFTER TRAINING
After training, you should always perform
stretching exercises in order to slowly
restore your circulation to a normal level.
You will find a few example exercises
below:
Upper body: Stand
upright, cross your arms
over your head and pull
your left elbow to the
right with your right hand.
The upper body moves
gently as you do this. Stay
in this position for 15 – 20
seconds. Change sides.
Calves: Stand up. Place
your right leg in front of
you and bend it slightly
while your left leg remains
stretched. Push your left
heel down onto the floor.
Stay in this position for
15 – 20 seconds. Change
sides.

Mini Trainer EN
15
Front of thighs: Stand on
one leg, bend the other
one and grab your foot
with your hand. Pull it up
to your buttocks and hold
this position for 15 – 20
seconds Change sides.
Back: Lie down flat on your back. Bend
your right leg and place it over your left
leg which is still stretched out. Your hip
twists but both shoulders must remain on
the floor. Stay in this position for 15 – 20
seconds. Change sides.
Inside of thighs: Sit down
on the floor, turn your
knees to face outwards,
place the soles of your
feet together and pull
towards your body. Place
your hands around your
ankles and press your
knees gently down to the
floor with your elbows.
Keep your back straight
as you do this. Stay in
this position for 15 – 20
seconds.
Whole leg: Squat down, rest your hands
on the floor next to your feet and stretch
one leg out behind you. The thigh and
lower part of your front leg form a right
angle, and the foot rests fully on the floor.
Stay in this position for 15 – 20 seconds.
Change sides.
Shoulders/back: Sit
cross-legged on the floor
with a straight back. Fold
/ clasp together your
hands and stretch your
arms out above your
head. Stretch your back.
Stay in this position for 15
– 20 seconds.
CLEANING AND STORAGE
Please Note!
■No liquid must get into the training
computer. Never immerse the device
in water!
■Do not use any sharp or abrasive
cleaning agents or cleaning pads to
clean the device. These may damage
the surfaces.
• If necessary, wipe down the device
with a damp cloth and mild cleaning
agent if required.
• Store the device in a dry place which
is protected from direct sunlight and
is out of the reach of children and
animals.

EN
16
DISPOSAL
Dispose of the packaging material
in an environmentally friendly man-
ner so that it can be recycled.
Batteries should be removed
before disposing of the device
and disposed of separately from
the device at suitable collection
points.
This device is governed by the
European Directive 2012/19/EU
on waste electrical and electron-
ic equipment (WEEE). Do not
dispose of this device as normal
domestic waste, but rather in an
environmentally friendly manner
via an officially approved waste
disposal company.
TECHNICAL DATA
Article number: 05032
ID of the operating instructions: Z 05032 M DS V2 1120 md
Device
Model number: JHK-20562
Class: HC (Use at home, training data with low level of
accuracy)
Max. load capacity: 100kg
Base area: 50cm2base area
Weight: 5kg
Complies with the standards: EN ISO 20957-1:2013, EN ISO 20957-5:2016
Brake system: speed independent
Training computer
Model number: Ms001
Voltage supply: 1.5 V DC (1 x 1.5V battery, AAA type))
All rights reserved.
NOTES ON THE DECLARATION OF CONFORMITY
The declaration of conformity for this device can be requested from:
DS Produkte GmbH, customer service
Am Heisterbusch 1
19258 Gallin

Appareil d’entraînement mini FR
17
SOMMAIRE
Composition 17
Aperçu général 17
Symboles 18
Mentions d’avertissement 18
Utilisation conforme 18
Consignes de sécurité 19
Montage 20
Mise en place / remplacement de la pile dans l’ordinateur d’entraînement 20
Avant l’entraînement 20
Mise en place de l'appareil 21
Utilisation 21
Après l’entraînement 23
Nettoyage et rangement 24
Mise au rebut 24
Caractéristiques techniques 24
Notes sur la déclaration de conformité 24
COMPOSITION
(IllustrationA)
1 Pied d’appui arrière (1 x)
2 Rondelles (4x)
3 Bagues élastiques (4x)
4 Vis (4x)
5 Corps de l’appareil avec ordinateur
d’entraînement (1 x)
6 Pédale de droite (1 x)
7 Pied d’appui avant (1 x)
8 Clé à six pans creux (1x)
9 Clé plate (1x)
10 Pédale de gauche (1 x)
Pile de 1,5 V, typeAAA (1x)
Mode d’emploi (1x)
S’assurer que l’ensemble livré est complet
et que ses composants ne présentent pas
de dommages imputables au transport.
En cas de dommages, ne pas utiliser et
contacter le service après-vente.
Enlever de l’appareil les éventuels films
protecteurs, adhésifs ou protections
de transport. Ne jamais ôter la plaque
signalétique de l'appareil ni les éven-
tuelles mises en garde apposées.
APERÇU GÉNÉRAL
(IllustrationB)
11 Poignée de transport
12 Molette de réglage (réglage de la
résistance de rotation)
13 Ordinateur d’entraînement

FR
18
SYMBOLES
Symbole de danger: ce symbole
signale des dangers possibles.
Lire et observer attentivement les
consignes de sécurité correspon-
dantes.
Informations complémentaires
Consulter le mode d'emploi avant
utilisation!
Signe de commutation pour le
courant continu
MENTIONS
D’AVERTISSEMENT
Les mentions d’avertissement désignent
les risques qu’implique le non respect
des consignes correspondantes.
AVERTISSEMENT– Risque moyen pou-
vant induire des blessures graves, voire
mortelles
AVIS– Risque de dégâts matériels
UTILISATION CONFORME
■Cet appareil d’entraînement station-
naire est destiné à l’exercice de la
condition physique et au travail des
muscles. Il est exclusivement réservé
à une utilisation en position assise. Ne
posez jamais les pieds sur l’appareil.
■Cet appareil n’est pas conçu à des
fins médicales ou thérapeutiques.
■L’appareil ne doit pas être utilisé par
plusieurs personnes à la fois.
■Attention – les données d’entraîne-
ment de cet appareil ont une faible
précision. L’appareil n’est pas adap-
té pour des mesures précises.
■L’appareil peut supporter une charge
de 100kg maximum.
■Cet appareil est conçu exclusivement
pour une utilisation domestique.
■Cet appareil est conçu pour un usage
domestique, non professionnel.
■Utiliser cet appareil uniquement dans
le but indiqué et tel que stipulé dans
le présent mode d’emploi. Toute autre
utilisation est considérée comme non
conforme.
■Tout défaut imputable à une utilisation
non conforme, à une détérioration
ou à des tentatives de réparation est
exclu de la garantie. L’usure normale
est également exclue de la garantie.
Chère cliente, cher client,
Nous vous félicitons d'avoir fait l’acquisition de l’appareil d’entraînement mini
MAXXMEE.
Veuillez lire attentivement le présent mode d’emploi avant la première utilisation de
l’appareil et le conserver précieusement pour toute question ultérieure ainsi que pour
les autres utilisateurs. Il fait partie intégrante de l’appareil. Le fabricant et l’importateur
déclinent toute responsabilité en cas de non-observation des instructions consignées
dans le mode d’emploi.
Pour toute question concernant cet appareil et ses pièces de rechange et accessoires,
veuillez contacter le service après-vente à partir de notre site Internet:
www.dspro.de/kundenservice
Nous espérons que votre appareil d’entraînement mini MAXXMEE vous donnera
entière satisfaction!

Appareil d’entraînement mini FR
19
CONSIGNES DE SÉCURITÉ
■Le niveau de sécurité de l’appareil ne
peut être maintenu que si l’on s’as-
sure régulièrement qu’il ne présente
pas de dommages. Par conséquent,
vérifier avant chaque mise en service
que l’appareil ne présente pas de
dommages (vis desserrées, pièces
usées etc.). Si l'appareil produit des
bruits inhabituels durant son utilisa-
tion, interrompre immédiatement
l'entraînement. Remplacer immédia-
tement les pièces défectueuses et ne
pas utiliser l’appareil tant qu’il n’aura
pas été réparé. En cas de dommage,
contacter le service après-vente ou
bien un atelier spécialisé.
AVERTISSEMENT – Risque de
blessures
■Cet appareil peut être utilisé par les
enfants à partir de 8 ans et les per-
sonnes dont les capacités physiques,
sensorielles ou mentales sont réduites
ou qui manquent d’expérience et /
ou de connaissances lorsqu’elles sont
sous surveillance ou qu’elles ont été
instruites quant à l’utilisation de l’ap-
pareil en toute sécurité et qu’elles ont
compris les risques en découlant.
■Les enfants ne doivent pas jouer avec
l’appareil.
■Le nettoyage et l’entretien utilisateur
ne doivent pas être réalisés par les
enfants sans surveillance.
■L'appareil n'est pas un jouet! Les pa-
rents et les autres personnes chargées
de la surveillance doivent prendre
conscience que l'envie naturelle de
jouer et d'expérimenter des enfants
engendre des situations et des com-
portements pour lesquels cet appareil
d'entraînement n'a pas été conçu.
■Ne pas laisser l’appareil sans sur-
veillance en présence d'enfants et
d’animaux.
■En cas de doute quant à la san-
té (groupe à risque), consulter un
médecin avant d’utiliser cet appareil.
Le cas échéant, établir avec lui un pro-
gramme d'entraînement.
■Les femmes enceintes ne doivent
pas utiliser cet appareil, sauf accord
préalable de leur médecin.
■Tenir le matériel de fixation et d’em-
ballage hors de portée des enfants et
des animaux. Risque de suffocation.
■L’ingestion de piles peut être mor-
telle. Conserver l’appareil et les piles
hors de portée des enfants et des
animaux. En cas d'ingestion d’une
pile, faire immédiatement appel aux
secours médicaux. Risque de brûlures
causées par l’électrolyte des piles.
■Si une pile fuit, éviter tout contact de
la peau, des yeux ou des muqueuses
avec l'électrolyte. En cas de contact
avec l'électrolyte, rincer immédiate-
ment et abondamment à l'eau claire
les zones touchées, puis faire appel
sans attendre aux secours médicaux.
Risque de brûlures causées par l’élec-
trolyte des piles.
■Poser l’appareil sur un support stable
et horizontal.
■Des dispositifs de réglage laissés
saillants peuvent entraver les mouve-
ments de l’utilisateur.
■Avant chaque utilisation, vérifiez
toutes les pièces, en particulier les
pédales, pour le serrage et l’usure.
AVIS – Pour éviter tout risque de
dégâts matériels
■Utiliser uniquement le type de pile
indiqué dans les caractéristiques
techniques.
■Les piles ne doivent pas être re-
chargées ou réactivées par d’autres
moyens, démontées, jetées au
feu, plongées dans des liquides ou
court-circuitées.

FR
20
■Toujours retirer les piles lorsqu’elles
sont usagées ou que l’appareil ne
sera plus utilisé pendant une période
prolongée. Ceci évite ainsi les dom-
mages dus à d’éventuelles fuites des
piles.
■Retirer immédiatement de l’appareil
les piles qui fuient et nettoyer les
contacts au sein de l’appareil.
■S’assurer que l’ordinateur d’entraîne-
ment ne puisse pas entrer en contact
avec de l’eau.
■Protéger l’appareil contre: les
températures extrêmes, les fortes
fluctuations de températures, l’humi-
dité prolongée, l’eau, le rayonnement
direct du soleil et les chocs.
■Pour nettoyer l’appareil, ne pas
utiliser de produits ni de tampons
de nettoyage corrosifs ou abrasifs
qui risqueraient d’endommager les
surfaces.
MONTAGE
Suivre les instructions de cette notice de
montage étape par étape pour éviter des
erreurs de montage et des défauts dans
l’utilisation ultérieure.
1. Poser précautionneusement toutes
les pièces sur le sol. Par précaution,
placer dessous un film de protection
ou une couverture pour éviter d’éven-
tuels endommagements de revête-
ments de sol sensibles.
2. Vissez les pieds d’appui(1, 7) sur la
face intérieure du corps de l’appa-
reil(5). Utilisez à cet effet les ron-
delles(2), les bagues élastiques(3) et
les vis(4) fournies ainsi que la clé à six
pans creux(8). (Illustration D)
3. Fixez les pédales(6, 10) sur les
supports de pédale à l’aide de la clé
plate(9) fournie. Assurez-vous que
les marquages L(gauche) et R(droite)
des pédales et des supports corres-
pondent bien. (IllustrationE)
La pédale de droite (filetage à droite)
se serre dans le sens des aiguilles
d’une montre.
La pédale de gauche (filetage à
gauche) se serre dans le sens inverse
des aiguilles d’une montre.
Réglage des boucles des pédales
La dimension de la boucle se règle sur la
pédale. Desserrez à cet effet les vis sur
les boucles, réglez la dimension voulue
puis resserrez les vis à la main. (Illustra-
tionF)
MISE EN PLACE /
REMPLACEMENT DE LA
PILE DANS L’ORDINATEUR
D’ENTRAÎNEMENT
1. Extrayez l’ordinateur d’entraîne-
ment(13) du corps de l’appareil de
l’appareil(5).
2. Insérez une pile de 1,5 V, de type
AAA dans le compartiment à pile
placé au dos de l’ordinateur d’entraî-
nement. Veuillez respecter la polarité
(+/–). (IllustrationG)
L Avant de mettre la pile en place,
vérifiez si les contacts dans l’ap-
pareil et sur la pile sont propres.
Nettoyez-les le cas échéant.
3. Logez délicatement l’ordinateur d’en-
traînement dans le corps de l’appareil.
Si l’ordinateur d'entraînement ne fonc-
tionne plus, les piles doivent être rempla-
cées.
AVANT L’ENTRAÎNEMENT
L’échauffement doit toujours faire partie
de toute activité sportive. Il stimule et
améliore toutes les composantes phy-
siques et psychiques de la performance.
En outre, le risque de blessures est ainsi
minimisé.
This manual suits for next models
1
Table of contents
Languages:
Other MAXXMEE Fitness Equipment manuals

MAXXMEE
MAXXMEE 09529 User manual

MAXXMEE
MAXXMEE 05854 User manual

MAXXMEE
MAXXMEE 09733 User manual

MAXXMEE
MAXXMEE Hula Workout Hoop User manual

MAXXMEE
MAXXMEE Sit-up-Assistent User manual

MAXXMEE
MAXXMEE QSF78 User manual

MAXXMEE
MAXXMEE Crunch-Trainer User manual

MAXXMEE
MAXXMEE 07908 User manual

MAXXMEE
MAXXMEE 72841A0 User manual
Popular Fitness Equipment manuals by other brands

G-FITNESS
G-FITNESS AIR ROWER user manual

CAPITAL SPORTS
CAPITAL SPORTS Dominate Edition 10028796 manual

Martin System
Martin System TT4FK user guide

CIRCLE FITNESS
CIRCLE FITNESS E7 owner's manual

G-FITNESS
G-FITNESS TZ-6017 user manual

Accelerated Care Plus
Accelerated Care Plus OMNISTIM FX2 CYCLE/WALK user manual