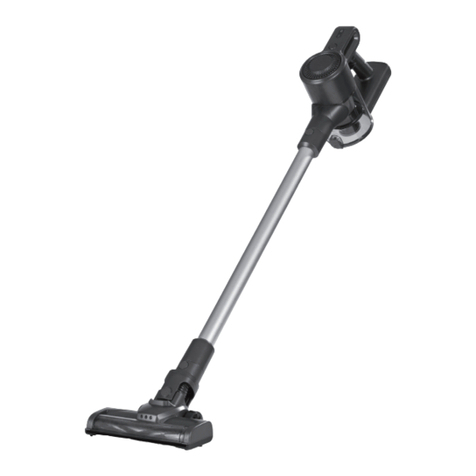
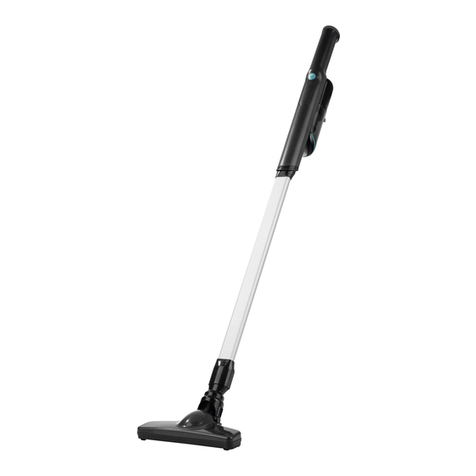
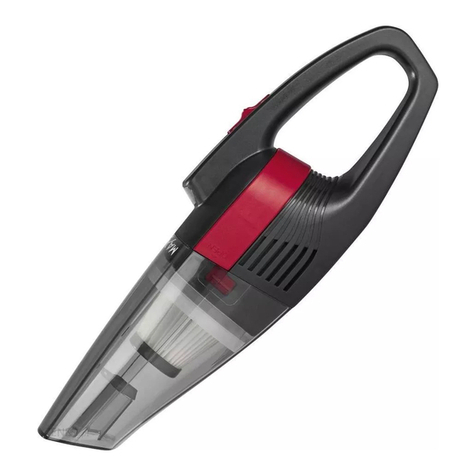
MAXXMEE MJ1901 User manual

Kabelloser Hand- und Bodenstaubsauger DE
1
INHALTSVERZEICHNIS
Symbole 1
Signalwörter 1
Lieferumfang 2
Auf einen Blick 2
Bestimmungsgemäßer Gebrauch 2
Sicherheitshinweise 3
Akku aufladen 5
Wandhalterung anbringen 6
Zubehör 6
Benutzung 7
Reinigung und Aufbewahrung 7
Fehlerbehebung 8
Entsorgung 9
Technische Daten 10
SYMBOLE
Gefahrenzeichen: Diese Sym-
bole zeigen mögliche Gefah-
ren an. Die dazugehörenden
Sicherheitshinweise aufmerk-
sam lesen und befolgen.
Ergänzende Informationen
Gebrauchsanleitung vor Benut-
zung lesen!
Wechselstrom
Gleichstrom
Energieeffizienzklasse VI
Nur in Innenräumen
verwenden!
Schutzklasse II
Polarität des Hohlsteckers
SSchaltnetzteil
Sichere elektrische Trennung
SIGNALWÖRTER
Signalwörter bezeichnen Gefährdungen
bei Nichtbeachtung der dazugehörigen
Hinweise.
GEFAHR – hohes Risiko, hat schwere
Verletzung oder Tod zur Folge
WARNUNG – mittleres Risiko, kann
schwere Verletzung oder Tod zur Folge
haben
VORSICHT – niedriges Risiko, kann ge-
ringfügige oder mäßige Verletzung zur
Folge haben
HINWEIS – kann Risiko von Sachschäden
zur Folge haben
WICHTIGE HINWEISE!
UNBEDINGT AUFBEWAHREN!

DE
2
LIEFERUMFANG
(Bild A)
A Fugendüse 1 x
B Kombidüse 1 x
C Motoreinheit mit Akku 1 x
D Verlängerungsrohr 1 x
E Düsenadapter 1 x
F Bodendüse1 x
G Wandhalterung (inkl. Befestigungs-
material)
H Anschlussleitung (Netzteil mit Kabel
und Hohlstecker) (1x)
• Staubbehälter (in der Motoreinheit
eingesetzt)
• Metallfilter (im Staubbehälter)
• EPA-Filter (im Staubbehälter)
• Gebrauchsanleitung (nicht abgebildet)
Den Lieferumfang auf Vollständigkeit
und die Bestandteile auf Transport-
schäden überprüfen. Bei Schäden nicht
verwenden, sondern den Kundenservice
kontaktieren.
Eventuelle Folien, Aufkleber oder
Transportschutz vom Gerät abnehmen.
Niemals das Typenschild und eventuel-
le Warnhinweise entfernen!
AUF EINEN BLICK
(Bild B)
1 Ladekontrollleuchten
2 Akku (im Gehäuse)
3 Ein-/Aus-Schalter (2 Saugstufen)
4 Handgriff
5 Ladebuchse
6 Staubbehälterklappe
7 Lasche zum Öffnen der Staubbehäl-
terklappe
8 EPA-Filter
9 Staubbehälter
10 Metallfilter
11 Saugöffnung
12 Entriegelungstaste Düse
13 Entriegelungstaste des Staubbehäl-
ters
BESTIMMUNGSGEMÄßER
GEBRAUCH
■Dieses Gerät ist zum Aufsaugen von
herkömmlichem Hausstaub vorgese-
hen.
Auf keinen Fall folgende Dinge
aufsaugen:
○Flüssigkeiten oder nasse
Stoffe (z.B. nasses Teppich-
Shampoo)
○glühende Asche, Zigaretten-
kippen, Streichhölzer etc.
○brennbare oder entzündliche
Stoffe
○sehr feinen Staub (z.B. Beton-
staub), Asche oder Toner
○spitze, harte Gegenstände,
z.B. größere Glassplitter
■Das Gerät ist für den privaten Ge-
brauch, nicht für eine gewerbliche
Nutzung bestimmt.
■Das Gerät nur wie in der Gebrauchs-
anleitung beschrieben nutzen. Jede
weitere Verwendung gilt als bestim-
mungswidrig.
■Von der Gewährleistung ausge-
schlossen sind alle Mängel, die
durch unsachgemäße Behandlung,
Beschädigung oder Reparaturversu-
che entstehen. Dies gilt auch für den
normalen Verschleiß.

Kabelloser Hand- und Bodenstaubsauger DE
3
Liebe Kundin, lieber Kunde,
wir freuen uns, dass du dich für den MAXXMEE Kabellosen Hand- und Boden-
staubsauger entschieden hast. Dieses Kraftpaket ist sowohl als Hand- als auch als
Bodenstaubsuager einsetzbar und punktet in Sachen Handhabung, Flexibilität und
Saugkraft. Setz ihn dir mit dem stabilen, verstellbaren Teleskoprohr einfach nach
Bedarf zusammen. So befreist du Tastaturen, Möbel, Autositze, Teppichböden,
Treppenstufen u.v.m. von Staub und Schmutz und kannst selbst Spinnweben an der
Decke entfernen. Die Saugkraft lässt sich einfach in zwei Stufen regulieren und damit
an deine Bedürfnisse anpassen.
Solltest du Fragen zum Gerät sowie zu Ersatz- / Zubehörteilen haben, kontaktiere
den Kundenservice über unsere Website: www.dspro.de/kundenservice
Wir wünschen dir viel Freude an deinem
MAXXMEE Kabellosen Hand- und Bodenstaubsauger.
Informationen zur Gebrauchsanleitung
Lies vor dem ersten Gebrauch des Gerätes diese Gebrauchsanleitung sorgfältig
durch und bewahre sie für spätere Fragen und weitere Nutzer auf. Sie ist ein Be-
standteil des Gerätes. Hersteller und Importeur übernehmen keine Haftung, wenn
die Angaben in dieser Gebrauchsanleitung nicht beachtet werden.
SICHERHEITSHINWEISE
WARNUNG: Alle Sicherheitshinweise, Anweisungen,
Bebilderungen und technischen Daten, mit denen
dieses Gerät versehen ist, beachten. Versäumnisse bei
der Einhaltung der Sicherheitshinweise und Anweisungen
können elektrischen Schlag, Brand und/oder Verletzun-
gen verursachen.
■Dieses Gerät kann von Kindern ab 8 Jahren sowie von Perso-
nen mit reduzierten physischen, sensorischen oder mentalen
Fähigkeiten oder Mangel an Erfahrung und/oder Wissen
benutzt werden, wenn sie beaufsichtigt oder bezüglich des
sicheren Gebrauchs des Gerätes unterwiesen wurden und die
daraus resultierenden Gefahren verstanden haben.
■Kinder dürfen nicht mit dem Gerät spielen.
■Reinigung und Benutzer-Wartung dürfen nicht durch Kinder
durchgeführt werden, es sei denn, sie sind älter als 8 Jahre
und werden beaufsichtigt.
■Kinder jünger als 8 Jahre und Tiere sind vom Gerät und der
Anschlussleitung fernzuhalten.

DE
4
■Das Gerät ist bei nicht vorhandener Aufsicht und vor dem
Zusammenbau, dem Auseinandernehmen oder Reinigen stets
auszuschalten oder vom Stromnetz zu trennen.
■Den Akku ausschließlich mit dem mitgelieferten Netzteil auf-
laden. Mit dem mitgelieferten Netzteil keine anderen Geräte
aufladen.
■Das Gerät im Interesse der eigenen Sicherheit vor jeder Inbe-
triebnahme auf Beschädigungen überprüfen. Nur benutzen,
wenn das Gerät keine Schäden aufweist! Wenn das Gerät oder
die Anschlussleitung beschädigt sind, müssen diese durch
den Hersteller, Kundenservice oder eine ähnlich qualifizierte
Person (z.B. Fachwerkstatt) ersetzt bzw. repariert werden, um
Gefährdungen zu vermeiden.
GEFAHR – Stromschlaggefahr!
■Nur in geschlossenen Räumen laden
und lagern.
■Nicht in Räumen mit hoher Luftfeuch-
tigkeit verwenden.
■Das Gerät und die Anschlussleitung
niemals in Wasser oder andere Flüs-
sigkeiten eintauchen und sicherstel-
len, dass diese nicht ins Wasser fallen
oder nass werden können.
■Sollte das Gerät ins Wasser fallen,
während es an das Stromnetz ange-
schlossen ist, sofort die Stromzufuhr
unterbrechen. Erst danach das Gerät
aus dem Wasser ziehen!
■Das Gerät und die Anschlussleitung
niemals mit feuchten Händen berüh-
ren, wenn diese Komponenten an das
Stromnetz angeschlossen sind.
■Niemals Flüssigkeiten aufsaugen. Kei-
ne Flüssigkeiten in den Staubbehälter
füllen. Die Motoreinheit von Feuch-
tigkeit oder Nässe fernhalten!
WARNUNG – Verletzungs-
gefahr!
■Kinder und Tiere vom Verpackungs-
material fernhalten. Es besteht Ersti-
ckungsgefahr!
■Sicherstellen, dass die Anschluss-
leitung stets außer Reichweite von
Kleinkindern und Tieren ist. Es be-
steht Strangulationsgefahr!
■Tiere, Haare, Schmuck, weite Klei-
dung, Finger und alle übrigen Kör-
perteile von den Düsen des Gerätes
fernhalten. Sie könnten sich fest-
saugen. Sollte sich der Staubsauger
doch einmal festsaugen, das Gerät
sofort ausschalten.
■Darauf achten, dass die Anschlusslei-
tung keine Stolpergefahr darstellt.
WARNUNG – Gefahr durch
Akkus!
■Der Akku darf nicht auseinander
genommen, ins Feuer geworfen,
hohen Temperaturen über +40 °C
ausgesetzt, in Flüssigkeiten getaucht
oder kurzgeschlossen werden. Der
Akku könnte sich entzünden oder
explodieren.

Kabelloser Hand- und Bodenstaubsauger DE
5
■Sollte der Akku ausgelaufen sein,
Kontakt von Haut, Augen und
Schleimhäuten mit der Batteriesäure
vermeiden. Bei Kontakt mit Batterie-
säure die betroffenen Stellen sofort
mit reichlich klarem Wasser ausspülen
und umgehend medizinische Hilfe in
Anspruch nehmen. Es besteht Verät-
zungsgefahr durch Batteriesäure!
■Sicherstellen, dass die Motoreinheit
und der Akku nicht nass werden
können. Das Gerät nicht benutzen,
wenn Flüssigkeit eingedrungen ist.
Der Akku könnte sich entzünden oder
explodieren.
■Das Gerät und das Netzteil während
des Ladens nicht abdecken, um einen
Gerätebrand zu vermeiden. Nichts in
die Lüftungsöffnungen des Gerätes
stecken und darauf achten, dass die-
se nicht verstopft sind.
HINWEIS – Risiko von Material- und
Sachschäden
■Darauf achten, dass die Anschlusslei-
tung nicht gequetscht, geknickt oder
über scharfe Kanten gelegt wird und
nicht mit heißen Flächen in Berüh-
rung kommt.
■Das Netzkabel nicht um das Netzteil
wickeln.
■Das Gerät nur benutzen, wenn es
vollständig und korrekt zusammenge-
baut ist! Der Staubbehälter und die
Filter müssen eingesetzt und unbe-
schädigt sein! Würde der Schmutz in
das Innere der Motoreinheit gelan-
gen, könnte es zum Motorschaden
kommen.
■Das Gerät muss ausgeschaltet sein,
wenn der Netzteil gezogen oder in
die Steckdose gesteckt wird. Immer
am Netzteil und nie am Netzkabel
ziehen, um das Gerät vom Stromnetz
zu trennen!
■Das Gerät niemals an der Anschluss-
leitung ziehen oder tragen.
■Keine schweren Gegenstände auf
Gerät oder Anschlussleitung stellen.
■Das Gerät vor Hitze, offenem Feuer,
extremen Temperaturen, lang an-
haltender Feuchtigkeit und Stößen
schützen.
■Nur Original-Zubehörteile des Her-
stellers verwenden, um die Funkti-
onsweise des Gerätes nicht zu beein-
trächtigen und eventuelle Schäden
zu verhindern. Die LEDs sind nicht
austauschbar.
AKKU AUFLADEN
Beachten!
■Vor der ersten Inbetriebnahme den
Akku vollständig aufladen, um die
maximale Ladekapazität zu errei-
chen. Wird der Akku während des
Gebrauchs entleert, sollte er vor der
nächsten Benutzung wieder vollstän-
dig aufgeladen werden.
■Den Netzteil nur an eine vorschrifts-
mäßig installierte Steckdose, die mit
seinen technischen Daten überein-
stimmt, anschließen. Die Steckdose
muss nach dem Anschließen gut zu-
gänglich sein, damit die Netzverbin-
dung schnell getrennt werden kann.
■Nur ordnungsgemäße Verlänge-
rungskabel verwenden, deren tech-
nische Daten mit denen des Netzteils
übereinstimmen.
■Den Netzteil aus der Steckdose
ziehen, wenn während des Ladens
ein Fehler auftritt oder vor einem
Gewitter.
1. Den Hohlstecker der Anschluss-
leitung(H) in die Ladebuchse(5)
stecken.
2. Den Netzteil an eine Steckdose
anschließen.
Die Ladekontrollleuchten(1) begin-
nen zu blinken und der Akku wird
DE
6
geladen.
Wenn alle Ladekontrollleuchten
dauerhaft leuchten, ist der Akku voll
aufgeladen.
3. Zuerst den Netzteil vom Stromnetz
trennen und danach den Hohlstecker
vom Gerät.
WANDHALTERUNG
ANBRINGEN
Beachten!
■Zum Aufhängen der Wandhalterung
das mitgelieferte Befestigungsmate-
rial verwenden. Bei Unsicherheit, ob
das mitgelieferte Befestigungsma-
terial für die Wand geeignet ist, im
Fachhandel beraten lassen.
■Die Wandhalterung an eine sichere
und feste Stelle hängen.
■Vor dem Bohren sicherstellen, dass
hinter der beabsichtigten Bohrstelle
keine Rohre oder Leitungen verlaufen.
1. Die Wandhalterung (G) an die Wand
anlegen und zwei Bohrlöcher (oben
und unten) markieren.
2. Löcher in die Wand bohren und mit
Dübeln versehen.
3. Die Wandhalterung an die Wand
schrauben.
ZUBEHÖR
Die Bodendüse(F) ist sowohl für Teppi-
che als auch für glatte Böden geeignet.
Mit dem Fußschalter kann zwischen Tep-
pich und glattem Boden umgeschaltet
werden. Für glatte Böden wird auf der
Unterseite der Bodendüse eine Bürste
ausgeklappt. Die Bodendüse kann nur
mit dem Verlängerungsrohr (D) verwen-
det werden.
Die Kombidüse (B) vereint kleine Fugen-
und Bürstendüse. Die Entriegelungstaste
auf dem Bürstenaufsatz drücken und
diesen gleichzeitig nach oben schieben,
um aus der Fugendüse eine Bürstendüse
zu machen (BildC). Der Bürstenaufsatz
muss hörbar einrasten:
○Die Fugendüse ist für Polsterungen,
die Innenreinigung von PKWs und
alle Ecken und Winkel geeignet.
○Die Bürstendüse dient zum Saugen
von Polstern und Textilien und zum
Entstauben von empfindlichen Ge-
genständen wie Bilderrahmen, Lam-
penschirmen, Tastaturen, Büchern etc.
Die Fugendüse(A) eignet sich für
schwer erreichbare Stellen, wie Ecken,
Fugen oder Nischen. Polsterungen und
alle Ecken und Winkel, die mit anderen
Düsen nicht erreicht werden können. Die
Fugendüse kann nur mit der Motorein-
heit (C) verwendet werden.
Das Verlängerungsrohr(D) ist zusammen
mit der Bodendüse (F) für die Boden-
reinigung bestimmt (BildD). Darüber
hinaus sorgt es für bessere Erreichbarkeit
von Decken und Ecken.
Der Düsenadapter (E) wird zum Anbrin-
gen der Kombidüse (B) am Verlänge-
rungsrohr (D) benötigt.
Die Wandhalterung (G) ist zum platzspa-
renden Verstauen des Gerätes geeignet.

Kabelloser Hand- und Bodenstaubsauger DE
7
BENUTZUNG
Beachten!
■Vergewissern, dass auf der zu reini-
genden Fläche keine größeren,
scharfen Gegenstände liegen.
■Die MAX-Markierung des Staubbe-
hälters beachten. Sollte während der
Benutzung die Markierung erreicht sein,
den Staubbehälter leeren. Den Staub-
behälter nach jedem Gebrauch leeren
und säubern. Auch die Filter müssen
regelmäßig gereinigt werden, um eine
Überlastung des Motors zu vermeiden.
■Das Gerät nach jeder gereinigten
Fläche abschalten, damit erhöht sich
die Betriebszeit pro Akkuladung.
Das Gerät lässt sich nicht in
Betrieb nehmen, wenn es an das
Stromnetz angeschlossen ist. Vor
dem Gebrauch die Anschlusslei-
tung(H) abnehmen.
1. Eine Düse auswählen (siehe Kapitel
„Zubehör“) und in die Saugöff-
nung(11) stecken. Sie muss hörbar
einrasten. Für eine längere Reichwei-
te das Verlängerungsrohr(D) dazwi-
schen stecken.
Um eine Düse oder das Verlänge-
rungsrohr wieder herauszuziehen, die
Entriegelungstaste (12) drücken.
2. Das Gerät einschalten und die Düse
über die zu reinigende Stelle führen.
Zum Einschalten auf SaugstufeI
denEin-/Aus-Schalter(3) einmal
drücken. Durch erneutes Drücken wird
die Saugleistung auf Stufe2 erhöht.
3. Um das Gerät auszuschalten,
denEin- /Aus-Schalter ein drittes Mal
drücken.
Für eine optimale Leistung des
Gerätes den Staubbehälter nach
jeder Benutzung leeren und ggf.
reinigen (siehe nächstes Kapitel).
REINIGUNG UND
AUFBEWAHRUNG
Beachten!
■Zum Reinigen keine scharfen oder
scheuernden Reinigungsmittel ver-
wenden. Sie können die Oberflächen
beschädigen.
Mit der Zeit können sich die Filter
verfärben. Dies ist normal und
beeinträchtigt nicht die Funktio-
nalität.
Staubbehälter leeren
1. Den Staubbehälter(9) ggf. von der
Motoreinheit (C) abnehmen (siehe
folgender Abschnitt) und über einen
geöffneten Mülleimer halten und die
Lasche (7) leicht nach vorne ziehen.
Die Staubbehälterklappe(6) öffnet
sich und der Schmutz fällt heraus
(Bild F).
2. Zum Verschließen die Staubbehäl-
terklappe an den Staubbehälter
drücken. Sie muss hörbar einrasten.
Staubbehälter, Metallfilter und EPA-
Filter reinigen
1. Den Staubbehälter abnehmen, indem
die Entriegelungstaste (13) gedrückt
und der Staubbehälter gleichzeitig im
Uhrzeigersinn gedreht wird.
2. In den Staubbehälter hineingreifen
und den Sockel des EPA-Filters(8) ein
Stück drehen, bis er sich vom Gerät
löst.
3. EPA- und Metallfilter (10) aus dem
Staubbehälter nehmen.
Der Metallfilter sitzt über dem EPA-
Filterund kann einfach abgezogen
werden.
4. Beide Filter ausklopfen und ggf.
mit einer weichen Bürste säubern.
Sie können auch mit klarem Wasser

DE
8
ausgespült werden, müssen aber vor
dem Zusammensetzen vollständig
trocken sein!
5. Den Staubbehälter bei Bedarf feucht
auswischen und abtrocknen oder
an der Luft trocknen lassen. Niemals
nasse oder feuchte Komponenten
zusammenbauen und an der Motor-
einheit(C) anbringen!
6. Wenn alle Komponenten trocken
sind, den Metallfilter über den EPA-
Filter stülpen.
7. Die Filter in den Staubbehälter ein-
setzen und im Uhrzeigersinn festdre-
hen.
8. Den Staubbehälter schließen.
Motoreinheit, Verlängerungsrohr
und Düsen reinigen
• Die Motoreinheit(C), das Verlänge-
rungsrohr(D) und die Düsen(A, B, F)
bei Bedarf mit einem feuchten Tuch
abwischen. Anschließend trocken-
wischen.
• Haare und Fussel von den Düsen und
Bürsten entfernen.
Aufbewahrung
• Das Gerät und Zubehör an einem
kühlen, trockenen, vor direkter Son-
neneinstrahlung geschütztem Ort
und außerhalb der Reichweite von
Kindern und Tieren aufbewahren.
• Die Motoreinheit(C) mit der Saugöff-
nung(11) nach unten in die Wandhal-
terung(G) einhängen (Bild E).
Um eine Tiefenentladung des
Akkus zu vermeiden, diesen bei
längerem Nichtgebrauch alle
3Monate aufladen.
FEHLERBEHEBUNG
Sollte das Gerät nicht ordnungsgemäß
funktionieren, überprüfen, ob ein Prob-
lem selbst behoben werden kann. Lässt
sich mit den nachfolgenden Schritten
das Problem nicht lösen, den Kundenser-
vice kontaktieren.
Nicht versuchen, ein elektrisches
Gerät selbst zu reparieren!
Das Gerät startet nicht.
Der Akku(2) ist leer.
►Den Akku aufladen.
Das Gerät ist an das Stromnetz ange-
schlossen.
►Die Anschlussleitung(H) abnehmen.
Die Saugleistung ist zu schwach.
Der Akku(2) ist schwach.
►Den Akku aufladen.
Der Staubbehälter (9) ist zu voll.
►Den Staubbehälter leeren.
Die Filter sind verschmutzt.
►Die Filter reinigen.
Die Saugöffnung(11), die Düse(A, B,
F) oder das Verlängerungsrohr(D) ist
verstopft.
►Das Gerät ausschalten und die Ver-
stopfung entfernen.
Die Schmutzpartikel sind zu groß oder zu
schwer.
►Das Gerät ausschalten und Schmutz-
partikel mit der Hand entfernen.
Beim Saugen entweicht Staub aus
dem Gerät.
Der Staubbehälter(9) ist nicht richtig
geschlossen.
►Die Staubbehälterklappe(6) schlie-
ßen, bis sie hörbar einrastet.
Die Filter sitzen nicht korrekt.
►Den Sitz der Filter korrigieren.

Kabelloser Hand- und Bodenstaubsauger DE
9
Die Filter sind verschmutzt.
►Die Filter reinigen.
Die Filter sind verschlissen oder beschä-
digt.
►Die Filter ersetzen.
Die Ladekontrollleuchten(1) blinken
nicht, wenn das Gerät an das Strom-
netz angeschlossen ist.
Der Netzteil steckt nicht richtig in der
Steckdose bzw. der Hohlstecker steckt
nicht richtig in der Ladebuchse(5) des
Gerätes.
►Den Sitz korrigieren.
Die Steckdose ist defekt.
►Eine andere Steckdose probieren.
Seltsamer Geruch
Das Gerät wird zum ersten Mal verwen-
det.
►Beim ersten Gebrauch des Geräts ist
ein Neugeruch normal, mit der Zeit
verschwindet er.
ENTSORGUNG
Das Verpackungsmaterial um-
weltgerecht entsorgen und der
Wertstoffsammlung zuführen.
Akku vor der Entsorgung des
Gerätes entnehmen und getrennt
vom Gerät an entsprechenden
Sammelstellen entsorgen.
Dieses Gerät unterliegt der euro-
päischen Richtlinie 2012/19/EU für
Elektro- und Elektronik-Altgeräte
(WEEE). Das Gerät nicht über den
normalen Hausmüll, sondern um-
weltgerecht über einen behördlich
zugelassenen Entsorgungsbetrieb
entsorgen.
Akku ausbauen
Beachten!
■Das Gerät darf beim Entnehmen/ Ein-
setzen des Akkus nicht an das Strom-
netz angeschlossen sein.
■Der Akku darf nicht auseinander
genommen, ins Feuer geworfen, in
Flüssigkeiten getaucht oder kurzge-
schlossen werden.
■Den Akku auf keinen Fall öffnen!
Um den Akku aus dem Gerät zu entneh-
men, wie folgt vorgehen:
1. Den Staubbehälter (9) entnehmen
und die Motoreinheit (C) auf den
Kopf drehen.
2. Die vier Schrauben auf der Unterseite
des Akkufaches mit einem Schrau-
bendreher lösen (BildG).
3. Den oberen Gehäuseteil abnehmen.
4. Die Schrauben am Akkupack mit
einem Schraubendreher lösen (Bild
H + I).
5. Das Akkupack herausnehmen (BildJ).
6. Die Steckverbindung an der Motor-
einheit lösen (BildK).
7. Die beiden verbleibenden, fest verlö-
teten Kabel an der Motoreinheit mit
einer Zange durchtrennen (BildL).
8. Das Akkupack entsprechend der
gesetzlichen Regelung zur Batterie-
entsorgung entsorgen.

DE
10
TECHNISCHE DATEN
Artikelnummer: 01839
ID Gebrauchsanleitung: Z 01839 M DS V1 0321 uh
Gerät
Modellnummer:
MJ1901
Spannungsversorgung: 22,2V DC (Li-Ion Akkupack; 2000mAh)
Leistung: 120 W max.
Akku-Ladedauer: 4 – 5 Stunden
Akku-Betriebsdauer: ca. 20 – 35 Minuten (bei voll aufgeladenem Akku)
Netzteil
Hergestellt für DS Produkte GmbH
HRB 8937 HL
Am Heisterbusch 1, 19258 Gallin
Deutschland
Modellnummer: YNQX12G270050VL
Eingang: 100 – 240V~ 50/60 Hz
Ausgang: 27V DC; 0,5A
Schutzklasse: II
Alle Rechte vorbehalten.

Cordless Handheld and Floor Vacuum Cleaner EN
11
LIST OF CONTENTS
Symbols 11
Signal Words 11
Items Supplied 12
At A Glance 12
Intended Use 12
Safety Notices 13
Charging Up the Battery 15
Attaching the Wall Mounting Bracket 16
Accessories 16
Use 16
Cleaning and Storage 17
Troubleshooting 18
Disposal 18
Technical Data 19
SYMBOLS
Danger symbols: These symbols
indicate possible dangers. Read
the associated safety notices
carefully and follow them.
Supplementary information
Read the operating instructions
before use!
Alternating current
Direct current
Energy efficiency class VI
Only use indoors!
Protection class II
Polarity of the barrel connector
SSwitching power supply
Safe electrical isolation
SIGNAL WORDS
Signal words indicate hazards if the asso-
ciated notices are not followed.
DANGER – high risk, results in serious
injury or death
WARNING – medium risk, may result in
serious injury or death
CAUTION – low risk, may result in minor
or moderate injury
NOTICE – may result in risk of damage to
material
IMPORTANT NOTICES!
PLEASE KEEP FOR REFERENCE!

EN
12
ITEMS SUPPLIED
(Picture A)
A Crevice nozzle 1 x
B Combi nozzle 1 x
C Motor unit with battery 1 x
D Extension tube 1 x
E Nozzle adapter 1 x
F Floor nozzle 1 x
G Wall mounting bracket (incl. fixings)
H Connecting cable (mains adapter with
cable and barrel connector) (1 x)
• Dust container (inserted in the motor
unit)
• Metal filter (in the dust container)
• EPA filter (in the dust container)
• Operating instructions (not shown)
Check the items supplied for complete-
ness and the components for transport
damage. If you find any damage, do not
use the device but contact our customer
service department.
Remove any possible films, stickers or
transport protection from the device.
Never remove the rating plate and any
possible warnings!
AT A GLANCE
(Picture B)
1 Charge control lamps
2 Battery (in the housing)
3 On/Off switch (2 suction levels)
4 Handle
5 Charging socket
6 Dust container flap
7 Tab for opening the dust container
flap
8 EPA filter
9 Dust container
10 Metal filter
11 Suction opening
12 Release button for nozzle
13 Release button for the dust container
INTENDED USE
■This device is designed for vacuum
cleaning normal household dust.
On no account should the device
be used to suck up the following:
○liquids or wet substances (e.g.
wet carpet shampoo)
○glowing ash, cigarette ends,
matches, etc.
○inflammable or explosive
substances
○very fine dust (e.g. concrete
dust), ash or toner
○pointed, hard objects such as
large pieces of broken glass
■The device is for personal use only
and is not intended for commercial
applications.
■The device should only be used as
described in the operating instruc-
tions. Any other use is deemed to be
improper.
■The warranty does not cover faults
caused by incorrect handling, damage
or attempted repairs. The same ap-
plies to normal wear and tear.

Cordless Handheld and Floor Vacuum Cleaner EN
13
Dear Customer,
We are delighted that you have chosen the MAXXMEE cordless handheld and floor
vacuum cleaner. This little powerhouse can be used both as a handheld and as a floor
vacuum cleaner and scores points for its handling, flexibility and suction force. With
the stable, adjustable telescopic tube, you can simply assemble it to suit your needs.
You can use it to free keyboards, furniture, car seats, carpets, stairs and more of dust
and dirt and you can even remove spiders’ webs from the ceiling. The suction force
can easily be regulated on two levels and thus adjusted to your needs.
If you have any questions about the device and about spare parts/accessories, contact
the customer service department via our website: www.dspro.de/kundenservice
We hope you have a lot of fun with your
MAXXMEE cordless handheld and floor vacuum cleaner.
Information About the Operating Instructions
Before using the device for the first time, please read through these operating in-
structions carefully and keep them for future reference and other users. They form an
integral part of the device. The manufacturer and importer do not accept any liability if
the information in these operating instructions is not complied with.
SAFETY NOTICES
WARNING: Note all safety notices, instructions, illus-
trations and technical data provided with this device.
Failure to follow the safety notices and instructions may
result in electric shock, fire and / or injuries.
■This device may be used by children aged 8 and over and by
people with reduced physical, sensory or mental abilities or a
lack of experience and/or knowledge if they are supervised or
have received instruction on how to use the device safely and
have understood the dangers resulting from failure to comply
with the relevant safety precautions.
■Children must not play with the device.
■Cleaning and user maintenance must not be carried out by
children, unless they are older than 8 years of age and are
supervised.
■Children younger than 8 years of age and animals must be
kept away from the device and the connecting cable.
■The device must always be switched off or disconnected from
the mains power when it is left unattended and before it is
assembled, disassembled or cleaned.

EN
14
■Only ever charge up the rechargeable battery using the
mains adapter supplied with the device. Do not use the mains
adapter that is supplied to charge up any other devices.
■In the interest of your own safety, inspect the device for dam-
age each time before you use it. Only use the device if it is not
damaged! If the device or the connecting cable are damaged,
they must be replaced or repaired by the manufacturer, cus-
tomer service department or a similarly qualified person (e.g.
specialist workshop) in order to avoid any hazards.
DANGER – Danger of Electric
Shock!
■Charge and store the device only in
closed rooms.
■Do not use the device in rooms with
high humidity.
■Never immerse the device and the
connecting cable in water or other
liquids and ensure that they cannot
fall into water or become wet.
■If the device falls into water while it is
connected to the mains power, switch
off the power supply immediately.
Only after this should you pull the
device out of the water!
■Never touch the device and the con-
necting cable with wet hands when
these components are connected to
the mains power.
■Never suck up liquids. Do not pour
any liquids into the dust container.
Keep the motor unit away from mois-
ture or wet conditions!
WARNING – Danger of Injury!
■Keep children and animals away from
the packaging material. There is a
danger of suffocation!
■Make sure that the connecting cable
is always kept out of the reach of
small children and animals. There is a
danger of strangulation!
■Keep animals, hair, jewellery, wide
clothing, fingers and all other body
parts away from the nozzles of the
device. They could become stuck.
Should the vacuum cleaner become
stuck, switch the device off immedi-
ately.
■Make sure that the connecting cable
does not present a trip hazard.
WARNING – Danger from
Rechargeable Batteries!
■The battery must not be taken apart,
thrown into a fire, exposed to high
temperatures of over +40°C, im-
mersed in liquids or short-circuited.
The battery could ignite or explode.
■If the battery leaks, do not allow your
skin, eyes and mucous membranes
to come into contact with the battery
acid. If you do touch battery acid,
rinse the affected areas with abundant
clear water straight away and seek
medical assistance immediately. There
is a danger of burns from battery acid!
■Ensure that the motor unit and the
battery cannot get wet. Do not use
the device if liquid has got inside it.
The battery could ignite or explode.
■Do not cover the device and the
mains adapter during charging in
order to prevent it from catching
fire. Do not insert anything into the
ventilation openings of the device and

Cordless Handheld and Floor Vacuum Cleaner EN
15
make sure that they do not become
clogged.
NOTICE – Risk of Damage to
Material and Property
■Make sure that the connecting cable
is not squashed, bent or laid over
sharp edges and does not come into
contact with hot surfaces.
■Do not wind the mains cable around
the mains adapter.
■The device should only be used if it
has been fully and correctly assem-
bled! The dust container and the
filters must be inserted and must
not be damaged! If the dirt were to
get inside the motor unit, this could
damage the motor.
■The device must be switched off when
the mains adapter is pulled out or
inserted into the plug socket. Always
pull the mains adapter and never the
mains cable to disconnect the device
from the mains power!
■Never pull or carry the device by the
connecting cable.
■Do not place heavy objects on the
device or connecting cable.
■Protect the device from heat, naked
flames, extreme temperatures, persis-
tent moisture and impacts.
■Use only original accessories from the
manufacturer in order to guarantee
that there is no interference that may
prevent the device from working and
to avoid possible damage. The LEDs
cannot be replaced.
CHARGING UP THE
BATTERY
Please Note!
■Charge up the battery fully before
you first use the device in order
to achieve the maximum charging
capacity. If the battery is discharged
during use, it should be fully charged
up again before it is next used.
■Only connect the mains adapter to a
plug socket that is properly installed
and matches its technical data. The
plug socket must be readily accessible
after connection so that the con-
nection to the mains can quickly be
isolated.
■Only use suitable extension cables
whose technical data is the same as
that of the mains adapter.
■Pull the mains adapter out of the plug
socket if an error occurs during charg-
ing or before a thunderstorm.
1. Plug the barrel connector of the
connecting cable(H) into the charging
socket(5).
2. Connect the mains adapter to a plug
socket.
The charge control lamps(1) start to
flash and the batteryis charging.
If all charge control lamps are con-
stantly lit, the battery is fully charged.
3. First disconnect the mains adapt-
er from the mains power and then
disconnect the barrel connector from
the device.

EN
16
ATTACHING THE WALL
MOUNTING BRACKET
Please Note!
■Use the fixings which are also sup-
plied to hang up the wall mounting
bracket. If you are unsure whether
the fixings supplied are suitable for
the wall, seek advice from a specialist
retailer.
■Hang the wall mounting bracket in a
secure and fixed position.
■Before drilling, ensure that there are
no pipes or cables behind the intend-
ed drilling point.
1. Place the wall mounting bracket (G)
against the wall and mark out two drill
holes (at the top and bottom).
2. Drill holes into the wall and place
anchors in them.
3. Screw the wall mounting bracket onto
the wall.
ACCESSORIES
The floor nozzle (F) is suitable for both
carpets and hard floors.
The foot switch allows you to change be-
tween carpet and hard floor. For hard floors,
a brush is extended on the underside of the
floor nozzle. The floor nozzle can only be
used with the extension tube(D).
The combi nozzle (B) is a combination of
a small crevice nozzle and brush nozzle.
Press the release button on the brush
attachment and slide it upwards at the
same time to turn the crevice nozzle into a
brush nozzle (PictureC). The brush attach-
ment must be heard to engage in place:
○The crevice nozzle is suitable for up-
holstery, cleaning the inside of cars
and for all nooks and crannies.
○The brush nozzle is used for vacuum-
ing upholstery and textiles and for
removing dust from delicate objects
such as picture frames, lamp shades,
keyboards, books etc.
The crevice nozzle (A) is suitable for places
which are hard to get to, such as corners,
crevices or recesses. Upholstery and all
nooks and crannies that cannot be reached
with other nozzles. The crevice nozzle can
only be used with the motor unit (C).
The extension tube(D) is intended to be
used with the floor nozzle (F) for cleaning
floors (PictureD). In addition, it makes it
easier to reach ceilings and corners.
The nozzle adapter (E) is required to at-
tach the combi nozzle (B) to the extension
tube (D).
The wall mounting bracket (G) is suitable
for storing the device in a space-saving
manner.
USE
Please Note!
■Make sure that there are no large,
sharp objects on the surface which is
to be cleaned.
■Note the MAX marking of the dust
container. If the marking is reached
during use, empty the dust container.
Empty and clean the dust container
after every use. The filters must also
be regularly cleaned in order to pre-
vent overloading of the motor.
■Switch off the device after you finish
cleaning each surface to increase the
operating time on each battery charge.
The device cannot be operated
when it is connected to the mains
power. Disconnect the connecting
cable(H) prior to use.
1. Select a nozzle (see the “Accesso-
ries” chapter) and plug it into the
suction opening(11). You must hear it
engage. For a longer reach, plug the
extension tube(D) in between.

Cordless Handheld and Floor Vacuum Cleaner EN
17
To pull a nozzle or the extension tube
out again, press the release button(12).
2. Switch on the device and guide the
nozzle over the area to be cleaned. To
switch on at suction levelI, press the
On/Off switch (3) once. If it is pressed
again, the suction power increases to
level 2.
3. To switch off the device, press the
On/Off switch a third time.
To ensure optimum performance
of the device, empty and if neces-
sary clean the dust container after
every use (see next chapter).
CLEANING AND STORAGE
Please Note!
■Do not use any sharp or abrasive
cleaning agents to clean the device.
They may damage the surfaces.
The filters may lose some of their
colour over time. This is normal
and does not have any adverse
effect on function.
Emptying the Dust Container
1. If necessary, remove the dust con-
tainer(9) from the motor unit (C) (see
the following section) and hold it over
an open dustbin and pull the tab (7)
gently forwards. The dust container
flap(6) opens and the dirt drops out
(Picture F).
2. To close it, press the dust container
flaponto the dust container. You must
hear it engage.
Cleaning the Dust Container, Metal
Filter and EPA Filter
1. Remove the dust container by
pressing the release button (13) and
twisting the dust container clockwise
at the same time.
2. Reach into the dust container and twist
the bottom of the EPA filter(8) a little
until it is detached from the device.
3. Remove the EPA filter and metal filter
(10) from the dust container.
The metal filter sits above the EPA
filterand can simply be pulled off.
4. Tap out both filters and clean them
with a soft brush if necessary. They
can also be rinsed out with clear wa-
ter, but they must be completely dry
before they are assembled!
5. Wipe the dust container with a damp
cloth if necessary and then dry it or
allow it to dry in the air. Never as-
semble wet or damp components or
attach them to the motor unit (C)!
6. Once all components are dry, pull the
metal filter over the EPA filter.
7. Insert the filters into the dust contain-
er and twist them clockwise to secure
them.
8. Close the dust container.
Cleaning the Motor Unit, Extension
Tube and Nozzles
• Wipe down the motor unit(C), the
extension tube(D) and the nozzles(A,
B, F) with a damp cloth if necessary.
Then wipe them dry.
• Remove hair and fluff from the nozzles
and brushes.
Storage
• Store the device and accessories in
a cool, dry place which is protected
from direct sunlight and is out of the
reach of children and animals.
• Hang the motor unit(C) with the suc-
tion opening(11) facing downwards
into the wall mounting bracket(G)
(Picture E).
To prevent a deep discharge of
the battery, charge it up every
3 months if it is not used for a
prolonged period.

EN
18
TROUBLESHOOTING
If the device does not work properly,
check whether you are able to rectify the
problem yourself. If the problem cannot
be solved with the steps below, contact
the customer service department.
Do not attempt to repair an elec-
trical device yourself!
The device does not start.
The battery(2) is empty.
►Charge up the battery.
The device is connected to the mains
power.
►Disconnect the connecting cable(H).
Low suction force.
The battery(2) is weak.
►Charge up the battery.
The dust container (9) is too full.
►Empty the dust container.
The filters are dirty.
►Clean the filters.
The suction opening(11), the nozzle(A,
B, F) or the extension tube(D) is blocked.
►Switch off the device and remove the
blockage.
The dirt particles are too large or too
heavy.
►Switch off the device and remove dirt
particles by hand.
Dust escapes from the device during
cleaning.
The dust container(9) is not closed cor-
rectly.
►Close the dust container flap(6) until
it is heard to engage.
The filters are not fitted correctly.
►Correct the fit of the filters.
The filters are dirty.
►Clean the filters.
The filters are worn or damaged.
►Replace the filters.
The charge control lamps (1) do not
flash when the device is connected
to the mains power.
The mains adapter is not inserted in
the plug socket correctly or the barrel
connector is not inserted in the charging
socket(5) of the device correctly.
►Correct the fit.
The plug socket is defective.
►Try another plug socket.
Unusual odour
The device is being used for the first
time.
►A new odour is normal when the
device is used for the first time; it
disappears after a while.
DISPOSAL
Dispose of the packaging material
in an environmentally friendly
manner so that it can be recycled.
Remove the battery before the
device is disposed of and dispose
of it separately from the device at
suitable collection points.
This device is governed by the
European Directive 2012/19/EU
on waste electrical and electron-
ic equipment (WEEE). Do not
dispose of the device as normal
domestic waste, but rather in an
environmentally friendly manner
via an officially approved waste
disposal company.

Cordless Handheld and Floor Vacuum Cleaner EN
19
Removing the Battery
Please Note!
■The device must not be connected to
the mains power while the battery is
being removed / inserted.
■The battery must not be taken apart,
thrown into a fire, immersed in liquids
or short-circuited.
■You should never open the battery!
To remove the battery from the device,
proceed as follows:
1. Remove the dust container (9) and
turn the motor unit (C) upside down.
2. Undo the four screws on the bottom
of the battery compartment with a
screwdriver (PictureG).
3. Remove the top part of the housing.
4. Undo the screws on the battery pack
with a screwdriver (Picture H + I).
5. Take out the battery pack (PictureJ).
6. Release the plug connection on the
motor unit (PictureK).
7. Sever the two remaining, soldered
cables on the motor unit with pliers
(PictureL).
8. Dispose of the battery pack in accord-
ance with the statutory regulations
governing the disposal of batteries.
TECHNICAL DATA
Article number: 01839
ID of operating instructions: Z 01839 M DS V1 0321 uh
Device
Model number:
MJ1901
Voltage supply: 22.2V DC (Li-ion battery pack; 2000mAh)
Power: 120 W max.
Battery charge time: 4 – 5 hours
Battery operating time: approx. 20 – 35 minutes (with fully charged battery)
Mains adapter
Manufactured for DS Produkte GmbH
HRB 8937 HL
Am Heisterbusch 1, 19258 Gallin
Germany
Model number: YNQX12G270050VL
Input: 100 – 240V~ 50/60Hz
Output: 27V DC; 0.5A
Protection class: II
All rights reserved.

FR
20
SOMMAIRE
Symboles 20
Mentions d’avertissement 20
Composition 21
Aperçu général 21
Utilisation conforme 21
Consignes de sécurité 22
Rechargement des accus 24
Installation du support mural 25
Accessoires 25
Utilisation 26
Nettoyage et rangement 26
Dépannage 27
Mise au rebut 28
Caractéristiques techniques 29
SYMBOLES
Symboles de danger: ces
symboles signalent des pos-
sibles dangers. Lire et observer
attentivement les consignes de
sécurité correspondantes.
Informations complémentaires
Consulter le mode d'emploi
avant utilisation!
Courant alternatif
Courant continu
Classe d'efficacité énergétique
VI
À utiliser uniquement à
l'intérieur de locaux!
Classe de protection II
Polarité de la fiche femelle
SBloc d'alimentation et de com-
mutation
Isolation électrique sûre
MENTIONS D’AVERTISSE-
MENT
Les mentions d’avertissement désignent
les risques qu’implique le non-respect
des consignes correspondantes.
DANGER– Risque accru induisant des
blessures graves, voire mortelles
AVERTISSEMENT– Risque moyen pou-
vant induire des blessures graves, voire
mortelles
ATTENTION– Risque faible pouvant
induire des blessures bénignes ou de
moyenne gravité
AVIS– Risque de dégâts matériels
AVIS IMPORTANTS!
À CONSERVER IMPÉRATIVEMENT!
This manual suits for next models
1
Table of contents
Languages:
Other MAXXMEE Vacuum Cleaner manuals

MAXXMEE
MAXXMEE 05487 User manual

MAXXMEE
MAXXMEE CBL-SV1606 User manual

MAXXMEE
MAXXMEE DZ006EHL090050V User manual

MAXXMEE
MAXXMEE HL-810B User manual

MAXXMEE
MAXXMEE 05878 User manual

MAXXMEE
MAXXMEE CBL-SV1606 User manual

MAXXMEE
MAXXMEE MC619P User manual

MAXXMEE
MAXXMEE YF131B User manual

MAXXMEE
MAXXMEE KB-816 User manual

MAXXMEE
MAXXMEE 04074 User manual