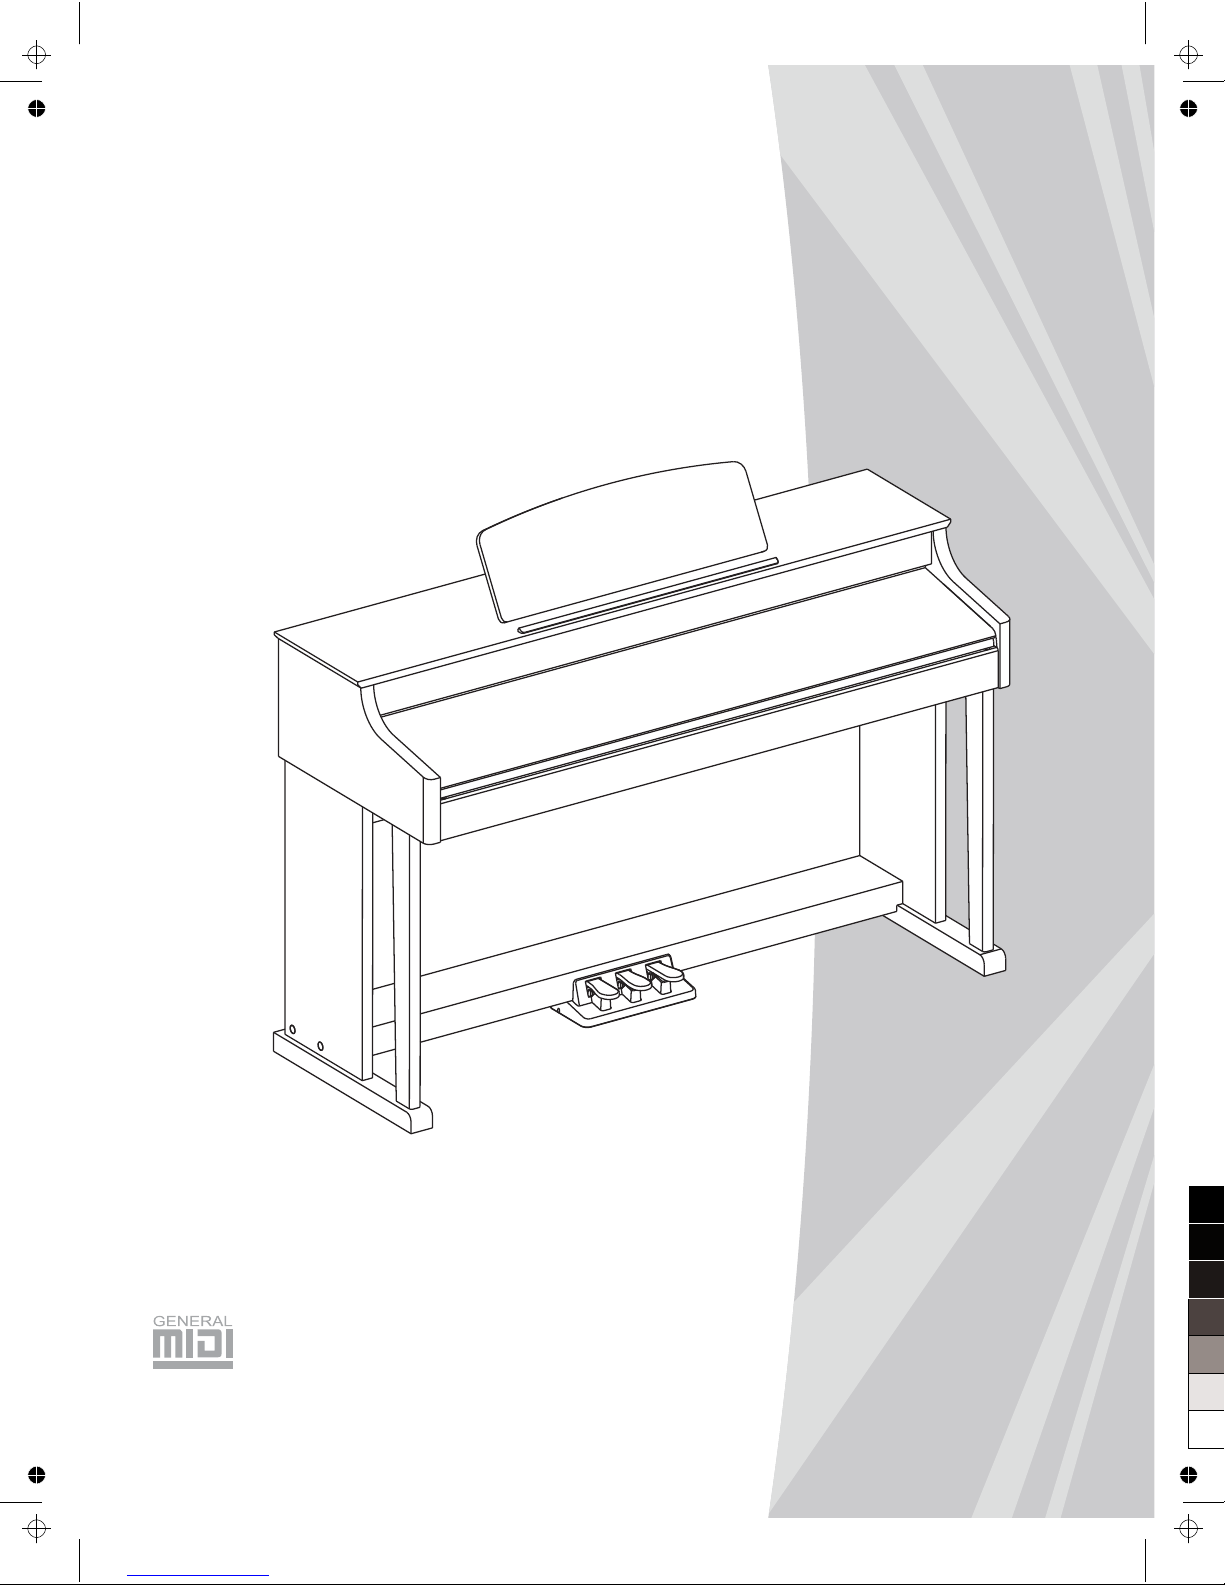
Medeli DP388 User manual

DIGITAL PIANO
Owner’s Manual
0
5
25
75
95
100
AW_DP388_Manual_G15_150405
201544 16:52:31

2
INFORMATION FOR YOUR SAFETY!
THE FCC REGULATION WARNING (for USA)
This equipment has been tested and found to comply with
the limits for a Class B digital device, pursuant to Part 15 of
the FCC Rules.
These limits are designed to provide reasonable protection
against harmful interference in a residential installation. This
equipment generates, uses, and can radiate radio frequency
energy and, if not installed and used in accordance with the
instructions, may cause harmful interference to radio
communications. However, there is no guarantee that
interference will not occur in a particular installation.
If this equipment does cause harmful interference to radio or
television reception, which can be determined by turning the
equipment off and on, the user is encouraged to try to
correct the interference by one or more of the following
measures:
Reorient or relocate the receiving antenna.
Increase the separation between the equipment and
receiver.
Connect the equipment into an outlet on a circuit
different from that to which the receiver is connected.
Consult the dealer or an experienced radio/TV technician
for help.
Unauthorized changes or modification to this system can
void the user's authority to operate this equipment.
CAUTION
The normal function of the product may be disturbed by
Strong Electro Magnetic Interference. If so, simply reset
the product to resume normal operation by following the
owner's manual. In case the function could not resume,
please use the product in other location.
PRECAUTIONS
PLEASE READ CAREFULLY BEFORE PROCEEDING
Please keep this manual in a safe place for future reference.
Power Supply
When removing the electric plug from an outlet, always hold
the plug itself and not the cord.
Do not connect the instrument to an electrical outlet using a
multiple-connector or an AC outlet of voltage other than that
for which your instrument is intended.
Remove the electric plug from the outlet when the
instrument is not to be used for extended periods of time, or
during electrical storms.
Connections
Before connecting the instrument to other devices, turn off
the power to all units. This will help prevent malfunction and
/ or damage to other devices.
Location
Do not expose the instrument to the following conditions to
avoid deformation, discoloration, or more serious damage:
Direct sunlight
Extreme temperature or humidity
Excessive dusty or dirty location
Strong vibrations or shocks
Close to magnetic fields
Interference with other electrical devices
Radios and televisions placed nearby may experience
reception interference. Operate this unit at a suitable
distance from radios and televisions.
Cleaning
Clean only with a soft, dry cloth.
Do not use paint thinners, solvents, cleaning fluids, or
chemical-impregnated wiping cloths.
Handling
Do not apply excessive force to the switches or controls.
Do not let paper, metallic, or other objects into the
instrument. If this happens, remove the electric plug from
the outlet. Then have the instrument inspected by qualified
service personnel.
Disconnect all cables before moving the instrument.
0
5
25
75
95
100
AW_DP388_Manual_G15_150405
201544 16:52:31

Contents
3
Panel & Display Description
Front Panel..................................................................4
LCD.............................................................................4
Rear Panel..................................................................5
Pedal...........................................................................5
Setup
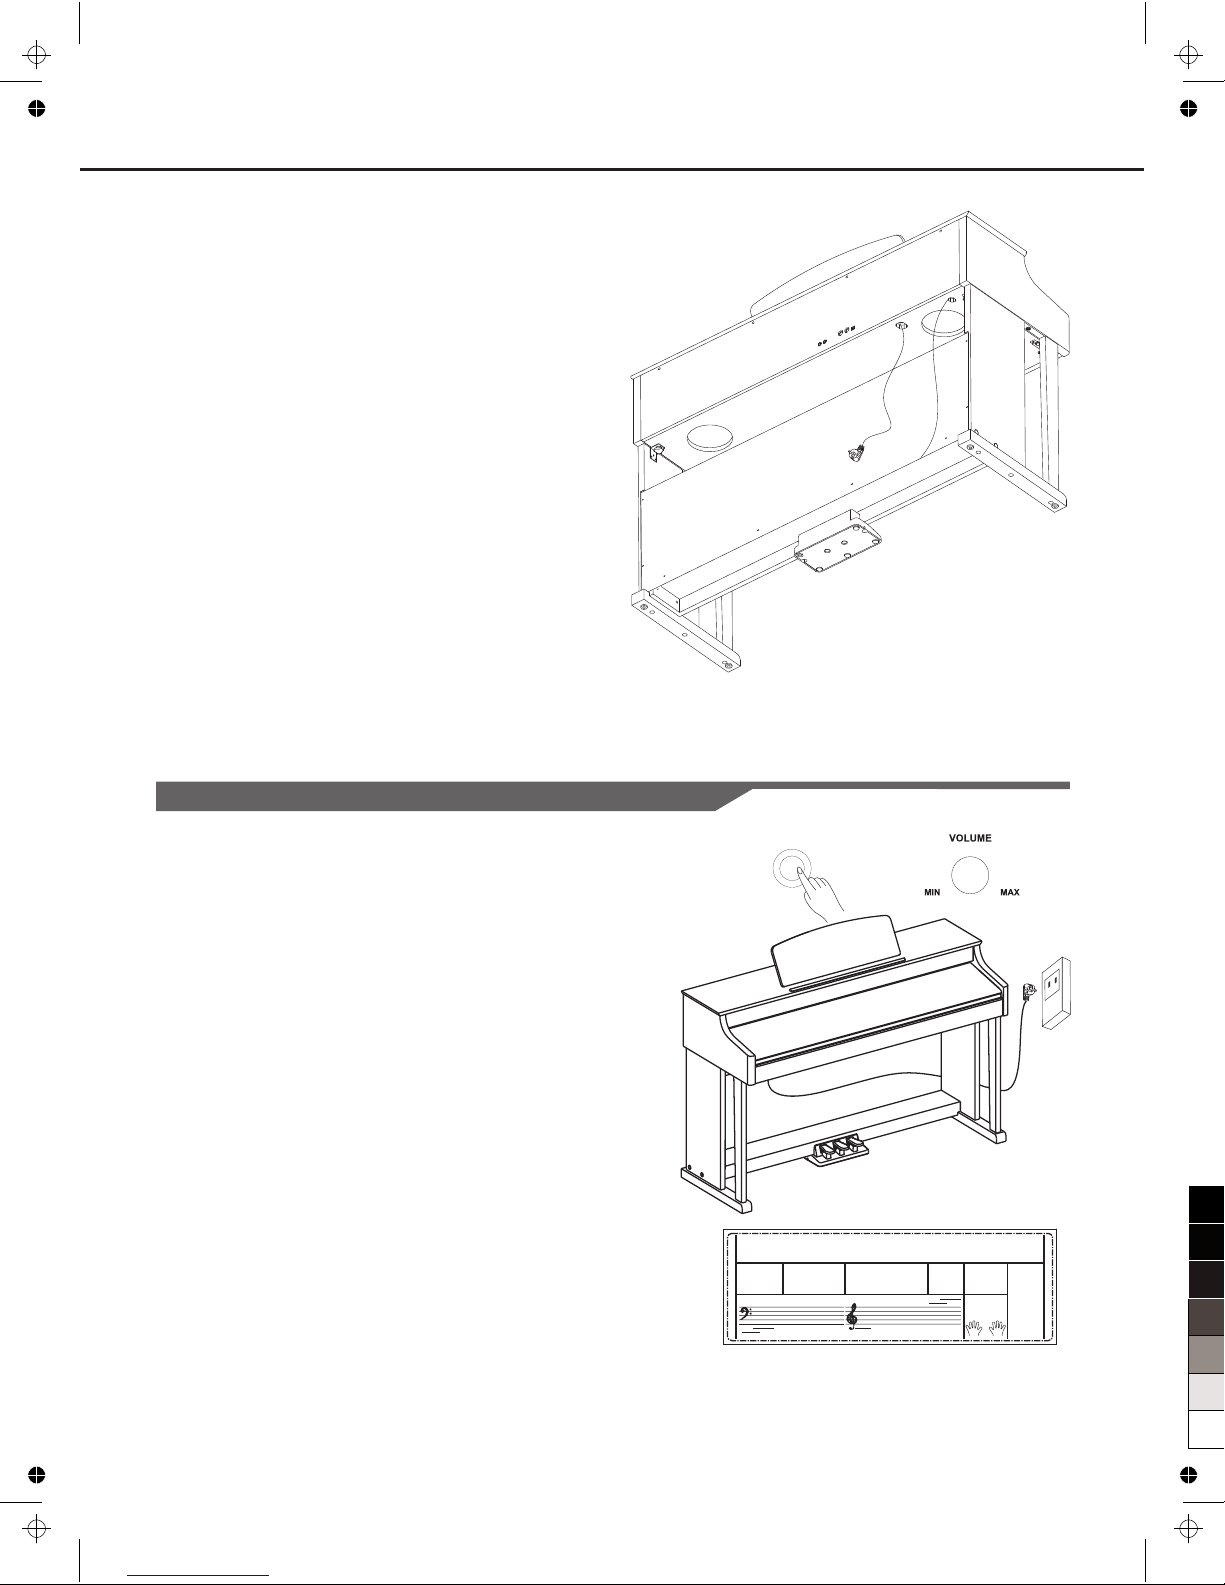
Setup Guide................................................................6
Power Supply..............................................................8
Connections
Connecting a pair of Headphones..............................9
Connecting an Audio Equipment.................................9
Connecting an MP3/CD Player...................................9
Connecting a Computer..............................................9
Connecting to Other Device........................................9
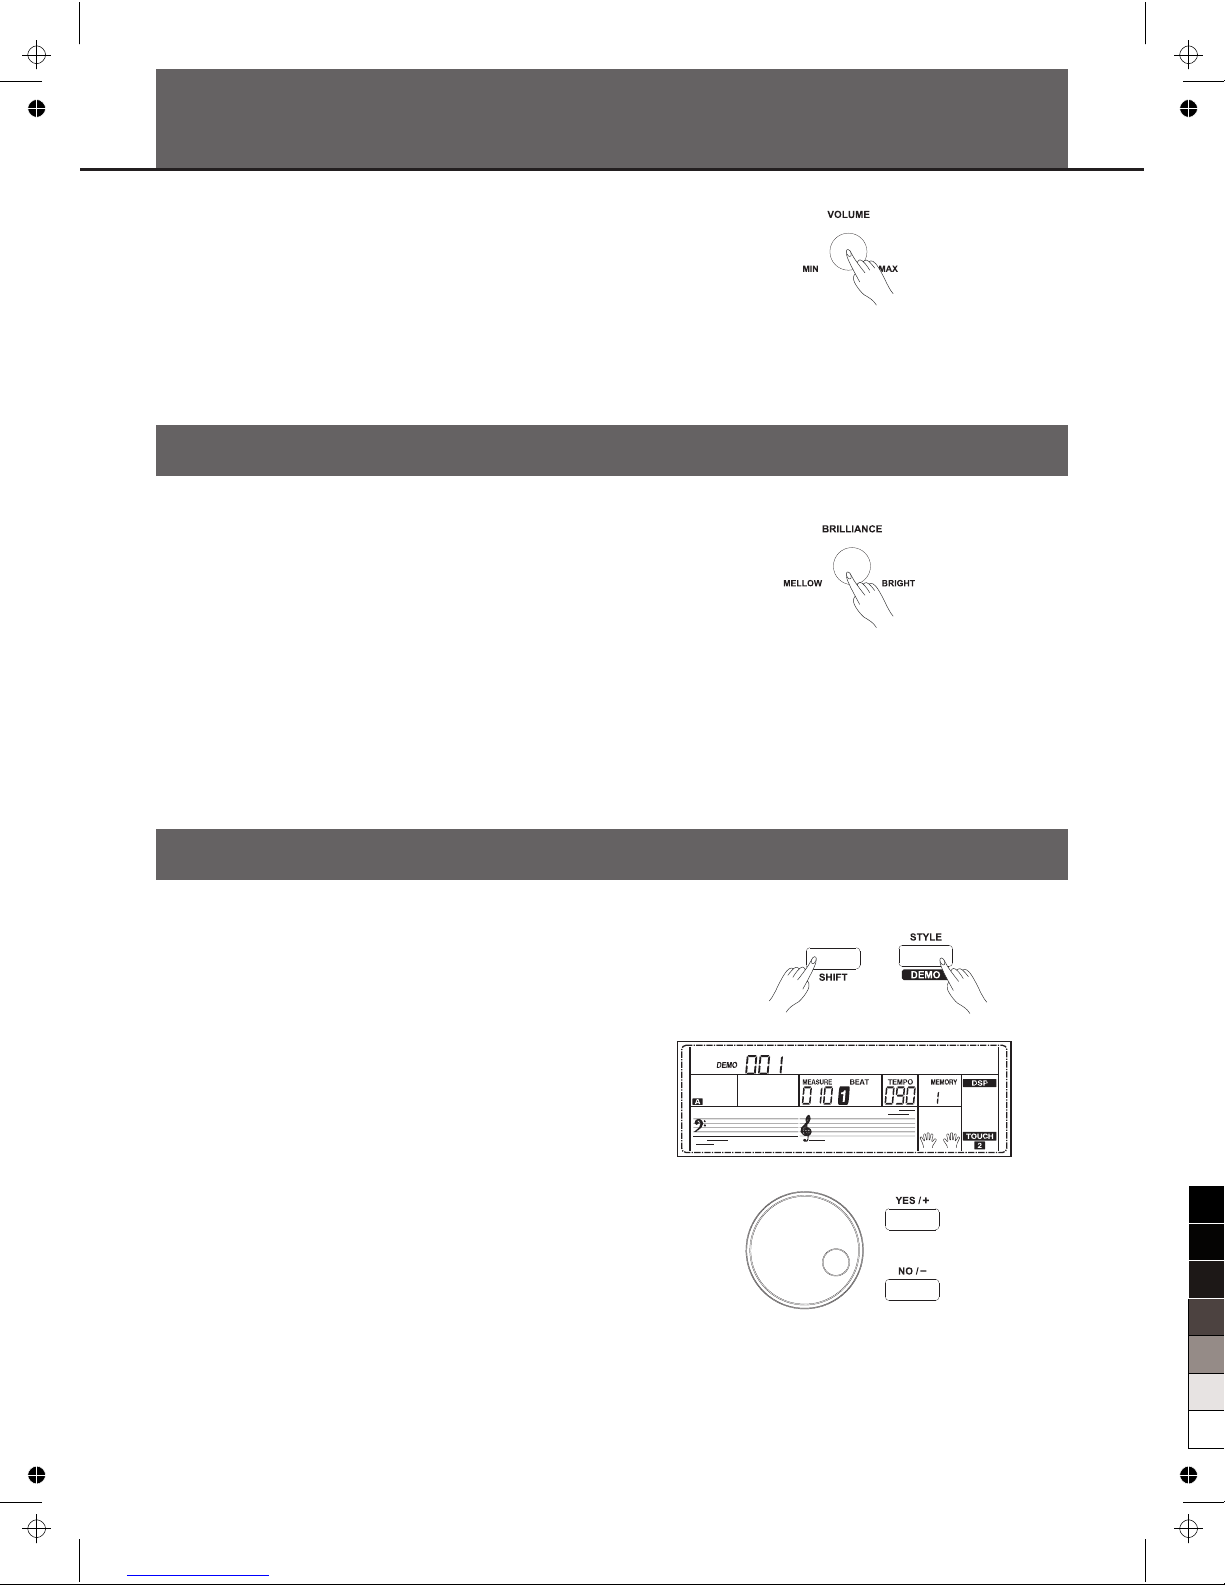
Adjusting the Master Volume.................................10
Adjusting the Voice Brilliance................................10
Playing the Demo Song..........................................10
Playing Voices
Playing Voices...........................................................11
Playing Two Voices Simultaneously-DUAL...............11
Playing Different Voices with Both Hands-LOWER...12
Touch.........................................................................12
Transpose.................................................................12
Piano Mode...............................................................13
Metronome................................................................13
Twinova.....................................................................14
Scale.........................................................................14
Auto Accompaniment
Play Auto Accompaniment(rhythm track only)..........15
Play Auto Accompaniment(all tracks)........................15
Accompaniment Sections.........................................16
Playing Different Accompaniment Sections..............16
Accompaniment Volume...........................................17
Chord Fingering........................................................17
Tempo.......................................................................18
One Touch Setting.....................................................18
Harmony
Harmony Switch........................................................19
Play with Harmony Effect..........................................19
Performance Assistant
What's the Performance Assistant?..........................20
Enter the Performance Assistant..............................20
Guitar Mode..............................................................20
Playing in Guitar Mode..............................................21
Piano Mode...............................................................21
Chinese Traditional Instruments Mode.....................22
Playing in Chinese Traditional Instruments Mode.....22
Exit the Performance Assistant.................................22
DSP Effect................................................................23
Mixer 23
Pedal Function........................................................23
Function Menu
Tune..........................................................................24
KeySplit.....................................................................25
Beat Type..................................................................25
Metro Volume............................................................25
Pedal Type................................................................25
Reverb Volume.........................................................26
Chorus Volume.........................................................26
Harmony Type...........................................................26
Harmony Speed........................................................27
MIDI IN......................................................................27
MIDI OUT..................................................................27
PowerOff...................................................................27
Performance Beat Type ............................................27
Restore Factory Setting..........................................28
Register Memory
Registering the Panel Setting...................................28
Recalling the Registered Panel Settings...................28
Selecting a Registration Bank...................................28
Accompaniment Freeze............................................29
Song Album.............................................................29
Song Recording......................................................29
Start Recording.........................................................30
Stop Recording.........................................................30
Playback Recording..................................................31
Delete User Song......................................................31
Song
Listen to the Songs...................................................32
Song Control.............................................................32
Lesson Mode............................................................32
Chord Dictionary.....................................................34
MIDI
What's MIDI?.............................................................35
Upload/Download Data from the Computer..............35
Troubleshooting......................................................36
Specifications..........................................................36
Appendices
Voice List...................................................................37
Style List....................................................................42
Song List...................................................................44
Album List.................................................................44
Chord List..................................................................46
MIDI Implementation Chart.......................................47
.........................................................................
0
5
25
75
95
100
AW_DP388_Manual_G15_150405
201544 16:52:31

Panel & Display Description
4
Front Panel
LCD
1. ACCOMP track
2. MELODY 1 track
3. MELODY 2 track
4. MELODY 3 track
5. MELODY 4 track
6. MELODY 5 track
7. Voice/Style/Demo/Song/Album
8. Number
9. A.B.C/Full range/Accompaniment
section
10. Chord
1
2
3
4
5
6
78
9
12
13
14
15 16 17
18
19
11
20
21
22
10 23
24
25
26
27
28
29
30
1
456 7 8 9
12 13 14 15 16 17
10
11 18
19 20
21
2
3
1. [VOLUME] knob
Adjust master volume
2. [BRILLIANCE] knob
Adjust voice brilliance
10. [SHIFT] button
Select the second function
of some buttons
16. [FILL C] button
A Fill-in C plays
17. [FILL D] button
A Fill-in D plays
18. [CHORD MODE] button
Choose chord mode
19. [L] button
Choose the left hand in lesson
mode
21. [LESSON] button
Enter lesson mode
SONG MODE:
11. [START/STOP] button
Start or stop playing the song
12. [PAUSE] button
Pause or continue playing the song
13. [REPEAT A/B] button
Set the beginning and ending
location of loop to the current song
14. [REW] button
Rewind the song
15. [FF] button
Fast forward the song
STYLE MODE
11. [START/STOP] button
Start or stop playing the style
12. [SYNC START] button
Turn the Sync Start on or off
13. [INTRO/ENDING] button
Play the Intro or Ending
14. [FILL A] button
A Fill-in A plays
15. [FILL B] button
A Fill-in B plays
When [SHIFT] button pressed
3. [ACCOMP] button
Adjust the ACCOMP volume
4. [RHYTHM] button
Adjust the RHYTHM volume
5. [BASS] button
Adjust BASS volume
6. [CHORD] button
Adjust CHORD volume
7. [LOWER] button
Adjust LOWER volume
8. [UPPER] button
Adjust UPPER volume
9. [FUNCTION+/-] button
Choose the function menu
20. [DICT.] button
Enter chord dictionary
When [SHIFT] button released
3~8. Style direct button
Shortcut to select a style
9. [TEMPO+/-] button
Adjust the tempo
20. [R] button
Choose the right hand in lesson mode
11. Bass note
12. Treble note
13. USB connection
14. Character
15. Measure
16. Beat
17. Tempo
18. Record
19. Memory/Freeze/O.T.S./Bank
20. Lesson/Left hand/Right hand
21. Twinova
22. Performance assistant
23. Performance assistant•high
24. Album
25. Harmony
26. Scale
27. DSP effect
28. Dual voice
29. Lower voice
30. Touch
ACCOMP
MELODY 1
MELODY 2
MELODY 3
MELODY 4
MELODY 5
TWINOVA
PERFORM
PREFORM.H
ALBUM
SCALE
0
5
25
75
95
100
AW_DP388_Manual_G15_150405
201544 16:52:32

Panel & Display Description
5
Rear Panel
49. AUX IN
Connect an external sound source, such as an Mp3 or
CD player.
50. AUX OUT
Connect the audio equipment
51. MIDI IN
Connect the MIDI OUT of other Device to theMIDI IN
jack on the rear panel
52. MIDI OUT
Connect the MIDI IN of other Device to the MIDI OUT
jack on the rear panel
53. USB JACK
Connect to a computer
54. Soft Pedal
When you step on the soft pedal, all notes played on
the keyboard will have a softer effect.
55. Sostenuto Pedal
When you step on the sostenuto pedal, the notes
played before you step on the pedal would have a
sustain effect.
56. Sustain Pedal(multi function pedal)
When you step on the sustain pedal, all notes
played on the keyboard will have a longer sustain
54 55
Pedal
When [SHIFT] button
pressed
23. [DEMO] button
Enter demo mode
24. [PERFORM] button
Enter the Performance
Assistant mode
25. [ALBUM] button
Enter album mode
29. [PIANO] button
Select the piano mode
30. [METRONOME] button
Turn the metronome
on or off
31. [DUAL] button
Turn the Voice R2
on or off
32. [LOWER] button
Turn the Voice L on or off
33. [TOUCH] button
Choose a keyboard
touch setting
34. [DSP] button
Turn the DSP effect
on or off
22. LCD
Display the information of
the piano
26. Data dial
Adjust the value
27~28. [YES/+]/[NO/-] button
Adjust the value
45. [SCALE] button
Turn the scale effect on
or off
46. [TWINOVA] button
Turn the TWINOVA on
or off
47. [OCTAVE] button
Set octave in TWINOVA
mode
When [SHIFT] button
released
23. [STYLE] button
Enter style mode
24. [VOICE] button
Enter voice mode
25. [SONG] button
Enter song mode and
play songs
29~36. Voice direct button
Shortcut to select a voice
37. [BANK] button
Adjust the memory bank
38. [STORE] button
Register the current
panel settings
39~42. M1~M4 button
Recall the registered
panel settings
43. [O.T.S] button
Turn one touch setting
on or off
44. [FREEZE] button
Freeze the style
parameter.
34. [DSP] button
Turn the DSP effect on
or off
35~36. [TRANSPOSE+/-]
button
Adjust the transpose
37. [RECORD] button
Enter record mode
38. [ACCOMP] button
Select the accomp track
to record
39~43. MELODY 1-5 button
Select the melody1-5
track to record
44. [HARMONY] button
Turn harmony effect on
or off
24
25
27
26
28
29 30 31 32 33 34 35 36
37 38 39 40 41 42 43 44
45
46 47
23
53
49 50 51 52
56
22
48 48. POWER SWITCH
Turn the power on or off
0
5
25
75
95
100
AW_DP388_Manual_G15_150405
201544 16:52:32

Setup
This section contains information about setting up your instrument and preparing to play. Please go through this section
carefully before turning the power on.
Setup Guide
Before you proceeding to assemble the stand, get a Philip's
screwdriver (not supplied).
Make sure you have the following parts, which are supplied into
package.
A. Open the package, and check whether the following parts are
available:
6
1
3
2
7
5
9
4
1
2
3
4
5
6
7
8
9
10
11
10
6 8
11
Piano body
Left leg component
Right leg component
Foot pedal
Rear board
Screws M6x18(2pcs)
Hand screws (2pcs)
Screws M6x40(4pcs)
Tapping screw 4x15(8pcs)
Screw caps(4pcs)
Foot pedal cable
0
5
25
75
95
100
AW_DP388_Manual_G15_150405
201544 16:52:33

Setup
7
B. Put the foot pedal unit(4) in between the left and right legs
components (2&3), use 4 pieces of screws (8)(2 on each side) to
stable the legs onto the foot pedal unit. (Make sure the direction of
the placement is correct before screwing)
C. Use 8 pieces screw(9), make the Rear board fixed on the Foot
pedal unit(4) and right leg component(3), the left leg component(2)
finished in part A on the previous page.
D. Put the piano body(1) on the top of the assembly finished in part B,
use 2 pieces of hand screws (7) and 2 pieces of screws (6) to stable
afterward.
0
5
25
75
95
100
AW_DP388_Manual_G15_150405
201544 16:52:33

Setup
E. After the initial set-up, connect pedal cable(11) in the foot pedal unit
to the bottom-panel PEDAL jack.
Power Supply
1. Make sure that the piano is turned off. Before you switch your piano
on or off, turn down the volume of piano and any connected audio
equipments first.
2. Connect the power cable to the AC outlet.
3. Press the [POWER] switch, the LCD display "Wait...!", which
indicates the piano has power on.
4. If you are ready to turn off the piano, press the [POWER] switch
again.
Note:
1. In the idle mode, the piano will automatically shutdown in 30
minutes if you do not take any action on the piano.
2. When the keyboard is not in use or during thunderstorm, please
disconnect the power for safety purpose.
8
W a i t . . . !
0
5
25
75
95
100
AW_DP388_Manual_G15_150405
201544 16:52:33

Connecting a pair of Headphones
A standard pair of stereo headphones can be plugged in here for
private practice or late-night playing.
Jack1: When a pair of headphones is plugged into the jack 1, the
sound can be heard from both headphones and speakers of
the instrument.
Jack2: When a pair of headphones is plugged into the jack 2, the
internal stereo speaker system is automatically shut off. The
sound can only be heard from headphones.
Note:
To avoid the risk of hearing loss when using headphones, please do
not play the piano with a high volume level for a long time.
Connecting an Audio Equipment
Connecting a Computer
The rear-panel AUX OUT jack delivers the output of the instrument
for connection to a keyboard amplifier, stereo sound system, a mixing
console, or tape recorder. Use an audio cord to plug into the AUX OUT
jack located on the rear panel then plug the other end of the cord
into AUX IN of the amplifier.
Note:
To avoid damaging the speakers, please ensure that the volume has
been set to the minimum level before connecting the power and other
devices.
The instrument receives and transmits MIDI messages via the
USB connector.
Connecting the MIDI IN /OUT to Computer via The MIDI/USB
converter.
Note:
If this product does not work correctly when connected to a USB 3.0
port, you will need to connect to a USB 2.0 port.
9
Connections
Connecting an MP3/CD Player
Connect the audio output of an MP3/CD player or other audio source
to the stereo AUX IN jack on the rear panel.
The input signal is mixed with the piano signal, allowing you to play
along the music.
Connecting to other device
Connect the MIDI OUT of other Device to the MIDI IN jack on the rear
panel, this instrument will as sound module.
Connect the MIDI IN of other Device to the MIDI OUT jack on the rear
panel. this instrument will as Midi Controller.
MIDI OUTMIDI IN
MIDI OUT MIDI IN
Headphone Jack 1
Headphone Jack 2
0
5
25
75
95
100
AW_DP388_Manual_G15_150405
201544 16:52:36

Adjusting the Master Volume
Turn the [VOLUME] knob clockwise, the volume increases and vice
versa.
Adjusting the Voice Brilliance
Turn the [BRILLIANCE] knob clockwise, the voice sounds brighter
and vice versa. You can change the piano brilliance as you wish.
Playing the Demo Song
The instrument features 2 wonderful demos. Please refer to Demo
List.
1. Holding down [SHIFT] button, then press the [DEMO] button to start
demo song playing, and the LCD will display the number and name
of demo.
2. You can use the data dial, the [+/YES]/ [-/NO] button to select a
demo song.
3. Press the [START/STOP] button to stop playing. Holding down
[SHIFT] button, then press the [demo] button to exit demo mode.
Note:
In the demo status, all the demo songs will loop playing. And all
buttons and keys are unavailable except [DEMO], [START/STOP],
[TEMPO+/-], [+/YES], [-/NO] button, data dial, [VOLUME]
knob,[BRILLIANCE] knob and POWER SWITCH.
W a l t z 1
10
0
5
25
75
95
100
AW_DP388_Manual_G15_150405
201544 16:52:36

Playing Voices
Playing Voices
The instrument features 500 exceptionally realistic voices. Please refer to Voices List.
1. In idle mode, press [VOICE] button or one of the voice direct
buttons to enter the voice mode. LCD will display the “VOICE R1”
indicate, and display the current voice name and number.
2. Use the data dial, [+/YES]/ [-/NO] button to select a voice you want
to play. You can also use the voice direct button to select one.
3. You can play the keyboard and listen to the wonderful voice.
Note:
When the DUAL and LOWER function is on, you can press [VOICE]
button repeatedly to choose the voice source. The corresponding LCD
indicate will highlight between R1, R2, L.
The piano has a dual voice function. You can play two voices to make
the sound more richly.
1. In idle mode, holding down [SHIFT] button, and then press [DUAL]
button to turn dual function on. The LCD displays the current voice
name and number, and the indicate “VOICE R 2” and “DUAL”
2. You can use the data dial, the [+/YES], [-/NO] button or voice direct
button to select the dual voice you want to play.
3. Play the keyboard, and then you will hear two different voices are
sounded simultaneously in a layer. It seems like two different
instruments playing at the same time.
4. When dual function is on, holding down [SHIFT] button, and then
pressing [DUAL] button will turn dual function off.
Note:
When the keyboard has been split, only the right hand area will
respond the dual voice, the left hand will not respond to it.
Playing two voices simultaneously-DUAL
S t G r d p n o
S S l o w S t r
11
0
5
25
75
95
100
AW_DP388_Manual_G15_150405
201544 16:52:36

Playing Voices
Playing Different Voices with Both hands-LOWER
The lower function splits the keyboard into two section. Each section
can be set to a voice. The left section voice is lower voice.
1. In idle mode, holding down [SHIFT] button, and then press
[LOWER] button to turn the lower function on.
The keyboard is split into two independent sections, and each
section has its voice. The LCD displays the left hand voice name
and number, and the indicate “VOICE L” and “LOWER”
2. You can use the data dial, the [+/YES], [-/NO] button or voice direct
button to select the lower voice you want to play.
3. Play the keyboard in different sections, and you will hear two
different voices.
4. When lower function is on, holding down [SHIFT] button, and then
pressing [LOWER] button will turn lower function off.
Note:
The right hand voice does not change when you change lower voice.
Split Point
The Point on the keyboard that separates voice L and voice R1/R2 is
called the "split point". The split point is set to F#3 at the factory
setting. However you can set this to any key you want. Refer to
KeySplit setting for split point setting.
Touch
The piano is equipped with a touch response feature that lets you
dynamically and expressively controls the level of the voice with your
playing strength just as on an acoustic instrument.
The piano has three touch types to choose.
1. Holding down [SHIFT] button, and then press [TOUCH] button to
enter touch settings. LCD displays the touch setting number.
The default number is 2.
2. Choose a touch type.
When LCD displays touch setting, using [+/YES]/ [-/NO] or data dial
or holding down [SHIFT] button, and then pressing [TOUCH]
button can change touch type: OFF, 001(soft), 002(normal),
003(hard). Pressing [+/YES] and [-/NO] simultaneously will set
touch value to default setting: 2(normal).
Transpose
Transpose function allows the overall pitch of the instrument to be
transposed up or down by a maximum of one octave in semitone
steps.
1. Holding down [SHIFT] button, and then press [TRANSPOSE+] or
[TRANSPOSE-] button to enter transpose settings. LCD displays the
current transpose: xxx Transpos. The default number is 0.
2. When LCD displays the current transpose, use [+/YES]/ [-/NO] or
data dial to change transpose value. The max transpose is±12
semitones.
3. Press [+/YES] and [-/NO] simultaneously will set the transpose
value to its default setting: 000 Transpos.
Hint:
If you want to play song in G key, you can set the transpose to -05 or
007, then you can play the G scale using C scale keys. Transpose
setting is applied to all part of the music and keyboard.
SSlowStr
T o u c h
T o u c h
T r a n s p o s
12
F 3#Default Split Point
0
5
25
75
95
100
AW_DP388_Manual_G15_150405
201544 16:52:37

Playing Voices
Piano Mode
This function is to set the voice of the whole keyboard to piano
instantly.
1. Holding down [SHIFT] button, and then press [PIANO] button can
enter or exit piano mode.
2. In piano mode, the accompaniment control is the same to other
mode.
The accompaniment only plays the rhythm part.
Note:
1. In piano mode, you can set the mixer function and enter function
menu.
2. In piano mode, the A.B.C. is automatically turned off.
Metronome
Using metronome helps you with beat that guides your playing by
preset tempo.
1. Holding down [SHIFT] button, and then press the [METRONOME]
button to turn the metronome on or off.
2. Metronome beat type setting
Please refer to Beat Type Setting.
Note:
1. The metronome will respond in the next beat if it is opened when
the accompaniment is playing.
2. When the metronome is on, then start the accompaniment, the
metronome will adjust the beat to the accompaniment.
3. When recording, metronome beats cannot be recorded.
Twinova
The twinova mode can split the keyboard into two sections which
have the same pitch and voice. It helps teaching and learning piano.
1. Press [TWINOVA] button to turn twinova function on. The LCD
indicate of twinova is lighted. In twinova mode, dual voice and
lower voice are unavailable. The default split point is E3 (32).
When you are ready to exit, press [TWINOVA] button again.
2. In twinova mode, the default voice of right hand and left hand is
the upper voice you select before entering twinova mode. Use the
data dial, the [+/YES], [-/NO] button or the voice direct button to
choose voice.
3. In twinova mode, press [OCTAVE] button, LCD temporarily
displays the octave value of twinova. Now you can use the data
dial, the [+/YES], [-/NO] button to set octave value of twinova. The
range of octave is -1 to 1. Press [+/YES] and [-/NO] simultaneously
will set the octave value to its default setting: 000.
Note:
1. In the Demo and song mode, the [TWINOVA] button is invalid.
2. Please refer to KeySplit setting to set the split point setting.
3. The [OCTAVE] button is invalid outside twinova mode.
When the octave is changed, some voices may be muted in the
highest or lowest range.
P i a n o
S t G r d P n o
S t G r d P n o TWINOVA
E3Default Split Point
13
0
5
25
75
95
100
AW_DP388_Manual_G15_150405
201544 16:52:37

Playing Voices
This function allows you to experience different stretched tunings when
you play certain genres of music that is not composed based on twelve
equal interval.
1. Press [SCALE] button can open or close scale function.
The corresponding indicate on the LCD will light or light off.
2. Scale type and root key selection
When the scale function is on, long press [SCALE] button to open
scale setting menu. The default setting is: 001 Pytha C.
When the scale indicate is flashing, press [+/YES], [-/NO] button
can select scale type. Use the C7-B7 key to set the root key.
The LCD displays the scale type and root key.
The piano has six types of scale, as shown below:
Scale
Number
1
2
3
4
5
6
LCD Name
Pytha
Major
Minor
Mean Tone
Werck
Kirnberg
Note:
1. In scale setting status, if no operation is done within 5 seconds, this
status will exit automatically.
2. The scale status will exit automatically in the song mode and demo
mode.
S t G r d P n o
SCALE
Pytha C
SCALE
14
0
5
25
75
95
100
AW_DP388_Manual_G15_150405
201544 16:52:37

The auto accompaniment feature puts a full backing band at your
fingertips. To use it, all you have to do is to play the chords with your
left hand using your selected accompaniment style, and then the
accompaniment will automatically play along, instantly following the
chords you play. With auto accompaniment, even a solo performer can
enjoy playing with the backing of an entire band or orchestra. This
keyboard features 200 styles in a variety of musical genres. Try to
select some of the different styles (refer to Style List) and enjoy the
auto accompaniment feature.
Play Auto Accompaniment(rhythm track only)
1. Press any of the style direct button or [STYLE] button to enter the
style mode. LCD displays the name and number of the current style.
2. Use the data dial, the [+/YES], [-/NO] button or the style direct
button to choose the style you want to play.
3. Press the [START/STOP] button to start the rhythm tracks of the
auto accompaniment. Also you can press [SYNC START] and then
play any key to start the rhythm tracks of the auto accompaniment.
Play Auto Accompaniment(all tracks)
1. In style mode, press [CHORD MODE] button to enter “auto bass
chord” (A.B.C.)mode. The keyboard is split into two sections. Left
hand section is chord detect section. The LCD will show the indicate
of “A.B.C.” Now pressing any key in chord detect section(Sync Start
status) you will hear the fantastic accompaniment.
Press [CHORD MODE] button again to enter “full range” mode.
The LCD will show the indicate of “FULL RANGE”. The whole
keyboard is chord detect section.
2. You can press [SYNC START] button and then play a chord in chord
detect section to start auto accompaniment of all tracks. When you
change a chord, the accompaniment automatically changes.
You can also press [START/STOP] button to start auto
accompaniment of rhythm track, then play a chord in chord detect
section. It will start auto accompaniment of all tracks.
Note:
The piano can save 3 user styles. To use your styles, you should use
the software of MEDELI to convert the style, then use the USB to save
the styles to piano.
15
Auto Accompaniment
8 B t P i a n o
8 B t P i a n o
8 B t P i a n o
Default auto accompaniment section
0
5
25
75
95
100
AW_DP388_Manual_G15_150405
201544 16:52:38

Auto Accompaniment
There are various types of Auto Accompaniment sections that allow
you to vary the arrangement of the accompaniment to match the song
you are playing.
They are: Intro, Main (A, B, C, D), Fill (A, B, C, D), and Ending.
By switching among them during your performance you can easily
produce the dynamic elements of a professional sounding
arrangement in your performance.
INTRO Section
The intro is an opening section of the song.
Each preset style features two different patterns. When the intro
pattern finished, the system will automatically shift to the main section.
MAIN Section
The main is an important section of the song. And it plays an
accompaniment pattern and repeat infinitely until another section's
button is pressed.
FILL IN Section
Auto fill in function automatically adds a fill to your performance. When
the fill-in is finished,accompaniment shifts to the Main section (A,B,).
ENDING Section
Ending is used for the ending of the song. When the ending is finished,
accompaniment automatically stops.
Note:
Hold down the FILL A/B/C/D button when the style is playing, the
selected fill-in pattern repeats continuously until button is released.
Press FILL A/B/C/D button when style stops, it will change to the
normal section.
16
Accompaniment Sections
Playing Different Accompaniment Sections
1. Press the【STYLE】 button
2. Press style direct button or use the data dial, [+/YES]/ [-/NO] button
to select a style.
3. Press [CHORD MODE] button to enter A.B.C. (auto bass chord)
mode.
4. Press [SYNC START] button.
5. Press [FILL A] button.
6. Press the [INTRO/ENDING] button. Now the “A” indicate on LCD,
and the style is ready to play.
7. It will start the accompaniment as soon as you start playing in
Chord section.When the playback of the intro is finished,
it automatically leads into Main A section.
8. Press the [FILL B] / [FILL C] / [FILL D] button. A fill-in plays,
automatically followed by the Main B/C/D section.
9. Press the [INTRO/ENDING] button again, and it will enter the
Ending Section.
When the ending is finished, the auto accompaniment automatically
stops.
8 B t P i a n o
8 B t P i a n o
0
5
25
75
95
100
AW_DP388_Manual_G15_150405
201544 16:52:38

Auto Accompaniment
17
Accompaniment Volume
This function is used to change the volume of all tracks of
accompaniment.
1. Holding down [SHIFT] button, and then press [ACCOMP] button,
the LCD will display ACCOMP volume (0 to 127).
At this time, you can use the data dial, or [+/YES]/ [-/NO] button to
adjust ACCOMP volume.
2. When the LCD will displays ACCOMP volume, press [+/YES] and
[-/NO] button simultaneously can mute the ACCOMP volume.
The LCD displays “OFF Accomp”. press [+/YES] and [-/NO] button
simultaneously again can open the ACCOMP volume.
Chord Fingering
How the chords are played or indicated with your left hand (in the auto
accompaniment section of the keyboard) is referred to as "fingering".
There are 2 types of fingerings as described below.
Chord Basics
A chord, in music, is any harmonic set of three or more notes that is
heard as if sounding simultaneously. The most frequently encountered
chords are triads. A triad is a set of three notes that can be stacked in
thirds. When stacked in thirds, the triad's members, from lowest
pitched tone to highest, are called: the Root, the Third, and the Fifth.
Triad Type
There are following basic triad types:
Chord Inversion
We define this chord its root is not in the bass (i.e., is not the lowest
note) as an inversion chord. When the root is in the bass, we call the
chord: root-position chord. If we put the Third and Fifth in the root
position, then it forms Inversion, we call this chord Inversion Chord. See
the following major triad and its inverted chord.
Chord Name
The chord name contains two parts content: Chord root and Chord
type.
Single Finger
Single finger type not only can detect single finger but also can detect
multi finger. And the single finger makes it easily to play chords through
only one, two or three keys. Including major, minor, seventh, and minor
seventh chord. Refer to relevant picture on the right for details.
A c c o m p
Major Triad
Minor Triad
Augmented
Triad
Diminished
Triad
A root with a major third added above and a perfect
fifth will consist as a Major Triad.
A root with a minor third added above and a perfect
fifth will consist as a Minor Triad.
A root with a major third added above and an
augmented fifth will consist as an Augmented Triad.
A root with a minor third added above and a diminished
fifth will consist as a Diminished Triad.
0
5
25
75
95
100
AW_DP388_Manual_G15_150405
201544 16:52:38

Auto Accompaniment
18
One Touch Setting
When One Touch Setting is switched on, you can instantly recall all
auto accompaniment related settings including voices selection and
digital effects simply with a single touch of a button.
1. Press the [O.T.S.] button to turns on the One Touch Setting for
current style.
2. Press one of the one touch setting buttons [M1]-[M4]. Various panel
settings (such as voice, effect, etc.) that match the selected style
can be instantly recalled with just a single button press.
Auto accompaniment is automatically turned on during O.T.S mode.
One Touch Setting parameter list:
Part ON/OFF (VOICE R1, R2, L)
Voice Change (VOICE R1, R2, L)
Voice Volume (VOICE R1, R2, L)
Voice Reverb Level (VOICE R1, R2, L)
Voice Chorus Level (VOICE R1, R2, L)
Note:
1. In O.T.S. mode, the A.B.C. function would turn on automatically.
2. In O.T.S. mode, the memory cannot be registered.
Tempo
Each style of the instrument has been set with a default or standard
tempo; however, this can be changed by using the [TEMPO+/-]
buttons.
1. Use the [TEMPO+/-] button to change the tempo.
While the tempo data is flashing, use the data dial can also change
the tempo.
2. Press the [TEMPO+] and [TEMPO-] buttons simultaneously to
restore the default tempo setting.
Note:
The tempo will change when changing the style not playing the
accompaniment . The tempo will not change when changing the
style playing the accompaniment .
S t G r d P n o
S t M u G t
Multi Finger
Multi finger type only can recognize those chords have listed in the
chord list, and also can be found in the dictionary function.
Note:
In full range mode, the whole keyboard is chord detect section. It
identifies only multi finger chord.
0
5
25
75
95
100
AW_DP388_Manual_G15_150405
201544 16:52:38

Harmony
Harmony Switch
1. Holding down [SHIFT] button, and then press [HARMONY] button.
The LCD displays “OFF”, which indicates the harmony effect is
turned off now.
2. When the LCD displays “OFF”, repeat the previous operation. The
LCD now displays “Duet”, which indicates the harmony effect is
open, and the type is Duet.
3. To choose a different harmony type, please refer to the harmony
setting in function menu.
Play with Harmony Effect
Open the A.B.C., first play a chord, then play notes in right hand
section, the notes played in main voice will be added with the harmony
effect.
Note:
The harmony types of 1+5,Octave,Echo, Tremolo, Trill will respond
whether the A.B.C. is open or not. Other types of harmony will respond
only when the A.B.C. is open.
19
The harmony function can add harmony effect to the main voice.
Off
D u e t
0
5
25
75
95
100
AW_DP388_Manual_G15_150405
201544 16:52:39

Performance Assistant
There are 7 voices you can select to perform in performance assistant mode: Guitar, Piano, Gu Zheng, Pi Pa, San Xian , Yang
Qin, and Zhong Ruan.
20
Enter the Performance Assistant
1. Holding down [SHIFT] button, and then press [PERFROM] button
you can enter the performance assistant mode. The default setting
is Guitar Mode and the LCD will display Guitar's voice name.
2. You can use the Data Dial, [+/YES] or [-/NO] button to change the
voice you want to perform.
3. In the measure field in LCD, the "4-4" will be displayed. It means
the default beat value is the 4/4 and you can change the beat value
you want in function menu. Please refer to Performance Beat
setting in function menu. You can choose the beat between 2/4, 3/4,
4/4, and 6/8 beat.
4. In Performance Assistant mode, use [TEMPO+] or [TEMPO-] to
change the tempo.
Guitar Mode
Guitar key map
The Guitar Mode makes you perform a guitar voice with keyboard just
like you're playing a real guitar. In this mode you can use some
perform skills like strum (5), broken chord (5), echoism (5) and also 2
endings.
Chord part
A0 to B3 is the chord part area. Play a chord in this area.
Sub Area 1
C4 to B4 (only white keys) is the sub area 1. 5 types of broken chord
are provided in this area.
Sub Area 2
The 6 keys: C5 to A5 (only white keys) is just like real guitar's 6 strings.
Play a free solo in this area.
Rhythm Area
C6 to G6 (only white keys) is the rhythm area. Wonderful styles and
strums are provided in this area. Use A6 to B6 to play an ending.
Position Change
Press C7, the guitar voice will be changed to a high position.
Note:
The keys above C7 doesn’t respond in this mode.
SteelGtr PERFORM
Guitar Key map
Chord Part Sub Area 1 Sub Area 2 Rhythm
Area
Position Change
S t e e l G t r
PREFORM.H
What’s the performance assistant?
Performance assistant is an easy-to-use function. With this function
you will find playing to be more interesting. Even if you are not a
keyboard player, the performance assistant will help you to play
your familiar instrument voice on the keyboard. If you're a pianist,
you can easier to achieve many hard perform skills on the keyboard
with the help of this function.
Performance assistant will provided many wonderful phrases. Just
use several keys and you will perform your own wonderful music.
PERFORM
0
5
25
75
95
100
AW_DP388_Manual_G15_150405
201544 16:52:39
Table of contents
Other Medeli Musical Instrument manuals

Medeli
Medeli CDP5200 User manual

Medeli
Medeli sp 5100 User manual

Medeli
Medeli SP4200 User manual

Medeli
Medeli Grand 510 User manual

Medeli
Medeli sp 5100 User manual

Medeli
Medeli DP250 User manual

Medeli
Medeli Sp5500S User manual

Medeli
Medeli DP10 User manual

Medeli
Medeli UP81 User manual

Medeli
Medeli DP370 User manual

Medeli
Medeli DP460K User manual

Medeli
Medeli DP268 User manual

Medeli
Medeli SDP-4 User manual

Medeli
Medeli SP-40 Series User manual

Medeli
Medeli SP3000 User manual

Medeli
Medeli SP4000/WH User manual

Medeli
Medeli Grand 1000 User manual

Medeli
Medeli SP5500 User manual

Medeli
Medeli DP660 User manual

Medeli
Medeli DP740K User manual