If further assistance is required, please contact CircAid® Customer Service
donnInG
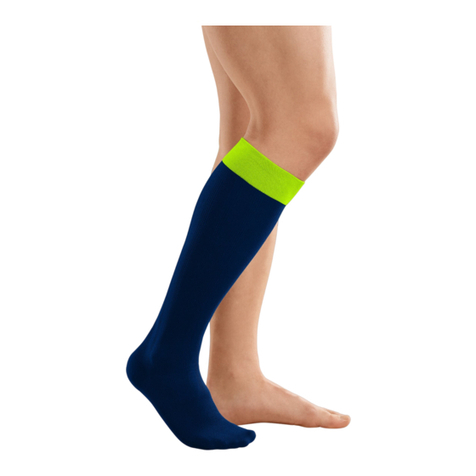
stEP 1. Slide the Comfort Knee-High Sock™ onto the leg and over the knee.
stEP 2. Apply the enclosed Comfort EZ Single-Band Ankle-Foot Wrap™ per the directions for use.
stEP 3. Lay the garment out at with the bands’ hook tabs folded back onto the bands. Position the
garment so that the neoprene spine runs along the back of the leg, with the black spine facing away
from the skin. The bottom edge of the garment should be just above the prominent points of the
ankle bone.
stEP 4. For standard-sized Classic-Flex™ leggings, if the top edge of the legging is closer than 1.3 cm
or 0.5 inches to the knee crease, bands on the legging can be cut o to shorten the garment. This is to
prevent irritation to the back of the knee. Please refer to the ‘ALTERATIONS’ section for further
information on adjusting the length.
stEP 5. Disengage the top two bands, pull them towards the front of
the leg and feed one band through the hole in the other band.
stEP 6. Pull the ends of the bands lightly and secure the hook tabs to
the outside of the legging to anchor the legging in place. Ensure that
the bottom edge of the legging is positioned just above the ankle bone.
stEP 7. Disengage the bottom two bands, feed one band through the
hole in the other and pull them to rm and comfortable compression.
Then, secure the hook tabs to the legging. Some sets of bands are color
coded to aid in pairing them.
stEP 8. Be sure to pull the bands forward and away from the leg before
securing the hook tabs to the legging.
stEP 9. Continue securing one set of bands at a time
going up the leg, pulling to rm and comfortable compression. Be sure
to readjust the top two bands to rm and comfortable compression.
stEP 10. Use the same amount of force when pulling each set of bands,
going up the leg to ensure gradient compression.
stEP 11. Once all of the bands are secured, inspect the garment for
any gaps, creases, or folds and adjust the bands as necessary. If gaps
are still present, return to the bottom of the garment and readjust
each set of bands accordingly.
stEP 12. The garment should lay at against the leg. The bands may
need to be pulled at a slight angle to make the garment contour
perfectly against the leg.
stEP 13. Flex the foot several times to conrm that the legging feels rm and comfortable.
stEP 14. Once the legging has been properly donned, roll the top part of the sock liner over the top
edge of the legging.
REmoVal
stEP 1. To remove the Classic-Flex™ legging, disengage each set of bands starting at the top of
the garment. Pull one band out of the other one and fold each hook tab back onto its band.
stEP 2. Do not tightly roll the bands back onto themselves, as this will cause the hook material
to bend, reducing its adherence strength.
stEP 3. Securing the hook tabs while not in use will aid in keeping them lint free, thus extending the
life of the product.
stEP 4. When complete, the garment should resemble its starting position for easy reapplication.
stEP 5. Proceed by removing the Comfort EZ Single-Band Ankle-Foot Wrap™ according to its removal instructions.
stEP 6. Lastly, slide the Comfort Knee-High Sock™ o the leg.
ALTERATIONS
The following steps will illustrate which alterations can be made to the
Classic-Flex™ legging. These adjustments should be made by the tter,
clinician, or therapist, if necessary.
lEGGInG lEnGtH adJUstmEnt
If the legging is too long for the patient, up to two of the bottom bands and
or the top band may be removed to shorten the garment. None of the other
bands may be cut. Remove the bottom set of bands and cut the neoprene
spine just below the reinforced seam. This may also be done to the second set
of bands from the bottom and the rst set of bands from the top, if necessary.
Band lEnGtH adJUstmEnt
If the patient has reduced signicantly, the Classic-Flex™ bands need to be shortened in
order to provide compression.
stEP 1. Determine which bands need trimming. Next, determine how much length
needs to be trimmed from the band. Both bands in the set should be trimmed by equal
amounts. For example, if the set of bands needs to be shortened by 2 cm, trim 1 cm o
of each band.
stEP 2. Detach one band from the neoprene spine. Leave the other band for overlap
and angle reference.
stEP 3. Cut the band to the desired length, then reattach it to the neoprene spine. If the
band was originally cut at an angle, be sure to follow the same angle. Use the opposing
band as a guide when reattaching the band.
stEP 4. Repeat step 3 with the opposing band.
stEP 5. Measure from the center of the male interlock to the center of the female
interlock. Never trim so much from a band that there is more than a 5 cm length dierence
between the trimmed band and the bands above and below it. For example, if the set of
bands is 40 cm long, the set below it should not be shorter than 35 cm long.
Band anGlE adJUstmEnt
If the bands do not lay at at the back of the legging, it may be necessary to adjust the angle of one or more sets of
bands. There are two ways to adjust the angle of the bands:
• One method to adjust the angle is to slide a pair of bandaging scissors into the gap between the band and the
neoprene spine. Push the gapping section under the neoprene spine and press the spine in place.
• The second method of adjusting the band angle is to remove the band from the neoprene spine and to cut the
band at a dierent angle. If the band gaps at the top edge, reduce the angle at which the band is cut. If the band
gaps at the bottom edge, increase the angle at which the band is cut.
When nished, the legging should lay at against the back of the leg.
PLEASE NOTE THAT NO OTHER MODIFICATIONS CAN BE MADE
TO THE CLASSICFLEX™ LEGGING.
DO NOT TUCK BANDS. tHE
VElCRo® HooK sHoUld
nEVER toUCH tHE sKIn!
REMEMBER: The Classic-Flex™ Legging should never hurt. It should feel rm
but comfortable. If pressure increases or decreases noticeably during wear,
loosen or tighten any bands accordingly.
IF EXPERIENCING ANY PAIN, REMOVE THE LEGGING
IMMEDIATELY AND CONSULT YOUR PHYSICIAN.
PRESS
TO SECURE
FEED
THROUGH
HOLE
PULL
DISENGAGE
FINISHED
STEP 3
LEGGING
LENGTH
ADJUSTMENT
DETACH BAND
TRIM BAND
Just above
ankle bone
←
DIRECTIONS FOR USE

