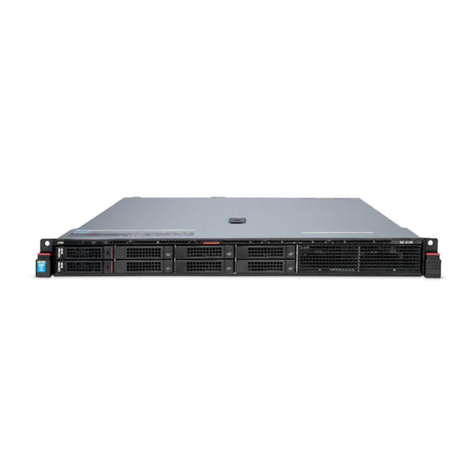
Media5 Mediatrix Sentinel 100 Manual

Model M - Sentinel 100
Hardware Installation Guide
DGW 48.0.2430
2021-07-05

Table of Contents
Table of Contents
Safety Recommendations and Information 5
Danger, Warning, Caution, and Note Definitions 5
Electrical Safety Guidelines 5
General Safety Practices 7
Electrostatic Discharge Prevention 8
Translated Warning Definition 8
Requirements 10
Location Requirements 10
Wiring Guidelines 10
Mediatrix Sentinel 100 Characteristics 11
Getting Started 12
Installation Check List 12
Package Check List 13
Cleaning Instructions 13
Mounting Tools and Equipment 13
Connectors and Indicators 14
Installing The Mediatrix Unit 18
Installing the Unit on a Flat Surface 19
Connecting the Telephony Cables 19
Connecting the Mediatrix Unit Using a DHCP Server 20
Connecting the Mediatrix Unit Using a Static IP Address 21
Verifying the Installation 22
media5corp.com

Table of Contents
Cables 23
Gigabit Ethernet Connection (RJ-45) 23
PRI Connection (RJ-48) 24
FXS and FXO Connections (RJ-11) 25
BRI S/T Connection (RJ-48) 26
Troubleshooting 27
Locating the Product Serial Number 27
Troubleshooting 28
LED Patterns 28
RESET/DEFAULT Button 29
Partial Reset 30
Factory Reset 33
Standards Compliance and Disclaimers 36
Supported Standards 36
Federal Communications Commission (FCC) Disclaimer 38
Innovation, Science and Economic Development Canada (ISED) Disclaimer 39
CE Marking 39
RoHS China 39
Other Disclaimers 40
FXO Card - Standards of Compliane and Disclaimers 41
FXO Card - Supported Standards 41
FXO Card - Federal Communications Commission (FCC) Disclaimer 41
FXO Card - Innovation, Science and Economic Development Canada (ISED)
Disclaimer 42
media5corp.com

PRI/T1/E1/J1 Card - Standards Compliance and Disclaimers 43
PRI/T1/E1/J1 - Card Supported Standards 43
PRI/T1/E1/J1 Card - Federal Communications Commission (FCC) Disclaimer 43
PRI/T1/E1/J1 Card - Innovation, Science and Economic Development Canada (ISED)
Disclaimer 44
BRI Standards Compliance and Disclaimers 45
BRI S/T- Card Supported Standards 45
Stock Keeping Unit (SKU) Number for Model M 46
Product Disposal Instructions 50
DGW Documentation 51
Copyright Notice 52

Model M - Sentinel 100 5
Safety Recommendations and Information
Danger, Warning, Caution, and Note Definitions
Danger: Indicates a hazardous situation which, if not avoided, will result in death or serious
injury.
Warning: Indicates a hazardous situation which, if not avoided, could result in death or
serious injury.
Caution: Indicates a hazardous situation which, if not avoided, could result in minor or
moderate injury or damage to property or equipment.
Note: Indicates important information not related to personal injury.
Electrical Safety Guidelines
Danger: Do not work on the Mediatrix unit, connect or disconnect its cables during periods
of lightning.
Danger: Avoid using a telephone (other than a cordless type) during an electrical storm.
There may be a remote risk of electric shock from lightning.
Warning: The earth ground cable must be firmly and securely connected to the grounding
screw on the back of the Mediatrix unit and an appropriate grounding point in your site: the
earth ground cable must remain tightly secured at all times during service and installation.
Warning: Disconnect all interface cables (including PRI, FXS, and FXO) before unplugging any
power sources from the Mediatrix unit.
Warning: Disconnect all interface cables (including PRI, FXS, and FXO) as well as all power
sources connected to the Mediatrix unit before servicing the unit.
Warning: This equipment must be installed and maintained by service personnel. Incorrectly
connecting this equipment to a general-purpose outlet could be hazardous.
media5corp.com

Model M - Sentinel 100 6
Warning: This product relies on the building's installation for short-circuit (overcurrent)
protection. Ensure that a fuse or circuit breaker no larger than 120 VAC, 15 A U.S. (240 VAC,
10 A international) is used on the phase conductors (all current-carrying conductors).
Warning: The unit must be grounded at all times when in use.
Warning: The earth ground connection between the grounding screw on the back of the
Mediatrix unit and an appropriate grounding point in your site must always be made first
and disconnected last.
Warning: Do not connect the ETH2, ETH1,LAN, and FXS connectors directly to the Public
Switched Telephone Network (PSTN), to an off premise application, an out of plant application,
any exposed plant application, or to any equipment other than the intended application,
connection may result in a safety hazard, and/or defective operation and/or equipment
damage. Exposed plant means where any portion of the circuit is subject to accidental contact
with electric lighting or power conductors operating at a voltage exceeding 300 V between
conductors or is subject to lightning strikes.
Warning: The Mediatrix unit must be installed on a circuit equipped with a breaker so that
you can easily power the unit off if required.
Warning: Hazardous network voltages may be present in PRI and FXO cables. Always
disconnect the cables from the Mediatrix unit first to avoid possible electric shock. Network
hazardous voltages may be present on the device in the area of the PRI and FXO port, even
when power is turned OFF.
Warning: Adequate earth ground connection of the Mediatrix unit is mandatory to avoid any
damage or injuries.
Warning: Hazardous network voltages might be present in WAN, LAN, Sync, and telephony
port connectors regardless of whether power to the device is OFF or ON. Use caution when
working near these connectors to avoid electric shocks.
Warning: The socket outlet, if used, shall be located near the equipment and shall be easily
accessible by the user. The AC adaptor inlet is considered as a disconnection device. The
device must be readily operational.
Caution: To reduce the risk of fire, use only No. 26 AWG or larger telecommunication line
cords.
Caution: The RJ-11 cable should comply with UL 1863 and CSA C22.2 No 233 standards.
media5corp.com

Model M - Sentinel 100 7
General Safety Practices
Warning: Do not use this product near water, for example, near a bath tub, wash bowl,
kitchen sink or laundry tub, in a wet basement or near a swimming pool.
Warning: Do not expose the unit to rain or moisture to avoid any shock hazard.
Warning: Do not use the telephone to report a gas leak in the vicinity of the leak.
Warning: Do not get this product wet or pour liquids into it.
Warning: Ultimate disposal of this product should be handled according to all national laws
and regulations.
Caution: If the unit is installed in a closed environment or on a multi-unit rack, the ambient
temperature of the environment next to the Media5 unit may become greater than the
maximum operating temperature recommended by Media5 for the use of its units, i.e. 40ºC.
The Mediatrix unit should never be used to temperatures greater than the recommended
maximum operating temperature. Any damage occurring in such environmental conditions
will void the warranty.
•Keep your Mediatrix unit clear and dust-free during and after installation.
•Locate the emergency power-off switch for the room in which you are working. Then, if an
electrical accident occurs, you can act quickly to turn off the power.
•Do not work alone if potentially hazardous conditions exist.
•Never assume that power is disconnected from a circuit. Always check.
•Do not perform any action that creates a potential hazard to people or makes the equipment
unsafe.
•Do not open or disassemble this product.
•The unit should be located at 20 cm from your monitor, computer casing or other peripheral
including speakers.
•When the unit is brought from a cold to a warm environment, condensation, that might be
harmful to the unit, may occur. If this is the case, wait one hour before powering the unit.
media5corp.com

Model M - Sentinel 100 8
Electrostatic Discharge Prevention
•When working on a Mediatrix unit, always wear an ESD wrist strap, ensuring that it makes a
good contact with your bare skin.
•Attach the ESD wrist strap end to an earth ground i.e. the grounding screw on the back of the
Mediatrix unit or on an unpainted bare metal spot of a grounded equipment rack.
Translated Warning Definition
Warning: Means danger. You are in a situation that could cause bodily injury. Before you
work on any equipment, you must be aware of the hazards involved with electrical circuitry
and familiar with standard practices for preventing accidents.
Attentie: Dit waarschuwingssymbool betekent gevaar. U overtreat in een situatie die
lichamelijk letsel kan veroorzaken. Voordat u aan enige apparatuur gaat werken, dient u zich
bewust te zijn van de bij elektrische schakelingen betrokken risico's en dient u op de hoogte
te zijn van standaard maatregelen om ongelukken te voorkomen.
Varoitus: Tämä varoitusmerkki merkitsee vaaraa. Olet tilanteessa, joka voi johtaa
ruumiinvammaan. Ennen kuin työskentelet minkään laitteiston parissa, ota selvää
sähkökytkentöihin liittyvistä vaaroista ja tavanomaisista onnettomuuksien ehkäisykeinoista.
Averrtissement: Ce symbole d'avertissement indique un danger. Vous vous trouvez dans
une situation pouvant causer des blessures ou des dommages corporels. Avant de travailler
sur un équipement, soyez conscient des dangers posés par les circuits électriques et
familiarisez-vous avec les procédures couramment utilisées pour éviter les accidents.
Warnung: Dieses Warnsymbol bedeutet Gefahr. Sie befinden sich in einer Situation, die
zu einer Körperverletzung führen könnte. Bevor Sie mit der Arbeit an irgendeinem Gerät
beginnen, seien Sie sich der mit elektrischen Stromkreisen verbundenen Gefahren und der
Standardpraktiken zur Vermeidung von Unfällen bewußt
Avvertenza: Questo simbolo di avvertenza indica un pericolo. La situazione potrebbe
causare infortuni alle persone. Prima di lavorare su qualsiasi apparecchiatura, occorre
conoscere i pericoli relativi ai circuiti elettrici ed essere al corrente delle pratiche standard per
la prevenzione di incidenti.
media5corp.com

Model M - Sentinel 100 9
Advarsel: Dette varselsymbolet betyr fare. Du befinner deg i en situasjon som kan føre til
personskade. Før du utfører arbeid på utstyr, må du vare oppmerksom på de faremomentene
som elektriske kretser innebærer, samt gjøre deg kjent med vanlig praksis når det gjelder å
unngå ulykker.
Aviso: Este símbolo de aviso indica perigo. Encontra-se numa situação que lhe poderá
causar danos físicos. Antes de começar a trabalhar com qualquer equipamento, familiarize-
se com os perigos relacionados com circuitos eléctricos, e com quaisquer práticas comuns
que possam prevenir possíveis acidentes..
Aviso: Este símbolo de aviso significa peligro. Existe riesgo para su integridad física. Antes
de manipular cualquier equipo, considerar los riesgos que entraña la corriente eléctrica y
familiarizarse con los procedimientos estándar de prevención de accidentes.
Varning - risk för maskinskada: Denna varningssymbol signalerar fara. Du befinner dig i en
situation som kan leda till personskada. Innan du utför arbete på någon utrustning måste du
vara medveten om farorna med elkretsar och känna till vanligt förfarande för att förebygga
skador.
media5corp.com

Model M - Sentinel 100 10
Requirements
Location Requirements
To avoid premature aging of the unit, insure user security and facilitate access, upgrades and
maintenance, the following guidelines must be followed.
•Install the Mediatrix unit:
•on a standard 48.26 cm (19 in.) equipment rack
•on a flat surface (desk, table, etc.)
•Install the Mediatrix unit in a well-ventilated location where it will not be exposed to high
temperatures or humidity.
•Storage temperature: -20ºC to +70ºC
•Operating temperature: 0ºC to +40ºC
Caution: If the unit is installed in a closed environment or on a multi-unit rack, the
ambient temperature of the environment next to the Media5 unit may become greater
than the maximum operating temperature recommended by Media5 for the use of its
units, i.e. 40ºC. The Mediatrix unit should never be used to temperatures greater than
the recommended maximum operating temperature. Any damage occurring in such
environmental conditions will void the warranty.
•Humidity lower than 85% and non-condensing
•Do not install the Mediatrix unit in a location exposed to direct sunlight or near stoves or
radiators. Excessive heat could damage the internal components.
•Unit should be positioned to be accessible for future upgrade, maintenance and
troubleshooting and where cables can be easily connected.
•Maintain a minimum of 25 mm (1 in.) clearance in front, in the back, on top, under (for rack
mounted units), and on the sides of the unit.
•Keep airflow around and through the vents of the unit clear of any obstruction.
•Do not put books or paper on the unit.
Wiring Guidelines
These guidelines apply for any cable, supplied or not, used with a Mediatrix unit.
•Always use straight through cables.
•Cables must not pull or create a lateral stress on the connectors, i.e. they must be long enough.
media5corp.com

Model M - Sentinel 100 11
•Cables must be installed in such a way not to present a trip hazard to personnel working in the
vicinity of the equipment.
•Keep cables away from:
•Sources of electrical noise such as radios, transmitters, and broadband amplifiers
•Power lines
•Fluorescent lighting fixtures
•Liquids or moisture
•Heat sources
Mediatrix Sentinel 100 Characteristics
Parameter Description
Dimensions •Height: 4.4 cm (1.75 in.)
•Width: 48.3 cm (19 in.)
•Depth: 19.5 cm (7.5 in.)
Weight •3 kg (7 lb)
Power consumption •100 Vac -240 Vac
•50 Hz/60 Hz 1.3 A
media5corp.com

Model M - Sentinel 100 12
Getting Started
Installation Check List
Task Verified by Date
Network information available
and recorded in site log.
Location requirements verified.
Site power Voltage.
Installation site pre-power
check completed.
Mounting tools and equipment
available.
Additional equipment available.
Mediatrix unit received.
Regulatory compliance and
safety information received.
Software version verified
Rack, desktop mounting of
chassis completed.
Initial electrical connections
established.
Cable length limits verified.
Initial configuration performed.
Initial operation verified.
media5corp.com

Model M - Sentinel 100 13
Package Check List
Item Condition
1 Mediatrix unit
1 power cord with the proper model for the
country
1 Bumpon kit for desktop use
1 printed flyer
1 black RJ-45 cable for each PRI and BRI port
1 grey Ethernet RJ-45 cable
Cleaning Instructions
To clean a Mediatrix unit, wipe with a soft dry cloth.
Caution: Do not use volatile liquids such as benzine and thinner as they can damage the
unit's casing.
For resistant markings, wet a cloth with a mild detergent, wring well and then wipe off. Use a dry
cloth to dry the surface.
Mounting Tools and Equipment
Tools
•Screwdriver as required for attaching brackets to rack
•ESD wrist strap
•Earth ground cable
Warning: The earth ground cable should be the same size (18 AWG minimum) as the earth
cable of the provided power cord. Otherwise, make sure the earth ground cable meets the
standards and requirements of your local electrical code. The type of the cable is likely to
have VW-1 or RT1 markings on the cable.
media5corp.com

Model M - Sentinel 100 14
Equipement
•RJ-45 cables for the WAN and LAN connections
•RJ-45 cable for PRI and BRI connections
•RJ-11 cable for telephony connections
Connectors and Indicators
Note: The Mediatrix Sentinel 100 is highly customizable in the sense that it may have one or several
types of cards, or none. Therefore the following images may not exactly represent your Mediatrix
unit.
LEDs
media5corp.com

Model M - Sentinel 100 15
# LED Behavior Condition
Green, blinking, 1 cycle per
second, 50% duty
Unit is being restarted
Green, steady ON Unit is restarted
1 Unit with Power 1 connector
only
OFF No current or failing power
supply
Green, steady ON All lines are enabled
(operational state)
OFF All lines are disabled
(operational state)
2 Ready
Blinking 1 cycle per 4
seconds, 75% duty
At least one line is enabled
and at least one line is
disabled (operational state)
OFF Lines idled and unlocked
Yellow, steady ON Lines in use and unlocked
3 In-Use
Yellow, blinking yellow, 1
cycle per second, 50% duty
Locked
Amber, steady ON Indicates that the PRI port is
in use
8 IN-USE
OFF Indicates that the PRI port is
not connected
Green, steady ON Indicates that the PRI port is
well connected
9 LINK
OFF Indicates that the PRI port is
not connected
Red, steady ON Indicates that the PRI port is
not working properly
11 ERROR/TROUBLE
OFF Indicates that the PRI port is
working properly
Green, blinking, variable
rate
Network traffic
Green, steady ON No network traffic
12 ETH1 - Right LED (activity)
OFF Not connected
OFF 10 Mbps
Green 100 Mbps
12 ETH1 -Left LED (speed)
Yellow 1000 Mbps
media5corp.com

Model M - Sentinel 100 16
# LED Behavior Condition
Green blinking, variable rate Network traffic
Green, steady ON No network traffic
13 ETH2/3/4/5/-Right LED
(activity)
OFF Not connected
OFF 10 Mbps
Green 100 Mbps
13 ETH2/3/4/5/ -Left LED
(speed)
Yellow 1000 Mbps
Green, steady ON Indicates that the BRI port is
well connected/configured
and the link is up.
16 LED
OFF Indicates that the BRI port
is not well connected or
configured, and that the link
is down.
Switches
# Switch Description
4 Reset/Default Allows setting the unit to default (known) values. Refer to RESET/
DEFAULT Button (p.29)
media5corp.com

Model M - Sentinel 100 17
Connectors and cards
# Connectors/
cards
Description
5 USB USB connector
6 SYNC IN 8 KHz TDM synchronisation pulse input
7 SYNC OUT 8 KHz TDM synchronisation pulse output
10 PRI card with PRI
port
RJ-48 connector for ISDN-PRI connectivity
12 ETH1 A 10/100/1000 BaseT Ethernet RJ-45 connector for access to a LAN,
WAN, or computer. This port is by default used for uplink / WAN
connection.
13 ETH2-ETH3-ETH4/
ETH5
10/100/1000 BaseT Ethernet RJ-45 connector for access to a
LAN, WAN or computer. These ports are used by default for LAN
connections.
14 FXS card with 4
FXS ports
RJ-11 connector for phone/fax/PBX-FXS connection
15 FXO card with 4
FXO ports
RJ-11 connector for PSTN/PBX-FXS connection
16 BRI card with 4
BRI ports
4 x RJ-48C connectors for BRI connectivity.
# Description
1 POWER 1 connector
3 Power switch
4 Grounding screw
media5corp.com

Model M - Sentinel 100 18
Installing The Mediatrix Unit
Before you start
Warning: When installing or replacing the Mediatrix unit, the earth ground connection
between the grounding screw on the back of the Mediatrix unit and an appropriate grounding
point in your site must always be made first and disconnected last. This is mandatory to avoid
any damage or injuries, even if the Mediatrix unit is installed in a grounded equipment rack.
Warning: The earth ground cable should be the same size (18 AWG minimum) as the earth
cable of the provided power cord. Otherwise, make sure the earth ground cable meets the
standards and requirements of your local electrical code. The type of the cable is likely to
have VW-1 or RT1 markings on the cable.
Warning: The earth ground cable must be firmly and securely connected to the grounding
screw on the back of the Mediatrix unit and an appropriate grounding point in your site: the
earth ground cable must remain tightly secured at all times during service and installation.
Warning: Before performing this procedure, you must first read and understand the Safety
Recommendations listed in this document.
Note: Note or take a picture of your unit's serial number before starting the installation, and
place the card stickers of the cards not factory installed. Refer to Locating the Product Serial Number
(p.27).
Steps
1) Install the unit on a flat surface or in an equipment rack. Refer to Installing the Unit on a Flat
Surface (p.19).
Caution: If the unit is installed in a closed environment or on a multi-unit rack, the ambient
temperature of the environment next to the Media5 unit may become greater than the
maximum operating temperature recommended by Media5 for the use of its units, i.e. 40ºC.
The Mediatrix unit should never be used to temperatures greater than the recommended
maximum operating temperature. Any damage occurring in such environmental conditions
will void the warranty.
2) Connect the Telephony Interface Cables. Refer to Connecting the Telephony Cables (p.19).
Caution: To prevent damage to the Mediatrix unit, make sure to connect the cables to their
proper location on the Mediatrix unit.
3) Connect the Ethernet Cables. Refer to:
a) Connecting the Mediatrix Unit Using a DHCP Server (p.20)
b) Connecting the Mediatrix Unit Using a Static IP Address (p.21)
media5corp.com

Model M - Sentinel 100 19
Installing the Unit on a Flat Surface
Before you start
Warning: Before performing this procedure, you must first read and understand the Safety
Recommendations listed in this document.
Steps
1) Unpack the unit and go through the Package Check List (p.13)
2) Apply the Bumpon ™ autoadhesive protective products to the bottom of the unit.
Note: This will improve the airflow under the unit.
3) Install the unit on a flat surface.
4) Make sure the unit is at 20 cm (8 in.) from your monitor, computer casing, or other
peripheral, including speakers.
Connecting the Telephony Cables
Information
Note: To prevent damage to the Mediatrix unit, make sure to connect the cables to their proper
location on the Mediatrix unit.
Steps
1) Make sure an adequate earth ground connection has been made between the grounding
screw on the back of the Mediatrix unit and an appropriate grounding point in your site.
Warning: Adequate earth grounding connection of the Mediatrix unit is mandatory to avoid
any damage or injuries.
2) Wear an ESD wrist strap, ensuring it makes good contact with your bare skin.
3) Attach the ESD wrist strap end to an earth ground (grounding screw on the back on the
Mediatrix unit or unpainted bare metal spot of a grounded equipment rack).
4) Make sure the unit's power switch is OFF.
5) Make sure the circuit breakers of AC power sources used to power the Mediatrix unit are
OFF.
6) Make sure the provided AC power cord is connected into the POWER connector located on
the back of the Mediatrix unit and in an appropriate AC electrical outlet.
7) Connect faxes, phones or a PBX to the FXS card.
8) Connect a PBX or ISDN line to the PRI card.
media5corp.com

Model M - Sentinel 100 20
9) Connect a PSTN or a PBX to the FXO card.
Connecting the Mediatrix Unit Using a DHCP Server
Before you start
•Make sure that your network connection is working.
•You must use an IPv4 Network.
•The IPv4 Network must have a DHCP server.
•If your unit does not have an FXS port, or if you do not have access to the DHCP server's logs,
then use the Connecting the Mediatrix Unit Using a Static IP Address (p.21) procedure.
Steps
1) Make sure an adequate earth ground connection has been made between the grounding
screw on the back of the Mediatrix unit and an appropriate grounding point in your site.
Warning: Adequate earth grounding connection of the Mediatrix unit is mandatory to avoid
any damage or injuries.
2) Wear an ESD wrist strap, ensuring it makes good contact with your bare skin.
3) Attach the ESD wrist strap end to an earth ground (grounding screw on the back on the
Mediatrix unit or unpainted bare metal spot of a grounded equipment rack).
4) Make sure the unit's power switch is OFF.
5) Make sure the circuit breakers of power sources used to power the Mediatrix unit are OFF.
6) Make sure the provided AC power cord is connected into the POWER connector located on
the back of the Mediatrix unit and in an appropriate AC electrical outlet.
7) Connect a 10/100/1000 BaseT Ethernet RJ-45 cable into the ETH1 connector of the Mediatrix
unit.
8) Connect the other end of the cable to a router/switch connected to your Network.
9) Validate the installation.
10)Turn ON the power sources that are used to power the Mediatrix unit at the circuit breaker.
Note: When the unit is brought from a cold to a warm environment, condensation, that might be
harmful to the unit, may occur. If this is the case, wait one hour before connecting the power cord.
11)Turn On the power switch of the Mediatrix.
12)If you have an FXS port, dial *#*0 to get the IP address or consult the DHCP server's logs
to find out your IP address.
media5corp.com
Table of contents
Other Media5 Gateway manuals

Media5
Media5 Mediatrix 4104 User manual

Media5
Media5 Mediatrix LP Series User manual
Media5
Media5 Mediatrix C710 Manual
Media5
Media5 Mediatrix 3000 Series User manual

Media5
Media5 Mediatrix 3308 Manual
Media5
Media5 Mediatrix C710 User manual

Media5
Media5 Mediatrix 4401 Manual

Media5
Media5 Mediatrix 3000 Series Quick start guide
Media5
Media5 Mediatrix 4400 Series User manual

Media5
Media5 Mediatrix 4108 Manual
