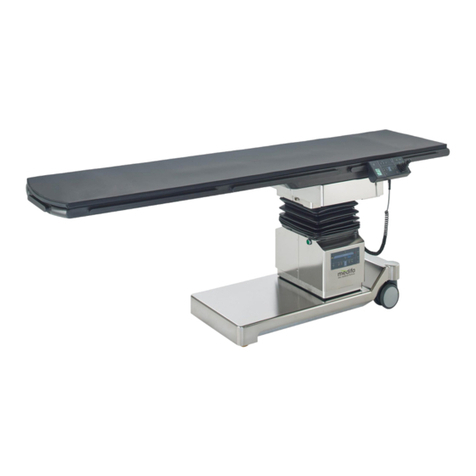
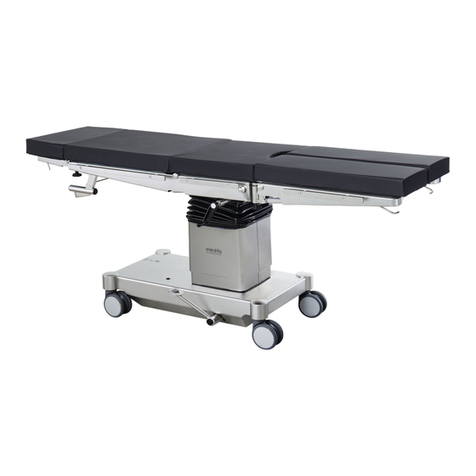
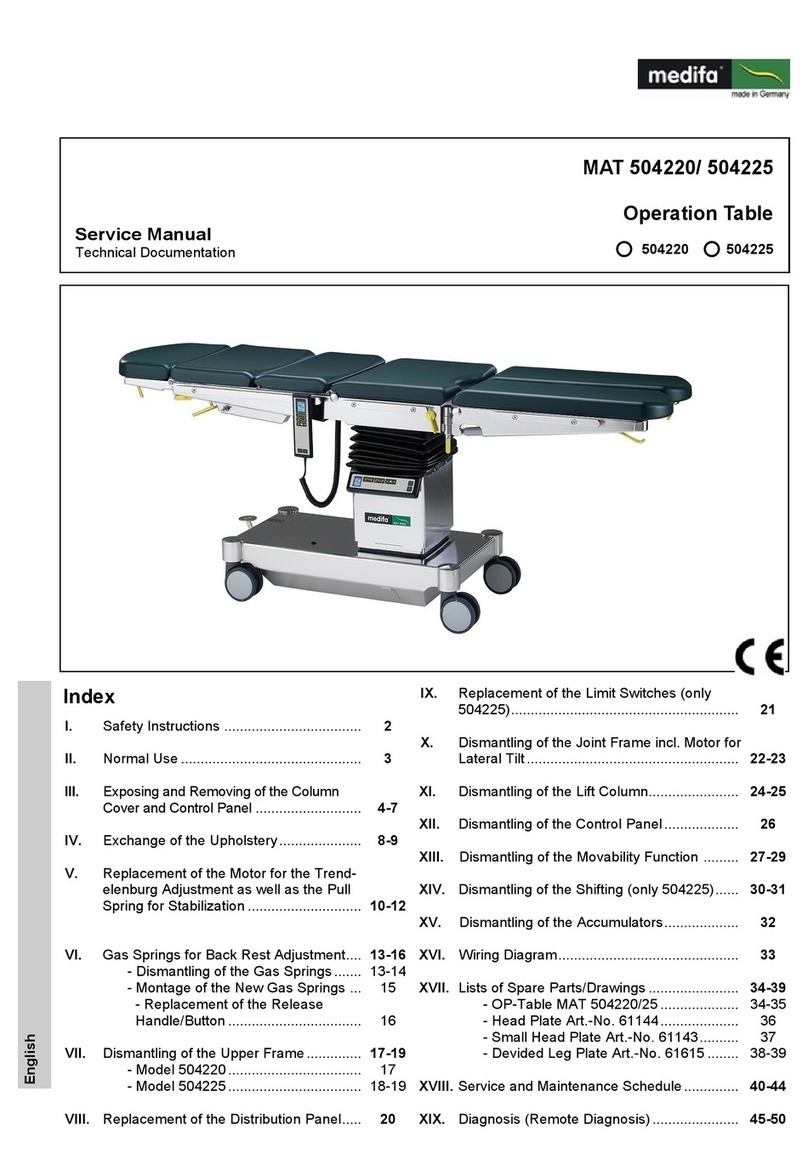
Medifa 800200 User manual

medifa 8000
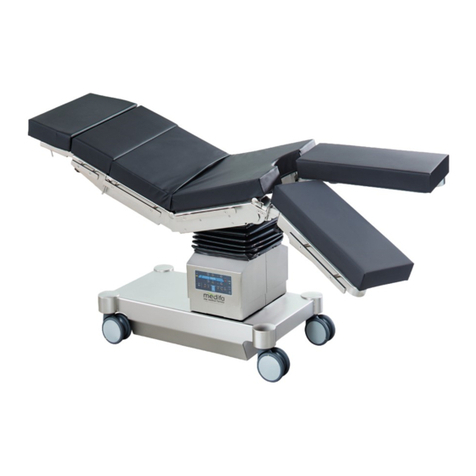
medifa imaging operating table
800200
Deutsch
Index
I. Safety Instructions...................................
II. Normal Use .............................................
III. Removing the Table Top ........................
IV. Removing the Crusting Protector ............
V. Removing the Column Cover....................
VI. Loosening of the Expansion Bellows ......
VII. Oil Level Check .......................................
- Refill Oil...........................................
VIII. Replacement of Hydraulic Cylinder
Blocks
- Longitudinal Shifting of table top.....
- Transverse Shifting of table top ......
IX. Mounting of the Upper Base ...................
X. Replacement of the Way measurement
System for ...........................................
- Longitudinal Shifting .......................
- Transverse Shifting .........................
- Trendelenburg Shifting ...................
- Lateral Tilt
XI. Replacement of Hydraulic Cylinder ...............
-Trendelenburg Shifting ...........................
-Lateral Shifting .......................................
XII. Replacement of the Control Panel.................
XIII. Replacement of the Hydraulic Power Unit.....
XIV. Replacement of Accumulator.........................
XV. Replacement of Movable Parts .....................
- Replacement of the Castors(front) ...........
- Replacement of the Castors (rear)............
XVI. Replacement of the External Battery Charger ..
XVII. Wiring Diagram Breaker Box (black) .................
XVIII. Electrical Wiring diagram...............................
XIX. Hydraulic Diagram .........................................
XX. List of Spare Parts & Drawings......................
XXI. Service/Maintenance Schedule .....................
- Service Report.......................................
- Maintenance Schedule..........................
23-25
23
24-25
26
27
28
29-32
29
30-32
33
34
35
36-37
38-39
40-44
40-41
42-44
2
3
4
5
6-9
10
11
11
12-15
12-13
14-15
16
17-22
17
18
19-20
21-22

Service Manual - medifa 8000
The Radioscopy Operating Table medifa 8000 has been manufactured according to the state of the art as well
as to the valid safety specifications and requirements.
Nevertheless, improper handling and/or damages on the radioscopy operating table can lead to safety hazards
for the user and/or other persons and tangible assets.
Only start running the radioscopy operating table when in perfect condition. This table has been solely desig-
ned for normal use. Operators should keep in mind to handle the table in compliance with the safety rules and
recommendations as listed in this manual in order to avoid any hazards which may occur from improper hand-
ling. Any defaults which may affect the safety have to be repaired immediately!
The table comes with conductive double castors, conductive upholstery and an equipotential bonding.The ra-
dioscopy operation table can be used in a Zone M - given the area is equipped with a conductive floor.
Always keep this manual close at hand. Please notice as well all legal and further guidelines and regulations
for accident prevention and pollution control.
Do not replace, change or repair any devices of the above mentioned table without the authorization of the ma-
nufacturer. All repairs and maintenance services need to be carried out by the manufacturer or by authorized
personnel.
Spare parts need to be in accordance with the requirements of the manufacturer. Original spare parts always
guarantee the proper running of the radioscopy operation table.
Keep the mandatory deadlines for recurring controls as stated in this service manual!
Think of an environnement friendly disposal of equipment and faulty parts!
Think of a barrier free surrounding before car-
rying out a downward or tilting motion!
DANGER OF TILTING!
Avoid collisions between parts of the table top and the
column, when carrying out the following adjustments:
Height adjustment (downwards)
Tilt adjustment
I. Safety Instructions
2

In compliance with the fullfilled regulations and rules of the international standard IEC 60601-1 and IEC
60601-2-46 this table is a Class I device, following the classification of the law for medical products
(Medizinproduktegesetz)(MPG).
It has to be listed in a respective index. All maintenance works, new installations, adjustments and mountings
should be reported in that index.
Alway keep in mind, that all of the above mentioned works should be solely carried out by Medifa Service
Technicians to guarantee a long, safe and proper function of the product.
This is an important requirement for all kind of warranty claims!
Operation tables, manufactured by Medifa, have been exclusively designed for human medicine and
should only be operated by authorized personnel in areas equipped according to the known standards.
Authorized personnel by definition are persons who took part in a training for the correct use of the device
by specially skilled staff.
This training will be documented and confirmed in a respective report.
Only use tables in a perfect condition and maintenanced according to the given schedule!
II. Normal Use
medifa GmbH & Co. KG – Industriestraße 5 – D-57413 Finnentrop, Tel.: +49 (0) 2721-7177-0 – Fax: +49 (0) 2721-7177-77 3
Attention:
This manuel cannot replace the absolutely necessary training for the operation
and maintenance of our products!

Service Manual - medifa 8000
Before starting any repair or maintenance work on the radioscopy operation table it might be necessa-
ry to take off the table plate, to prevent damages. In some cases this will become absolutely necessary
in order to reach special parts.
Adjust the table in the highest position and carry on as follows:
Adjust the table at the headboard with the help of the sliding
mechanism. You will now see the guide rails for the sliding
mechanism under the table top.
unscrew the eight screws.
Then drive the table plate to the end of the foot board. You
will now see the guide rails for the sliding mechanism.
unscrew the six screws.
The cylinder piston for the hydraulic sliding function has to
be taken off. To do so, put off the screw at the end of the
piston.
Note:
To put off the screw, push against the screw with a screwdri-
ver or similar. The piston itself is freely movable.
Finally move the table plate to the left (1 x) and to the right
(1x) in order to put off the last two screws through the notch
in the base plate.
Now the plate can be easily removed.
Attention:
before removing the last screws, a second person
should secure the table top to prevent the table top from
falling down.
In such a case serious injuries or damages of the table
top could be the result.
When remounting the table top, all screws should be
fastened first and then should be loosened by a half
turn.
After that, move the table top in all directions before fi-
nally fastening the screws tightly.
III. Removing The Table Top
4
fig. 1: removing the table top
fig. 2+3: removing the table top
fig. 4+5: removing the table top

After removing the table top, you can start to remove the in-
tegrated crusting protector,
Move the table top with the help of the cross-sliding function-
to the complete right, ( from the patients side of view).
You will find the connection for the crusting protector of the
sliding mechanism.
By loosening the screws you can pull the cables from the
socket.
The cables can now be pulled off easily from the cable ducts
on the surface of the base plate.
If necessary, move the runners for the longitudinal shifting.
.
Attention:
Do not pull the slides out of the guide rail.This will de-
stroy the guide rail and will make it useless!
Therefore we recommend to protect the guide rail with a
cable tie against the complete pull out. ( Pull the cable tie
through the hole in the middle of the guide rail, while it is
in the middle position!)
Now loosen the cover panel of the crusting protector. Remo-
ve all screws on the front and on the back.
Now the cover panel can be bend and removed.
Attention:
Before removing the last screw, a second person should
secure the cover panel to prevent it from falling down!
Now you will see a second cover panel, as well kept together
with two screws, but, in addition, secured by eight more
screws, screwed from below.
Loosen all screws and remove the cover panel by bending it
up!
Attention:
Before removing the last screw, a second person should
secure the cover panel to prevent it from falling down!
IV. Removing The Crusting Protective Cover
medifa GmbH & Co. KG – Industriestraße 5 – D-57413 Finnentrop, Tel.: +49 (0) 2721-7177-0 – Fax: +49 (0) 2721-7177-77 5
fig. 7: remove crusting protector
fig. 6: remove crusting protector
fig. 10: remove crusting protector
fig. 8+9: remove crusting protector

Service Manual - medifa 8000
For various repairs the column cover needs to be removed.
Do as follows:
Use the hand switch or the control panel and put the table into the top position. Remove the supply
cable, if necessary. Turn off the table at the base.
V. Removing The Column Cover
6
Loosen the screws at the back of the middle part of the co-
ver.
When unhooked, the cover can be bend open around the
lower cover and can be dismantled. .
fig. 11: open the middle part of the cover
fig. 14: dismantle the middle part of the
column
fig. 12+13: unhook the middle part of the
cover
After removing both screws, the cover can be unhooked from
the upper cover by pushing it to the inside and pulling it down
at the same time. Repeat this procedure on the other side
and you will be able to completely uncover the middle part.
Attention:
Be careful to prevent the cover from falling down!

Remove the screws on the left and on the right to dismantle
the lower cover.
fig. 15: loosening the lower cover
medifa GmbH & Co. KG – Industriestraße 5 – D-57413 Finnentrop, Tel.: +49 (0) 2721-7177-0 – Fax: +49 (0) 2721-7177-77 7
fig. 16: loosening the lower cover
Loose the screws in the back.
Dismantle the cover by bending it up around the column.
fig. 17: dismantle the lower cover
fig. 18: loosening the expansion bellows
To dismantle the upper cover, the expansion
bellows need to be detached.
Remove all four expanding rivets to dismant-
le the expansion bellows from the upper co-
ver. Use a small slot screw driver or flat
pliers.

Inside the upper cover
Service Manual - medifa 8000
8
After removing the expansion bellows from the upper cover,
do the same with the control panel.
Do as follows: Loosen the screws (4 screws) from the inside
of the upper cover.
Now move the control panel towards the headboard, pull the
screw heads through the notch and remove the control panel.
fig. 20: removing the control panel
fig. 21: removing the data cable of the
control panel
Put the visible data cable off the jack.
The control panel is now dismantled and can be put aside.
Now the expansion bellows can be pulled over the frame. A
fig. 19: removing the expansion bellows
fig. 22+23: remove data cable from the
control panel
Now, remove the cables from the illuminated push button,
from the inside.
Just pull each plug off the illuminated push button.
Note:
Keep in mind the plug-in location and order as well as the
respective colours, to prevent a mix up.

Loose the screws on the back to remove the upper cover.
fig. 28: loosening the upper cover
medifa GmbH & Co. KG – Industriestraße 5 – D-57413 Finnentrop, Tel.: +49 (0) 2721-7177-0 – Fax: +49 (0) 2721-7177-77 9
fig. 29: removing the upper cover
Bend the cover around the column, like you did with the mi-
ddle and lower covers,in order to remove it.
fig. 24+25+26: dismantling of expansion
bellows
To remove the upper cover the holders of the expansion bel-
lows on the front and in the back have to be dismantled. .
Now the fastening screws on both sides can be removed as
well.
Attention:
Before removing the fastening screws on both sides, a
second person should secure the upper cover to prevent
it from falling down and causing secondary failures!

Service Manual - medifa 8000
Before being able to loose the expansion bellows, it is necessary to dismantle the crusting protector of the sli-
ding function.
Please see Chapter IV „Removing the Crusting Protective Cover“.
Do as follows:
Stand in front of the table.
Loosen the front holders of the expansion bellows by remo-
ving the two hexagon bolts on the upper side of the lower
base plate.
Now move to the back of table and remove the two other he-
xagon bolts on the upper side of the lower base plate.
After loosening all fastening screws, the expansion bellows
and holders can be left on the remaining holders on the co-
lumn.
The table construction is now accessible.
VI. Loosening The Expansion Bellows
10
fig. 30: loosening the holders of the ex-
pansion bellows
fig. 31 : loosening the holders of the
expansion bellows
fig. 32: : loosening the holders of the
expansion bellows

In order to carry out an oil level check, expose the table column as stated in Chapter VI „Exposing the taTable
Column“.
Please follow the instructions:
For an oil level check of the hydraulic system do as follow:
method 1:
1. Drive the table into the lowest position.
2. Additionally, tilt the table into the lowest position of the
head rest, as far as possible without the danger of colli-
sion with the floor.
3. Now, tilt the table to the left (from the patients view) as
far as possible without the danger of collision with the
floor.
All mounted cylinders should be in its lowest position, which
means, the highest possible oil level (max in) in the oil coll-
ecting pan has to be visible!
Attention:
Avoid collisions between the carbon table plate and the
floor!
If all above mentioned functions are in its end position,
serious damage can be the result.
Method 2:
1. Drive the table into the highest position.
2. Additionally, tilt the table into the lowest position of the
foot rest.
3. Now, tilt the table to the right (from the patients view).
All mounted cylinders should be in its highest position, which
means, the lowest possible oil level (max out) in the oil collec-
ting pan has to be visible
Note:
The oil level „min out“ indicates the absolute minimum level
while the table is in the mentioned position.
For refilling, put off the plug and refill oil with a funnel!
oiL type
ARAL VITAM DE 32
Type: HLP-D
VII. Oil Level Check
medifa GmbH & Co. KG – Industriestraße 5 – D-57413 Finnentrop, Tel.: +49 (0) 2721-7177-0 – Fax: +49 (0) 2721-7177-77 11
fig. 33: oil level check
fig. 34: oil level check
fig. 36: oil level check
fig. 35: oil level check

Service Manual - medifa 8000
To replace the hydraulic cylinder for the longitudinal shifting, first take off the table top as stated in Chapter III
“Removing The Table Top“.
Then remove the crusting protector and loosen the expansion bellows. For further information please see
Chapter IV „Removing The Crusting protector“, Chapter V“ Removing The Column Cover“ and Chapter
VI “Loosening The Expansion Bellows“.
Do as follows:
Loosen the threaded joint at the end of the hydraulic cylinder.
Note:
While loosening the screw, the piston has to be supported
with a - e.g.- screwdriver in order to disconnect the threaded
joint.
Now remove the fastening screws of one of the two guide
rails of the hydraulic cylinder block.
As soon as the guide rails are taken off the cylinder block can
be removed.
In case the hydraulic cylinder is faulty it now can be replaced
by removing the screws of the tube connection.
After removing the screws, the tube can be easily removed
from the block.
Attention:
Should the cylinders or the tubes still be pressurised, oil
might penetrate.
We recommend to have a collecting pan for waste oil at
hand.
VIII. Replacing the Hydraulic Cylinder (Longitudinal Shifting)
12
fig. 37+38: removing the hydraulic cylin-
der
fig. 39+40: removing the hydraulic cylin-
der

Should the tubes be faulty, they have to be retraced to the
tube connection (quick acting coupling).
You will find those connections in the center part of the table
column.
To separate the couplings just pull the spring of the coupling.
Note:
There will be no penetration of oil while separating the coup-
lings, as they are equipped with a return valve.
Attention:
while working with tubes of the shifting function it is ab-
solutely necessary to install them exactly as provided by
the manufacturer, to prevent damages on the shifting
function.
Note:
We recommend to replace the tubes one by one to make
sure they will be properly installed. Separate the tube from
the coupling and connect the new tube right away. Install the
new tube while dismounting the faulty tube.
This procedure will guarantee the proper installation of the
tube.
Always take care of cable ties and band clamps.
medifa GmbH & Co. KG – Industriestraße 5 – D-57413 Finnentrop, Tel.: +49 (0) 2721-7177-0 – Fax: +49 (0) 2721-7177-77 13
fig. 41+42: loosening quick acting coup-

Service Manual - medifa 8000
Before replacing the hydraulic cylinder for the transverse shifting function, remove the table top. For further
help, please see Chapter III “Removing the Table Top“.
Also remove the crusting protector and loosen the expansion bellows, as stated in Chapter IV “Removing the
Crusting protector“, Chapter V “Removing the Column Cover“ and Chapter VI „ Loosening the expan-
sion bellows“.
Do as follows:
In order to approach to the cylinder block of the transverse
shifting function, the upper base plate has to be dismantled.
First loosen the connection between the cylinder block and
the upper base plate by loosening the two screws of the
connection of the cylinder from underneath the upper base
plate.
The connection is placed on the left.
Now the upper base plate is freely movable by hand.
Attention:
Take care as not to pull the base plate with its rails out of
the guide rails. That would destroy the guide rail system
and render it useless!
Move the base plate by hand to the left side until you will be
able to reach the screws, which connect the guide rails to
upper base plate, from underneath. (3x screws/ rails).
As soon as this procedure is carried out, do the same on the
opposite side.
Attention:
Before removing the last screw, a second person should
secure the base plate, as it is no longer connected to the
frame and therefore prevent it from falling down.
When all fastening screws are removed, the upper base plate
can be detached from the frame.
Note:
There are still connections, e.g. cables and hydraulic tubes
attached to base plate.
Put the plate on a place of deposit, prepared in advance and
in the same height as the table frame.i
Attention:
While removing the base plate do not damage any
electrical wires or tubes!
VIII. Replacing the Hydraulic Cylinder (Transverse Shifting)
14
fig. 43: loosen driving pin
fig. 44+45: loosening base plate

After removing the plate, you can start dismounting the cylin-
der block for the transverse shifting.
First remove the two fastening screws at the connection of
the cylinder piston.
Now remove one of the two guide rails of the hydraulic cylin-
der block. To do so, loosen the four fastening screws. When
you removed the guide rails, the whole cylinder block can be
taken out.
Should the hydraulic cylinder block be faulty, it can now be
replaced by taking off the screws at the tube connection. Af-
ter removing the screws the tubes can be easily pulled off the
block.
Attention:
Should the cylinder and/or the tubes still be pressurised,
oil might penetrate.
We recommend to have a collecting pan for waste oil at
hand.
Should the tubes be faulty, they have to be traced back to the
connection point ( quick acting coupling).
To separate the couplings, just pull the spring of the coup-
lings. (please see: Removing the Hydraulic Cylinder, longitu-
dinal shifting).
Note:
While seperating couplings, no oil will pentrate as they are
equipped with a return valve.
Attention:
while working with tubes of the shifting function, it is
absolutely necessary to install them exactly as provided
by the manufacturer, to prevent damages of the shifting
function.
.
Note:
We recommend to replace the tubes one by one to make
sure they will be installed properly. Separate the tube from
the coupling and connect the new tube right away. Install the
new tube while dismounting the faulty tube.
This procedure will guarantee the proper installation of the
tube.
Always take care of cable ties and band clamps.
medifa GmbH & Co. KG – Industriestraße 5 – D-57413 Finnentrop, Tel.: +49 (0) 2721-7177-0 – Fax: +49 (0) 2721-7177-77 15
fig. 52: remove hydraulic cylinder
fig. 48+49: remove hydraulic cylinder
fig. 46+47: remove hydraulic cylinder
fig. 50+51: remove hydraulic cylinder

Service Manual - medifa 8000
Do as follows:
First, screw back the cylinder connection to the lower base
plate.
Properly place the base plate onto the guide rails. Now move
to foot position of the table.
Take care that the position screw, which you will see on the
lower base plate,exactly fits into the connection (signal gene-
rator) of the way measurement system for the transverse shif-
ting.
Improper handling might lead to serious problems of the shif-
ting functions.
As soon as the upper base plate fits properly, the plate can
be fixed to the guide rails by screws.
In order to reach all screws move the plate by hand.
Attention:
Do not pull out the base plate completely out of the gui-
de rails. That would destroy the guide rail system and
render it useless!
Finally, fix the other cylinder connection to the back of the
upper base plate.
IX. Mounting of the Upper base plate
16
fig. 56+57:
fig. 53: fastening hydraulic cylinder
connection
fig. 54+55: signal generator ( way measu-
rement )

Before replacing the way measurement system for the longitudinal shifting the table top has to be taken off.
For further help please see Chapter III. „Removing the Table Top“.
Do as follows:
After taking off the table top, you will be able to look at the
way measurement system and dismantle it.
To replace the way measurement system just remove the
screw at the end.
Now retrace the cable to the connection of the expansion
bellows holder.
There, the cables can be removed by opening the cable
clamps.
X. Replacing the Way Measurement System (Longitudinal Shifting)
medifa GmbH & Co. KG – Industriestraße 5 – D-57413 Finnentrop, Tel.: +49 (0) 2721-7177-0 – Fax: +49 (0) 2721-7177-77 17
fig. 58: dismantle way measurement sys-
tem
fig. 60: dismantle way measurement sys-
tem
fig. 59 dismantle way measurement sys-
tem

Service Manual - medifa 8000
Before replacing the way measurement system for the transverse shifting, the table top has to be taken off. For
further help please see Chapter III „Removing the Table Top“.
Also remove the crusting protector and loosen the expansion bellows, as stated in Chapter IV “Removing the
Crusting protector“ and Chapter VI „ Loosening the expansion bellows“.
Do as follows:
First, remove the two fastening screws of the way measure-
ment system on the upper base plate.
Now take off the upper base plate!
For further help please see Chapter VIII „ Replacing the Hyd-
raulic Cylinder (Transverse Shifting).
The way measurement system is now hanging on the back
of the upper base plate.
Retrace the cable to the connection of the expansion bel-
lows holder.
By opening the cable clamps, the cables can be easily remo-
ved.
Note:
Be sure to install the cables as provided by the manufacturer
to prevent problems with the shifting devices.
Note:
Before remounting the upper base plate the way measure-
ment system has to be fixed to the back of the upper base
plate.
Please see Chapter X „Installation of the Upper Base Plate“.
X. Replacing the Way Measurement System (Transverse Shifting)
18
fig. 61:
fig. 62+63:

Before replacing the way measurement system for the Trendelenburg shifting, the table top has to be taken
off. For further help please see Chapter III „Removing the Table Top“.
Also remove the crusting protector and loosen the expansion bellows, as stated in Chapter IV “Removing the
Crusting protector“ and Chapter VI „ Loosening the expansion bellows“.
Additionally put off the column cover. For further help, please
see Chapter V „ Removing the Column Cover“.
Do as follows:
Before removing the way measurement system, the respecti-
ve driving pin has to be loosened from the cylinder.
Later on, the position of the driving pin on the cylinder will
indicate the preset „Zero Point Adjustment“. It is absolutely
necessary to place the driving pin correctly in order to gua-
rantee the right position of the „zero point adjustment“.
Therefore, the right position of the driving pin should be
marked in advance by drawing the contour with a pencil.
The tube clamp, which fixes the driving pin to the cylinder,
can now be opened.
Loosen the screws of the way measurement system with the
holder at the piston rod of the cylinder.
The system can be easily removed.
X. Replacing the Way Measurement System (Trendelenburg Shifting)
medifa GmbH & Co. KG – Industriestraße 5 – D-57413 Finnentrop, Tel.: +49 (0) 2721-7177-0 – Fax: +49 (0) 2721-7177-77 19

Service Manual - medifa 8000
Finally, sepeaate the wire of the way measurement system
( Trendelenburg shifting) .
Remove the two screws and open the way measurement
cap. You will now see the plug. Simply put it off.
After separating the way measurement system from the cylin-
der and cutting off the connection, simply screw off the holder
of the driving pin.
Remove the two fastening screws and mount the holder di-
rectly to the driving pin of the new system.
Note:
Should the cable be faulty, too, retrace it back to the connec-
tion and replace it.
See the diagram for the correct placement of the cables in
the breaker box.
20
fig. 68: looseningholder of driving pin
fig. 66+67:
This manual suits for next models
1
Table of contents
Other Medifa Medical Equipment manuals
Popular Medical Equipment manuals by other brands

Getinge
Getinge Arjohuntleigh Nimbus 3 Professional Instructions for use

Mettler Electronics
Mettler Electronics Sonicator 730 Maintenance manual

Pressalit Care
Pressalit Care R1100 Mounting instruction

Denas MS
Denas MS DENAS-T operating manual

bort medical
bort medical ActiveColor quick guide

AccuVein
AccuVein AV400 user manual
