manuals.online logo
Brands
  1. Home
  2. •
  3. Brands
  4. •
  5. Medline
  6. •
  7. Medical Equipment
  8. •
  9. Medline HCSM70C User manual

Medline HCSM70C User manual

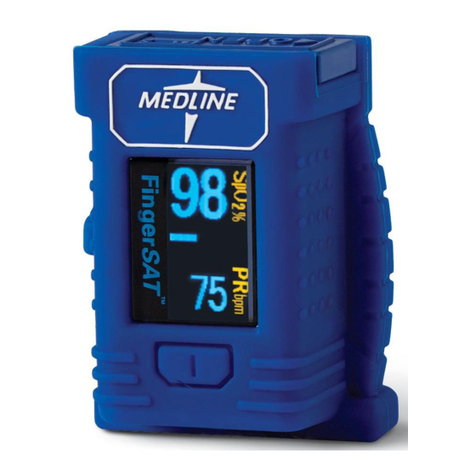
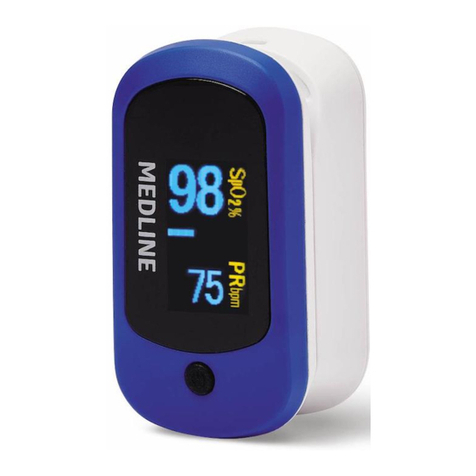
PULSE OXIMETER
GENERAL DESCRIPTION
PRECAUTIONS FOR USE
CAUTION
INTENDED USE
PRODUCT SPECIFICATIONS
OPERATION INSTRUCTIONS
The measurement of oxygen saturation of arterial blood (also known as pulse
oxygen saturation, usually shortened as SpO�) adopts the principles of light
spectra and volume tracing. The LED emits lights with two specific wavelengths,
which are selectively absorbed by oxygenated hemoglobin and
deoxyhemoglobin. The optical receptor measures the changes in the light
intensity after the light passes the capillary network and estimates the ratio of
oxygenated hemoglobin and the total hemoglobin.
SpO�% = x 100%
oxygenated hemoglobin
oxyhemoglobin + deoxyhemoglobin
■ Explosion hazard. Do not use the oximeter in the presence of flammable
anesthetics mixture with air, oxygen, or hydrogen.
■When the oximeter is in use, there should not be any great power appliances
as high voltage cables, X-ray machine, ultrasound equipment and electrizer in
use nearby.
■Keep the oximeter away from dust, vibration, corrosive substances, explosive
materials, high temperature and moisture.
■This oximeter does not have alarm function; please do not use this product in
the environment where alarm is required.
■The oximeter should be handled with care so as to avoid shocks and falls.
■When the oximeter is in use, it must be ensured the batteries have sufficient
capacity; otherwise there might be such phenomena as hstarting-up
abnormalities or inaccurate measurement data, etc.
■Please do not use such pointed objects as pen point or nails for pressing
operation, otherwise it might cause permanent damage to the surface of the
keyboard.
■Do not make any clinical judgments based solely on the oximeter. The
oximeter is intended only as an adjunct in patient assessment. It must be used
in conjunction with clinical signs and symptoms, as well as doctor’s diagnoses.
■To ensure accurate performance and prevent device failure, do not expose the
oximeter to extreme moisture, such as direct exposure to rain. Such exposure
may cause inaccurate performance or device failure.
■Do not conduct SpO� measurement on the finger smeared with nail polish,
otherwise this will lead to unreliable measurement results.
■Please do not open the enclosure. The enclosure shall only be opened by the
authorized person.
■In order to have more accurate measurements of SpO� and PR, the oximeter
should be used in quiet and comfortable environment.
■Follow local ordinances and recycling instructions regarding disposal or
recycling of the device and device components, including batteries.
■Prolonged continuous monitoring may increase the risk of unexpected
changes in skin characteristics, such as irritation, reddening, blistering or
burns. Inspect the sensor site every two hours and move the sensor if the skin
quality changes.
■Pulse oximeter simulator can not be used to access the accuracy of the pulse
oximeter.
■The expected service life of the device is three years.
The Fingertip Pulse Oximeter is intended to measure functional arterial oxygen
saturation (SpO�) and pulse rate of adult, pediatric and adolescent patients in
hospital, hospital type facilities, and in the home care envirorment.
The oximeter is not suitable to monitor patients continuously for long term.
LANYARD INSTALLATIONS
BATTERY INSTALLATIONS
NOTES: Be sure to install batteries as
directed by the polarity indicators in the
battery cabin. Batteries in this device are
different than conventional battery
installation.
■Please put or remove batteries in right
order, or it is likely to damage the device
bracket.
■Battery polarities must be correctly
installed. Otherwise, damage might be
caused to the device.
1. Press the button down on the back panel of the oximeter.
2 Push the battery cover horizontally along the arrow shown on the back panel
of the oximeter.
3. Install two AAA batteries into the battery cabin.
4. Close the battery cover.
MAINTENANCE
1. Use a soft cloth dampened with either a commercial, nonabrasive cleaner, or a
solution of 70% alcohol in water, lightly wipe the surfaces of the oximeter.
2. Avoid using alcohol-based, amido or acetone-based detergents.
3. The casing of the oximeter should be kept from the contamination of filth and
dirt, and it can be wiped with non-velvet soft cloth. When cleaning, do not
spill the liquid onto the instrument. Ensure no liquid is allowed to enter the
inside of the oximeter.
4. It is forbidden to use such grinding materials as wire brush or metal polishing
agent, because these materials may cause damage to the panels of the
oximeter.
5. Please do not soak the oximeter in liquid.
6. Under normal circumstances, it is unnecessary for the oximeter to have
special maintenance, and cautions must be exercised on the following points
during the use of the oximeter:
■Please use the oximeter in the environment according to the requirements of
the performance criteria.
■Avoid exposure or direct sunlight.
■Avoid excessive radioactive infrared rays or ultraviolet rays.
■Avoid contacts with organic solutions, dusts or corrosive gases.
Measurement specifications
SpO�
Measuring Range 0~100%
Resolution 1%
Accuracy At 70~100%, ±2%; At 0~69%, unspecified
Data updated period <13 s
Accuracy in the discrete
SpO� ranges
At 70%~80%, ±2%; At 80%~90%, ±2%;
At 90%~100%, ±2%
PR
Measuring Range 25~250 bpm
Resolution 1 bpm
Accuracy ±1% or ± 1 bpm, whichever is greater
Data updated period <13 s
Battery specifications
Type Voltage
two AAA alkaline battery 1.5 Volts DC (per battery)
The oximeter uses two 1.5 V AAA type batteries and a set of new batteries can be
used for more than 18 hours, depending on concrete battery types.
1. Install batteries as indicated by the battery
installation instructions.
2. Open the oximeter. Insert one finger into the
rubber hole of the oximeter before releasing.
Your nail surface must be upward.
3. Press the function button once on the front panel.
4. Read corresponding data on the display screen.
5. After turning on the oximeter, each time you press the power switch, the
display screen will change to another direction. If you hold down the power
switch, you can adjust the brightness of the screen from 1 to 5.
1. Attach the lanyard through the hole in the middle of the front face as the
arrows show.
2. Complete.
The mechanical activity of the heart causes arterial pulse, by measuring the
pulse we can get PR value.
The oximeter is standalone, reusable, and not reprocessed. The sensor of the
oximeter is built-in.
■ Federal Law Restricts this device to sale by or on the order of a physician.
■Please read the user manual carefully prior to operating.
① ②
②
①③
⑤
④
①SpO� Plethysmogram (normalized)
②SpO� reading
③Pulse rate reading
④Indication of battery capacity
⑤Indication of pulse intensity
Indication of screen brightness (Default value of brightness is 3)
Display modes
POSSIBLE PROBLEMS AND RESOLUTIONS
SYMBOLS DEFINITIONS
Environmental specifications
Physical specifications
Sensors specifications
Temperature +5°C ~ +40°C
Atmospheric Pressure 700hPa ~ 1060hPa
Relative Humidity ≤85%
Temperature +20°C ~ +55°C
Atmospheric Pressure 500hPa ~ 1060hPa
Relative Humidity ≤93%
Weight about 21g (exclude battery)
about 54g (include battery)
Dimensions 60mm(length) x 35mm(width) x 35mm(height)
Wavelength
Pulse oximetry sensors contain LEDs that emit red light at a
wavelength of approximately 660 nm and infrared light at a
wavelength of approximately 905 nm. The total optical output
power of the sensor LEDs is less than 15 mW.
This information may be useful to clinicians, such as those
performing photodynamic therapy.
Note: Sensor LED light emissions fall within Class 1 level,
according to IEC 60825-1. No special safety precautions are
required.
Operation
Transport and Storage
Problems Possible causes Solution
There is no respons
to the function
button.
The button can not be
pressed to its position
Ensure that the button is fully
depressed.
Battery capacities are low
The batteries may be missing,
discharged, or oriented
incorrectly. Replaced them with
new ones.
The pulse search
time is too long
Perfusion may be too low
Check the patient. Change the
measuring site. Try another
oximeter.
Patient movement
Interference due to patient
activity may be preventing the
oximeter from tracking the pulse.
Keep the patient still, if possible.
Electromagnetic interference
may be preventing the
oximeter from tracking the
pulse.
Remove the source of
interference.
There may be interference
due to ambient light, or the
oximeter may be on an
extremity with a blood
pressure cuff, arterial
catheter, or intravascular line.
Reposition oximeter, as nec-
essary.
Display is
dark-or-bright
Battery capacities are low. Replace the batteries.
Symbol Definition
Type BF equipment (Refer to IEC 60601-1)
Attention! Please refer to this manual.
%SpO� Oxygen saturation of arterial blood
/Min Pulse rate
Non-Alarm indication (The device does not have alarm
function)
IPX1 Enclosure degree of ingress protection.
SN Serial number
Refer to this user’s manual.
Symbol for the marking of electrical and electronics devices
according to Directive 2002/96/EC.
The device, accessories and the packaging have to be disposed
of waste correctly at the end of the usage. Please follow Local
Ordinances or Regulations for disposal.
Note: The Oximeter is applied to this regulation.
Date of Manufacture
Manufacturer’s information
Guidance and manufacture’s declaration-electromagnetic
emissions-for all EQUIPMENT and SYSTEMS
Guidance and manufacture’s declaration - electromagnetic emission
The Fingertip Pulse Oximeter is intended for use in the electromagnetic environment
specified below. The customer or the user of the Fingertip Pulse Oximeter should assure
that it is used in such an environment.
Emission
test
Compliance Electromagnetic environment - guidance
RF
emissions
CISPR 11
Group 1 The Fingertip Pulse Oximeter uses RF energy only for its
internal function. Therefore, its RF emissions are very
low and are not likely to cause any interference in nearby
electronic equipment.
RF
emission
CISPR 11
Group B The Fingertip Pulse Oximeter is suitable for use in all
establishments, including domestic establishments and
those directly connected to the public low-voltage power
supply network that supplies buildings used for domestic
purposes.
APPLICABLE MODELS
HCSM70C
Warranty
One year
PACKING LIST
No. Item Quantity
1 Oximeter 1
2 AAA battery 2
3Cord 1
4 User’s manual 1
www.medline.com Made in China.
Manufactured for Medline Industries, Inc.
Three Lakes Drive, Northfield, IL 60093 USA.
1.800.MEDLINE RI18GZB
ALL RIGHTS RESERVED
Declaration: After the electromagnetic compatibility test, the essential performance of SpO�
and PR meet the requirements as follow:
a) SpO�: Accuracy at 70%~100% is ±2%, at 0~69% is unspecified.
Measuring range is 0~100%.
b) PR: Accuracy is ±1% or ± 1 bpm, whichever is greater.
Measuring range is 25 bpm~250bpm.
PN: 22-025-0029
CLINICAL TRIAL RESULTS
SpO� range % 70-100 70-79 80-89 90-100
The number of samples 325 83 87 155
Mean Bias -0.1692 -0.0843 -0.2874 -0.1484
Standard Deviation 1.4779 1.9140 1.6347 1.0678
Standard Error 0.0819 0.2100 0.1753 -0.086
95% CI Lower Bound -0.3305 -0.5023 -0.6358 -0.3178
Upper Bound -0.0080 0.3336 0.0610 0.0210
Minimum SpO� % 70.00 70 80 90
Maximum SpO� % 99.00 79 89 99
Arms 1.4853 1.9043 1.6900 1.0746

Other Medline Medical Equipment manuals

Medline GUARDIAN User manual

Medline

Medline GUARDIAN User manual

Medline MDS3003 User manual

Medline

Medline MDS3003 User manual

Medline MDS705154 User manual

Medline

Medline MDS705154 User manual

Medline MDS80600 Instruction Manual

Medline

Medline MDS80600 Instruction Manual

Medline OR212 User manual

Medline

Medline OR212 User manual

Medline Alterra 1232 User manual

Medline

Medline Alterra 1232 User manual

Medline ALTERRA 1385 User manual

Medline

Medline ALTERRA 1385 User manual

Medline Aeromist Colors MCS70004P User manual

Medline

Medline Aeromist Colors MCS70004P User manual

Medline Patient Lift Operator's manual

Medline

Medline Patient Lift Operator's manual

Medline AEROMIST COMPACT HCS70004RD User manual

Medline

Medline AEROMIST COMPACT HCS70004RD User manual

Medline SwivAssist Bar User manual

Medline

Medline SwivAssist Bar User manual

Medline HUDSON RCI Neptune ConchaSmart HUD42500 User manual

Medline

Medline HUDSON RCI Neptune ConchaSmart HUD42500 User manual

Medline Alterra MAXX User manual

Medline

Medline Alterra MAXX User manual

Medline HCS70004 User manual

Medline

Medline HCS70004 User manual

Medline MDS400ELB User manual

Medline

Medline MDS400ELB User manual

Medline HEMO-FORCE MDS600INT2 User manual

Medline

Medline HEMO-FORCE MDS600INT2 User manual

Medline HCSMD400 User manual

Medline

Medline HCSMD400 User manual

Medline FCEQRHFB User manual

Medline

Medline FCEQRHFB User manual

Medline MDS80500 User manual

Medline

Medline MDS80500 User manual

Medline HCSM70S User manual

Medline

Medline HCSM70S User manual

Medline HCSM70 User manual

Medline

Medline HCSM70 User manual

Medline Bed Assist Bar User manual

Medline

Medline Bed Assist Bar User manual

Medline Hemo-Force MDS600INT User manual

Medline

Medline Hemo-Force MDS600INT User manual

Medline Compat DualFlo 9521437 User manual

Medline

Medline Compat DualFlo 9521437 User manual

Popular Medical Equipment manuals by other brands

Kiwi OmniCup VAC-6000M Instructions for use

Kiwi

Kiwi OmniCup VAC-6000M Instructions for use

MAGSTIM MOP11-EN operating manual

MAGSTIM

MAGSTIM MOP11-EN operating manual

FHC microTargeting 22375Z Directions for use

FHC

FHC microTargeting 22375Z Directions for use

Stryker EPIC II Maintenance manual

Stryker

Stryker EPIC II Maintenance manual

Spacelabs Healthcare elance Series Service manual

Spacelabs Healthcare

Spacelabs Healthcare elance Series Service manual

Atmos A 161 operating instructions

Atmos

Atmos A 161 operating instructions

InTouch Health InTouch Mini user guide

InTouch Health

InTouch Health InTouch Mini user guide

Rocket Medical CRAFT R29655 Service manual

Rocket Medical

Rocket Medical CRAFT R29655 Service manual

Ormed ARTROMOT-K1 classic operating instructions

Ormed

Ormed ARTROMOT-K1 classic operating instructions

Otto Bock Genium Instructions for use

Otto Bock

Otto Bock Genium Instructions for use

Welch Allyn Propaq LT Directions for use

Welch Allyn

Welch Allyn Propaq LT Directions for use

Heidelberg Engineering Spectralis OCT Installation instruction

Heidelberg Engineering

Heidelberg Engineering Spectralis OCT Installation instruction

Welch Allyn CP 50 Updating Software

Welch Allyn

Welch Allyn CP 50 Updating Software

sensiplast 300418 Instructions for use

sensiplast

sensiplast 300418 Instructions for use

Abbott ID NOW NAT-000 quick start guide

Abbott

Abbott ID NOW NAT-000 quick start guide

Molift Etac Nova Stand Up user manual

Molift

Molift Etac Nova Stand Up user manual

Clearlight RED LIGHT THERAPY user manual

Clearlight

Clearlight RED LIGHT THERAPY user manual

AngioDynamics VenaCure 1470 Operator's manual

AngioDynamics

AngioDynamics VenaCure 1470 Operator's manual

manuals.online logo
manuals.online logoBrands
  • About & Mission
  • Contact us
  • Privacy Policy
  • Terms and Conditions

Copyright 2025 Manuals.Online. All Rights Reserved.