Medline Guardian K1 User manual

K1 Guardian, K2 Guardian, K3 Guardian, Guardian Recliner
MEDLINE®
STANDARD MANUAL
WHEELCHAIRS
USER GUIDE
K1 Wheelchair
K2 Wheelchair
K3 Wheelchair

2MEDLINE K1 Guardian| K2 Guardian | K3 Guardian | Guardian Recliner | PIC-00270 (Rev: 02-23-21) 1-800-MEDLINE (633-5463) |medline.com 3
Warnings
TO ENSURE YOUR SAFETY IN USING THIS MEDLINE WHEELCHAIR, ALL WARNINGS AND SAFETY INFORMATION AND ALL INSTRUCTIONS
MUST BE FOLLOWED. FAILURE TO DO SO MAY RESULT IN SERIOUS BODILY INJURY OR DAMAGE TO THE CHAIR.
DO NOT USE THIS PRODUCT WITHOUT FIRST READING AND UNDERSTANDING THE INSTRUCTIONS CONTAINED IN THIS BOOKLET. IF YOU ARE
UNABLE TO UNDERSTAND THE WARNINGS, CAUTIONS OR INSTRUCTIONS, CONTACT A HEALTHCARE PROFESSIONAL, DURABLE MEDICAL
DEALER OR TECHNICAL PERSONNEL, OR CONTACT MEDLINE AT 1-800-MEDLINE BEFORE USE - OTHERWISE SERIOUS BODILY INJURY OR
PRODUCT DAMAGE MAY OCCUR.
DO NOT USE ACCESSORIES, PARTS, OR ADAPTERS OTHER THAN THOSE AUTHORIZED BY MEDLINE.
CONSULT WITH YOUR DOCTOR, PHYSICAL OR OCCUPATIONAL THERAPIST, OR OTHER QUALIFIED PROFESSIONAL REGARDING THE
SELECTION OF THE TYPE OF WHEELCHAIR AND ACCESSORIES BEST SUITED TO YOUR INDIVIDUAL NEEDS AND CAPABILITIES.
NOTE: THESE STANDARD MANUAL WHEELCHAIRS ARE DESIGNED TO PROVIDE MOBILITY FOR THOSE THAT HAVE DIFFICULTY WALKING.
THEY MAY BE SELF-PROPELLED OR PUSHED BY A CARETAKER. YOUR HEALTHCARE PROFESSIONAL SHOULD DETERMINE THE PROPER
WHEELCHAIR THAT MEETS YOUR NEEDS.
Medline limited warranty
Medline has great confidence in the quality of our wheelchairs. That is why Medline warranties for the original
purchaser, that the frame of the wheelchair will be free from defects in materials and workmanship for the life of
the chair.
Medline also warranties the parts and upholstery on the wheelchair to be free from defect in materials and
workmanship for a period of one (1) year from date of purchase by the original purchaser.
If within the warranty period any such product shall be proven to be defective, such product shall be repaired or
replaced, at Medline’s option.
This warranty does not cover device failure due to owner misuse or negligence, or normal wear and tear.
All warranty claims must include the product in question unless otherwise authorized by Medline. For more
information about your wheelchair or warranty call Medline at 1-800-MEDLINE.

4MEDLINE K1 Guardian| K2 Guardian | K3 Guardian | Guardian Recliner | PIC-00270 (Rev: 02-23-21) 1-800-MEDLINE (633-5463) |medline.com 5
Table of contents
General warnings.......................................................................................................... 2
Medline limited warranty ............................................................................................ 3
Table of contents .......................................................................................................... 4
Warnings and safety instructions............................................................................... 5
Guidelines: safety and handling of wheelchairs ........................................................ 6-8
General use instructions
Anti-tippers .................................................................................................................. 9
Opening/closing the wheelchair ................................................................................. 10
Wheel locks................................................................................................................... 10
Adjusting seat height................................................................................................... 11
Adjusting leg or footrest height.................................................................................. 11
Installing or removing leg and footrest riggings....................................................... 12
Elevating legrest operation......................................................................................... 12
Recliner operation........................................................................................................ 13
Safety inspection and maintenance............................................................................ 14
Safety inspection checklist.......................................................................................... 15
Warnings & safety instructions
General information
DO NOT use the wheelchair in a vehicle for transport. This wheelchair has not been approved as a seat surface to be used within a vehicle of any
kind. Always transfer the wheelchair user to an approved vehicle seat and use restraints available from the auto industry for this application.
DO NOT exceed the weight capacity 300 lbs (136 kg). The weight capacity includes the weight of the rider plus items carried or attached to the
wheelchair.
DO NOT use the wheelchair while weight training. Medline wheelchairs have not been tested for any type of weight training. If the chair is used
during weight training, Medline will not be held liable. If the weight capacity is exceeded, risk of fall, tip-over or loss of control may occur which
can result in bodily injury or product damage.
Use of the seat belt is recommended to maximize safety and stability.
A qualified wheelchair technician must perform any repair or change to this wheelchair or serious injury may occur. Technicians: do not service
the wheelchair without first reading and understanding this owner’s manual. If you are unable to understand the warnings, cautions, or
instructions; contact Medline at 1-800-MEDLINE.
Environmental
The wheelchair is designed for use on firm, even surfaces such as concrete, asphalt, and indoor floors and carpeting.
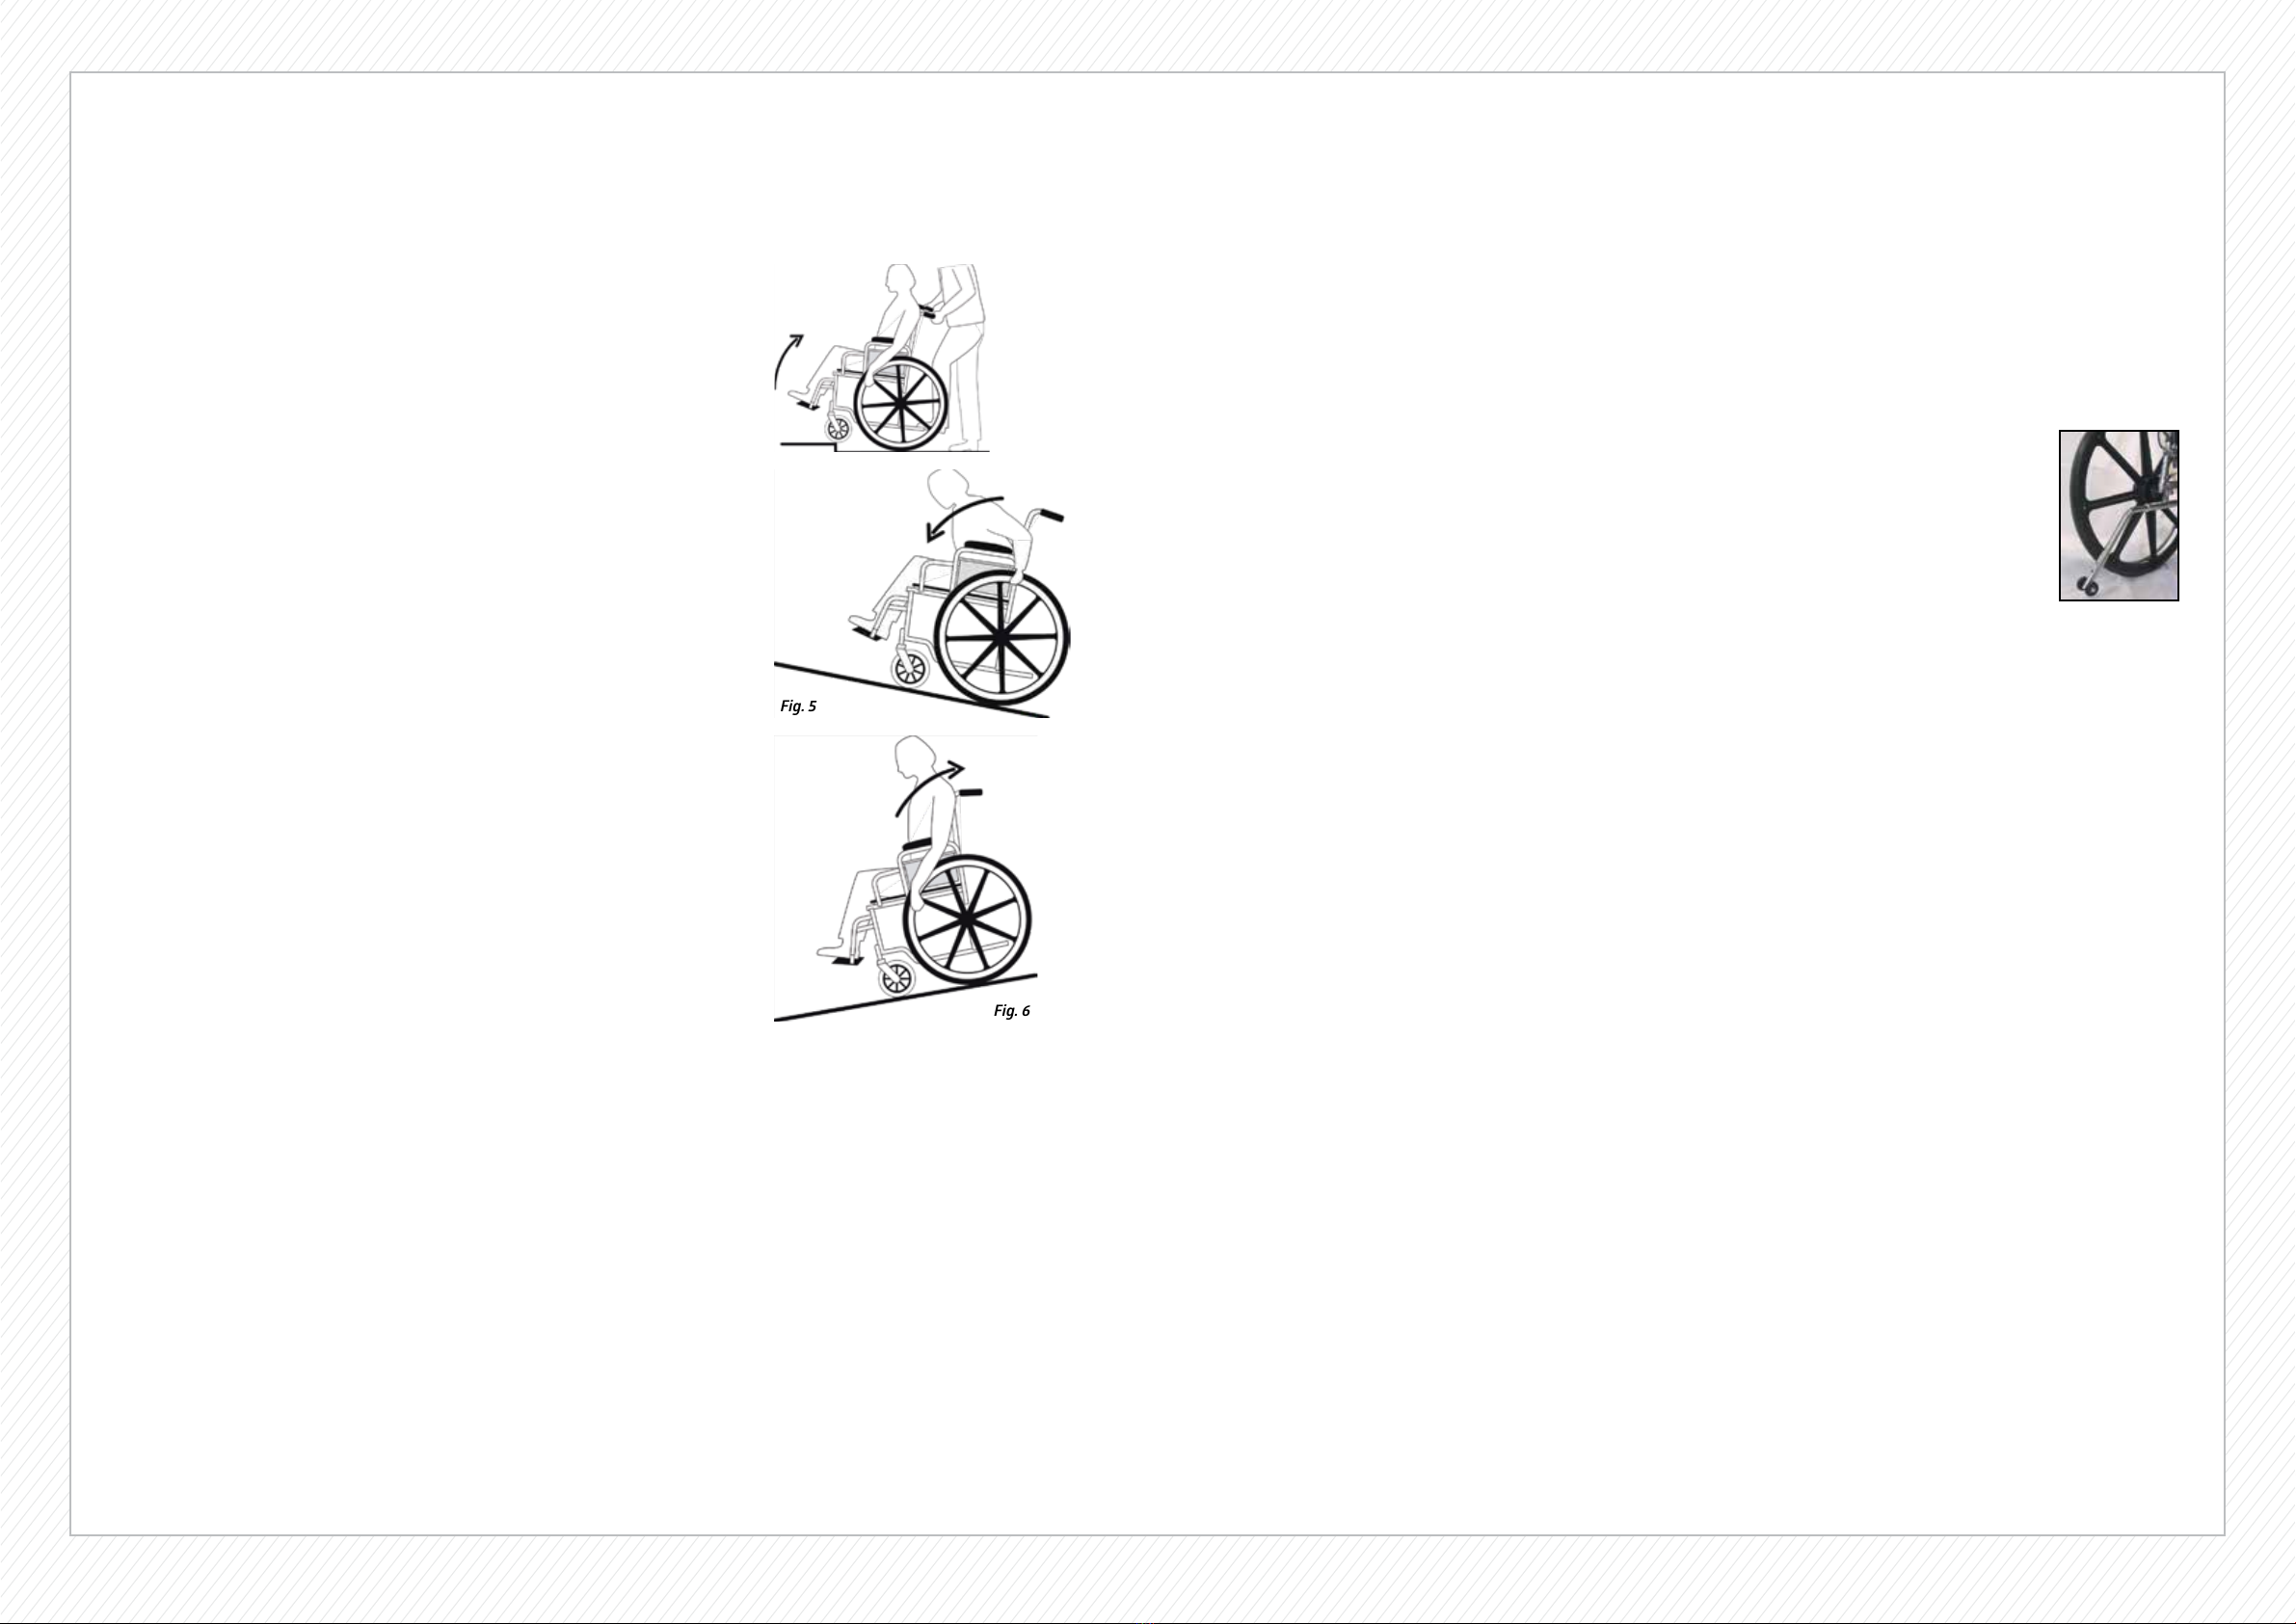
DO NOT operate the wheelchair on loose, slippery, or uneven surfaces such as sand, gravel, hills, dirt roads, or ice.
DO NOT operate the wheelchair on inclines greater than 10% (6 degrees) without assistance.
DO NOT attempt to go up or down inclines that are covered with oil, water, ice or any other potentially slippery substance.
DO NOT attempt to ride over curbs or obstacles. Doing so may cause your wheelchair to tip over and cause bodily harm to you
or damage to the wheelchair.
DO NOT use the wheelchair on stairs or escalators.
General use
DO NOT stand on the frame of the wheelchair.
DO NOT stand or put pressure on the footrests. When getting in or out of the wheelchair, make sure the footplates are in the up position.
DO NOT attempt to lift the wheelchair by armrests or any detachable components.
There are potential finger pinch point areas at moving parts and between the seat frame and the seat cradles on some models.
When opening the wheelchair, take care not to place your hand or fingers between the seat frame and the seat cradles (if present) or on
any other moving parts.
ALWAYS keep hands and fingers away from moving parts. DO NOT sit in the wheelchair until the seat is completely in the open position.
Risk of injury may occur if care is not taken.
The wheelchair should be on a stable, level surface with the wheel locks engaged before transferring the user to or from the wheelchair.
Completely engage the wheel locks when entering and leaving the wheelchair or using the wheelchair in an elevator or a wheelchair lift.
DO NOT transfer in or out of the wheelchair on your own unless you have sufficient upper body strength, balance and agility and have been
instructed in transfer techniques by a health professional. Every precaution should be taken to reduce the gap distance between the wheelchair
and the target seat or bed. Turn both casters parallel to the object you are transferring to.
DO NOT use the wheel locks to stop the wheelchair from moving. Wheel locks are not brakes. DO NOT use the wheel locks to slow your descent
down an incline.
Changing direction when going down an incline could cause instability.
DO NOT lean forward out of the wheelchair any farther than the length of the armrests.
DO NOT attempt to reach for objects if doing so means you must move forward in the seat.
DO NOT attempt to reach objects if you have to pick them up from the floor by reaching down between your knees.
DO NOT shift your weight or sitting position toward the direction you are reaching as the wheelchair may tip over.
DO NOT attempt to lean over the top of the back upholstery to reach objects.
Before leaning or reaching forward, make sure to rotate the casters straight ahead toward the front of the wheelchair and engage the wheel
locks to prevent the wheelchair from tipping over or moving.
DO NOT tip the wheelchair without assistance. DO NOT lean the wheelchair back since this can cause the wheelchair to tip over. If trying to reach
objects, reach back only as far as your arm will extend without altering your seating position.
Any person assisting the rider in maneuvering or lifting of the wheelchair must have sufficient strength and be able to see obstacles in the path
of travel. When learning a new assistance technique, have an experienced assistant help you before attempting it alone. Remember to use good
body mechanics.
Contact with water or excess moisture may cause the non-aluminum wheelchairs to rust or corrode. DO NOT use the chair in a shower, pool
or other body of water. Avoid excess moisture (example: do not leave the chair in a damp bathroom while taking a shower). Dry the chair
immediately if exposed to moisture.
When cleaning the hand grips, use only a clean towel lightly dampened with cool water. Ensure the hand grips are dry before use. Use of soap or
ammonia based cleaning solutions may result in the hand grips sliding off.
If the wheelchair is exposed to extreme temperatures, high humidity and/or becomes wet, check the hand grips to ensure they are not loose and
do not twist on the handle.
Avoid storing or using the wheelchair near open flames or combustible smoldering products.

6MEDLINE K1 Guardian| K2 Guardian | K3 Guardian | Guardian Recliner | PIC-00270 (Rev: 02-23-21) 1-800-MEDLINE (633-5463) |medline.com 7
Recliner models only
Make sure the stabilizer bar is securely attached BEFORE using the wheelchair.
DO NOT use the recliner wheelchair without the stabilizer bar securely locked in place.
The push canes must be reclined evenly and stay even during use. The push canes should not be used at different angles. Failure to do so may
result in failure to the push cane.
The recliner wheelchair MUST be operated by a healthcare professional or assistant when in ANY reclined position. Caregivers MUST be
prepared to support the weight of the occupant when reclining or returning the wheelchair occupant to the full upright position. Use proper
body mechanics when inclining (lifting) the back of the chair.
Completely engage BOTH wheel locks before reclining/lifting the wheelchair while the occupant is sitting in it.
Make sure the occupant is properly positioned before the wheelchair is reclined/lifted.
DO NOT use the recliner wheelchair without the anti-tip devices installed. Anti-tippers MUST be attached at all times and both must be adjusted
to the same height. Ensure the anti-tippers are secured as evidenced by the spring buttons fully protruding out of the holes. Make sure both
canes are at the same angle BEFORE releasing the handles of the reclining mechanism.
Adjustments
DO NOT operate, maintain, or adjust the wheelchair without reading and understanding all instructions in the manual.
DO NOT adjust the footrests any closer than 2.5"(6.4 cm) from the floor.
DO NOT modify the wheelchair. Examples: drilling holes, grinding, welding parts, using non-authorized / non-approved parts.
Such modifications may change the chair’s structure and center of balance which may increase the risk of serious injury to the user
and void the warranty.
Before each use
√ Make sure the chair rolls easily and that all parts work smoothly.
√ Check for noise, vibration, or any change in use. Changes may indicate loose parts or wheelchair damage.
√ Check to ensure wheel locks are in good working order.
√ Make sure hand grips are not loose and cannot be moved or twisted.
√ Make sure the seatback is locked in the upright position.
√ Make sure that lap belt is securely attached to the wheelchair.
√ If chair is damaged, discontinue use until completely repaired.
√ Have any problem found repaired promptly with authorized parts.
Guidelines:
Safety & handling of wheelchairs
Center of gravity, balance and stability
This Medline wheelchair has been designed to be safe and stable during normal transport activity as long as proper balance is maintained. The
point at which a wheelchair will tip forward, backward, or to the side depends on its center of balance. To assure stability and proper operation
of the wheelchair, the center of gravity must be maintained in the chair. Center of gravity is the point at which all the weight of an object can be
considered to be concentrated and represents the balance point.
Most activities such as transferring in and out of the wheelchair, bending, and reaching affect the center of gravity and weight distribution
of the wheelchair. Addition of accessories such as a backpack will also re-distribute weight. Loss of proper balance may cause the chair to tip
over. Use of the seat belt is advised to help maintain stability by minimizing movement within the wheelchair seat. The use of anti-tip devices,
especially when maneuvering on ramps or inclines, will also enhance safety.
To assure safe operation of the wheelchair, ALL of the Warnings and Instructions in this manual must be followed. Failure to do so may result in
tipping the wheel chair over or causing the user to fall which may result in serious bodily injury or damage to the wheelchair.
Some basic wheelchair safety guidelines follow. The guidelines are critical for standard wheelchair use, however, the principles also hold true for
transport chairs. If any of the following activities are required while using the wheelchairs, these guidelines must be followed to ensure safety
and to avoid potential injury to the user or the transporter and to avoid damage to the chair.
Reaching / leaning / bending – forward or sideways
• Position the wheelchair as close as possible to the object.
• When reaching forward make sure the front casters are pointing in a forward position (Fig. 1). This extends the wheel base and will help
stabilize the chair.
• When reaching sideways position the casters to provide the greatest stability side to side (Fig. 2).
• Make sure the wheel locks are engaged before activity.
• DO NOT attempt to reach for objects if doing so means you must move forward in the seat. DO NOT shift your weight toward the direction
you are reaching.
• DO NOT attempt to reach objects if you have to pick them up from the floor by reaching down between your knees.
• DO NOT shift your weight or seat position toward the direction you are reaching.
Guidelines:
Safety & handling of wheelchairs
Reaching / leaning – backward
Position the wheelchair as close as possible to the object.
Make sure the front casters are pointing in a forward position (Fig. 3). This extends the wheel base
and will help stabilize the chair.
DO NOT engage the wheel locks – if your weight shifts while reaching backwards it is better for the
wheelchair to roll than to tip.
DO NOT lean back over the top of the back upholstery.
Reach back only as far as your arm will extend without changing your position in the seat (Fig. 3).
Transferring into and out of the wheelchair
Transferring to and from the wheelchair is a significant task that requires balance, agility and upper
body strength. Practice with your healthcare provider before attempting transfers. If possible,
always use a transfer board and have assistance available.
• Position the wheelchair as close as possible.
• Position both casters parallel to the seat you are transferring to.
• Make sure both wheel locks are engaged.
• Remove the armrest and the footrests that are in the transfer path.
• DO NOT put weight on the foot rests.
• Transfer as far back into the seat or onto the bed/chair as possible.
• On the recliner wheelchair models, make sure the seat back is in the upright position and the stabilizer bar is securely in place.
Obstacles
Obstacles such as floor threshold strips, uneven floors, cords or items on the floor, or cracks in pavements can damage your wheelchair and may
cause loss of control or a tip over. Be alert! Scan your path and avoid any items that may cause instability.
Fig. 3
Fig. 2
Fig. 1

8MEDLINE K1 Guardian| K2 Guardian | K3 Guardian | Guardian Recliner | PIC-00270 (Rev: 02-23-21) 1-800-MEDLINE (633-5463) |medline.com 9
Curbs, steps and stairs
Do not attempt to negotiate curbs or single steps without assistance. Ask your healthcare worker to provide instructions regarding safe
wheelchair use for curbs, steps and stairs. Proper body mechanics and awareness of the center of gravity is crucial for these maneuvers. The
step tubes (Fig. 4) at the back of the chair are utilized to tilt the wheelchair backwards until the balance point is achieved
and the front casters clear the curb/step. Gently lower the front wheels to the ground and slowly roll the wheelchair forward until the rear
wheels roll up over the curb/step.
Extreme caution is required if it is absolutely necessary to maneuver an occupied chair up or down
stairs. Two assistants with adequate body strength and endurance must be present. DO NOT lift
the chair by any removable parts (i.e. swing-away footrests). Make sure the hand grips are not
loose. Techniques for going up or down steps should be received from a health care professional
familiar with wheelchair use and practiced before attempting to transport on stairs. If at all
possible, an alternate means of transport up or down stairs is recommended.
Ramps / inclines
The assistant must know their capabilities and limitations in terms of strength and endurance
before attempting to go up or down a ramp. Slopes will change the center of gravity. DO NOT
attempt to negotiate steep inclines greater than 10% (6 degrees, or one foot of rise or fall for every
ten feet of ramp length) without an experienced assistant. Use of anti-tip devices are encouraged,
however, they may not prevent a tip-over. Sometimes anti-tip devices may catch at the beginning
of a ramp. If this occurs, they will need to be disengaged and extra care should be taken. Backpacks
or other gear on the back of the wheelchair will cause it to tip backward more easily. Training and
practice negotiating ramps with a healthcare professional is recommended.
• Go as straight up or down the incline as possible.
• Check the ramp for any obstacles, bumps, depressions, or wetness before beginning.
Ask for additional assistance if necessary.
• Stay in the center of the ramp if possible.
• Avoid changing direction while on the ramp as this may cause loss of control of the wheelchair.
• Avoid stopping on a ramp. Stopping may cause loss of control of the wheelchair. If stopping is
necessary, avoid sudden, abrupt forward movement when you resume propelling the chair as
that could cause instability.
• When going up an incline, the occupant should lean forward. This will adjust the center of
gravity to counteract the tendency of the wheelchair to tip backward.
• When going down a ramp, the occupant should face forward and lean backward into the seat.
Descent should always be done slowly.
DO NOT use wheel locks as brakes to slow down or stop the chair. Attempting to use the wheel
locks could result in accidental locking, veering or tipping to one side, or suddenly stopping.
• When going down a steep incline, the assistant should turn the chair and go down backwards to
avoid tipping the occupant out of the chair.
Basic information for wheelchair
assistants / transporters
Work with the wheelchair user’s healthcare professional or your institution to learn safe ways to assist that are within your capability and
comfort level. To prevent injury to yourself or the chair occupant use good body mechanics:
• Always tell the rider what you intend to do so he/she is ready for your actions and can assist with maintaining a balanced center of gravity
for stability.
• Bend at the knees, not at the waist. Keep knees bent, not locked straight.
• Use legs for strength, not the back or arms. This will help prevent back strain.
• DO NOT twist at the waist. Keep the torso facing the same direction as the hips and move the feet to turn. This will help prevent back strain.
• Maintain a straight back. Hunching or rounding the shoulders can cause back strain.
• DO NOT hesitate to call for additional assistance if needed.
• If you do not feel comfortable with an activity you are requested to assist with (such as negotiating a step or a steep incline), you may
decline to assist and should help find appropriate assistance.
• RECLINER models: Be prepared to support the weight of the occupant when reclining or returning the wheelchair back to the full upright
position.
• RECLINER models: Always stay in attendance when the wheelchair is in the reclined position.
Fig. 4
Fig. 5
Fig. 6
General use instructions
Safety lap belt use (included with select models)
• The lap belt is provided to help the rider be safe and well positioned in the wheelchair.
• The lap belt should be initially fitted by a qualified healthcare professional or dealer.
• While sitting back in the chair, it should be adjusted to be sufficiently tight around the rider's pelvis to keep from sliding down without
causing discomfort.
• There should be sufficient room to slide a hand between your body and the belt.
• Adjust belt so that it buckles in the front.
Anti-tippers (included with select models)
• Rear anti-tippers help keep the chair from tipping and are recommended attachments for additional safety (Fig. 7).
• The use of anti-tippers is required on all recliner models.
Warning on use of anti-tippers
• Anti-tippers must be fully engaged. Ensure the release button of the anti-tipper fully protrudes out of the hole on the
bottom of the wheelchair frame.
• A 1.5-2"(3.8-5.0 cm) clearance between the bottom of the anti-tipper wheels and the ground/floor must
be maintained at all times.
Installing anti-tippers
1. Depress the release button and insert the anti-tippers with the anti-tipper wheels pointing toward the ground/floor into the wheelchair
frame tubing.
2. Ensure that the release button of the anti-tipper fully protrudes out of the hole in the bottom of the wheelchair frame tubing.
Important notes
There are potential finger pinch point areas at moving parts and between the seat frame and the seat cradles on some models. When
opening the wheelchair, take care not to place your hand or fingers between the seat frame and the seat cradles (if present) or on any other
moving parts.
ALWAYS keep hands and fingers away from moving parts.
Fig. 7 Anti-Tipper

10 MEDLINE K1 Guardian| K2 Guardian | K3 Guardian | Guardian Recliner | PIC-00270 (Rev: 02-23-21) 1-800-MEDLINE (633-5463) |medline.com 11
Opening and folding the wheelchair
To open the chair
1. Hold onto one armrest and push the opposite side to open the chair.
2. With your fingers and thumbs pointed towards the inside of the wheelchair, push downward on the seat to ensure the wheelchair is fully
open. Make sure the seat tubing rests completely inside the seat cradles (if equipped).
CAUTION: Pinch points exist. Keep hands and fingers away from any moving parts.
DO NOT sit in the wheelchair until the seat is completely in the open position. Risk of injury may occur if care is not taken.
Alternative method to open the chair
1. Tilt the chair to one side by grasping the hand grip or arm nearest to you.
2. With fingers pointed away from the seat rail, push down on one side of the seat frame / rail
until the wheelchair is fully open. Keep hands and fingers away from any moving parts.
Recliner models only
3. Secure the stabilizer bar (Fig. 8). The bar should already be attached on the left side
of the chair. Push the notched part of the stabilizer bar flush with the stabilizer bar
connection on the right back cane and hand tighten the thumb screw.
4. Keep push canes even at all times.
To close / fold the chair
1. Ensure the swing-away leg or footrests are in the forward and locked position.
2. Fold the footplates up to the vertical position.
3. Using both hands, grasp the center of the seat upholstery at the front and back edge
and lift the seat up.
Alternative method to close the chair
1. Ensure the swing-away leg or footrests are in the forward and locked position.
2. Fold the footplates up to the vertical position.
3. Grasp the handles/straps on each side of the seat.
4. Pull up until the chair is fully closed.
Wheel locks
Push forward toward front of chair to lock.
Wheel lock warnings
Check the wheel locks to ensure proper function before using the chair. Wheel locks should embed into the wheel at least 1/8" (3.2 mm)
when engaged.
Engage the wheel locks on both wheels before entering the chair, leaving the chair, leaning forward in the chair or while being transported
in an elevator or a wheelchair lift.
Check to make sure that the legrests do not unlock the wheel locks when they are swung back.
DO NOT use the wheel locks to stop the wheelchair from moving. Wheel locks are not brakes. DO NOT use the wheel locks to slow your
descent down an incline.
Fig. 8 Stabilizer bar
Adjusting seat height to hemi-height
For models equipped with a dual axle position, the seat height can be lowered.
1. Remove the nut which secures the wheel axle to the frame (Fig. 9). Turn the nut on the outside of the wheel counterclockwise
in order to unscrew the axle from the frame.
2. Reinsert the axle into the hemi-height hole of the frame (Fig. 10). Turn axle and wheel clockwise to secure axle to the frame.
3. Replace nut onto axle and secure tightly.
4. Adjust front casters into top mounting holes to accommodate the new wheelchair height. Ensure that the wheelchair is level
and rolls smoothly.
Adjusting seat height to standard- height (for models equipped with a dual axle
position, the seat height can be raised)
1. Remove the nut which secures the wheel axle to the frame (Fig. 9). Turn the nut on the outside of the wheel counterclockwise in order to
unscrew the axle from the frame.
2. Reinsert the axle into the standard height hole of the frame (Fig. 10). Turn axle and wheel clockwise to secure axle to the frame.
3. Replace nut onto axle and secure tightly.
4. Adjust front casters into top mounting holes to accommodate the new wheelchair height. Ensure that the wheelchair is level and
rolls smoothly.
Adjusting leg or footrest length and position
To adjust the length
WARNING: The footrest should not be closer than 2.5" (6.4 cm) from the ground to ensure proper clearance.
1. Loosen the plunger by pulling out (Fig. 11).
2. Adjust the length of the leg or footrest assembly by pushing the push button and adjusting it
properly. The front rigging should not be lowered to the point that it causes pressure on the thighs at the
front of the seat upholstery.
3. Let go of the push button and engage the plunger by pushing down.
Fig.10
Hemi Height
Standard
Height
Fig.9
Fig.11
Plunger, Push
Button

12 MEDLINE K1 Guardian| K2 Guardian | K3 Guardian | Guardian Recliner | PIC-00270 (Rev: 02-23-21) 1-800-MEDLINE (633-5463) |medline.com 13
Installing / removing the swing-away legrest / footrest riggings
To install the riggings
1. Hold the legrest rigging to the side of the wheelchair.
2. Install the legrest assembly hinge plates onto the hinge pins of the frame (Fig. 12/13).
3. Push the legrest rigging to the front until it locks securely into place. (Fig. 14).
To swing-away / remove the legrest assembly
1. Fold the footplate up to the vertical position.
2. Release the legrest lock by pushing on the legrest lever (Fig. 15/16).
3. Swing the legrest outward and to the side (Fig. 17).
4. To remove the legrest, lift up on the assembly to remove the legrest off the hinge pins.
Elevating the legrest (for models equipped with elevating legrests)
1. To elevate the legrest assembly, simply lift up on the legrest assembly by the footplate to the desired height or position.
2. Release the legrest and it will automatically lock in place due to the ratchet rod.
3. To lower the legrest assembly, hold onto it by the footplate and push out on the legrest lever.
4. Slowly lower the legrest until the desired position is reached.
Fig.12 Fig.13 Fig.14
Hinge
Pins
Fig.15 Fig.16 Fig.17
Recliner operation (recliner models only)
WARNINGS:
• ALWAYS make sure the wheelchair is stable BEFORE using the recliner.
• Anti-tippers MUST be attached at all times. Ensure both ant-tippers are adjusted to the same height.
• Ensure the stabilizer bar is attached and secured BEFORE using the recliner.
• Use good body mechanics. Be prepared to support the weight of the occupant when assisting with reclining / inclining the back.
• The occupant must never be left unattended while the wheelchair is reclined.
To recline
1. Attach stabilizer bar if not already in place.
2. Inform the wheelchair occupant that the back of the chair will be reclined.
3. Make sure the wheelchair is occupied and is on a level surface before reclining.
4. Stand behind the wheelchair and grasp both handles firmly. Make sure both back canes and handles are at the same angle BEFORE releasing
the levers.
5. Lift up on the handles and squeeze the release levers.
6. SLOWLY pull back on the back assembly while squeezing the release levers.
7. When the back reaches the desired angle, SLOWLY let go of the release levers.
WARNING: Push canes MUST be even at all times. Failure to do so can result in damage to the product or injury.
To incline
(DECREASE THE ANGLE OF RECLINE OR RETURN THE BACK TO THE UPRIGHT POSITION):
1. Lift up on the handles and squeeze the release levers. Be prepared to support the occupant's weight.
2. SLOWLY raise the back of the chair while continuing to squeeze the release levers.
3. Stop at the desired height or when the back is fully upright.
4. Release the release levers.
Adjusting the reclining mechanism
Adjustments to the reclining mechanism should only be performed by a qualified wheelchair technician. If the seat back does not recline / incline
smoothly, or if the seat back does not lock into place easily, DO NOT USE the reclining feature until the chair has been serviced.

14 MEDLINE K1 Guardian| K2 Guardian | K3 Guardian | Guardian Recliner | PIC-00270 (Rev: 02-23-21) 1-800-MEDLINE (633-5463) |medline.com 15
Safety inspection & maintenance
It is highly recommended that the wheelchair be taken to a qualified dealer annually for a thorough inspection and maintenance / repair service.
General care
• Wipe off chrome / aluminum parts at least once per week using a clean, soft cloth.
• Clean all metal parts with auto wax or similar products.
• Dry the chair immediately if exposed to moisture.
• Do not use abrasive cleanser or materials that will scratch the finish of the chair.
• Clean the upholstery with a mild soap solution, rinse and wipe dry.
• Clean the hand grips with water only and dry thoroughly. Use of soap or ammonia based cleaning solutions may loosen the grips.
General
Inspect the entire wheelchair for broken parts, sharp edges and loose fasteners. Ensure that everything works and the chair rolls straight
without drag and does not pull to one side. Replace or tighten parts as needed. Inspect for bent frame and crossbars.
Frame and Cross braces:
Check that the frame and cross braces are not bent or dented. Check the tubing for cracks and rust. If such issues are found, take the wheelchair
to your local service dealer.
Upholstery
Inspect for any rips, tears or worn spots and replace as necessary. Inspect the upholstery screws and assure that all are present and tight.
Torn or worn upholstery may not support the user’s weight and could result in a fall with serious bodily injury.
Armrests
Check for cracks, looseness, or sharp edges.
Hand grips
Ensure the hand grips are tight and secure on the handles. They should not move or twist.
Footrests / legrests
Ensure the legrest assembly release works properly. Ensure the assembly automatically locks securely into place when attached and will not
accidentally unlock.
Front caster forks
Verify the forks swivel freely without binding. Check to ensure the casters roll freely by lifting the chair and spinning the castor. The castor
should come to a gradual stop. If the nut is too loose, the castor will flutter or shimmy. If the nut is too tight, the chair will be difficult to steer.
Check the bearings and clean the fork stem housing.
Front casters and rear wheels
Ensure the castor/wheel axle and nuts are tight. The fork housing and the rear and front wheels are constructed with low maintenance, sealed
bearings to keep dirt out and increase the durability of the chair. Bearings are also protected with an additional bearing spacer component.
Check that the wheels are not warped, cracked or otherwise damaged and the spokes are not broken. Replace as needed. Assure that the wheels
spin freely. Replacement and maintenance of wheel bearings should be completed by a qualified wheelchair technician only.
Front and rear tires
Solid tires require minimal maintenance. They should occasionally be cleaned with a damp cloth. Replace the tires if they become cracked,
excessively worn, or have flat spots.
Recliners (for models equipped)
Inspect the reclining mechanisms to ensure they are clean and work freely. Ensure the stabilizer bar locks securely into place.
Maintenance
Safety inspection checklist
ITEM INITIALLY INSPECT / ADJUST
WEEKLY
INSPECT / ADJUST
MONTHLY
INSPECT
/ ADJUST
PERIODICALLY
GENERAL
Chair rolls straight.
(no excessive pull to one side)
X X
CLEANING
Wipe chrome parts with clean, soft cloth.
Auto wax / similar product on metal parts.
Clean upholstery with mild soap solution.
X
Use only water on hand grips.
Dry chair immediately when wet.
Do not use abrasive cleansers or cloths.
X
FRAME & CROSS BRACES
Inspect for loose or missing hardware. X X
Inspect for bent frame or cross braces. X X
SEAT AND BACK UPHOLSTERY
Inspect for rips or sagging. X X
Inspect for loose or broken hardware. X X
FRONT CASTERS AND REAR WHEELS
Inspect wheel / fork assembly for proper tension
by lifting the chair and spinning the caster. It should
come to a gradual stop.
X X
Loosen locknut if wheel wobbles / tighten locknut if
wheel binds to a stop.
X X
Ensure wheel bearings are clean and free of
moisture.
X X
REAR WHEELS
No excessive side movement or binding when chair
is lifted and wheels are spun.
X X
FRONT AND REAR TIRES
Inspect for flat spots and wear. X X
HAND GRIP WHEEL LOCKS
(If equipped) Test in both complete and intermittent
lock positions. Ensure the chair does not move
when the locks are engaged.
X X
WHEEL LOCKS
Do not interfere with tires when rolling. X X
Pivot points free of wear and looseness. X X
Wheel locks are easy to engage. X X
LAP BELT
Inspect for secure attachment. X X
Inspect for worn or frayed belt. X X
RECLINER
Inspect reclining mechanism to ensure they are
clean and work freely.
X
X
Ensure stabilizer bar engages securely. X X

16 MEDLINE K1 Guardian| K2 Guardian | K3 Guardian | Guardian Recliner | PIC-00270 (Rev: 02-23-21) 1-800-MEDLINE (633-5463) |medline.com 17
Your authorized service facility:
Record your Serial Number:

Medline México
01-800-831-0898
Medline Canada
1-800-268-2848
Medline United States
1-800-MEDLINE (633-5463)
Some products may not be available for sale in Mexico or Canada. Please contact your Account Representative for additional information. We reserve the right to correct any errors that may
occur within this instruction sheet. ©2021 Medline Industries, Inc. Medline and Guardian are registered trademarks of Medline Industries, Inc.
Medline Industries, Inc.
Three Lakes Drive, Northfield, IL 60093, USA
1-800-MEDLINE
FOLLOW US BLOG
This manual suits for next models
2
Table of contents
Other Medline Wheelchair manuals

Medline
Medline Excel User manual

Medline
Medline Elements MDS89745ELMB Installation guide

Medline
Medline Excel K3 Basic User manual

Medline
Medline Excel 2000 Narrow User manual

Medline
Medline MDS806250EEBC User manual

Medline
Medline GUARDIAN G2-105RX1 User manual

Medline
Medline Excel 2000 Narrow User manual

Medline
Medline MDS808200RTR Operating manual

Medline
Medline MDS808200SLRR Series Operating manual

Medline
Medline GUARDIAN G1-502PWX1 User manual