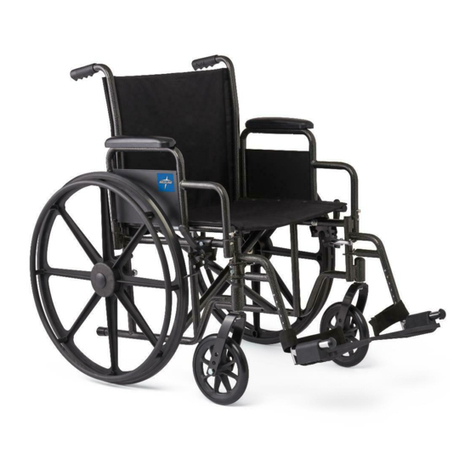
Medline excel k4 qr User manual

MEDLINE
Excel K4 QR
Lightweight Wheelchair
with Quick Release
Rear Wheels
Owner's Manual
Please read this manual before operation for,
warnings, maintenance and safe usage instructions
of this wheelchair.
I

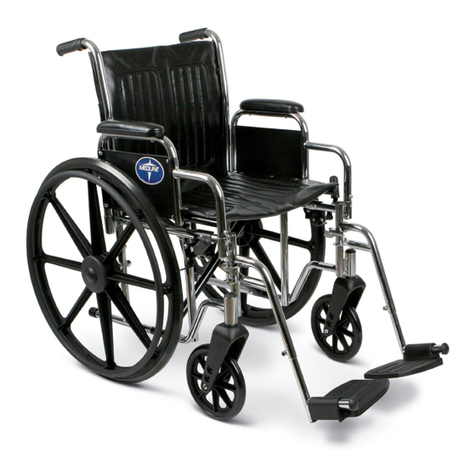
Wheelchair Terminology
3 2
r~ 1
/
6
Serial #
stamped on
5 crossbar
J
4 7
1. Armrests
2. Seat/Back
Upholstery
3. Wheel and Handrim
4. Wheel Locks
5. Casters
6. Footplates/Footrest
7. Quick Release Axle
2

WARNINGS:
Do not operate, maintain or adjust wheelchair
without reading and understanding all
instructions in the manual.
.This wheelchair has not been approved as a
seat surface to be used within a vehicle of any
kind. Always transfer the wheelchair user to an
approved vehicle seat and use restraints
available from the auto industry for this
application.
.Always make sure to complete.lyopen the
wheelchair before boarding the wheelchair.
Confirm that the seat tube is completely resting
in the seat cradles. Caution: Pinch point
between seat tubing and seat cradles.
.Do not operate this wheelchair on streets or
roadways.
.Do not operate wheelchair on inclines greater
than 10 degrees without assistance.
.Completely engage the wheel locks when
entering and leaving the wheelchair or using the
wheelchair in an elevator or a wheelchair lift.
.The wheelchair should be on a stable, level
surface and wheel locks should be engaged
before transferring the user to or from the
wheelchair.
.Do not adjust the footrests any closer than 2 ~
inches from the floor.3

!
.WARNINGS (Continued):
Do not stand or put pressure on the footrests.
Before leaning or reaching forward, rotate the
casters toward the front of the wheelchair and
engage wheel locks to help prevent the
wheelchair from tipping over or moving.
Do not lean wheelchair back since this can
cause the wheelchair to tip over. If trying to
reach objects, reach back only as far as your
arm will extend without altering your seating
position.
Do not use the wheel locks to slow your
descent down an incline.
Changing direction when going down an inclin~
could cause instability.
Do not transfer in and out of this wheelchair on
your own unless you have sufficient upper body
strength, balance and agility.
Do not use this wheelchair on stairs or
escalators.
Do not exceed the weight capacity of this
wheelchair. The weight capacity includes the
weight of the rider plus items carried or
attached to the wheelchair.
Do not modify the wheelchair (such as drilling
holes, grinding, welding parts, using non-
approved parts, etc.). Such modifications may
4
.
.
.
.
.
.
.
.
.,

.
WARNINGS (Continued):
increase the risk to the user and void the
warranty.
Do not operate on loose, slippery, or uneven
surfaces such as sand, gravel, dirt roads or ice.
Any person assisting the rider in the
maneuvering or lifting the wheelchair must have
sufficient strength and be able to see obstacles
in the path of travel.
Assure that the quick release axles for rear
wheels are in the locked position before each
use. The axles are locked when the quick
release button is fully popped out and the ball
bearings on the other end of the axle are fully
exposed. Also check that the axle is locked by'
pulling on the wheel. A quick release axle that
is notfully locked can allow the wheel to come
off during use.
.
.
Quick Release
PushButton
must be fully
popped out.
(continued on next page..)
5
'.\

WARNINGS (Continued):
Ball bearings
must be fully
exposed
6
.,

Congratulations on your selection of a Medline
Wheelchair. Medline wheelchairs are the result
of extensive engineering and are manufactured
to meet our rigid specifications and to surpass
your expectations.
Medline wheelchairs are designed to combine
comfort, safety and reliability. Medline
Industries, Inc. is committed to the quality of
our products and to the satisfaction of our
customers.
7

Use and Safety:
To Open Chair -Open wheelchair by tilting to one
side and pushing downward on the seat rail/tubing
until fully open. Make sure the seat tubing rests
completely inside the seat cradles.
To Close/Fold Chair- Foldfootplates to the vertical
position. Hold center of seat upholstery with both
hands at the front and back edge and lift up, or tilt
chair to one side and lift up on the seat rail.
Wheel Locks-Engage the wheel locks on both
wheels before entering the chair, leaving the chair,
leaning forward in the chair, or while being
transported in an elevator or a wheelchair lift. .
Check to make sure that the legrests do not unlock
the wheel locks when they are swung back.
When adjusted correctly, the wheel lock shoe
should be embedded into the tire at least 1/8"when
engaged in the locked position. To adjust locks,
loosen the nut on the carriage bolt. Slide the clamp
toward/away from the rear wheel until the lock shoe
is embedded at least 1/8 inch into the tire when the
handle is engaged in the locked position. Tighten
the nut and bolt to secure in position. Inspect for
correct locking action BEFORE actual use.
8
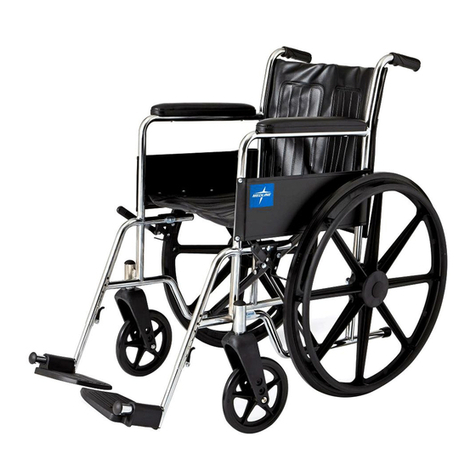
Removalof SwingawayFootrest/Legrest-
Release the lock by pushing on the front rigging
lever. Swing the footrest/legrest outward and
sideways. Lift up on the assembly to remove the
footrest or legrest.
Adjusting length of the Footrest/Legrest - When
adjusting the length of the footrest/legrest, the
wheelchair user should be sitting in the wheelchair
with his/her feet on the footplates. Loosen the bolt
on the clamp around the support assembly. Raise
or lower the footplate as needed to provide
maximum support of the thighs on the seat
upholstery. The front rigging should not be lowered
tothe point that it causes pressure to thighs at front
of seat upholstery. The footrest should not be
closer than 2 ~" from the ground to ensure proper
clearance.
Adjusting/Elevating Legrest - Lift up on the
legrest assembly on the footplate to the desired
height or position. Release the legrest assembly
and it will automatically lock in place. To lower,
push out on legrest lever and slowly lower the
footplate until the desired position is reached.
Swing-Back Arms - To swing back arm, depress
the plastic paddle to unlock the front of the arm.
9
'.'

Lift up on the front of the arm to unlock and swing
up.
,
Adjusting to Hemi Height (lowering the rear
frame by 2 inches)
Hemi Height
Axle Hole
Standard
Height Axle
Hole
Step 1: Depress the quick release button on the
wheel hub and pull off the wheel and quick release
the axle from the standard height axle hole.
Step 2: Remove the plastic plug on the hemi height
axle hole and insert into the standard height axle
hole.
Step 3: Insert the quick release axle with the wheel
into the hemi height axle hole. Push in all the way.
Make sure the quick release button pops out all the
way and the two bearings are fully showing.
(Caution: Check wheel lock adjustment for proper
adjustment.) 10
I

Caution: Stability - The wheelchair is designed to
be safe and stable as long as you maintain your
center of gravity in the chair. Never reach for
objects that require you to shift in the seat or bend
over out of the chair. Whenever reaching for
objects that require you to lean, make sure the front
casters are pointing in a forward position, which
extends the wheel base and will help stabilize the
chair. Also lock the wheel locks to prevent the
wheelchair from moving.
Ramps - Know your own capabilities and
limitations in terms of strength and endurance
before attempting to go up a ramp. You and your
attendant should first consult a qualified
professional for correct techniques on ramp .
negotiation. Assistance is recommended when
going up or down steep inclines greater than 10
degrees. If it becomes necessary to stop on an
incline, avoid sudden, abrupt forward movement
when you resume propelling the chair. Because of
the backward angle of the chair, sudden abrupt
movement could cause instability. Attempting to
use the wheel lock brakes could result in accidental
locking, veering or tipping to one side, or suddenly
stopping. Avoid changing direction when going
down an incline, as this could cause instability.
11
'.\

Maintenance
Itis highly recommended that the wheelchair be
taken to a qualified dealer annually for a
thorough inspection and maintenance/repair
.
service.
General Care- W"ipeoffthe chrome parts at least
once a week using a clean, soft cloth. Clean all
metal parts with auto wax or similar products. Dry
the chair immediately if exposed to moisture. Do
not use abrasive cleanser or materials that will
scratch the finish off of the chair.
Monthly Checks:
Inspect the entire wheelchair for broken parts
and loose fasteners. Replace or tighten as
needed.
Front and Rear Tires-Solid tires require minimal
maintenance, but should occasionally be cleaned
with a damp cloth. Replace the tires if they become
cracked or severely worn.
Front Caster and Rear Wheels -Check that the
wheels are not warped and the spokes are not
broken. Also assure that the bearings are in good
working condition and the wheels spin freely.
Front Forks - Verify that the forks swivel freely
without binding. If binding occurs, check the
bearings and clean the fork stem housing. If the
nut is too loose, the caster will flutter or shimmy. If
12

cit is too tight, the chair will be difficult to steer.
Wheels - The large rear wheels should be checked
for correct tightness. Ifthe wheel wobbles or is
loose, the bearings may be worn. The quick
release bolt may not be locked in place or it may
need to be adjusted. To check if the quick release
axle is locked in place, make sure the push button
is popped out and that the two small ball bearings
are protruding through the holes on the opposite
end of the axle. Do not attempt to adjust the quick
release mechanism unless you are qualified to do
so. Take the wheelchair to your local dealer for
service.
Quick release mechanism - The quick release
mechanism should be checked for proper function.
The quick release should be cleaned and lubricated
(or replaced if necessary) if the push button does
not actuate easily or there is dirt/grime build up.
Frame - Check that the frame is not bent or .
dented. Check the tubing for cracks and rust. If
such issues are found, take the wheelchair to your
local service dealer.
Clean and lightly oil the three rear axles on each
side of the frame to prevent rust. Plastic caps
should be placed over the axles while not in use.
13
I

Medline Limited Warranty
Your Medline Excel K4 QR wheelchair frame is
warranted to be free of defects in material and
workmanship for the life of the original consumer
purchaser. The life of the frame is five years. The
upholstery, quick release mechanism, fasteners
and other parts have a warranty of six months.
This warranty does not cover device failure due to
owner misuse or negligence, or normal wear and
tear. The warranty does not extend to non-durable
components such as rubber accessories, tires,
casters and grips, which are subject to normal wear
and replacements. Medline's sole obligation under
this warranty will be limited to repair or replacement
of the affected part(s).
For more information about your wheelchair,
warranty or to reorder parts call 1-800-MEDLINE.
~
MEDLINE.
r
Medline is a registered trademark of Medline Industries, Inc.
Manufactured for Medline Industries, Inc., Mundelein, IL 60060 USA
14
I
Table of contents
Other Medline Wheelchair manuals

Medline
Medline Excel K3 Basic User manual

Medline
Medline MDS86000 User manual

Medline
Medline Excel User manual

Medline
Medline GUARDIAN G1-502PWX1 User manual

Medline
Medline GUARDIAN G2-105RX1 User manual

Medline
Medline Elements MDS89745ELMB Installation guide

Medline
Medline Guardian K1 User manual

Medline
Medline MDS808200RTR Operating manual

Medline
Medline MDS806250EEBC User manual

Medline
Medline Excel 2000 Narrow User manual