MGG DTC-WP User manual

1
DTC-WP
Waterproof and Re-chargeable Dog Training Collar
1. Antenna
2. LED light
3. Red LED light (launch or charging)
4. LCD display
1-100 level
Static shock mode
Vibration mode
Beep mode
Light mode
Channel 1
Channel 2
Low battery
5. Up/down button
6. LED light button
7. Channel button
8. Launch button
9. Mode button
10. Charging jack
◘Features
1. 100 levels of vibration.
2. 100 levels of static correction (optional).
3. The levels can be altered by use of up & down button.
4. A tone button activates a tone on the Collar Receiver.
5. The system can be used for 1 or 2 receivers.
POWER SAVING
6. The Collar Receiver will TURN OFF if it is unused for 4 minutes.
7. Any movement will activate the Collar Receiver into STANDBY MODE.
8. The Transmitter will go into STANDBY MODE if there is no operation after 20 seconds and
turn off after 2 minutes.
◘To Prepare the Remote Hand-held Transmitter
Charge the Remote Hand-held Transmitter
1. Connect the charger connector to the charging jack.
2. Plug the charger into a power outlet
2
3. The Red light on the Transmitter will turn on.
4. Charge the Transmitter for at least 6 hours for the first charge.
5. After being fully charged, the Red LED will turn off automatically.
The low battery indicator will show up on the right side of LCD screen
How to use the Transmitter
1. To turn on/off the Transmitter, hold the Mode button for 5 seconds.
2. Set to the different modes by pressing the Mode button –the LCD images will change.
3. Press the up and down buttons on right hand side to set level.
4. Choose the different channels for 1 or 2 receivers.
5. The Transmitter will go into STANDBY MODE if not operated for 20 seconds and will TURN
OFF if not operated for 2 minutes.
6. In STANDBY MODE, press any button (except LED light button) to wake it up.
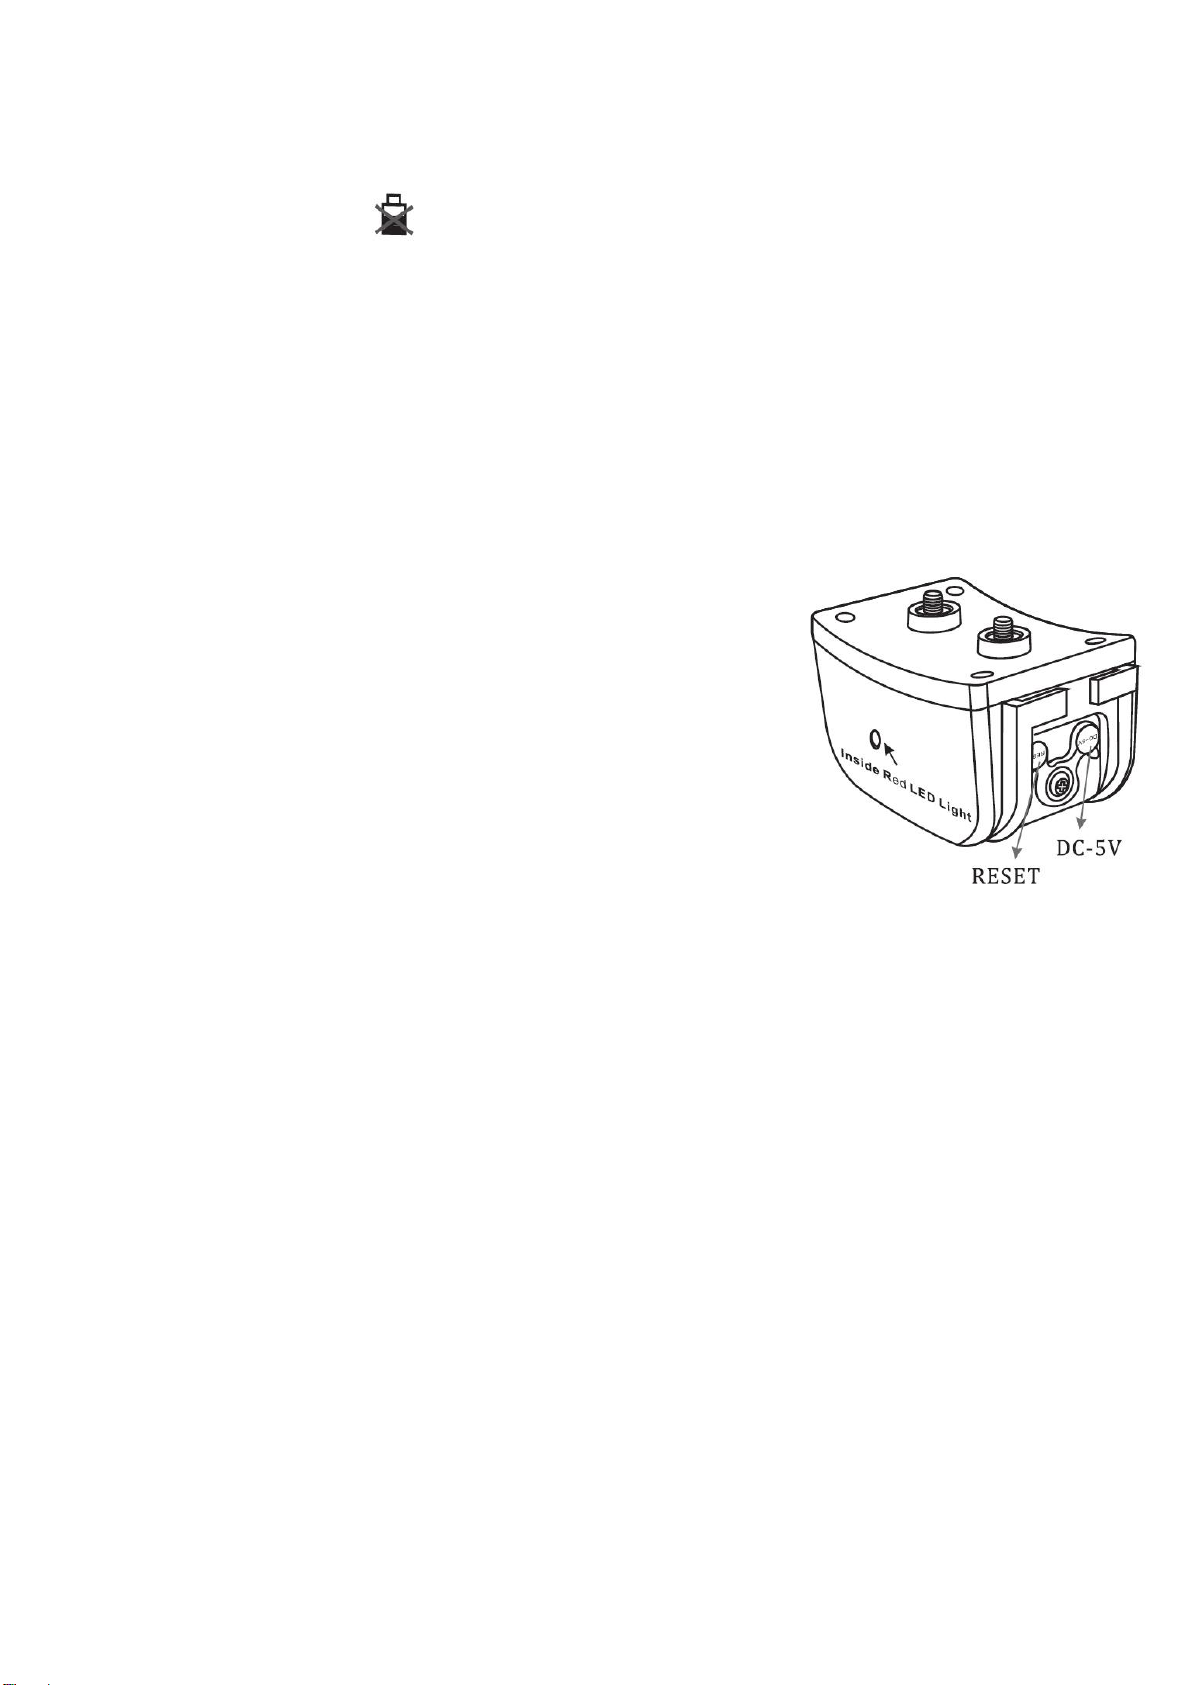
◘Prepare the Collar Receiver
Charge the Collar Receiver
1. Connect the charger connector to the charging jack.
2. Plug the charger into a power outlet.
3. The Red LED light inside the Collar Receiver will turn on.
4. Charge the Collar Receiver for at least 6 hours for the first
charge.
5. When fully charged the Red LED light will turn off
automatically.
6. When charging is completed, replace the rubber cover
securely so no moisture can enter.
Low battery indicator: when activated the Collar Receiver will keep beeping for 2 minutes unless it
gets charged.
◘Connect the Transmitter with the Collar Receiver
1. Turn on the Transmitter and choose 1 or 2 channels to encode.
2. Lift the Reset part of Rubber cover in the Collar Receiver.
3. With a pen or paper clip, press the Reset Button inside the Collar Receiver.
4. After a beep from the Collar Receiver, press the LAUNCH button on Transmitter
immediately.
5. The Collar Receiver will beep –it is now encoded to the Transmitter.
6. After Encoding is completed, replace the rubber cover back.
Import Notice: The Collar Receiver is designed to be waterproof. To ensure thisthe Rubber cover has to be
re-fitted in the right position. It may be hard to put it back when you are not used to it. You could take out
the screw first and doing so may help you to put the Rubber cover to the correct position.
◘How to check that the static is working
Use the test light LED –provided.
Attach the light to the metal probes –select Static Mode –you can see static symbol on the
screen –press the LAUNCH button –the LED will flash on.
Or you could select a low number on the LCD display –put your fingers accross the metal
probes and press the launch button.

3
◘Notes for use:
1. The lifetime of the batteries varies according to how often you use the product. Therefore,
you should check the batteries often by hearing the beep from the Collar Receiver and
watching the indicator sign on the LCD screen of the Transmitter.
2. The valid distance of remote control means the straight-line distance between the
Transmitter and the Collar Receiver without obstacles in between. If there are any
interference signals or signal screening around the actual remote control, distance may
vary.
3. This product is for dog training. Only by training, can a dog understand the intention of its
owner. Success can only be achieved after a period of consistent training.
4. Training sessions should be kept positive and short, about 10-15 minutes long each time.
5. This product is a very effective and safe tool for training dogs. Following the correct
operational instructions, you can efficiently train your dog without any harm.
This equipment is made in China for Machines Gadgets and Gizmows Limited, Kerikeri, NZ.
Website: www.MGG.co.nz Email: [email protected]
©MGG2012
Frequency: 433. 825 MHz
Transmitter: 3.7V 500 ma LiP
Receiver: 3.7V 500ma LiP
Table of contents
Other MGG Pet Care Product manuals

MGG
MGG Trainertec DTC1200V User manual

MGG
MGG HT-023 User manual

MGG
MGG DTC Pro-Trainer User manual

MGG
MGG Maxi User manual

MGG
MGG DTC 600 User manual

MGG
MGG DTC GT-211 User manual

MGG
MGG Maxi Dog Fencing System Setup guide

MGG
MGG EF681 User manual

MGG
MGG DTC 2000 Pro Series User manual

MGG
MGG DTC-2000-1 User manual


