Keypad Lock Icon
The Keypad Lock Icon is seen on top of the screen at various positions depending on
the number of icons displayed. An Open Lock signifies that the phone’s keypad is
unlocked and a closed lock signifies that the keypad is locked. You can unlock the
keypad by pressing Unlock (by right soft key) on the phone, followed by the Send
(GREEN) key. Similarly for locking the keypad, press the End (RED) key, to be
followed by the Send key.
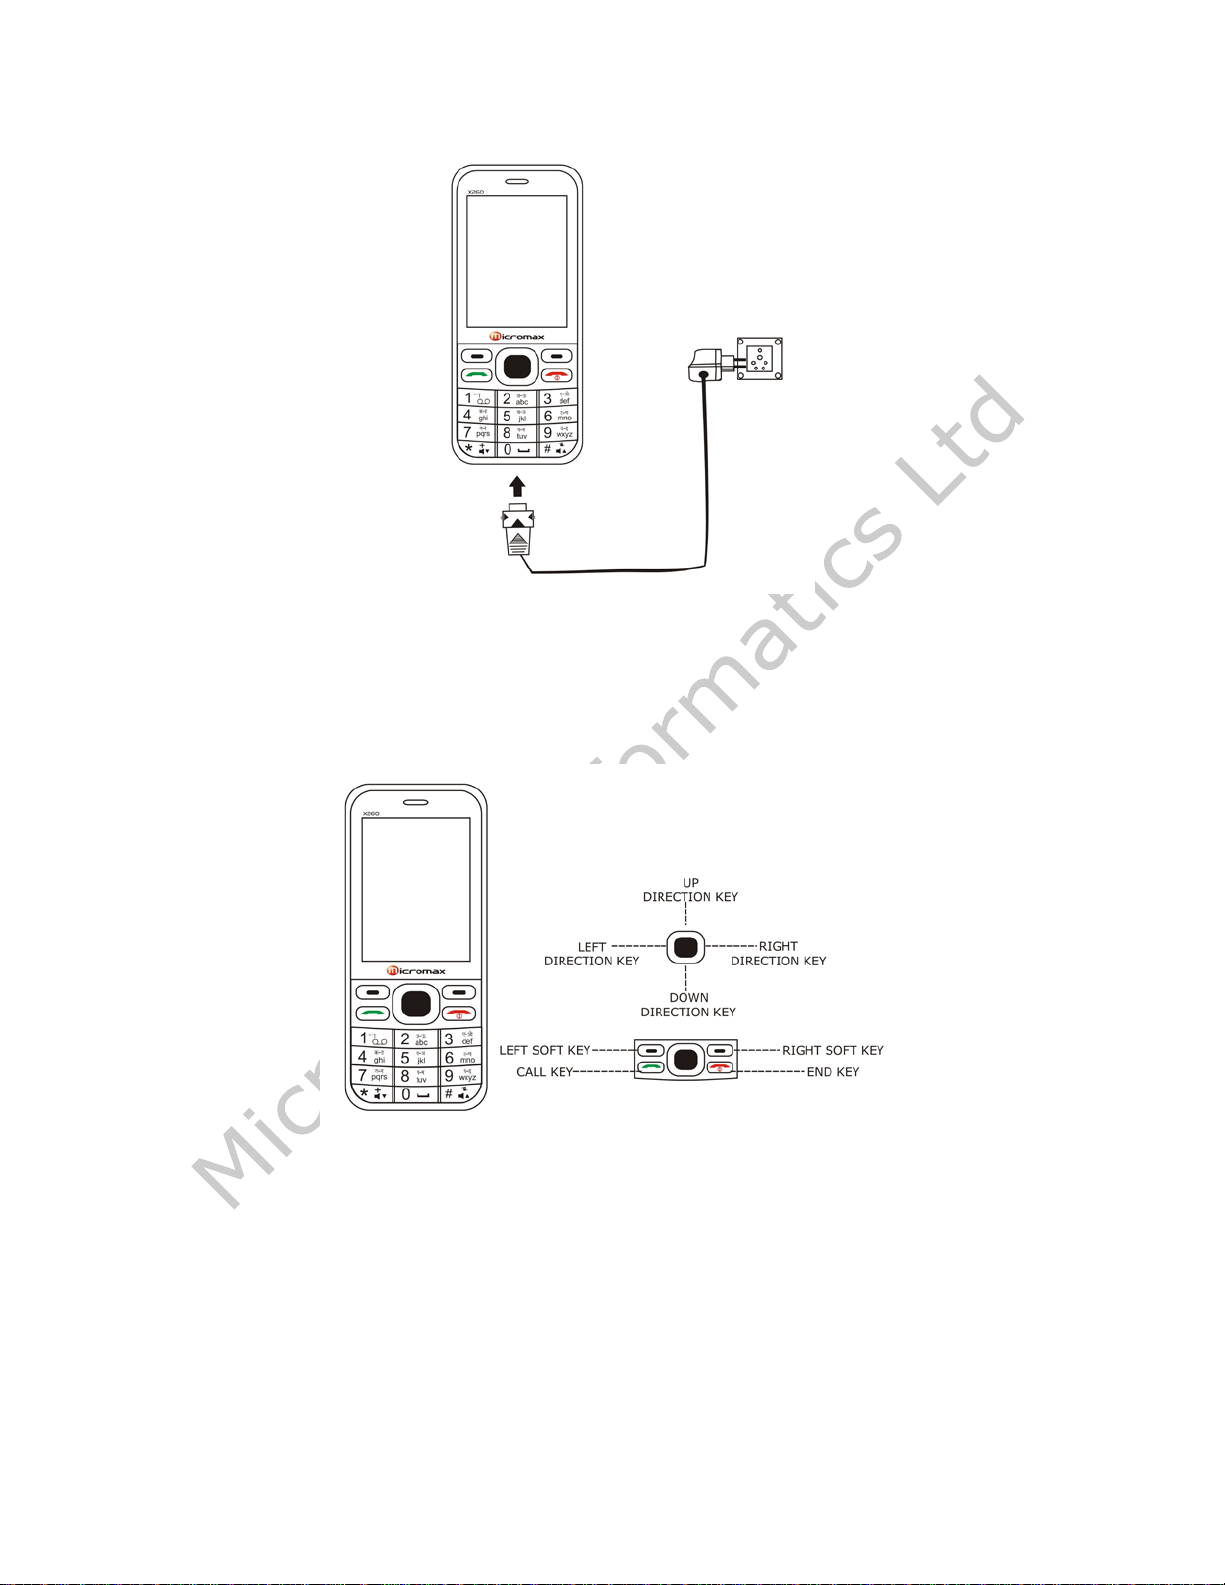
3.5. Basic Functions
Make a Call
To make a call, unlock the keypad, if locked, enter the desired phone number, press
the Send (GREEN) key and select the appropriate SIM.
NOTE: Your service provider programs one or more emergency phone numbers, such
as 112, 100, that you can call under any circumstances, even when your phone is
locked or the SIM card is not inserted. Check with your service provider, as
emergency numbers vary by country. Your phone may not work in all locations, and
sometimes an emergency call cannot be placed due to network, environmental or
interference issues.
Making a Call Using Call Logs
All dialed and incoming numbers are saved in call logs and categorized into Missed
Calls, Received Calls and Dialed Calls. To check the logs, please follow these steps:
In standby mode, press the Send (GREEN) key to view Call Logs. Use the scroll keys
to scroll between Missed Calls, Received Calls and Dialed Calls.
Or else, you can go to Call Logs>Call History>Select the appropriate SIM to view the
missed, received and dialed calls.
Answering a Call
•To receive an incoming call, press the Option key and select ‘Answer’ or
receive it directly by pressing the Send (GREEN) key.
•If headset is available, user can choose headset keys to answer the call or
turn on auto answer.
Call Option
The Micromax X260 phone offers multiple functions during a call. During a call,
following functions can be actualized if you operate according to the instructions on
the screen. Press up and down direction keys to choose the wanted function and
press select key to enter.
•Hold a Call: To hold an Active call.
•Swap between Held/Waiting and Active: Swap among the calls. This option is
network dependent.
•End: End the present active call only.
•New call: To make a new call.
•Phone Book: To explore the Phonebook for phone numbers.
•Message: To explore the SMS menu (Inbox, outbox, etc)
•Sound Recorder: To record the present active call for later listening/review.