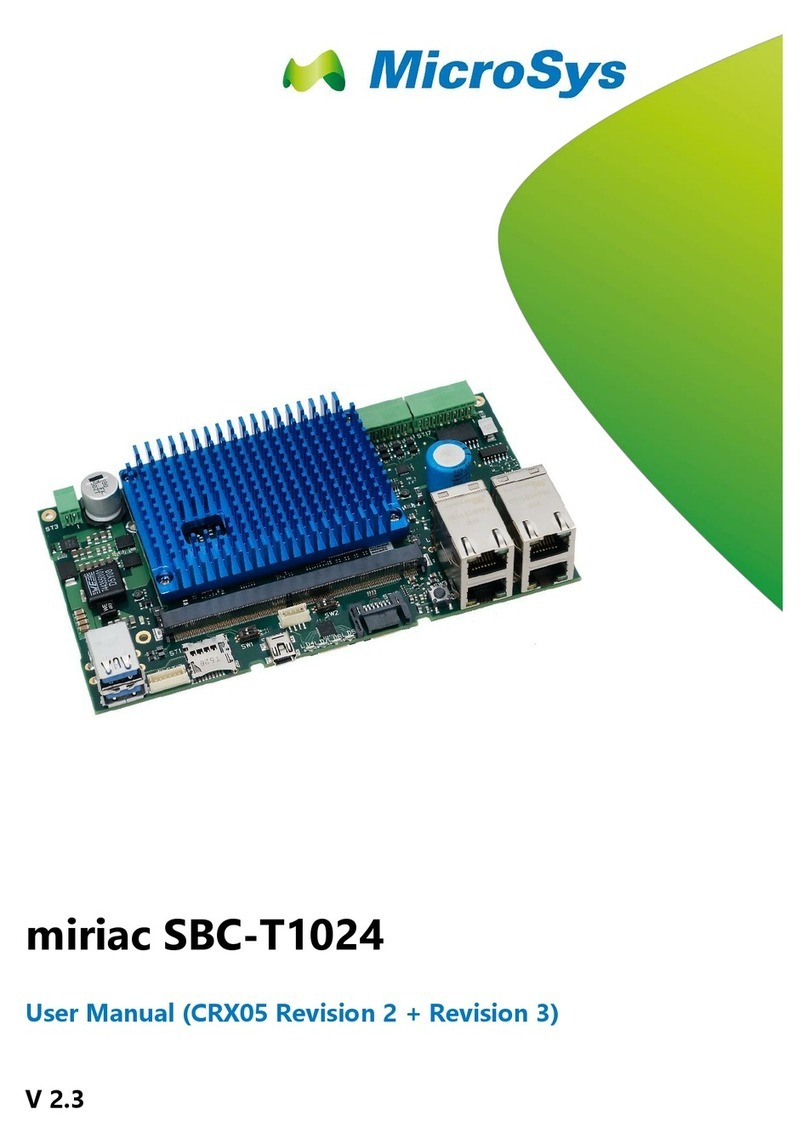
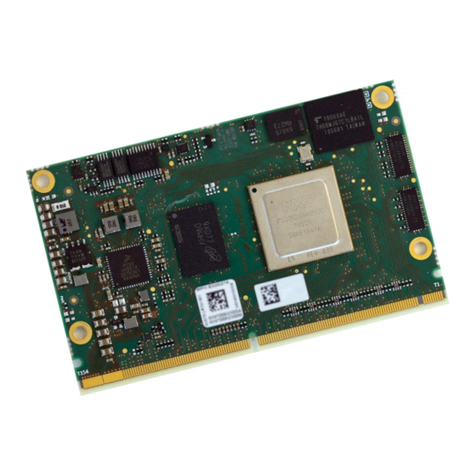
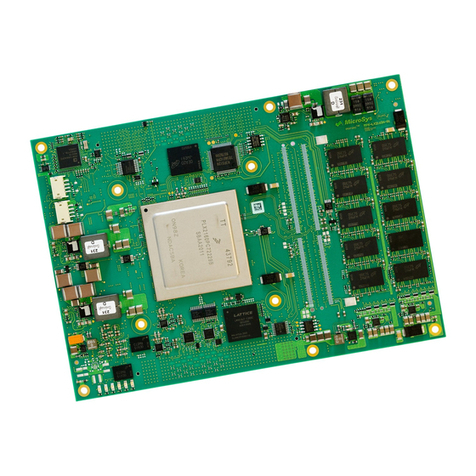
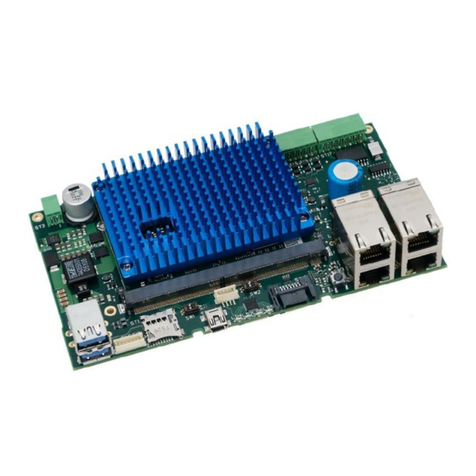
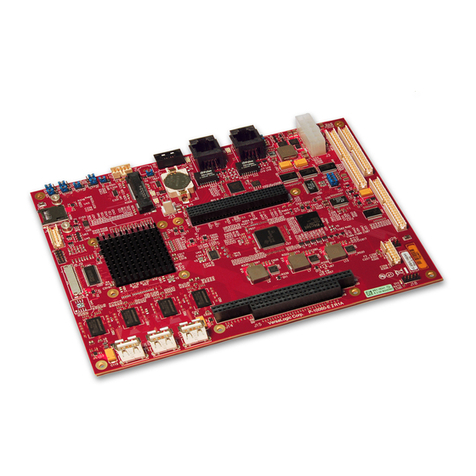
MicroSys miriac SBC-S32G274A User manual

miriac SBC-S32G274A
User Manual (HW Revision 3)
V 3.2

Table of Contents
miriac SBC-S32G-R3_User Manual
V 3.2
2/65
© MicroSys Electronics GmbH 2021
Table of Contents
1General Notes..............................................4
1.1Warranty........................................................4
1.2 Links..............................................................4
1.3 Liability..........................................................4
1.4 Offer to Provide Source Code of Certain
Software........................................................5
1.5 Symbols, Conventions and Abbreviations.....6
1.5.1 Symbols ........................................................6
1.5.2 Conventions ..................................................6
2Introduction .................................................7
2.1 Safety and Handling Precautions..................7
2.2 Short Description...........................................8
2.3 Shipping List..................................................8
3Quick Start Guide........................................9
3.1 Prerequisites .................................................9
3.1.1 Minimum Requirements ................................9
3.1.2 Recommended Items....................................9
3.2 Board Preparation and Power-Up ...............10
3.3 Operation ....................................................11
3.3.1 Default switch settings.................................11
3.3.2 U-Boot Startup.............................................11
3.4 Ordering Information ...................................12
4System Description...................................13
4.1 Block Diagram.............................................13
4.2 Feature Overview........................................14
4.2.1 MPX-S32G274A..........................................15
4.2.2 CRX-S32G ..................................................15
4.3 Connector Layout........................................16
4.4 Power Supply..............................................18
4.4.1 Input Supply Rating.....................................18
Input Power Connector................................18
Input Protection...........................................19
4.4.4 Power Supply Structure...............................19
4.4.5 Watchdog....................................................20
4.4.6 RTC Backup Battery....................................20
4.4.7 Power control by KL15................................20
4.5 Changes from R2 to R3...............................21
5System Core, Boot Configuration and
On-Board Memory.....................................22
5.1 S32G274A Processor..................................22
5.2 Reset Structure ...........................................22
5.3 Clock Distribution ........................................23
5.4 Boot Configuration.......................................23
5.5 eMMC..........................................................23
5.6 QSPI Flash..................................................23
5.7 I²C Bus.........................................................24
5.7.1 I2C-0............................................................24
5.7.2 I2C-1............................................................25
5.7.3 I2C-2............................................................26
5.7.4 I2C-3............................................................26
5.7.5 I2C-4............................................................26
5.7.6 I2C_SCL_PROG .........................................27
5.8 IO-Expander................................................28
6Peripherals.................................................29
6.1 Connector References.................................29
6.2 Module Connector.......................................30
6.3 PCIe / SerDes Usage..................................30
6.4 LAN Connections.........................................30
6.4.1 LAN Structure..............................................31
6.4.2 MDIO addressing.........................................33
6.4.3 1G LAN SerDes_0 Lane1 (ST21A)..............33
6.4.4 1G LAN RGMII-0 (ST22B)...........................34
6.4.5 1G LAN RGMII-1 (ST22A)...........................34
6.4.6 SJA1110 Automotive Switch........................35
6.4.7 1G LAN SGMII (ST21B) ..............................36
6.4.8 100Mbps LAN (ST20)..................................37
6.4.9 1000Base-T1 (ST23)...................................37
6.4.10 100Base-T1 LAN (ST17, ST18, ST19)........38
6.4.11 SJA1110 Standalone (ST16).......................39
6.5 PCIe Connections........................................40
6.5.1 Mini PCIe Slot (ST15)..................................40
6.5.2 M.2 Socket (ST9).........................................42
6.5.3 PCIe Root Complex / Endpoint....................43
6.6 USB.............................................................44
6.6.1 USB1, USB4 (ST14)....................................45
6.6.2 USB2 (mPCIe).............................................45
6.6.3 USB3 (M.2)..................................................45
6.7 CAN, LIN, FlexRay connectors....................45
6.8 CAN (ST11, ST12) ......................................46
6.9 LIN (ST13)...................................................48
6.10 FlexRay (ST13) ...........................................49
6.11 Console (ST6) .............................................50
6.12 microSD (ST5).............................................51
6.13 JTAG ...........................................................52
6.13.1 JTAG for MPX-S32G274A (ST7).................52
6.13.2 JTAG for SJA1110 (ST10)...........................53
6.14 Aurora (ST8)................................................54
6.15 Analog In (ST1) ...........................................55
6.16 Switches......................................................56
Table of Contents
miriac SBC-S32G-R3_User Manual
V 3.2
3/65
© MicroSys Electronics GmbH 2021
6.16.1 SW1 = Reset button....................................56
6.16.2 SW2 = Configuration (boot selection)..........57
6.16.3 SW3 = SJA1110 boot configuration ............58
6.17 LEDs ...........................................................59
6.17.1 LEDs on Carrier...........................................59
6.17.2 LEDs on Module..........................................59
6.18 Test and expansion Connector (ST4)..........60
7Software.....................................................61
7.1 U-Boot.........................................................61
7.2 Operating System Support ..........................61
8Appendix....................................................62
8.1 Acronyms.....................................................62
8.2 Table of Figures...........................................63
8.3 Table of Tables............................................63
9History........................................................65

miriac SBC-S32G-R3_User Manual
V 3.2
4/65
© MicroSys Electronics GmbH 2021
1 General Notes
Copyright MicroSys Electronics GmbH, January 2021
All rights reserved. All rights in any information which appears in this document
belong to MicroSys Electronics GmbH or our licensors. You may copy the
information in this manual for your personal, non-commercial use.
Copyrighted products are not explicitly indicated in this manual. The absence of the
copyright (©) and trademark (TM or ®) symbols does not imply that a product is not
protected. Additionally, registered patents and trademarks are similarly not
expressly indicated in this manual.
1.1 Warranty
To the extent permissible by applicable law all information in this document is
provided without warranty of any kind, whether expressed or implied, including but
not limited to any implied warranty of satisfactory quality or fitness for a particular
purpose, or of non-infringement of any third party’s rights. We try to keep this
document accurate and up-to-date but we do not make any warranty or
representation about such matters. In particular we assume no liability or
responsibility for any errors or omissions in this document.
MicroSys Electronics GmbH neither gives any guarantee nor accepts any liability
whatsoever for consequential damages resulting from the use of this manual or its
associated product.
MicroSys Electronics GmbH further reserves the right to alter the layout and/or
design of the hardware without prior notification and accepts no liability for doing
so.
1.2 Links
We make no warranty about any other sites that are linked to or from this
document, whether we authorise such links or not.
1.3 Liability
To the extent permissible by applicable law, in no circumstance, including (but not
limited to) negligence, shall we be liable for your reliance on any information in this
document, nor shall we be liable for any direct, incidental, special, consequential,
indirect or punitive damages nor any loss of profit that result from the use of, or the
inability to use, this document or any material on any site linked to this document
even if we have been advised of the possibility of such damage. In no event shall
our liability to you for all damages, losses and causes of action whatsoever,
whether in contract, tort (including but not limited to negligence) or otherwise
exceed the amount, if any, paid by you to us for gaining access to this document.
MicroSys Electronics GmbH
Muehlweg 1
82054 Sauerlach
Germany
Phone: +49 8104 801-0
Fax: +49 8104 801-110

miriac SBC-S32G-R3_User Manual
V 3.2
5/65
© MicroSys Electronics GmbH 2021
1.4 Offer to Provide Source Code of Certain
Software
This product contains copyrighted software that is licensed under the General
Public License (“GPL”) and under the Lesser General Public License Version
(“LGPL”). The GPL and LGPL licensed code in this product is distributed without
any warranty. Copies of these licenses are included in this product.
You may obtain the complete corresponding source code (as defined in the GPL)
for the GPL Software, and/or the complete corresponding source code of the LGPL
Software (with the complete machine-readable “work that uses the Library”) for a
period of three years after our last shipment of the product including the GPL
Software and/or LGPL Software, which will be no earlier than December 1, 2010,
for the cost of reproduction and shipment, which is dependent on the preferred
carrier and the location where you want to have it shipped to, by sending a request
to:
MicroSys Electronics GmbH
Muehlweg 1
82054 Sauerlach
Germany
In your request please provide the product name and version for which you wish to
obtain the corresponding source code and your contact details so that we can
coordinate the terms and cost of shipment with you.
The source code will be distributed WITHOUT ANY WARRANTY and licensed
under the same license as the corresponding binary/object code.
This offer is valid to anyone in receipt of this information.
MicroSys Electronics GmbH is eager to duly provide complete source code as
required under various Free Open Source Software licenses. If however you
encounter any problems in obtaining the full corresponding source code we would
be much obliged if you give us a notification to the email address
send large attachments such as source code archives etc to this email address)

miriac SBC-S32G-R3_User Manual
V 3.2
6/65
© MicroSys Electronics GmbH 2021
1.5 Symbols, Conventions and Abbreviations
1.5.1 Symbols
Throughout this document, the following symbols will be used:
Information marked with this symbol MUST be
obeyed to avoid the risk of severe injury, health
danger, or major destruction of the unit and its
environment
Information marked with this symbol MUST be
obeyed to avoid the risk of possible injury,
permanent damage or malfunction of the unit.
Information marked with this symbol gives important
hints upon details of this manual, or in order to get
the best use out of the product and its features.
Table 1-1 Symbols
1.5.2 Conventions
Symbol
explanation
#
denotes a low active signal
←
denotes the signal flow in the shown direction
→
denotes the signal flow in the shown direction
↔
denotes the signal flow in both directions
→
denotes the signal flow in the shown direction with additional logic /
additional ICs in the signal path
I/O
denotes a bidirectional pin
Input
denotes an input pin
matched
denotes the according signal to be routed impedance controlled and
length matched
Output
denotes an output pin
Pin 1
refers to the numeric pin of a component package
Pin a1
refers to the array position of a pin within a component package
XXX-
denotes the negative signal of a differential pair
XXX+
denotes the positive signal of a differential pair
XXX
denotes an optional not mounted or fitted part
Table 1-2 Conventions

miriac SBC-S32G-R3_User Manual
V 3.2
7/65
© MicroSys Electronics GmbH 2021
2 Introduction
Thank you for choosing the MicroSys SBC-S32G274A Single Board Computer
system. This manual should help you gain a good understanding of all the features
of the SBC-S32G274A.
2.1 Safety and Handling Precautions
ALWAYS use the correct type and polarity of the power supply!
DO NOT exceed the rated maximum values for the power
supply! This may result in severe permanent damage to the
unit, as well as possible serious injury.
ALWAYS keep the unit dry, clean and free of foreign objects.
Otherwise, irreparable damage may occur.
Parts of the unit may become hot during operation. Take care
not to touch any parts of the circuitry during operation to avoid
burns, and operate the unit in a well-ventilated location.
Provide an appropriate cooling solution as required.
ALWAYS handle the unit in an ESD-safe manner!
Many pins on external connectors are directly connected to the
SoC or other ESD sensitive devices.
Make or break ANY connections ONLY while the unit is
switched OFF.
Otherwise, permanent damage to the unit may occur, which is
not covered by warranty.
There is no separate SHIELD connection.
All the metal sheaths of shielded connectors are connected to
GND.
Also, all mounting holes of the carrier board are connected to
GND.
The module’s mounting holes are not connected to GND
Take this into account when handling and mounting the unit.
Table 2-1 Safety and Handling Precautions

miriac SBC-S32G-R3_User Manual
V 3.2
8/65
© MicroSys Electronics GmbH 2021
2.2 Short Description
The SBC-S32G274A is a small computer system consisting of
■the MPX-S32G274A module, based on NXP’s S32G274A Vehicle Network
Processor
■and the CRX-S32G carrier board.
It targets both
■evaluation of the MPX-S32G274A SoM
■direct usage as an industrial computing solution
This document gives you an overview on the board's connectors and how to take the
first steps on the initial setup.
2.3 Shipping List
The SBC-S32G274A Development Kit contains the following items:
■The SBC-S32G274A system including a suitable heatsink
■Power Supply 12V DC stabilized / 2 A
■Cable adapter for the power supply
■USB cable type A –mini B
■microSD card with U-Boot and Linux
■Documentation:
a) This hardware manual.
b) Manual for MPX-S32G274A module “miriac_MPX-
S32G274A_User_Manual.pdf”

miriac SBC-S32G-R3_User Manual
V 3.2
9/65
© MicroSys Electronics GmbH 2021
3 Quick Start Guide
3.1 Prerequisites
Always take the necessary ESD precautions when handling the
SBC-S32G274A. Otherwise, the unit may suffer permanent
damage.
Do not place the unit directly flat on a metal surface, as this
may result in short circuits and damage to the board.
Before first using the SBC, unpack the unit and make sure that is clean and free of
visible damage or foreign objects.
3.1.1 Minimum Requirements
To operate the board, you will at least need the following items:
■an adequate power supply, delivering 12V DC (stabilized) / 2A minimum.
■a USB cable (type A –mini B) connected to ST6.
■a serial terminal, such as a PC with a USB port running a terminal software
(e.g. TeraTerm, HyperTerminal, minicom, putty, ckermit...), or else a hardware
serial console. Choose the following parameters:
(a) 115200 Bd
(b) 8 Data bits
(c) No parity
(d) 1 Stop Bit
3.1.2 Recommended Items
The following items are not absolutely necessary, but strongly recommended for
practical operation and development purposes:
■Network connection to your local network installation
■TFTP server available for downloading within the network (may run on the
same PC as the serial terminal)
■SD card as mass storage and/or boot media

miriac SBC-S32G-R3_User Manual
V 3.2
10/65
© MicroSys Electronics GmbH 2021
3.2 Board Preparation and Power-Up
■Make sure the switches SW1 and SW2 are set properly in order to select the
correct boot source and board configuration
■The board comes preconfigured to boot correctly on arrival.
■Connect the mini USB cable to ST6.
■Connect other peripherals (USB, LAN ...) as needed.
■Connect power to the PWR connector, while the power supply is still switched
off.
■Switch on power.
Figure 3-1 System setup example

miriac SBC-S32G-R3_User Manual
V 3.2
11/65
© MicroSys Electronics GmbH 2021
3.3 Operation
After power-on, the green LED on the module should be lit and
any red LED should be off.
IF NOT, DISCONNECT THE UNIT FROM POWER AND CHECK
FOR FAULTS!
3.3.1 Default switch settings
Switch SW2 (S32G274A config):
Switch
Default
Function
1
Off
RCW select
Default RCW
2
Off
On = boot from SPI on SoM
Off = boot from SD card
3
Off
Off = root complex
4
Off
Off = JCOMP signal open
Table 3-1 Switch2 setting
Switch SW3 (SJA1110 config):
Switch
Default
Function
1
Off
BOOT_OPTION0 = 1
2
Off
BOOT_OPTION1 = 1
Table 3-2 Switch3 setting
3.3.2 U-Boot Startup
When power is supplied the system will start and boot into U-Boot.
The exact output may vary, depending on U-Boot and MPX-S32G274A module
versions in use.
U-Boot 2020.04-4.1+g97081903ce (Mar 03 2021 - 07:18:34
+0000)
CPU: NXP S32G274A rev. 2.1.0
Reset cause: Power-On Reset
Model: MicroSys S32G274ASBC2
DRAM: 3.5 GiB

miriac SBC-S32G-R3_User Manual
V 3.2
12/65
© MicroSys Electronics GmbH 2021
U-Boot 2020.04-4.1+g97081903ce (Mar 03 2021 - 07:18:34
+0000)
CPU: NXP S32G274A rev. 2.1.0
Reset cause: Power-On Reset
Model: MicroSys S32G274ASBC2
DRAM: 3.5 GiB
Board: Rev. 2
CA53 core 1 running.
CA53 core 2 running.
CA53 core 3 running.
All (4) cores are up.
MMC: FSL_SDHC: 0
Loading Environment from EEPROM... OK
DIP EEPROM[0]
PCIe0 CLK: 100MHz
PCIe1/SGMII CLK: 125MHz
RCON EEPROM WP: no
SEL SDHC: SDHC
BOOT MODE: RCON
PCIe0 clock 100MHz
Using external clock for PCIe0
Frequency 100Mhz configured for PCIe0
Configuring PCIe0 as RootComplex(x1)&SGMII [XPCS0
OFF(PCIex1), XPCS1 1G]
PCIe1 clock 125MHz
Using external clock for PCIe1
Frequency 125Mhz configured for PCIe1
Configuring PCIe1 as SGMII(x2) [XPCS0 2.5G, XPCS1 OFF]
PCIe0: Failed to get link up
Pcie0: LINK_DBG_1: 0x00000000, LINK_DBG_2: 0x00000800
(expected 0x000000d1)
DEBUG_R0: 0x0070b500, DEBUG_R1: 0x08200000
PCIe1: Not configuring PCIe, PHY not configured
In: serial
Out: serial
Err: serial
USB EHCI 1.00
Net: eth0: eth_eqos PFE: emac0: sgmii emac1: rgmii
emac2: rgmii , eth1: eth_pfeng
Hit any key to stop autoboot: 0
=>
3.4 Ordering Information
Ordering information can be found on the website
https://microsys.de/en/home/
or contact your local sales representative.

miriac SBC-S32G-R3_User Manual
V 3.2
13/65
© MicroSys Electronics GmbH 2021
4 System Description
This section describes all parts of the SBC-S32G274A system.
4.1 Block Diagram
Figure 4-1 Block Diagram (MPX-S32G274A on carrier CRX-S32G-R3 )

miriac SBC-S32G-R3_User Manual
V 3.2
14/65
© MicroSys Electronics GmbH 2021
4.2 Feature Overview
The SBC-S32G274A offers the following features:
1. CRX-S32G carrier (size: 200mm x 140mm)
2. Single power input
oRange +9V to +30Vdc (+12Vdc is nominal voltage)
oFor LIN operation supply should be limited to <18V; higher
voltages will not destroy LIN parts but proper operation is not
guaranteed
3. MPX-S32G274A module
oNXP S32G274A SoC: 4 ARM® Cortex®-A53 64-bit cores, 3x
dual-core ARM® Cortex®-M7 cores in lockstep
o4GB 64-bit soldered LPDDR4 RAM at 1600MT/s
o16GB eMMC and 512Mb QuadSPI Flash
4. Debugging
oUART0 to USB (FTDI)
oJTAG1 to SoM (3.3V)
oJTAG2 interface to components on carrier (1.8V)
o40-pin Aurora interface
5. SD card as boot option (multiplexed with eMMC on SoM)
6. USB
oMAC2 connects to USB-ULPI (Microchip USB3320)
oUSB-Hub (Microchip USB2514)
oPort 1 to external USB-A connector top
oPort 2 to mPCIe slot
oPort 3 to M.2 slot
oPort 4 to external USB-A connector bottom
7. LAN
o2x 1Gbps Ethernet via RGMII directly to S32G274A
o1x 1Gbps Ethernet via Serdes0_L1 directly to S32G274A
oSJA1110 Automotive Ethernet Switch (S1_L1 alt. S1_L0)
▪1x 100Mbps Ethernet
▪6x 100Base-T1 Ethernet
▪1x 1Gbps Ethernet via SGMII
▪1x 1000BaseT1 Ethernet via RGMII
8. PCIe
o1x miniPCIe (Serdes0_L0)
o1x M.2 Module type M + B (Serdes1_L0)
9. CAN
o2x FlexCAN high speed (TJA1448CTK)
o12x LLCE CAN high speed (TJA1448CTK)
o4x LLCE CAN FD with SIC (TJA1463ATK)
10. LIN
o4x directly to S32G274A
o4x from SJA1124 via SPI interface
11. FlexRay (2 channels)
12. ADC
o12x analog inputs to ADCs
13. Powercap 0.47F for RTC
14. Development Kit for immediate start up (includes power supply, cables).
Table 4-1 Feature Overview

miriac SBC-S32G-R3_User Manual
V 3.2
15/65
© MicroSys Electronics GmbH 2021
4.2.1 MPX-S32G274A
For a detailed description of the SoM please refer to the separate document
“MPX-S32G274A User Manual”.
The SoM User Manual also provides detailed mechanical dimensions.
4.2.2 CRX-S32G
The following drawing shows the mechanical outline of the SBC-S32G274A
assembly.
Figure 4-2 CRX-S32G Mechanical Dimensions

miriac SBC-S32G-R3_User Manual
V 3.2
16/65
© MicroSys Electronics GmbH 2021
4.3 Connector Layout
Figure 4-3 Top connectors

miriac SBC-S32G-R3_User Manual
V 3.2
17/65
© MicroSys Electronics GmbH 2021
Figure 4-4 Bottom connector

miriac SBC-S32G-R3_User Manual
V 3.2
18/65
© MicroSys Electronics GmbH 2021
4.4 Power Supply
4.4.1 Input Supply Rating
The SBC-S32G274A system is run from a single DC power supply with the
following ratings:
Maximum Input Voltage Operating Range:
9V - 36V DC
Nominal Input Supply Voltage:
12V DC
(@12V / room temperature / U-Boot prompt):
Carrier without module
Module without carrier (calculated)
0.4A = 4.8W
0.18A = 2.16W
4.8 –2.16 = 2.64W
ALWAYS use the correct type and polarity of the power supply!
DO NOT exceed the rated maximum values for the power
supply! This may result in severe permanent damage to the
unit, as well as possible serious injury.
Input Power Connector
Part Reference
ST2
Manufacturer:
Phönix Contact
Type:
PHX-1759020
Pinout:
Pin
Silkscreen Label
Signal
Function
1
„KL30“
KL30
Power
2
„KL15“
KL15
Power On
3
„KL31“
KL31
Return
Table 4-1 Pinout Pressure Clamp

miriac SBC-S32G-R3_User Manual
V 3.2
19/65
© MicroSys Electronics GmbH 2021
Input Protection
The board is protected against wrong polarity and over-voltage spikes.
J1 is for surge protection. It monitors polarity and over-voltage. Voltage “VIN-1” is
limited to 36.0V. This is the maximum voltage for supplying regulators and the
SoM.
4.4.4 Power Supply Structure
■Input power from PWR connector is fed in parallel to:
a) MPX-S32G274A module
b) DC/DC 12V to 5V0 @5A
c) DC/DC 12V to 3V3 @5A
d) DC/DC 12V to 1V8 @5A
e) DC/DC 12V to 7V5 @450mA
■The 3V3 DC are fed to
a) DC/DC 3.3V to 1V5 @1A
b) DC/DC 3.3V to 1V1 @1A
c) DC/DC 3.3V to 0V9 @1A
The following diagram shows the Power Supply structure:
Figure 4-5 Power supply structure

miriac SBC-S32G-R3_User Manual
V 3.2
20/65
© MicroSys Electronics GmbH 2021
4.4.5 Watchdog
Watchdog is triggered from the S32G274A port PB02. As long as PB02 is not
activated the watchdog is inactive. As soon as PB02 is activated once, the
watchdog is active and requires a permanent retrigger. It is not possible to stop
watchdog activity.
MIC826
MXM1
S32G274A
Pin
Name
Pin
Signal
Pin
Name
4
WDI
←
T111
PB02
←
W18
PB02
Table 4-2 Watchdog trigger
The MPX-S32G274A module has its own power supply. All SoM internal voltages
are generated from V_IN supplied from the carrier.
4.4.6 RTC Backup Battery
The RTC on the module is supplied from a 470mF supercap (C77) that is charged
by a power source on the carrier
4.4.7 Power control by KL15
Powerlines may be connected permanent to KL30 (+PWR) and KL31 (-PWR). As
long as KL15 is open the board is in standby.
There are 3 scenario for power control:
1. Power controlled
a) Connect KL30 and KL15 to +PWR
b) Switch +PWR external
2. KL15 controlled
a) Connect KL30 to +PWR
b) Connect KL15 to +PWR to switch ON
c) Disconnect KL15 (open) to switch OFF
3. KL15 controlled with power hold
a) Connect KL30 to +PWR
b) Connect KL15 to +PWR to switch ON
c) Set GPIO2 in IO-expander J47 (addr 0x44) to 1 for HOLD
d) Disconnect KL15 (open) to switch OFF
e) System will remain ON by HOLD
f) Reset GPIO2 in IO-expander J47 (addr 0x44) to 0 to switch OFF
Table of contents
Other MicroSys Single Board Computer manuals

MicroSys
MicroSys miriac MPX-LX2160A User manual

MicroSys
MicroSys Linux 5.10 Yocto SDK User manual

MicroSys
MicroSys miriac SBC-LX2160A User manual

MicroSys
MicroSys miriac MPX-S32G274A User manual

MicroSys
MicroSys miriac SBC-T1024 User manual

MicroSys
MicroSys miriac SBC-T1024 User manual

MicroSys
MicroSys miriac SBC-LS1046A-TSN User manual