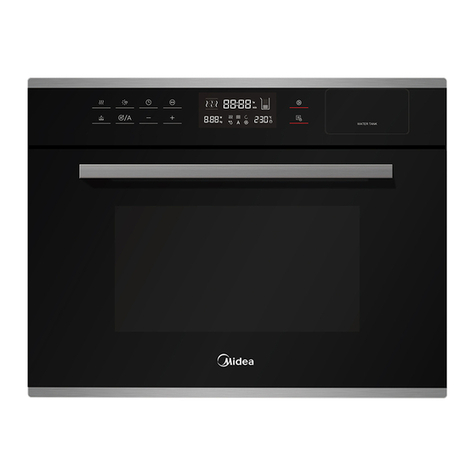
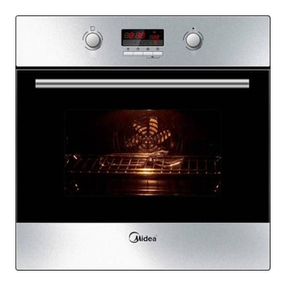
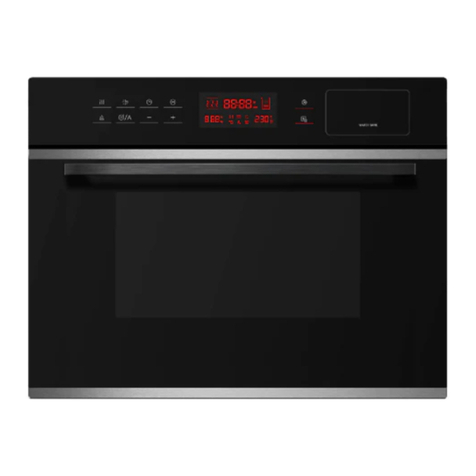
Midea TVN50E4AQ User manual

SAVE THESE INSTRUCTIONS CAREFULLY
Read these instructions carefully before using your
microwave oven, and keep it carefully.
If you follow the instructions, your oven will provide you with
many years of good service.
MODEL:TVN50E4AQ
OPERATION MANUAL
BUILT-IN
WITH
COMBINATION OVEN
HOT AIR


Table of contents
laanum nructioInst[en]
Important safety instructions ......................................................... 3
Causes of damage.............................................................................. 5
Installation
Your new appliance .......................................................................... 7
Control panel........................................................................................7
Function and screen display.............................................................. 7
Cooling fan ...........................................................................................7
Accessories..........................................................................................8
Before using the applia nce for the first time ............................9
Setting the clock .................................................................................. 9
Heating up the oven............................................................................ 9
Cleaning the accessories................................................................... 9
Setting the oven ................................................................................ 9
Setting the type of heating and temperature... ............................... 9
Rapid preheating............................................................................ .....10
Setting the time-setting options ............................................... 11
Setting the cooking time .................................................................11
Setting the clock ..............................................................................11
Childproof lock ............................................................................. 10
Switching on the childproof lock ................................................... 10
Switching off the childproof lock.. ................................................. 10
Care and cleaning ........................................................................ 12
Cleaning agents.............................................................................. 12
Malfunction table .................................................................. 13
Technical data.................................................................................12
Acrylamide in foodstuffs ............................................................
Energy and environment tips ...................................................
Saving energy .................................................................................
Environmentally-friendly disposal ................................................
1
14
14
.........................................................................................
Touch keys and display ..................................................................... 7
Parameter adjustment
5
14
2
....................................................................... 7
Setting the ............. .................................. 10
pre-set cooking ........
Setting the timer ..............................................................................11
3

IMPORTANT SAFETY INSTRUCTIONS
WARNING
To reduce the risk of fire, electric shock,
persons
when
injury to using your
appliance, follow basic precautions,
including the following:
IMPORTANT SAFETY INSTRUCTIONS
3
When the oven is first switched on, it may give off an unpleasant smell. This
is due to the bonding agent used for the insulating panels within the oven.
Please run up the new empty product with the
250 ℃, 90 minutes to clean oil impurities inside the cavity.
During the first use, it is completely normal that
and odors. If it does occur, you merely have wait for the smell to clear
before putting food into the oven.
Please use the product under the open environment.
The appliance and its accessible parts become hot
taken to avoid touching heating elements. Children less than 8 years of age
shall be kept away unless continuously supervised.
If the surface is cracked, switch off the appliance to
shock.
This appliance can be used by children aged from 8
persons with reduced physical, sensory or mental capabilities or lack of
experience and knowledge if they have been given
concerning use of the appliance in a safe
hazards involved. Children shall not play with the appliance.
maintenance shall not be made by children without supervision.
During use, the appliance becomes very hot. Care
touching heating elements
inside the oven.
Do not allow children to go near the oven when it is
when the grill is on.
Ensure that the appliance is switched off before
to avoid the possibility of
in the fixed wiring in accordance with the wiring
specifications.
conventional cooking function,
there will be a slight smoke
during use. Care should be
avoid the possibility of electric
years and above and
supervision or instruction
way and understand the
Cleaning and user
should be taken to avoid
operating, especially
replacing the oven lamp
electric shock.

4
supervision or instruction concerning use of the
appliance in a safe way and understand the
hazards involved. Children shall not play with the
appliance. Cleaning and user maintenance shall not
be made by children without supervision.
During use, the appliance becomes very hot. Care
should be taken to avoid touching heating elements
inside the oven.
Do not allow children to go near the oven when it is
operating, especially when the grill is on.
Ensure that the appliance is switched off before
replacing the oven lamp to avoid the possibility of
electric shock.
The means for disconnection must be incorporated
in the fixed wiring in accordance with the wiring
Children should be supervised to ensure that they
appliance.
This appliance is not intended for use by persons
reduced physical, sensory or mental capabilities, or lack of experience and
knowledge,unless they have been given
concerning use of the appliance by person responsible for their safety.
Accessible parts may become hot during use.
kept away.
An all-pole disconnection means must be
wiring in accordance with the wiring rules.
The means for disconnection must be incorporated
accordance with the wiring
specifications.
If the supply cord is damaged, it must be replaced
service agent or similarly qualified persons in order to avoid a hazard.
Do not use harsh abrasive cleaners or sharp metal scrapers to clean the oven
can scratch the surface, which may result in
shattering of the glass.
A steam cleaner is not to be used.
The appliances are not intended to be operated by
or separate remote- control system.
the correct installations of the shelves.
in the fixed wiring in
do not play with the
(including children) with
supervision or instruction
Young children should be
incorporated in the fixed
by the manufacturer, its
door glass since they
means of an external timer
The instructions for ovens
that have shelves shall include details indicating

Causes of damage
Caution!
■Creation of sparks: Metal e.g. a spoon in a glass must be
kept at least 2 cm from the oven walls and the inside of the
door. Sparks could irreparably damage the glass on the inside
of the door.
■Water in the hot cooking compartment: Never pour water into
the hot cooking compartment. This will cause steam. The
temperature change can cause damage.
■Moist food: Do not store moist food inthe closed cooking
compartment for long periods.
Do not use the appliance to store food. This can lead to
corrosion.
■Cooling with the appliance door open: Only leave the cooking
compartment tocool with the door closed. Do not trap anything
in the appliance door. Even if the door is only slightly ajar, the
fronts of adjacent units may be damaged over time.
■Heavily soiled seal: If the seal is very dirty, the appliance door
will no longer close properly during operation. The fronts of
adjacent units could be damaged. Always keep theseal clean.
■Using the appliance door for standing on or placing objects on:
Do not stand or place anything on the open appliance door. Do
not place ovenware or accessories on the appliance door.
■Transporting the appliance: Do not carry or hold the appliance
by the door handle. The door handle cannot support the weight
of the appliance andcould break.
■Liquid that has boiled over must not be allowed to run through
the turntable drive into the interior of the appliance. Monitor the
cooking process. Choose a shorter cooking timeinitially, and
increase the cooking time as required.
■Failure to maintain the oven in a cleancondition could lead to
deterioration of the surface that could adversely affect the life of
the appliance and possibly result in a hazardous situation.
Installation
Fitted units
■This appliance is only intended to be fully fitted in a kitchen.
■This appliance is not designed to be used as a tabletop
appliance or inside a cupboard.
The fitted cabinet must not have a back wall behind the
■
appliance.
■
■The fitted cabinet must have a ventilation opening of 250 cm
A gap of at least 45 mm must be maintained between the
wall and the base or back panel of the unit above.
2
on the front. To achieve this, cut back the base panel or fit a
ventilation grille.
■
■The safe operation of this appliance can only be guaranteed
■
■
Ventilation slots and intakes must not be covered.
if it has been installed in accordance with these installation
instructions.
The fitter is liable for any damage resulting from incorrect
installation.
The units into which the appliance is fitted must be heat-
resistant up 90 C.
o
Note: There should be gap above the oven.
Installation dimensions
50
460
250
min 45
min 850
5

• Do not hold or carry the appliance by the door handle. The door handle cannot hold
the weight of the appliance and may break off.
1. Carefully push the oven into the box, making sure that it is in the centre.
2. Open the door and fasten the oven with the screws that were supplied.
Building in
Fully insert the appliance and centre it.
Do not kink the connecting cable.
Screw the appliance into place.
The gap between the worktop and the appliance must not be closed by
add tional battens.
10
i
,PSRUWDQWLQIRUPDWLRQ
6
5IFBQQMJBODFJTEFTJHOFEUPCFQFSNBOFOUMZJOTUBMMFEXJUIB UISFFQJOQPXFSDPSEBOENBZPOMZCFDPOOFDUFECZBMJDFOTFE
FYQFSUJOBDDPSEBODFXJUIUIFDPOOFDUJPOEJBHSBN
0OMZBRVBMJGJFEFMFDUSJDJBOXIPUBLFTUIFSFMFWBOUSFHVMBUJPOTJOUP BDDPVOUNBZSFQMBDFUIFQPXFSDPSE
%P OPU VTF NVMUJQMF QMVHT QPXFS TUSJQT PS FYUFOTJPOT 0WFSMPBEJOH DBVTFTBSJTLPGGJSF
*GUIFDPOOFDUJPOJTOPMPOHFSBDDFTTJCMFGPMMPXJOHJOTUBMMBUJPOBO BMMQJO JTPMBUJOH TXJUDI XJUI B DPOUBDU HBQ PG BU MFBTU NN NVTU CF
QSPWJEFE
&RQQHFW WKH ZLUHV RI WKH PDLQV SRZHU FRUG LQ DFFRUGDQFH ZLWK WKHIROORZLQJFRORXUFRGLQJ
*UHDW%ULWDLQDQG$XVWUDOLD
%P OPU DPOOFDU UIF BQQMJBODF VTJOH B " QMVH PS QSPUFDU JU XJUI B "GVTF5IFBQQMJBODFNVTUCFQSPUFDUFEVTJOHBGVTFUIBUJT
SBUFE " PS IJHIFS 5IF BQQMJBODF NVTU CF EJTDPOOFDUFE GSPN UIF QPXFSTVQQMZEVSJOHBMMJOTUBMMBUJPOXPSL8IFOUIFBQQMJBODFJT
JOTUBMMFE QSPUFDUJPO NVTU CF QSPWJEFE BHBJOTU BDDJEFOUBM DPOUBDU JO UIFGVUVSF
(SFFOBOE
ZFMMPX
&BSUIXJSF <&
#MVF /FVUSBMXJSF/
#SPXO -JWF-

Your new appliance
Use this section to familiarise yourself with your new appliance.
The control panel and the individual operating controls are
explained. You will find information on the cooking compartment
and the accessories.
Control panel
The touch s are used to set the various additional functions.
e values that you have set.
Function
Use the function keys to set the type of heating.
Cooling fan
Your appliance has a cooling fan. The cooling fan switches on
during operation. The hot air escapes above the door.
The cooling fan continues to run for a certain time after operation.
Caution!
Do not cover the ventilation slots. Otherwise, the appliance will
overheat.
Symbol
Touch keys and display
On the display, you can read th
Function Use
For baking on several levels(e.g.
Use the adjusting keys to set the parameters.
Parameter adjustment
key
Function
and display
screen
function
Select the temperature of cooking( ).
:100-235
°C
:
:
:100-250
Se the of cooking.t time
parameter
Temperature
Time
:
:
Convection baking trays of chocolate chip
cookies).
For gratin dishes and finishing roasted
Double Grill+Fan
Double Grilling
50-235
100-235
5
:50-250
:50-235
Temperature
Start/Stop
Fan
Light bulb
Kitchen Timer/
Childproof Lock
On/Off
Pre-set
Preheat
Function
Parameter adjustment
Slider control bar
Clock
Function Use
Defrost
50-250
100-23
:30-45
Conventional
The top and bottom elements work
together to provide conventional
cooking. The oven needs to be pre-
heated to the required temperature:
ideal for slow cooking dishes such as
casseroles and stews.
Conventional +
Convenient and time savings, up to 4
dishes can be cooked simultaneously
on different shelves without mixing of
taste or smell.
Radiant Grilling
Best results can be obtained from
using the top shelf for small items and
lower shelves for larger items.
vegetables.
The inside radiant elements and out-
side top element work simultaneously
giving a rapid and even grilling heat,
therefore effectively browning the top
surface of the food.
Pizza
Pizza is perfectly cooked with extra
heat from both bottom and sides of
the oven, guaranteening pizza bases
are crispy.
Lower Heater
Element
This is ideal for slow cooking dishes
such as casseroles, stews.
Dough Proofing
This function provides a warm
environment, perfect for proving yeast
dough while improving the texture and
quality of pastry foods, such as cakes
and breads.
The circulation of air at room
temperature enables quicker thawing
of frozen food(without the use of any
heat).
7
Convection
ECO mode optimises the cooking
process at the maximum energy
efficiency level decreasing the energy
consumption.
:
150-2 00

Accessories
For making cake roll, roasting whole chickens.
For grilling, e.g. steaks, sausages and for toasting bread.
Type and quantity of accessories is subject to actual demand.
Grill rack
Baking tray
■In order to ensure the best cooking effect, the baking tray should be placed in the bottom of the side
hanger, as shown in the figures below, the baking tray should be pushed along the lowest guide rails of
the side hanger in place.
■
■
■
■In order to ensure the best cooking effect, the baking rack should be placed in the second of the side
hanger, as shown in the figures below, the baking tray should be pushed along the second guide rails of
the side hanger in place.
8

Before using the appliance for the first time
Here you will find everything you need to do before using your
oven to prepare food for the first time. First read the section on
Safety information
.
Setting the clock
Heating up the oven
Cleaning the accessories
Before you use the accessories for the first time, clean them
thoroughly with hot soapy water and a soft dish cloth.
1.
The time is set. And the appliance will enter waiting state.
To remove the new cooker smell, heat up the oven when it is
empty and closed. One hour with
Ensure that no packaging remnants have been left in the cooking
compartment.
The oven begins to heat up.
Touch the key.
Setting the oven
There are various ways in which you can set your oven. Here we
will explain how you can select the desired type of heating and
temperature or grill setting. You can also select the oven cooking
time for your dish.
setting options
.
Setting the type of heating and temperature
Example : Radiant Grilling at 200 °C for 25 minutes.
Opening the oven door during operation
Operation is suspended. After closing the door, touch the
Pausing operation
Changing the cooking time
Cancelling operation
This can be done at any time. Touch
Touch the
the
key.
key. Operation continues.
key to pause operation. Then touch the
key to continue operation.
This can be done at any time. Touch th e key to enter
into the waiting state.
Changing the temperature
This can be done at any time.
Touch the key for the new temperature setting.
Convection at 250 °C is ideal.
the screen.
1.
In waiting state, touch key once.
In waiting state, touch the key to enter clock
setting mode. " "00:00 will display and the hour
figures will flash.
Touch or or slide the to set the
be within 0--23.
hour figures. The input time should
2.
Touch to confirm, the minute figures will flash.
3.
Touch or or slide the to set the
be within 0--59.
figures. The input time should
4.
minute
Touch to finish clock setting, ":" will flash.
5.
2.
Touch key repeatedly till light. The default temperature
and the default
ill light in
temperature w
of convection will display.
Touch or or slide the to set the
temperature to 250
°C.
3.
Touch to enter cooking time setting mode. "00:00min" will flash.
Touch or or slide the to set
5.
the cooking
time to 60 minutes.
4.
6.
The oven begins to heat up.
Touch the key.
the screen.
1.
In waiting state, touch key once.
2.
Touch key repeatedly till light. The default
and the default
ill light in
temperature w
Touch or or slide the to set the
temperature to 200
°C.
3.
Touch to enter cooking time setting mode. "00:00min" will
Touch or or slide the to set
5.
the
4.
6.
temperature of Radiant Grilling will display.
flash.
cooking time to 25 minutes.
Touch or or slide the to change the cooking
time.
Touch or or slide the to the
set temperature.
9

With rapid preheating, your oven reaches the set temperature
particularly quickly.
able for the following types of
heating:
■
■
■
To ensure an ven cooking result, only put your food in the
cooking compartment when the preheating phase is complete.
1.
2.
Setting the type of heating and temperature.
Touch the key .
The symbol lights up in the display.
The preheating process is complete
A signal sounds. The symbol in the display blinks. Put your
dish in the oven.
Note:
1.Only when you can hear alarm and preheating icon is
blinking you can open the door and put food inside.
Rapid Preheating
Rapid Preheating is avail
o
Setting the pre-set cooking
The pre-set time has elapsed
An audible signal sounds. The oven starts cooking.
Childproof lock
The oven has a childproof lock to prevent children switching it on
accidentally.
The oven will not react to any settings. The timer and clock can
also be set when the childproof lock has been switched on.
Switching on the childproof lock
symbol appears in the display.
activated.
Switching off the childproof lock
key for approx. 3 seconds.
Fan
Conventional +
Radiant Grilling
■
■
■
■
■
Pizza
Lower Heater Element
The oven begins to heat up.
More flexibility and convenience: The appliance can be
programmed to preset the cooking start-up time and duration.
Setting the type of heating and temperature.
1.
In waiting state, touch the key.
and the hour figures will flash.
Touch or or slide the to set the
hour figures.
2.
Touch to confirm, the minute figures will flash.
3.
Touch or or slide the to set the
figures.
4.
minute
Touch to finish the pre-set time setting.
5.
The symbol
lights up in the display
6.
Touch to finish the setting.
7.
Before setting the pre-set cooking, the clock must has been set.
In the process of setting pre-set cooking, preheat can not be set.
Kitchen Timer can not be set after the pre-set cooking setting.
In waiting state, touch and hold the
There will be a long beep and the
The childproof lock is
symbol in the display.
key for approx. 3 seconds.
In locked state, touch and hold the
There will be a long beep and the
The childproof lock is
goes out
deactivated.
10
Specifications
Conventional
Convection
Double Grill+Fan
Double Grilling

Setting the time-setting options
Setting the cooking time
The cooking time for your meal can be set on the oven. When the
cooking time has elapsed, the oven switches itself off
automatically. This means that you do not have to interrupt other
work to switch off the oven. The cooking time cannot be
accidentally exceeded.
The oven starts. The cooking time counts down in the display.
The cooking time has elapsed
An audible signal sounds. The oven stops heating.
Your oven has various time-setting options. You can use the
witch between the individual
functions.
A time-setting option that has already been set can
be changed directly with the key or .
key to call up the menu and s
Setting the clock
Changing the clock
Refer to
Before using the appliance for the first time.
setting the clock.
Repeat the steps of
Setting the timer
You can use the timer as a kitchen timer. It runs independently of
the oven. The timer has its own audible signal. In this way, you
can tell whether it is the timer or a cooking time which has
elapsed.
1.
2.
In waiting state.Touch key to enter kitchen timer.
"00:00min " will flash.
Touch key to start timer.
3.
Touch or or slide the to set the
timer time.
11

Model
TVN50E4AQ
-
4

Malfunction table
Malfunctions often have simple explanations. Please refer to the
malfunction table before calling the after-sales service.
If a meal does not turn out exactly as you wanted, refer to the
plenty of cooking tips and tricks.
Risk of electric shock!
Incorrect repairs are dangerous. Repairs may only be carried out
by one of our trained after-sales engineers.
Acrylamide in foodstuffs
Which foods are affected?
Acrylamide is mainly produced in grain and potato products that
are heated to high temperatures, such as potato crisps, chips,
toast, bread rolls, bread, fine baked goods (biscuits, gingerbread,
cookies).
Tips for keeping acrylamide to a minimum when preparing food
General Keep cooking times to a minimum. Cook meals until they are golden brown, but not too
dark. Large, thick pieces of food contain less acrylamide.
Baking biscuits
Oven chips
Max. 200 °C in Top/bottom heating or max. 180 °C in 3D hot air or hot air mode. Max.
190° C in Top/bottom heating or max. 170 °C in 3D hot air or hot air mode. Egg white
and egg yolk reduce the formation of acrylamide. Distribute thinly and evenly over the
baking tray. Cook at least 400 g at once on a baking tray so that the chips do not dry out.
Expert Cooking Guide section, where you will find
Malfunction table
Problem Possible cause Remedy/information
The appliance does not work. Faulty circuit breaker. Look in the fuse box and check that the circuit
breaker for the appliance is in working order.
Plug not plugged in. Plug in the plug.
Power cut Check whether the kitchen light works.
The appliance does not work.
appears in the display panel.
Childproof lock is active. Deactivate the childproof lock (see section:
Childproof lock).
‹:‹‹ is in the display panel. Power cut Reset the clock.
A particular operating mode or power
level cannot be set.
The temperature, power level or combined
setting is not possible for this operating mode.
Choose permitted settings.
thermal safety switch-off function has been
activated.
thermal safety switch-off function has been
activated.
appears in the display panel. Rapid heating has failed. Call the after-sales service.
Call the after-sales service.
13
‹

Energy and environment tips
Here you can find tips on how to save energy when baking and
roasting and how to dispose of your appliance properly.
Saving energy
■Only preheat the oven if this is specified in the recipe or in the
operating instruction tables.
■Use dark, black lacquered or enamelled baking tins. They
absorb the heat particularly well.
■Open the oven door as infrequently as possible while you are
cooking, baking or roasting.
■It is best to bake several cakes one after the other. The oven is
still warm. This reduces the baking time for the second cake.
You can also place two loaf tins next to each other.
■For longer cooking times, you can switch the oven off
10 minutes before the end of the cooking time and use the
residual heat to finish cooking.
Environmentally-friendly disposal
Dispose of packaging in an environmentally-friendly manner.
This appliance complies with European Directive 2012/
and Electronic Equipment
(WEEE). The directive gives a framework for the
collection and recycling of old appliances, which is valid
across the EU.
19/EC on Waste Electrical
14
PN:16170000A81311

Table of contents
Other Midea Oven manuals

Midea
Midea 7NM30M1 User manual

Midea
Midea MBI-8085SB User manual

Midea
Midea MG25BNM User manual

Midea
Midea 310503 Wiring diagram

Midea
Midea MO9BL User manual

Midea
Midea PS2022Z User manual

Midea
Midea MC32AHB User manual

Midea
Midea 93M90D0 User manual

Midea
Midea MAF-CN20A User manual

Midea
Midea 315545 User manual

Midea
Midea MCOS34BL User manual

Midea
Midea MEO-25EX1 User manual

Midea
Midea PS30L22Z User manual

Midea
Midea MEO-10BDW-BK User manual

Midea
Midea MOC5BL User manual

Midea
Midea MOP9BL User manual

Midea
Midea ESK 2875 BL User manual

Midea
Midea 310716 Wiring diagram

Midea
Midea MO5BL User manual

Midea
Midea VS96048D User manual