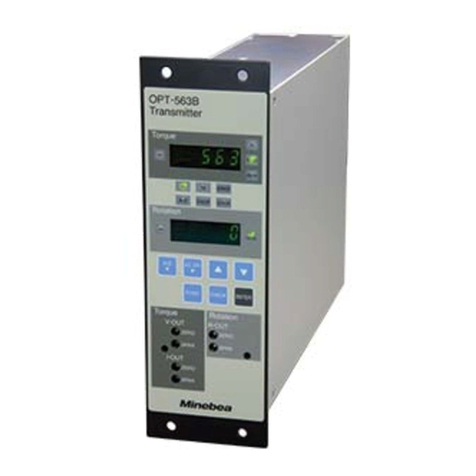
Minebea CSA-591 User manual

Transmitter
CSA-591
Instruction Manual
EN294-1141-F


I
FOREWORD
Thank you very much for your purchasing our Transmitter CSA−591.
This manual explains installation procedures and connecting method and also operating
method for the Transmitter CSA−591. Make use of it properly after reading through the
manual carefully.
Be sure to deliver the manual to the end user. Moreover, the end user should keep the
manual at hand after reading it over.

II
Marks and arrangements used in this manual
The following marks are attached to the explanation on the matters that indicate “Don’t do
this.”, “Take care.” and “For reference”.
Be sure to read these items where these marks are attached.
Warning ●Warning may cause injury or accident that may harm to the operator.
Don’t do these things described here.
●Caution during operation and working.
Be sure to read the item to prevent malfunction.
Mark during operation.
●Press the switch.

III
For safe operation
Be sure to read this instruction manual before use.
1. Installation place
●Use the instrument where the temperature/humidity specifies with the range as follows:
Environmental temperature :0℃to 50 ℃
Environmental humidity :Less than 80 %R.H. (Non condensing)
(1) Location where installation is not allowed.
Warning ●Don’t locate the instrument on the places as follows :
It may cause an unexpected faulty in the instrument.
・Don’t locate the instrument in direct sunshine and/or high temperature
area.
・Don’t use the instrument in a high humid area.
・Don’t install the instrument where there are vibrations and shocks.
・Don’t use the instrument where there is excess of dusts and fine particles.
・Don’t use the instrument where there are corrosive gas and salt and like
that.
・Don’t install the instrument where there is rapid change of temperature
and humidity.
・Don’t install the instrument near the devices that are magnetized or
generate an electromagnetic field.
・Don’t install the instrument where the instrument may be affected by
radioactivity or radial rays.
・Avoid the location where chemical reaction may take place such as in a
laboratory, or like that.

IV
(2) Installation
●When installing the instrument, install as referring to the following figures and secure
the space around the instrument.
Each dimensions of the instrument and required dimensions for the environmental
spaces are as follows:
Outline dimensions
Panel cut size
Unit:mm

V
2. Power supply
Warning ●Be sure to check that the power supply is off in connecting each cable. If the work is
done while the power is on, there may have the case that electric shock to the operator
or even may have damage to the instrument.
Warning ●Before supplying the power, check that the indication of power supply voltage
/specifications for the instrument and the power going to supply should be the same.
If they are not equal, contact us.
If you use the instrument without checking them, it may cause a damage in the
instrument or electric shock to the operator.
●Earth wire should be grounded securely.
When earth wire is not connected, it may cause a malfunction of the instrument or
electric shock to the operator.
3. Application note
Warning ●Before using a new instrument or exchanging the strain gage applied transducer for a
new one, be sure to make calibration. If calibration will not be made, the correct
measuring results may not be obtained nor which may cause malfunction in the
instrument and there may exist damage in peripheral equipments.
Besides, even though calibration has been made, there may occur the similar case when
the results are not correct, so make calibration, again.
Warning ●In case of using the instrument, check that the connections are executed properly. If not
connected properly, the correct measuring result will not be obtained, nor it may cause
malfunctions of the instrument, damage to the peripheral equipments or even more
serious accidents.
Warning ●When change of setting is made carelessly on the instrument during measurement,
correct measured results may not be obtained and it may cause malfunction in the
instrument and even have the possibility of damage in peripheral instruments.
Warning ●Do not shock the instrument such as throwing something on it.
If neglected, it may cause destruction of the parts and damage to the electrical circuits.

VI
History of revision
Date Instruction manual No. Details of revised point
Feb. 2006 DRW. NO.EN294-1141 First Version
Jan.2007 DRW. NO.EN294-1141-A Due to ECN No.FN06−01050
−Correction −
former name −> “tie bar gage”
Aug. 2007 DRW. NO.EN294-1141-B
Due to ECN No.FN07−02094
−Change −
4−3. Connection Extension cable
“FA409−357“→“FA409−404”
Feb. 2010 DRW.No.EN294-1141-C Due to ECN FN10−02026
−Change −
Front cover’s logo is changed.
Oct. 2010 DRW.No.EN294-1141-D Due to ECN FN10−02140
−Change −
Minebea logo is changed.
Feb. 2018 DRW.No.EN294-1141-E Due to ECN FN17-02017
・Delete the company name in the cover page.
・Delete the company name in the contents.
Mar. 2018 DRW.No.EN294-1141-F
Due to ECN FN18-02019
-Correction-
INDEX
P10 5-2 Calibration procedure
①CSA−591 calibration by the actual load →
CSA−591 calibration procedure by the actual load
②CSA−591 (with automatically zero function) by the actual
load.→CSA−591-99 (with automatically zero function
calibration. procedure) by the actual load.
5−2−1. Calibration procedure by the actual load →
CSA-591 Calibration procedure by the actual load
P12 5-2-2 Electrical calibration by the actual load
(CSA−591−99)→CSA−591-99 (with automatically zero
function) calibration. procedure by the actual load.
P13 Procedures
-Correction drawing-
P9 5-1. The front panel was removed.
P12 The front panel was removed.
P13 Procedures

INDEX
Forwards 1........................................................
Marks and arrangementsused in this manual 2....................................
For safe operation 3............................................................
1. Installation place 3.........................................................
2. Power supply 5............................................................
3. Application note 5.........................................................
History of revision 6............................................................
1. General 1.................................................................
2. Name and function of each point 1...........................................
2−1. Front panel 1.........................................................
2−2. Rear panel 2..........................................................
3. Installation method 3.......................................................
3−1. Installation place 3....................................................
3−2. Location where installation is not allowed 3..............................
3−3. Installation 4.........................................................
4. Connecting method 5.......................................................
4−1. Layout of the terminal boards 5.........................................
4−2. Note on connection 6..................................................
4−3. Connection 7..........................................................
4−3−1. Connection of power supply and ground 8..........................
5. Calibration procedure 9....................................................
5−1. Preparation 9.........................................................
5−2. Calibration procedure 10................................................
10
5−2−1. CSA-591 Calibration procedure by the actual load ..................
12
5−2−2. CSA-591-99 Calibration procedure by the actual load. ....... .......
6. Options 14.................................................................
6−1. Automatic zero (CSA591−P99) 14........................................
6−1−1. Equivalent circuit of input/output section 14.........................
6−1−2. Function 14......................................................
7. Trouble shooting 15.........................................................
7−1. Execute trouble shooting 16.............................................
8. Specifications 18............................................................
8−1. Specifications 18.......................................................
8−2. General specifications 18................................................
8−3. Standard specification at the shipment 18.................................
8−4. Accessories 18..........................................................
8−5. Option 19..............................................................
8−6. Outline dimensions 19..................................................
9. Warranty 20................................................................
9−1. Warranty 20...........................................................
9−2. Repair 20..............................................................

1
1. General
This instrument is a transmitter for the tie bar gage (350 ohm, 2 pieces one pair)
2. Name and function of each point
2−1. Front panel
①
②
③
④
⑤
⑥
⑦
⑧
⑩
⑪
⑫
⑬
⑭
⑨
The front panel was removed.
Front panel
Front panel
mounting screw
1“ZERO” adjustment polarity switch
It is a polarity switch in executing zero adjustment.
2“ZERO” coarse adjustment rotary switch
It is a rotary switch for zero corse adjustment.
3“ZERO” coarse adjustment trimmer
It is a trimmer for zero coarse adjustment.
4“ZERO” fine adjustment trimmer
It is a trimmer for zero fine adjustment.
5“GAIN” coarse adjustment rotary switch
It is a rotary switch for sensitivity coarse adjustment.
6“GAIN” fine adjustment trimmer
It is a trimmer for sensitivity fine adjustment.
7CAL switch
CAL value is output when switch is turned on.
8LED
When both LED are turned off, the analog output is within some ±50mV.
9Check pin of analog output
The same voltage as V−OUT of the back terminal is output.

2
10 PC board for automatic zero as an option
When model CSA−591 is specified, PC board for automatically zero is not attached.
When model CSA−591−99 is specified as an option, it is attached.
11 Trimmer for adjusting automatic zero comparator
It is adjusted at the shipment from factory. Don’t turn it.
12 Switch of ON for automatically zero
A/Z (Automatically zero) operates by turning ON.
13 Switch of OFF for automatically zero
The voltage in which the voltage of PC board for automatically zero is subtracted by turning
OFF is output. It is used when the initial zero is adjusted.
14 LED
It lights on while the automatically zero is working.
2−2. Rear panel
①
1Terminal block
It is a terminal block for gage, voltage output, power supply, A/Z, BUSY and COM.

3
3. Installation method
3−1. Installation place
●Use the instrument where the temperature/humidity specifies with the range as
follows:
Environmental temperature :0℃to 50 ℃
environmental humidity :Less than 80 %R.H. (Non condensing)
3−2. Location where installation is not allowed
Warning ●Don’t locate the instrument on the places as follows :
It may cause an unexpected faulty in the instrument.
・Don’t locate the instrument in direct sunshine and/or high temperature area.
・Don’t use the instrument in a high humid area.
・Don’t install the instrument where there are vibrations and shocks.
・Don’t use the instrument where there is excess of dusts and fine particles.
・Don’t use the instrument where there are corrosive gas and salt and like that.
・Don’t install the instrument where there is rapid change of temperature and humidity.
・Don’t install the instrument near the devices that are magnetized or generate an
electromagnetic field.
・Don’t install the instrument where the instrument may be affected by radioactivity or
radial rays.
・Avoid the location where chemical reaction may take place such as in a laboratory, or like
that.

4
3−3. Installation
●When installing the instrument, install as referring to the following figures and
secure the space around the instrument.
Each dimensions of the instrument and required dimensions for the environmental
spaces are as follows:
Outline dimensions
Panel cut size
Unit:mm

5
4. Connecting method
4−1. Layout of the terminal boards
The layout of each signal of the terminal block is shown in the following table.:
・Terminal block
Terminal Description Application
1 A Input 1 connecting terminal (RED)
2 D Output 1−1 connecting terminal
(BLU) Tie bar gage is connected.
3 D’ Output 1−2 connecting terminal
(WHT)
gg
4 GND Shield (Connected internally with
terminal No.12)Shield of gage is connected.
D class single grounding.
5 VOUT +Voltage output terminal (+)
V
oltage
output
6 VOUT −Voltage output terminal (−)
V
o
l
tage output.
7 DC24 V +Power supply input terminal (+)
DC24
V
is
connected
8 DC24 V −Power supply input terminal (−)
DC
24
V
i
s connecte
d
.
9 C Input 1 connecting terminal (RED)
10 B Output 1−1 connecting terminal
(BLU) Tie bar gage is connected.
11 B’ Output 1−2 connecting terminal
(WHT)
gg
12 GND Shield (Connected internally with
terminal No.4)
Shield of gage is connected.
D class single grounding.
13 BUSY Output terminal for BUSY signal Open collector output with approx.400 ms
as an option
14 A/Z Connecting terminal for external
automatically zero
external automatically zero
as an option
15 COM Common terminal for BUSY/A/Z
●Terminal No. 4 for “GND” and terminal No.12 for “GND” are connected internally.
Take the D class single ground for No.4 or No.12.

6
4−2. Note on connection
Warning ●In case of connection with the instrument, keep strictly to the following items. If
neglected, it may cause an unexpected failure or a damage to the instrument.
・Be sure to set the power supply to OFF, when the connection is made.
・Since the terminal block at the front of the instrument is made of resin, take care not to
drop it down or not to apply strong impact.
・The tightening torque of the screw on the terminal block is 0.8 N・m at the maximum.
・Crimp terminal that suits the terminal block of this unit is shown in the table below.
Width of Crimp terminal Suitable crimp terminal
6.0 mm or less 1.25−3, or Y−type 1.25−3.5
・Connecting cable with the instrument should be away from the noise source such as power
supply line and/or I/O line for control and so on as far as possible.
・All of the connections should be executed securely by referring to the Instruction manual
for the instrument.

7
4−3. Connection
(1) When tie bar gage model UX010(LB)(LB) is used.
UX010(LB)
DC24 V +
V−OUT +
BUSY output (between 13−15(COM))
External A/Z
DC24 V −
V−OUT −
Open collector output
Rear panel
(Terminal No.4 and No.12 are shortened internally.)
RED
BLU
WHT
YEL(Shield)
RED
BLU
WHT
5m
UX010(LB)
5m
YEL(Shield)
D class
single ground
or
(2) When tie bar gage model UX010(LB) with extension cable model FA409−404 is used.
DC24V “+”
V−OUT “+”
BUSY output
(between 13−15(COM))
External A/Z
DC24V “−”
V−OUT “−”
Open collector output
Rear panel
GN
RD/WH
GN/WH
YL(Shield)
BK
BK/WH
RD D type single
grounding
FA409−404
Connected
by connector
UX010(LB)
UX010(LB)
or
Warning ●Connection with external control input should be made securely according to the
figures. If neglected, it may cause an unexpected failure and/or malfunction to the
instrument.
●For the connection with external control input/output, be sure to apply shielded
cable, and shielded cable should be connected with the GND terminal (Terminal
No.4 or No.12) If not connected, it may cause malfunction due to the effects from
external noises and so on.

8
4−3−1. Connection of power supply and ground
Please connect the power supply and the ground (GND) as shown in the figure.
Grounding should be the D class with single earth.
Power supply voltage DC24 V (DC18 V to DC36 V)
Power consumption Approx. 0.15 A (at DC24 V)
Warning ●Connections with voltage outputs should be made securely according to the figures
and also within specified load resistance.
If neglected, it may cause an unexpected failure and/or malfunction to the
instrument.
●For the connections with voltage outputs, be sure to apply shielded cable, and the
shielded cable should be connected with the F.G. terminal of the instrument. If not
connected, it may cause malfunction due to the effects from external noises and so
on.

9
5. Calibration procedure
Warning ●Before using the new instrument or after exchanging the tie bar gage, be sure to
make calibration. If calibration is not made, the correct measured results may not
be obtained, or it may cause malfunction to the instrument and it may damage the
peripheral equipment. Moreover, even if the calibration has made already, there
may occur the similar case as above when the result is not correct. So make precise
calibration again.
Warning ●When you connect the tester and digital volt meter, etc., please connect them
correctly before turning on the power supply.
5−1. Preparation
1According to the “4. Connection method”, connect this unit and a tie bar gage correctly, and
turn on the power.
2In case of CSA−591−99 (with automatically zero function), begin the adjustment after set the
condition to turn off that function.
VR1
A/Z
A/Z OFF
LED1
OFF ON
PCB for auto−zero
The front panel was removed.
PC board for
automatically zero
ON Switch for
automatically zero
OFF Switch for
automatically zero

10
5−2. Calibration procedure
The explanation of actual load calibration procedures for this unit are two as follows:
1 CSA−591 calibration procedure by the actual load → 5−2−1
2 CSA−591−99 (with automatically zero function) calibration procedure by the actual load. →5−2−2.
5−2−1. CSA-591 Calibration procedure by the actual load.
Procedures
1
Set the gage onto tie bar, etc.
Connect the digital volt meter, tester, etc.,
between “+” and “−” of the check pin, or
between “+” and “−” of the voltage output at
rear panel.
Set the gage to the condition of zero adjustment.
Set the rotary switch for zero adjustment to the
position of zero.
“ZERO” adjustment
polarity switch
“ZERO” adjustment
rotar
y
switch
The front panel was removed.
2
Zero adjustment
Confirm whether the output voltage can be
adjustable to ±0.2 V or less by turning corse
adjustment trimmer.
1Adjustable
Adjust the output voltage to approx. ±0.2 V or
less by “ZERO” coarse adjustment trimmer,
and then adjust the output voltage to 0.000 V
by “ZERO” fine adjustment trimmer.
2Not adjustable
Set the “ZERO” adjustment rotary switch at
the position in which the output voltage
becomes ±10 V or less.
When the output voltage does not change, set
the “ZERO” adjustment polarity switch to the
position which the output voltage becomes ±10
V or less. After that, set the output voltage to
approx. ±0.2 V or less by “ZERO” coarse
adjustment trimmer, and adjust the output
voltage to 0.000 V by “ZERO” fine adjustment
trimmer.
・When both LED1 and LED2 is turned off, the
output voltage outputs approx. が±50 mV or
less.
・When LED1 lights on, the output voltage is
approx. +50 mV or more. When LED2 lights on,
the output voltage is approx. −50 mV or more.
rotary
switch
“ZERO” coarse
adjustment trimmer
“ZERO” fine
adjustment trimmer
“GAIN” rotary switch
“GAIN” trimmer
CAL switch
LED1
Check pin “+”
Check pin “−”
LED2
V−OUT “+”
V−OUT “−”
Rear panel
3
Sensitivity adjustment
1Take the rated load to the gage, and turn the
“GAIN” rotary switch so that the output
voltage may approach 10.00 V most.
2Adjust the output voltage to 10.000 V by using
the “GAIN” trimmer.
The sensitivity adjustment range is ±10 V of
output voltage at the input of ±300μST to
±2000μST.
Other manuals for CSA-591
1
Table of contents
Other Minebea Transmitter manuals

Minebea
Minebea CSA-528-80-4 User manual

Minebea
Minebea OPT-563B-71 User manual

Minebea
Minebea CSA-507C User manual

Minebea
Minebea CSA-591 User manual

Minebea
Minebea CSA-524 User manual

Minebea
Minebea OPT-563B User manual

Minebea
Minebea CSA-522B User manual

Minebea
Minebea CSA-593 User manual

Minebea
Minebea OPT-564-71 User manual

Minebea
Minebea NS100A User manual