Updated 06/06/2016 3 Version 1.0
OPERATING THE KCLM200WIFI
BEFORE YOU START
1. First you must download the PV Cam Viewer app from the
Google Play Store or the iPhone App Store.
oAndroid:
https://play.google.com/store/apps/details?id=cam.ac
.com&hl=en
oiPhone: https://itunes.apple.com/us/app/pv-cam-
viewer/id986625862?mt=8
2. If you wish to enable SD Card recording you must insert a
MicroSD card into the unit.
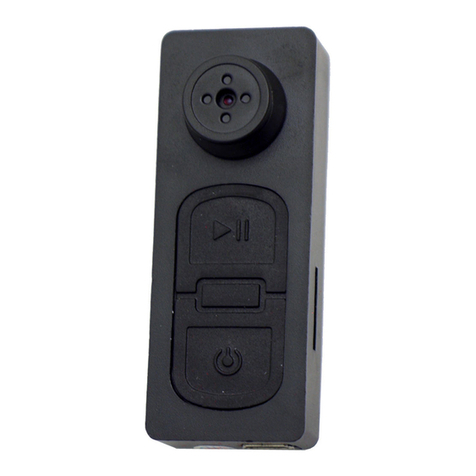
3. To do so, remove bottom cap to reveal the MicroSD card slot.
CHARGING YOUR DEVICE
1. Please charge your device before attempting to use it
2. In order to charge your device, remove the cap from the
bottom of the keychain that is covering the micro USB port.
3. Plug the provided USB cable into the device and then into the
USB port on your computer.
4. While charging there will be a blue light illuminated near the
USB port on the device.
5. When charging is complete the light will turn off
CONNECTING TO YOUR DEVICE
1. Turn the device on by pressing the top button one time
(button has an image of a lock on it)
2. Activate wifi by pressing the bottom button (button has an
image of an open trunk) one time.
3. Orange light will blink when WiFi is activated.
4. Turn on your phone’s WiFi and look for the WiFi signal
generated by the device. The WiFi Signal name will be similar
to this: “PV-RC200HDWxxxxxxxxxx” The x’s will be a string of
random letters and numbers unique to your device.
5. Once the device generates its WiFi signal, connect to it via the
WiFi settings on your phone.
oNOTE: Some Android devices may produce a warning
that the network has no internet access. If you see this,
choose to connect to the network anyway.
6. After connecting to the WiFi Signal with your mobile device,
open the PV Cam Viewer App.
oNOTE: For iOS devices you must wait until the WiFi
Signal appears next to your Phone Carrier Name in the
status bar at the top of your phone screen.
7. Once the app opens, tap the “Device Management” button.
8. The new camera will be listed in the “Device Management”
screen and will say “Device on-line”
9. Tap the camera to make it your active device and you will be
returned to the home screen of the app.
10. Tap “Recorder Setting” to view the live stream of the camera
video.
11. From this screen, you can choose to use Motion Activated
recording or Normal Mode (continuous recording) and start
recording.
HOW TO USE FILE OVERWRITE RECORDING (LOOP
RECORDING), SET MOTION RECORDING LENGTH AND MOTION
DETECTION SENSITIVITY
File overwrite recording allows the device to continue to record when
the memory card becomes full. In the event that the memory is full,
the device will delete the oldest file on the memory card and then
create a new file.
1. Open the live video stream of your camera.
2. Once the video is streaming, “Setup” button at the top right
3. Switch the “Overwrite” switch to the on position.
