Mitel SX-2000 Superconsole 2000 User manual

8VHU*XLGH
for SX-2000Superconsole 2000

Notice to Canadian Customers
This Class B digital apparatus complies with Canadian
standard ICES-003.
Notice to U.S. Customers
This equipment has been tested and found to comply with the
limits for a Class B digital device, pursuant to Part 15 of the
FCC Rules. These limits are designed to provide reasonable
protection against harmful interference when the equipment is
operated in a commercial environment. This equipment
generates, uses, and can radiate radio frequency energy and, if
not installed and used in accordance with the instruction
manual, may cause harmful interference to radio
communications. Operation of this equipment in a residential
area is likely to cause harmful interference in which case the
user will be required to correct the interference at his own
expense.
Notice to Customers in EU Countries
If the CE mark appears on this product it indicates that this
product is in compliance with the 89/336/ EEC EMC directive,
Class B emissions. It also indicates that this product complies
with 73/23/EEC Low Voltage directive.
IMPORTANT! This device is designed for connection to a
MITEL telephone system. DO NOT connect directly to the
public-switched telephone network.
® Trademark of MITEL Corporation
© Copyright 1999, MITEL Corporation
All Rights Reserved. Printed in Canada

Contents ▼iii
Contents
Getting Started ................................................................................3
Introduction .......................................................................................................... 4
Console Components............................................................................................. 4
Console Screen...................................................................................................... 5
Console Keypad..................................................................................................... 6
Softkeys (F1 –F12) ................................................................................................ 7
Handset and Cradle............................................................................................... 7
Starting and Closing the Superconsole 2000 ......................................................... 8
Adjusting the Console............................................................................................ 9
Call Handling Basics.....................................................................13
Answering Calls................................................................................................... 14
Dialing Telephone Numbers................................................................................. 16
Extending (Transferring) Calls ............................................................................. 18
Holding and Retrieving Calls................................................................................ 20
Conference Calls.................................................................................................. 21
Answering Recalls................................................................................................ 22
Recovering the Last Released Call........................................................................ 22
Advanced Features .......................................................................25
Account Codes..................................................................................................... 26
Bulletin Board..................................................................................................... 26
Call Answering Priority ........................................................................................ 27
Call Park ............................................................................................................. 28
Call Waiting Threshold ........................................................................................ 29
Cancel Call Forwarding ....................................................................................... 29

iv ▼Contents
Clear All Features................................................................................................ 29
Data Calls............................................................................................................ 30
Day and Night Service ......................................................................................... 31
Do Not Disturb (Extensions) ................................................................................ 32
Feature Access Codes .......................................................................................... 33
Firmkey Programming ......................................................................................... 33
Message Waiting.................................................................................................. 34
Operator Absent/Present Status.......................................................................... 35
Override............................................................................................................... 35
Paging ................................................................................................................. 36
Phone Book ......................................................................................................... 37
Scratch Pad......................................................................................................... 38
Serial Call............................................................................................................ 38
Trunk Group Status Display................................................................................ 39
System Speed Call............................................................................................... 40
Tone Signaling..................................................................................................... 40
Hotel/Motel Features......................................................................43
Displaying and Changing Room Information........................................................ 44
Searching for Rooms............................................................................................ 45
Changing Room Occupancy and Condition Status............................................... 45
Checking-In/Checking-Out ................................................................................. 46
Setting and Clearing Wake-up Calls .................................................................... 46
Setting Call Restrictions ...................................................................................... 47
Blocking Room-to-Room Calls ............................................................................. 47
Monitoring Guest Rooms ..................................................................................... 48
Clearing the Message Register ............................................................................. 48
Printing Reports .................................................................................................. 48

Contents ▼v
Reference.......................................................................................51
Superset 700 vs. Superconsole 2000 ................................................................... 52
Keyboard changes................................................................................................ 52
Screen changes.................................................................................................... 53
New features........................................................................................................ 53
Discontinued/Changed Features......................................................................... 53
Alarms................................................................................................................. 54
Alarm types ......................................................................................................... 54
Greetings............................................................................................................. 54
Rerouted Calls..................................................................................................... 55
Class of Restriction.............................................................................................. 56
Class of Service.................................................................................................... 56
Feature Access Codes .......................................................................................... 57
Glossary .............................................................................................................. 58
Hunt Groups ....................................................................................................... 60
Paging Zones ....................................................................................................... 60
System Speed Call List ........................................................................................ 61
System Messages................................................................................................. 62
Telephone Directory............................................................................................. 68
Trunk Numbers................................................................................................... 68
Index............................................................................................... 69


Getting Started


Getting Started ▼3
Getting Started
Contents
Introduction........................................................................................................................4
Console Components...........................................................................................................4
Starting and Closing the SUPERCONSOLE 2000..................................................................8
Adjusting the Console .........................................................................................................9

4 ▼Getting Started
Introduction
The Mitel Superconsole 2000 is an attendant console and PBX
administration application for the SX-2000 telephone system. It
features a specialized keypad and an intuitive user interface for
smooth, efficient call handling.
A note about feature availability
The features available on your telephone system have been
selected by your company and may not include all the features
described in this guide.
Before you begin using the console
Take a few minutes to explore this guide —it contains all the
information you need to operate the Superconsole 2000.
The first section introduces you to the console. You will learn
about the console keypad and what the Function keys on the
computer keyboard do. You will also learn about the console
screen and how to interpret the information it displays.
If any problems occur while you are using the console, contact
your communications department for assistance.
Are you an experienced Superset 700™ user?
The Superconsole 2000 will look familiar to users of the
Superset 700 attendant console. The consoles also work alike –
enough that experienced Superset 700 users can probably begin
handling calls with the Superconsole 2000 right away. Still, it may
help to read the section of page 52, which describes the differences
between the consoles.
Conventions used in this guide
Throughout this guide, the fixed-function keys and firmkeys
(both key types are explained later in this section) are in bold
type—for example, Answer or Release.
Softkey commands that appear on your screen and correspond to
the Function keys (F1, F2, F3, etc.) at the top of your keyboard
are shown in brackets—for example, [Source] or [Destination].
See page 7 for more information about softkeys.
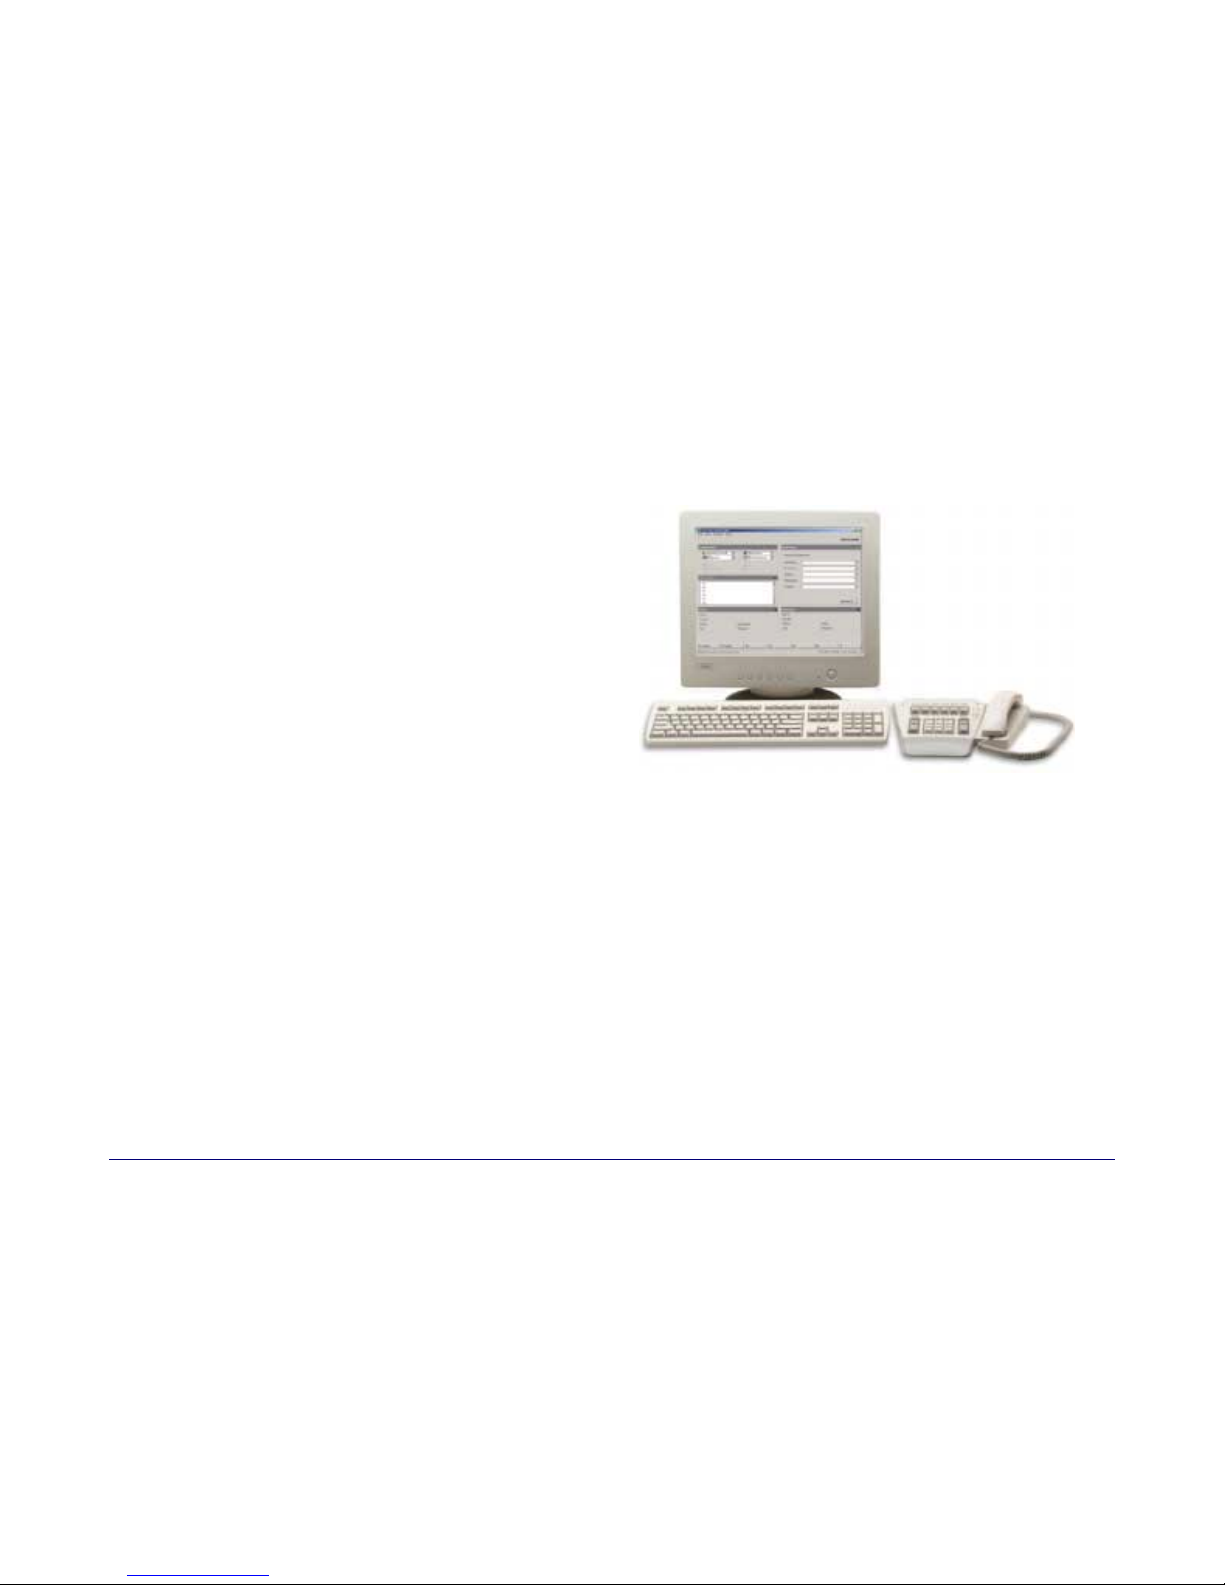
Console Components
Your Superconsole 2000 Attendant Console consists of a
personal computer (PC) with monitor, a standard computer
keyboard, a keypad, a mouse and a handset with cradle.
The monitor displays call-handling prompts and call status
information. Use the keypad for all call-handling functions,
including dialing. The handset (or optional headset) is for talking
with callers.
You use the computer keyboard to find entries in the Phone Book
or to type in the Scratch Pad or Bulletin Board. The Function
keys (F1, F2, F3, etc.) at the top of the keyboard execute the
softkey commands that appear on the screen.

Getting Started ▼5
Console Screen
The Superconsole 2000 screen is divided into five areas:
•The Console Status area shows you at a
glance what state the console and the system
are in—for example whether the console
ringer is on or off and whether the system is
in Day or Night Service.
•The Application area is divided into four
sections: The top left section displays
information about calls on hold; the top right,
a Phone Book for finding users on the system
and other tools such as an electronic scratch
pad for taking notes. The bottom two areas
display information on the Source (calling
party) and Destination (called party) of all calls
handled by the console.
The information displayed includes the name
of the party, extension or trunk number or
trunk label, type of extension (e.g., Superset),
status of call (e.g., ringing), privileges
assigned to the trunk or extension, and the
type of call (e.g., Conference, Recall, Serial).
•The Call Waiting area displays an icon ( )
as a visual indication of incoming calls. The
icon appears above the softkey that’s used to
answer the call. You can tell how many calls
are waiting by the color of the icon: yellow
() for one call; blue ( ) for two calls and
red ( ) for three or more calls.
•The Softkey areas at the bottom of the screen
and above the Destination area display the Softkey
commands. The commands correspond to the
Function keys on the computer keyboard. See the
next section for more information on the Softkeys.
•The Response area at the bottom of the
screen displays the date and time, the
number of calls waiting to be answered, and
messages received from the system.
Console
Status Area
Softkey Area
Response Area
Application
Area
Call Waiting
Area

6 ▼Getting Started
Console Keypad
The console keypad is used for dialing, call processing and
accessing PBX features. You can adjust the slope of the keypad
and detach (or attach) it from the handset cradle.
The keys on the keypad are arranged in three groups:
Volume and Mute Keys –used to increase (+) or decrease (-) the
ringer volume and the volume of the earpiece in the handset or
headset. The Mute key turns the microphone in the headset or
handset on or off.
Call-processing Keys –fixed-function keys that are used to
answer and manage calls. They include Retrieve, Hold, Answer
Cancel, Recover and Release.
Firmkeys –programmable keys that provide access to the
following console features and system services:
SCRATCH
PAD Displays an electronic notepad where you can type
messages from callers, reminders, questions, or
anything else you would write on note paper. You
can also use the Scratch Pad to store telephone
numbers for speed dialing.
BULLETIN
BOARD Displays an area where you can type messages
that can be viewed from all other Supersconsole
2000s on the system.
GUEST
SERVICE Displays room status information and softkeys
for managing guest services in a Hotel/Motel
installation.
PAGER Accesses paging equipment for making
announcements.
HELP Opens Help, which provides information to help
you accomplish your tasks.
OPERATOR
MODE Re-displays the main console screen.
PHONE
BOOK Allows you to find and call an extension by
typing the user’s name, extension number or
other information.
APPL Starts another application that extends the
capabilities of the Superconsole 2000. Your
communications department selects the
application.
TRUNK
STATUS Displays information about trunk (outside line)
usage.
MESSAGE Displays softkeys for setting or clearing the
Message Waiting indicator on the dialed
extension.
TONES Sends subsequently dialed digits as tones (used
when dialing into voicemail systems.)
VOICE
MAIL Transfers a recall to an extension user’s
voicemail box.
Note: Some of the features shown are optional and may not
appear on your console keypad. Other features can also be
programmed to the keypad; see Firmkey Programming
on page 33.
Call-
processing
Keys
Firmkeys
Volume and
Mute Keys

Getting Started ▼7
Softkeys (F1 – F12)
The softkeys are the F1 to F12 keys on your computer keyboard.
You use them to enter commands shown in the softkey area on
the screen. The commands are not fixed to a specific softkey;
instead, they change depending on the state of the call you are
handling or the feature you are using. For example, when you
call a busy extension, the F4 key might be used to request a
Callback. At another time, the same key, F4, could be used to set
up a conference call.
Handset and Cradle
The Superconsole 2000 is equipped with a handset and cradle.
You can adjust the slope of the cradle and detach (or attach) it
from the console keypad.
Mitel-approved headsets are also available for use with the console.
See page 9 for more information about using the handset or a
headset.

8 ▼Getting Started
Starting and Closing the
Superconsole 2000
The Superconsole 2000 starts with the operator status set to
“Operator Absent.”To begin receiving calls, you must change the
status to “Operator Present.”For more information, see page 35.
To start the Superconsole 2000 application
•Start Windows.
•Type your user name and password.
For turnkey consoles, the default user name and password
are mitelconsole and mitel1 respectively. Type both in
lowercase letters.
•Click on your Windows desktop.
To close the Superconsole 2000 application
•On the File menu, click Exit.
Starting a CDE Session
Starting a CDE session provides access to the PBX for
programming and maintenance purposes. Access requires
authorization (i.e., a user name and password) and is usually
restricted to trained technicians. A connection to your local area
network is also required—see the Superconsole 2000 Help for
more information.
To start a CDE Session
•On the File menu, click Connect to CDE.
Questions about Starting and Closing the
Superconsole 2000 application
What happens to incoming calls when I close the
Superconsole 2000 application?
If yours is the only console on the system, the system
automatically switches to Night Service 1. Calls then ring
night bells or another designated answering point. If there are
other consoles, yours will switch to Operator Absent status
when you close the application. Other answering points will
receive the calls that would otherwise go to your console. For
more information, see Day and Night Service on page 31 and
Operator Status on page 35.
What happens to calls if my computer stops working?
Usually, a nearby extension will serve as a backup answering
position in the event of a power failure or other problem that
causes your computer to stop working. Calls that normally
ring the console would then ring the backup extension.
Can I use other applications while the Superconsole
2000 is running?
Yes, but keep in mind that having multiple applications open
at the same time as the Superconsole 2000 can adversely
affect its performance. If possible, try to limit your use of
other applications to periods when call traffic is low.
My screen goes blank sometimes—why?
A power-saving feature built into the computer automatically
reduces the screen intensity when there has been no keyboard
or mouse activity for approximately two minutes. After approxi-
mately five minutes, the screen goes blank. When you press the
spacebar on the keyboard, the console screen will reappear.

Getting Started ▼9
Adjusting the Console
The console is designed with your comfort in mind. You can
make adjustments to the ringer, the language of text on the
screen, the angle of the keypad, whether you want to handle calls
using a handset or headset and more.
Console Ringer
To turn the console ringer on or off
•Select Ringer On or Ringer Off from the list in the
Console Status area.
When the ringer is off, the call waiting icon ( ) is the only
indication that you have calls waiting.
To adjust the ringer volume
•While the console is ringing, press the key on the console
keypad to set the volume to the level you want.
You can also use the Options command on the Tools menu to
adjust the ringer volume.
Console Keypad and Handset Cradle
You can adjust the slope of the keypad and detach (or attach) it
from the handset cradle.
To attach the handset cradle
to the console keypad
•Align the tabs on the
clamp with the slots on the
bottom of the keypad.
•Press to seat the tabs in
the slots.
To detach the clamp from
the keypad
•Grasp the keypad as shown.
•Place your thumbs along
the edge of the clamp, and
then press down and away
from the keypad.
To detach the clamp from
the cradle
•Using your finger or a tool
such as a screwdriver, push
against either of the tabs as
shown.
•While pushing on the tab,
use the other hand to twist
the U-clamp upward.

10 ▼Getting Started
Handset/Headset
The console keypad provides jacks for connecting a handset and
a headset. One jack is labeled for headset use only, the other for
either handset or headset use. Both jacks can be in use at the
same time but when they are, the dual-use jack is used for
listening only. (Typically, a supervisor uses the dual-use jack to
monitor a new attendant during training.)
Connect Mitel-approved headsets only to the keypad. For a list of
approved headsets, see the Superconsole 2000 Installation Guide.
The dual-use jack provides different audio levels for headsets and
handsets. Use the list to indicate which one—headset or
handset—is connected to the jack.
To set the dual-use jack for handset or headset operation
1. Plug the handset or headset into the dual-use jack ( ) on the
back of the console keypad.
2. Select Handset or Headset from the list in the Console
Status area.
To adjust the handset (or headset ) volume during a call
•Press the key on the console keypad to set the volume to
the level you want.
You can also use the Options command on the Tools menu to
adjust the volume. After selecting the command (either during a
call or while the console is idle) click Audio, and then drag the
slider to set the volume to the level you want.
Console Language
Text on the console screen can appear in English (the default) or
French.
To change the console language
1. Choose Options on the Tools menu.
2. Select Language.
3. Select the language you want.
4. Click Apply or OK.
The change takes effect when you restart the Superconsole 2000.
Console Time
You can use either the PBX clock or the clock in your PC as the
time source for the console. Using the PBX clock is recommended
since it’s the time source for extensions in the system.
You should also use the PBX clock if you set wake-up calls for guests.
(Setting wake-up call applies to hotel/motel systems only.)
To set the console time
1. Choose Options on the Tools menu.
2. Select Time.
3. Select the option you want.
4. Click Apply or OK.
Unplugging the Handset or Headset
Unplugging the handset or headset from the console keypad
automatically enables the other if it is plugged in. If neither is
plugged in, the console changes to Operator Absent status.
Or, if you are the last active attendant, the system goes into
Night Service 1 mode.
Note that plugging the handset/headset back in does not
change the Operator status back to Present.

Call Handling
Basics


Call Handling Basics ▼13
Call Handling Basics
Contents
Answering Calls.................................................................................................................14
Dialing Telephone Numbers ..............................................................................................16
Extending (Transferring) Calls...........................................................................................18
Holding and Retrieving Calls ............................................................................................. 20
Conference Calls ...............................................................................................................21
Answering Recalls .............................................................................................................22
Recovering the Last Released Call .....................................................................................22

14 ▼Call Handling Basics
Answering Calls
When a new call arrives at the console the bell rings (if it is turned
on) and a call waiting icon ( ) appears above the softkey associated
with the call.
You can answer calls on a “first-come, first-served basis,”using
the Answer key or use the softkeys for “selective answer.”
Note: You cannot answer a new call until the one you are
engaged in is transferred, disconnected, or put on hold.
Answering calls on a first-come, first-served basis,
With both the Source and Destination areas clear,
•Press Answer
to greet the caller who was waiting the longest. Information
about the call, such as the trunk name and number for an
external call or the caller’s name and extension number for
an internal call, is displayed in the Source area.
Note: The Answer key has a hierarchy; recalls are answered first,
then any other call in order of arrival, regardless of whether it is
an internal or external call. You can assign answering priorities
to calls based on the telephone number that callers dial to reach
the console. For more information, see page 27.
Selectively answering calls
You can select the call you want to answer by pressing a softkey
([Recall], [Dial 0], [External], [WATS], etc.) instead of the Answer
key. If you have more than one call waiting at a particular softkey,
then they will be answered on a “first-come, first-served”basis.
Use the call waiting icons ( ) in the Call Waiting area to help
you decide which type of calls to answer first. The icon appears
above the softkey associated with the various call types (external,
recalls, etc.). The number below the icon shows you how many
calls of a particular type are waiting. The color of the icon also
indicates the number of calls waiting: yellow for one call, blue for
two calls, and red for three or more calls.
About the Call Answering Softkeys
The call answering softkeys are assigned by your
communications department to suit the types of calls your
company receives.
The leftmost softkey is reserved for recalls (see Answering
Recalls on page 22), but the other softkeys may be
programmed in a variety of ways. For example, you might
have Dial “0” and “External” to indicate whether a call is
from outside the system or inside; or WATS or TIE to tell you
the type of trunk the call arrived on; or you might see the
department name assigned to the trunk.
You can use the softkeys to guide you when answering a call.
For instance, when you see that a call is from outside the
system, your company might want you to answer with a
different greeting than you use for internal calls or recalls.
Use the form provided on page 49 to record your company’s
preferred greetings.
Call Waiting
indicator
Total Calls Waiting
Table of contents
Other Mitel Telephone manuals

Mitel
Mitel MiVOICE 6930 User manual

Mitel
Mitel Superset 4125 User manual

Mitel
Mitel 5324 User manual

Mitel
Mitel 3100 ICP - 4.0 L User manual

Mitel
Mitel MIVOICE OFFICE 250 User manual

Mitel
Mitel 3100 ICP - 4.0 L User manual

Mitel
Mitel Superset 4125 User manual

Mitel
Mitel UC360 Manual

Mitel
Mitel Deskphone 6867 User manual

Mitel
Mitel Panther II 2064 User guide

Mitel
Mitel Navigator 3300 ICP User manual

Mitel
Mitel 7000 User manual

Mitel
Mitel MIVOICE OFFICE 250 User manual

Mitel
Mitel 6867i Premium User manual

Mitel
Mitel M3820 User manual

Mitel
Mitel 6863i User manual

Mitel
Mitel 6753 User manual

Mitel
Mitel MiVoice 6940 User manual

Mitel
Mitel MIVOICE OFFICE 250 User manual

Mitel
Mitel 8568 User manual