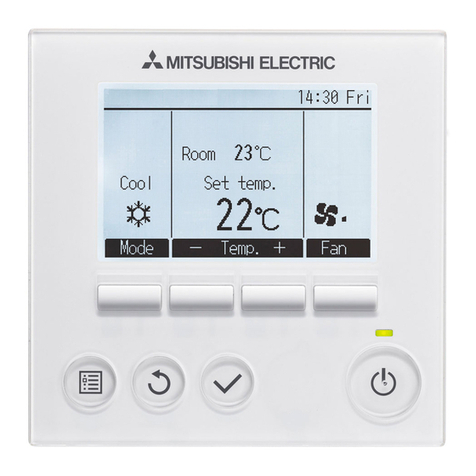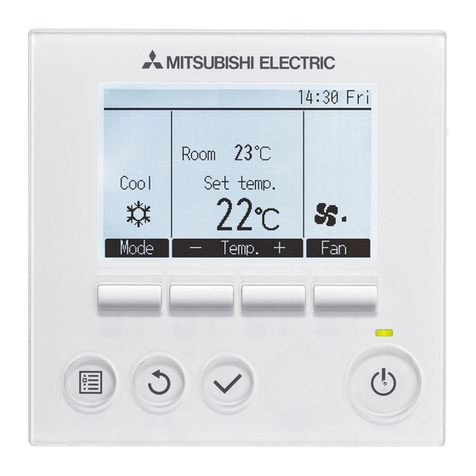
This remote controller is to be connected to a Lossnay unit to allow that unit to be started and
stopped, and to allow selection of the ventilation mode and of the fan speed.
■Thismanualmustbereadbothfullyandcarefullybeforecommencinginstallationprocedures;
furthermore, the subsequent installation must be performed correctly and safely in accordance
withtheinstructionsgiven.
■Theinstallationofthisremotecontrolleristobeperformedbythedealerorbyaninstallation
contractor.
■Aswitchboxwillberequiredforthisinstallation.
1 Safety Precautions
WARNING This symbol denotes what could lead to serious injury or death if the Lossnay
remote controller is misused.
- Never modify or repair by yourself.
-Iftheproductismodiedorinappropriatelyrepaired,electricshock,re,etc.couldresult.
Contact your dealer for repair.
- Do not move or reinstall the product by yourself.
-Ifitisinstalledimproperly,electricshock,re,etc.couldresult.Contactyourdealerortechnical
representative.
- Use the specied cables for wiring and connect them securely. Hold the cables so as not
to apply external force of the cables to the connector.
-Improperconnectioncouldresultinheatgenerationorre.
- All electrical work must be performed by a licensed technician, according to local
regulations and the instructions given in this manual.
- Install the product in a rm and stable place to withstand the product weight.
-Ifthestrengthisinadequate,theproductcoulddropandcauseaninjury.
- Ensure that installation work is done correctly following this installation manual.
-Ifitisinstalledimproperly,electricshock,re,etc.couldresult.
CAUTION Thissymboldenoteswhatcouldleadtopersonalinjuryorpropertydamageif
the Lossnay remote controller is misused.
- Do not install the product in a place where ammable gases may leak.
-Ifgasshouldleakoraccumulatearoundtheproduct,reorexplosioncouldresult.
- Do not use the product in special environments.
-Theproductcouldunderperformorthepartscouldbedamagedifitisusedinlocationssubject
tolargequantitiesofoil(includingmachineoil),steam,orsuldegas.
- Do not install the unit in a place where large amounts of oil, steam, organic solvents, or
corrosive gases, such as sulfuric gas, are present or where acidic/alkaline solutions or
sprays are used frequently.
- These substances can compromise the performance of the unit or cause certain components
oftheunittocorrode,whichcanresultinelectricshock,malfunctions,smoke,orre.
- Do not touch the button with a sharp object.
-Doingsocouldresultinelectricshockorbreakdown.
- Do not supply 220-240 V to the remote controller. The maximum is 12 VDC.
-Doingsocouldresultinreorbreakdown.
- Do not install in any place at a temperature of more than 40°C (104°F) or less than 0°C (32°F)
or exposed to direct sunlight.
-Doingsocouldresultinreorbreakdown.
- Do not install in any steamy place such a bathroom or kitchen.
-Avoidanyplacewheremoistureiscondensedintodew.Doingsocouldcauseelectricshockor
malfunctions.
- Do not touch the button with wet hands.
-Doingsocouldresultinelectricshockorbreakdown.
- Do not wash the product with water.
-Doingsocouldresultinelectricshockorbreakdown.
- Take appropriate measures against electrical noise interference when installing the
Lossnay in hospitals or facilities with radio communication capabilities.
- Inverter, high-frequency medical, or wireless communication equipment as well as power
generatorsmaycausetheLossnaytomalfunction.TheLossnaymayalsoadverselyaffectthe
operationofthesetypesofequipmentbycreatingelectricalnoise.
- Wire so that it does not receive any tension.
-Tensioncouldcausewirebreakage,heatingorre.
- Completely seal the wire lead-in port with putty etc.
-
Anydew,moisture,cockroaches,insectsenteringtheunitcouldcauseelectricshockormalfunctions.
- Use standard wires in compliance with the current capacity.
- Failure to do so could resultinelectricleakage,heatingorre.
-
Put on gloves during installation.
- Failure to do so could cause injury.
1608875HJ7103
Lossnay Remote Controller PZ-43SMF-E
InstallationManual(Forusebydealer/contractor)
8
16
(
5/8
)
16
(
5/8
)
ø6
(
1/4OD
)
20
(
13/16
)
20
(
13/16
)
83.5±0.4
(
3
-
3/8±1/32
)
25
(
1
)
25
(
1
)
102
(
4
)
54
(
2-1/8
)
ø6
(
1/4OD
)
6
(
1/4
)
20
(
13/16
)
10
(
3/8
)
44
(
1-3/4
)
1.5(1/16)
or less
2 Component names and supplied parts
The following parts are included in the box.
Parts name Qty. Appearance
Remotecontroller(topcase) 1Rightgure*1
Remotecontroller(bottomcase) 1Rightgure*2
Roundhead cross slot screws M4×30 2 *3
Wood screws 4.1×16
(fordirectwallinstallation) 2
InstallationManual(thismanual) 1
Operation Manual 1
*3ISOmetricscrewthread
*4Remotecontrollercableisnotincluded.
3 Field-supplied parts/Required tools
(1) Field-supplied parts
Thefollowingpartsareeld-suppliedparts.
Parts name Qty. Notes
Singleswitchbox 1Not required for direct wall installation
Thin metal conduit Necessary
Locknutandbushing Necessary
Cable cover Necessary Requiredforroutingremotecontrollercablealongawall
Putty Reasonable
Molly anchor Necessary
Remote controller cable
(Usea0.3mm²(AWG22)
2-coresheathedcable.)
Necessary
Switch box
(2) Field-supplied tools
-Flat-tipscrewdriver(Width:3-5mm(1/8-7/32inch))
- Knife or Nipper
- Miscellaneous tools
4 Installation
Thisremotecontrollerisforthewallinstallation.Itcanbeinstalledeitherintheswitchboxor
directlyonthewall.Whenperformingdirectwallinstallation,wirescanbethreadthrougheither
backortopoftheremotecontroller.
(1) Selecting an installation site
Installtheremotecontroller(switchbox)onatsurface.
Note:
-Toreducetheriskofmalfunctions,donotinstallthecontrollerinaplacewherewateroroilmay
comeintocontactwiththecontroller,orinacondensingorcorrosiveenvironments.
- Toavoiddeformationandmalfunction,donotinstalltheremotecontrollerindirectsunlightor
wheretheambienttemperaturemayexceed40ºC(104°F)ordropbelow0ºC(32°F).
- Do not install the remote controller directly onto electrically conductive objects such as metal
plate that has not been painted.
(2) Installation space
Leave a space around the remote controller as
shownintherightgure,regardlessofwhether
thecontrollerisinstalledintheswitchbox
ordirectlyonthewall.Removingtheremote
controllerwillnotbeeasywithinsufcientspace.
Also,leaveanoperatingspaceinfrontofthe
remote controller.
(3) Installation work
Controllercanbeinstalledeitherintheswitchboxordirectly
onthewall.Performtheinstallationproperlyaccordingtothe
installation method.
1 Drill a hole in the wall.
■Installationusingaswitchbox
-Drillaholeinthewall,andinstalltheswitchboxonthe
wall.
-Connecttheswitchboxtotheconduittube.
■Directwallinstallation
-Drillaholeinthewall,andthreadthecablethroughit.
2 Seal the cable access hole with putty
■Installationusingaswitchbox
-Sealtheremotecontrollercableaccessholeattheconnectionofswitchboxandconduit
tube with putty.
Note:
Toreducetheriskofelectricshock,malfunctions,orre,sealthegapbetweenthecablesand
cable access holes with putty.
3Prepare the bottom case of the remote controller.
4 Connect the remote controller cable to the terminal block on the bottom case.
Peelofftheremotecontrollercablesheathasshownbelowtoconnecttotheterminalblockproperly.
Securetheremotecontrollercablesothatthepeeledpartofthecablewilltintothecase.
■Directwallinstallation
Sealtheholethroughwhichthecableisthreaded
with putty.
Toreducetheriskofelectricshock,shorting,or
malfunctions,keepwirepiecesandsheathshavings
outoftheterminalblock.
Note:
-Donotusesolderlessterminalstoconnectcablestotheterminalblock.
Solderlessterminalsmaycomeincontactwiththecircuitboardandcausemalfunctionsor
damagethecontrollercover.
5Install the bottom case.
Be sure to secure two places of the bottom case.
■ Installation using a switch box ■ Direct wall installation
Note:
-Toavoiddeformationanddamagetothe
bottomcase,donotovertightenthescrews.
6Cut out the cable access hole.
■Directwallinstallation(whenrunningthecablealongthewall)
-Cutoutthethin-wallpartonthecover(theshadedareain
therightgure)withaknifeoranipper.
-Threadthecablefromthegroovebehindthebottomcase
throughthisaccesshole.
Wall Conduit tube
Locknut
Switchbox
Sealthegap
with putty.
Remote
controller cable
Bushing
Top case Bottom case
16 (5/8)
6 (1/4)
Sheath
Unit:mm(in)
Connect the
cable.
(non-polarized)
2-Corewire
must be seen
ontheback.
Insert the sheathed
part of the cable
inside the case,
and then secure
the cable.
Remote controller cable
Sealthegapwithputty.
Route the cable behind
the remote controller
Singleswitchbox Sealthecableaccess
hole with putty.
Refer to 1
Refer to 4
Remote controller
cable
Roundhead cross
slot screws
Wood
screws Refer to 4
Remote controller
cable
-Toavoiddamagetothebottom
case,donotmakeholesonit.
Unit:mm(in)
30 (1-3/16)
30 (1-3/16)
120 (4-3/4)
30 (1-3/16)
Minimum required space
around the remote controller
Topcase*1Bottomcase*2
Unit:mm(in)


