manuals.online logo
Brands
  1. Home
  2. •
  3. Brands
  4. •
  5. modway
  6. •
  7. Indoor Furnishing
  8. •
  9. modway EEI –2787 User manual

modway EEI –2787 User manual

Customer Service 908-368-1025︱www.modwayfurniture.com Page 1 of 5
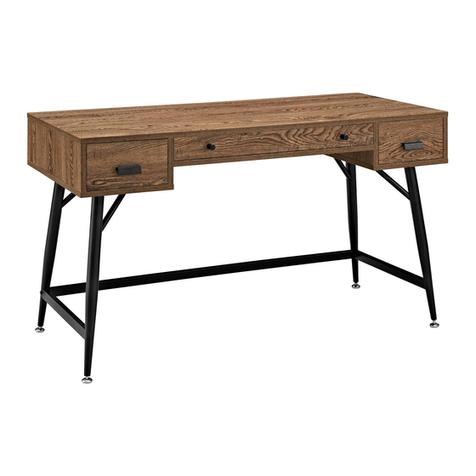
EEI –2787 DESK
Thank you for purchasing the MODWAY DESK!
Before you start, here is some helpful advice:
1.We suggest you spend a short time reading through this leaflet and then follow the simple step-by-step
instructions.
2.Owing to the size and weight of the desk, we recommend that it is assembled by two adults, on a carpeted or
padded area, in the room that it is intended for. Approximate assembly time: 45 minutes.
3.Please do not use any tools other than those provided or recommended in these instructions.
4.Please do not throw away any of the packaging or the instruction until you have checked all the components and
hardware and the furniture is fully assembled. Please ensure that the packaging is disposed of in a safe and
environmentally friendly way.
5.Assemble all components loosely until advised to tighten. Depending on use, it may be necessary to tighten the
components from time to time, so please save the tools that have been provided.
6.Please keep all fitting out of reach of children.
Hardware:
A Long Bolt M6x12mm x16
B
G Allen Wrench M4 x1
D
Components:
Short Bolt M4x6mm x6
Long Screw M4x14mm x24
1
2
2
3
4
6
3
5 7
3
C Small Nut x6
E
F Adjustable leveler x4
Short Screw M4x12mm x2
Phillips Head Screwdriver
( Not included)
3
4
6
8
1 Desk Top x1 2 Rail x2 3 Leg x4 4 Stretcher x2
5 Cube Left x1 6 Cube Right x1 7 Cube Top x1 8 Cube Bottom x1
Customer Service 908-368-1025︱www.modwayfurniture.com Page 2 of 5
EEI –2787 DESK
STEP 1:
STEP 2:
Put Cube Left (5), Cube Right (6), Cube Top (7), and Cube Bottom (8) together on a carpeted or padded surface as shown.
Attach them by using 6 pieces of Small Bolt (B), 6 pieces of Small Nut (C) , and 4 pieces of Short Screw (E).
Hold Small Nut (C) by hand, then use Phillips Head Screwdriver (Not provided) to tighten Small Bolt (B) clockwise until secure.
Hardware & Tools required
Bx6 Cx6 Phillips Head Screwdriver
( not included)
Ex4
B
5
Put Desk Top (1) upside down on a carpeted or padded surface as shown.
Place 1 piece of Rail (2) to the bottom of Desk Top (1) as shown.
Attach them by using 12 pieces of Long Screw (D).
Use Phillips Head Screwdriver (Not provide) to tighten Long Screws (D) clockwise until secure.
1
E
C
Dx12 Phillips Head Screwdriver
( not included)
2
D
E
E
6
8
7 B
C
B
C
C
B
B
C
B
C
D D
D D D
D D D
Customer Service 908-368-1025︱www.modwayfurniture.com Page 3 of 5
EEI –2787 DESK
STEP 3:
STEP 4:
Hardware & Tools required
Put 2 pieces of Leg (3) and 1 piece of Stretcher (4) together as shown.
Insert 4 pieces of Bolt (A) into the pre-drilled holes on the Legs (3) through the pre-drilled holes on Stretcher (4).
Repeat the same steps for the remaining Legs (3) and Stretcher (4).
Use Allen Wrench (G) to tighten Bolts (A). Do not fully tighten Bolts (A) at this step.
Ax8 Gx1
1
2
2
7
4
6
D
Put the assembled Cube to the assembled Desk Top (1) and Rails (2) as shown.
Place the remaining Rail (2) to the bottom of Table Top (1).
Attach them by using 12 pieces of Long Screw (D).
Use Phillips Head Screwdriver (Not provide) to tighten Long Screws (D) clockwise until secure.
3
3
4
A
G
A
A
A
Dx12 Phillips Head Screwdriver
( not included)
5
8
D
D
D D D
Customer Service 908-368-1025︱www.modwayfurniture.com Page 4 of 5
EEI –2787 DESK
STEP 5:
STEP 6:
Hardware & Tools required
Ax8 Gx1
Insert 4 pieces of Adjustable Leveler (F) into the bottom of assembled Legs (3) as shown.
Secure Leveler (F) by hand.
5
Fx4
Insert the assembled Legs (3) and Stretcher (4) to the assembled Table Top (1), Rails (2), and Cube as shown.
Insert 8 pieces of Bolt (A) into the pre-drilled holes on Rail (2) to secure the assembled Legs (3) and Stretcher (4).
Use Allen Wrench (G) to tighten all Bolts (A) clockwise until secure.
1
2
2
4
4
3
3
2
2
1
4
3
3
6
F
3
4
6
7
8
F
F
F
3
3
5
6
7
8
A
A A
A
A A
A
G A
3
Customer Service 908-368-1025︱www.modwayfurniture.com Page 5 of 5
EEI –2787 DESK
STEP 7:
Carefully turn over the assembled desk.
If leveling is needed, turn Leveler (F) clockwise to down and counterclockwise to raise.
Assembly is complete. Your desk is ready to be used now!

Other modway Indoor Furnishing manuals
modway MOD-6224 User manual

modway

modway MOD-6224 User manual

modway EEI-2712/2713 User manual

modway

modway EEI-2712/2713 User manual

modway MOD-6254 User manual

modway

modway MOD-6254 User manual

modway EEI-3676-NAT User manual

modway

modway EEI-3676-NAT User manual

modway EEI-6345 User manual

modway

modway EEI-6345 User manual

modway EEI-4368 User manual

modway

modway EEI-4368 User manual

modway Direct EEI-2037 User manual

modway

modway Direct EEI-2037 User manual

modway Energize EEI-5550 User manual

modway

modway Energize EEI-5550 User manual

modway EEI - 3735 User manual

modway

modway EEI - 3735 User manual

modway EEI-2921 User manual

modway

modway EEI-2921 User manual

modway EEI-4225 User manual

modway

modway EEI-4225 User manual

modway MOD-6216 User manual

modway

modway MOD-6216 User manual

modway Bennington EEI-3490 User manual

modway

modway Bennington EEI-3490 User manual

modway EEI-1215 User manual

modway

modway EEI-1215 User manual

modway Alyson MOD-6144 User manual

modway

modway Alyson MOD-6144 User manual

modway EEI-2547 User manual

modway

modway EEI-2547 User manual

modway Energize EEI-5548 User manual

modway

modway Energize EEI-5548 User manual

modway MOD-6075 User manual

modway

modway MOD-6075 User manual

modway EEI-5083-NAT User manual

modway

modway EEI-5083-NAT User manual

modway EEI-2134 User manual

modway

modway EEI-2134 User manual

modway MOD-6229 User manual

modway

modway MOD-6229 User manual

modway EEI-2870 User manual

modway

modway EEI-2870 User manual

modway EEI-798 User manual

modway

modway EEI-798 User manual
modway EEI-2228 User manual

modway

modway EEI-2228 User manual

Popular Indoor Furnishing manuals by other brands

Graham Studios RADIUS-XP instruction manual

Graham Studios

Graham Studios RADIUS-XP instruction manual

diotti ALIANT 03 manual

diotti

diotti ALIANT 03 manual

rst brands SL-CAB-8 Assembly instructions

rst brands

rst brands SL-CAB-8 Assembly instructions

Cooper Lighting 618 Series Specification sheet

Cooper Lighting

Cooper Lighting 618 Series Specification sheet

Samson M21109 quick start guide

Samson

Samson M21109 quick start guide

Teknion HWBCTF quick start guide

Teknion

Teknion HWBCTF quick start guide

Trasman 1742 SECRET Assembly manual

Trasman

Trasman 1742 SECRET Assembly manual

Auping AVS 488 user manual

Auping

Auping AVS 488 user manual

Forte CLFR716 Assembling Instruction

Forte

Forte CLFR716 Assembling Instruction

Costway FH10064 manual

Costway

Costway FH10064 manual

Forte BHLV621 Assembling Instruction

Forte

Forte BHLV621 Assembling Instruction

ENDORFY Meta manual

ENDORFY

ENDORFY Meta manual

Bush Business Furniture OFH172BW Assembly guide

Bush Business Furniture

Bush Business Furniture OFH172BW Assembly guide

Profijt Meubel YORK TV1 Assembly instructions

Profijt Meubel

Profijt Meubel YORK TV1 Assembly instructions

Jysk RIMINI 5215301 quick start guide

Jysk

Jysk RIMINI 5215301 quick start guide

ZEITRAUM E8 LONGUE Assembly instruction

ZEITRAUM

ZEITRAUM E8 LONGUE Assembly instruction

La Redoute INTERIEURS SEMEON 4624360 quick start guide

La Redoute INTERIEURS

La Redoute INTERIEURS SEMEON 4624360 quick start guide

CAMELBACK Displays 8 FOOT VALANCE Assembly instructions

CAMELBACK Displays

CAMELBACK Displays 8 FOOT VALANCE Assembly instructions

manuals.online logo
manuals.online logoBrands
  • About & Mission
  • Contact us
  • Privacy Policy
  • Terms and Conditions

Copyright 2025 Manuals.Online. All Rights Reserved.