manuals.online logo
Brands
  1. Home
  2. •
  3. Brands
  4. •
  5. Monacor
  6. •
  7. Dj Equipment
  8. •
  9. Monacor MB-200 User manual

Monacor MB-200 User manual

ELECTRONICS FOR SPECIALISTS ELECTRONICS FOR SPECIALISTS ELECTRONICS FOR SPECIALISTS ELECTRONICS FOR SPECIALISTS ELECTRONICS FOR SPECIALISTS ELECTRONICS
MB-200 Bestell-Nr. • Order No. 38.0050
MB-300 Bestell-Nr. • Order No. 38.0060
MBM-100 Bestell-Nr. • Order No. 38.0840
MBM-300 Bestell-Nr. • Order No. 38.0850
MONACOR INTERNATIONAL GmbH & Co. KG • Zum Falsch 36 • 28307 Bremen • Germany
Copyright©by MONACOR INTERNATIONAL. All rights reserved. A-1209.99.05.06.2017
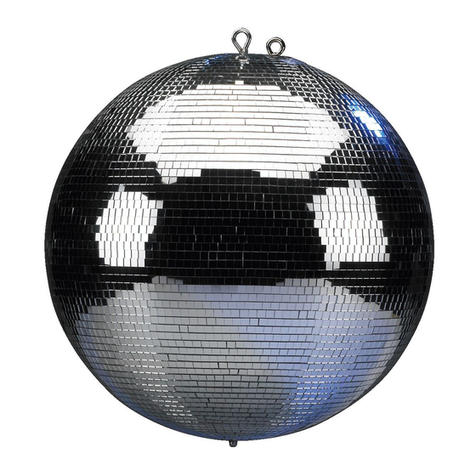
MB-… Mirror Balls
MBM-… Mirror Ball Motors
These instructions are intended for users with-
out any specific technical knowledge. Please
read these instructions carefully prior to operat-
ing the unit and keep them for later reference.
1 Applications
With the mirror ball in connection with a spot light
light effects can be generated. The mirror ball can
e.g. be used in the discothèque or in the party
room. It is designed especially for ceiling mounting
and driven by a motor.
2 Important Safety Notes
The motors correspond to all relevant directives of
the EU and are therefore marked with .
WARNUNG The motor uses dangerous mains
voltage. Leave servicing to skilled
personnel only. Inexpert handling
may result in electric shock.
• The unit is suitable for indoor use only. Protect
it against dripping water and splash water, high
air humidity, and heat (admissible ambient tem-
perature range 0–40°C).
• When handling mirror balls always wear gloves.
Observe the danger of cutting and splintering
by glass!
• Do not take the unit into operation and imme-
diately take the mains plug out of the mains
socket if:
1. damage at the unit or the mains cable can be
seen,
2. a defect might habe occurred after a drop or
similar accident,
3. there are malfunctions.
In any case the unit must be repaired by skilled
personnel.
• A damaged mains cable must be replaced by
skilled personnel only.
• Never pull the mains cable to disconnect the
mains plug from the socket; always seize the plug.
• Only use a dry, soft cloth for cleaning, never use
chemicals or water.
• No guarantee claims for the unit and no liability
for any resulting personal damage or material
damage will be accepted if the unit is used for
other purposes than originally intended or not
installed by authorized personnel.
• Important for U. K. Customers!
The wires in this mains lead are coloured in ac-
cordance with the following code:
green/yellow = earth, blue = neutral, brown = live
As the colours of the wires in the mains lead
of this appliance may not correspond with the
coloured markings identifying the terminals in
your plug, proceed as follows:
1. The wire which is coloured green and yellow
must be connected to the terminal in the plug
which is marked with the letter E or by the
earth symbol , or coloured green or green
and yellow.
2. The wire which is coloured blue must be con-
nected to the terminal which is marked with
the letter N or coloured black.
3. The wire which is coloured brown must be
connected to the terminal which is marked
with the letter L or coloured red.
Warning – This appliance must be earthed.
If the motor and the mirror ball are to be
put out of operation definitively, take them
to a local recycling plant for a disposal
which is not harmful to the environment.
3 Mounting
To the motor units MBM-100 and MBM-300 only
mount the following mirror balls provided for them:
1) After mounting the motor unit at the ceiling,
suspend the mirror ball with the fixing chain
supplied with each motor unit.
2) Finally plug the mains plug to a mains socket
(230V/50Hz). Thus, the motor is switched on,
the mirror ball rotates. For switching off, discon-
nect the mains plug from the mains socket. For
a more convenient operation connect the motor
to a mains socket to be switched on and off via
a light switch.
4 Specifications
Motor Units
Power supply: . . . . . . . . .230V/50Hz/3 VA
max. carrying load: . . . . .4 kg
Turning speed
MBM-100: . . . . . . . . . .1 rpm
MBM-300: . . . . . . . . . .3 rpm
Dimensions/weight: . . . .⌀10cm/450g
Mirrow balls
Dimensions/weight
MB-200:. . . . . . . . . . . .⌀20 cm/ 880g
MB-300:. . . . . . . . . . . .⌀30 cm/2100g
Subject to technical modification.
MB-… Spiegelkugeln
MBM-… Spiegelkugelmotoren
Diese Bedienungsanleitung richtet sich an
Benutzer ohne besondere Fachkenntnisse.
Bitte lesen Sie die Anleitung vor dem Betrieb
gründlich durch und heben Sie sie für ein spä-
teres Nachlesen auf.
1 Einsatzmöglichkeiten
Die Spiegelkugel dient in Verbindung mit einem
Punktstrahler zur Erzeugung von Lichteffekten und
lässt sich z.B. in der Diskothek oder im Partykeller
einsetzen. Die Spiegelkugel ist speziell zur Decken-
montage konzipiert und wird durch einen Motor
angetrieben.
2 Hinweise für den sicheren Gebrauch
Die Motoren entsprechen allen relevanten Richt-
linien der EU und tragen deshalb das -Zeichen.
WARNUNG Der Motor wird mit lebensgefähr-
lich hoher Netzspannung versorgt.
Nehmen Sie deshalb niemals selbst
Eingriffe daran vor. Durch unsach-
gemäßes Vorgehen besteht die
Gefahr eines elektrischen Schlages.
• Verwenden Sie den Motor nur im Innenbereich
und schützen Sie ihn vor Tropf- und Spritzwas-
ser, hoher Luftfeuchtigkeit und Hitze (zulässiger
Einsatztemperaturbereich 0–40°C).
• Tragen Sie beim Umgang mit Spiegelkugeln
grundsätzlich Handschuhe. Beachten Sie die
Schnitt- und Splittergefahr durch Glas!
• Nehmen Sie den Motor nicht in Betrieb bzw. zie-
hen Sie sofort den Netzstecker, wenn:
1. sichtbare Schäden am Motor oder am Netzka-
bel vorhanden sind,
2. nach einem Sturz oder Ähnlichem der Ver-
dacht auf einen Defekt besteht,
3. Funktionsstörungen auftreten.
Geben Sie den Motor in jedem Fall zur Reparatur
in eine Fachwerkstatt.
• Ein beschädigtes Netzkabel darf nur durch eine
Fachwerkstatt ersetzt werden.
• Ziehen Sie den Netzstecker nie am Kabel aus der
Steckdose, fassen Sie immer am Stecker an.
• Verwenden Sie für die Reinigung nur ein trocke-
nes, weiches Tuch, auf keinen Fall Chemikalien
oder Wasser.
• Wird der Motor zweckentfremdet oder nicht
fachgerecht installiert, kann keine Haftung für
daraus resultierende Sach- oder Personenschä-
den und keine Garantie für den Motor übernom-
men werden.
Sollen der Motor und die Spiegelkugel
endgültig aus dem Betrieb genommen
werden, übergeben Sie sie zur umwelt-
gerechten Entsorgung einem örtlichen
Recyclingbetrieb.
3 Montage
An die Motor-Einheit MBM-100 und MBM-300 nur
die dafür vorgesehenen Spiegelkugeln montieren:
1) Nach der Montage der Motor-Einheit an der
Decke die Spiegelkugel mit der Befestigungs-
kette anhängen, die jeder der Motor-Einheiten
beiliegt.
2) Zum Schluss den Netzstecker in eine Steckdose
stecken (230V/50Hz). Damit ist der Motor ein-
geschaltet, die Spiegelkugel rotiert. Zum Aus-
schalten den Netzstecker wieder aus der Steck-
dose ziehen. Für einen besseren Bedienkomfort
den Motor an eine Steckdose anschließen, die
sich über einen Lichtschalter ein- und ausschal-
ten lässt.
4 Technische Daten
Motor-Einheiten
Stromversorgung: . . . . . .230V/50Hz/3VA
maximale Anhängelast:. .4kg
Drehgeschwindigkeit
MBM-100: . . . . . . . . . .1 U/min
MBM-300: . . . . . . . . . .3 U/min
Abmessungen/Gewicht: .⌀10cm/450g
Spiegelkugeln
Abmessungen/Gewicht
MB-200:. . . . . . . . . . . .⌀20 cm/ 880g
MB-300:. . . . . . . . . . . .⌀30 cm/2100g
Änderungen vorbehalten.
DeutschEnglish
ELECTRONICS FOR SPECIALISTS ELECTRONICS FOR SPECIALISTS ELECTRONICS FOR SPECIALISTS ELECTRONICS FOR SPECIALISTS ELECTRONICS FOR SPECIALISTS ELECTRONICS
MONACOR INTERNATIONAL GmbH & Co. KG • Zum Falsch 36 • 28307 Bremen • Germany
Copyright©by MONACOR INTERNATIONAL. All rights reserved. A-1209.99.05.06.2017
MB-200 Référence num. • Codice 38.0050
MB-300 Référence num. • Codice 38.0060
MBM-100 Référence num. • Codice 38.0840
MBM-300 Référence num. • Codice 38.0850
MB-… Sfere a specchi
MBM-… Motori per sfere
a specchi
Queste istruzioni sono rivolte all‘utente senza
conoscenze tecniche specifiche. Vi preghiamo
di leggerle attentamente prima della messa in
funzione e di conservarle per un uso futuro.
1 Possibilità di impiego
La sfera a specchi serve, in combinazione con uno
spot, a produrre effetti luce, per esempio in disco-
teca o a casa. La sfera è prevista specialmente per il
montaggio al soffitto ed è azionata da un motore.
2 Avvisi importanti di sicurezza
I motori sono conformi a tutte le direttive rilevanti
dell’UE e pertanto porta la sigla .
AVVERTIMENTO Il motore funziona con perico-
losa tensione di rete. Non in-
tervenire mai personalmente al
suo interno. La manipolazione
scorretta può provocare delle
scariche elettriche pericolose.
• Usare l’apparecchio solo all’interno di locali
e proteggerlo dall’acqua gocciolante e dagli
spruzzi d’acqua, da alta umidità dell’aria e dal
calore (temperatura d’impiego ammessa fra
0e40°C).
• Maneggiando sfere a specchi è assolutamente
consigliabile portare dei guanti. Pericolo di tagli
provocati da eventuali schegge!
• Non mettere in funzione l‘apparecchio e staccare
subito la spina rete se:
1. l‘apparecchio o il cavo rete presentano dei
danni visibili;
2. dopo una caduta o dopo eventi simili sussiste
il sospetto di un difetto;
3. l‘apparecchio non funziona correttamente.
Per la riparazione rivolgersi sempre ad una offi-
cina competente.
• Il cavo rete, se danneggiato, deve essere sostitu-
ito solo da un laboratorio specializzato.
• Staccare il cavo rete afferando la spina, senza
tirare il cavo.
• Per la pulizia usare solo un panno seco, asciutto;
non impiegare in nessun caso prodotti chimici
o acqua.
• Nel caso di uso improprio o d‘installazione non a
regola d‘arte, non si assume nessuna responsabi-
lità per eventuali danni consequenziali a persone
o a cose e non si assume nessuna garanzia per
l’apparecchio.
Se si desidera eliminare il motore e la
palla a specchi definitivamente, conse-
gnarli per lo smaltimento ad un’istitu-
zione locale per il riciclaggio.
3 Montaggio
Alle unitè motore MBM-100 e MBM-300 si pos-
sono montare solo le sfere a specchi previste:
1) Dopo il montaggio dell‘unità motore, appen-
dere la sfera al soffitto mediante la catena for-
nita con ogni unità motore.
2) Alla fine inserire il cavo rete nella presa
(230V/50Hz). L’unità è accesa e la sfera comin-
cia a roteare. Per spegnerla, staccare la spina
dalla rete. Per maggiore comodità si può col-
legare l’unità con una presa comandata da un
interruttore.
4 Dati tecnici
Unità motore
Alimentazione: . . . . . . . .230 V/50 Hz/3VA
Peso da
appendere max.:. . . . . . .4 kg
Velocità di rotazione
MBM-100: . . . . . . . . . .1 g/m
MBM-300: . . . . . . . . . .3 g/m
Dimensioni/peso: . . . . . .⌀10cm/450g
Mirrow balls
Dimensioni/peso
MB-200:. . . . . . . . . . . .⌀20 cm/ 880g
MB-300:. . . . . . . . . . . .⌀30 cm/2100g
Con riserva di modifiche tecniche.
MB-… Boules à facettes
MBM-… Moteurs pour boules
à facettes
Cette notice s‘adresse aux utilisateurs sans
connaissances techniques particulières. Veuil-
lez lire la présente notice avant le fonction-
nement et conservez-la pour pouvoir vous y
reporter ultérieurement.
1 Possibilités d’utilisation
La boule à facettes permet de créer des effets lu-
mineux, associée à un projecteur spot, par exemple
en discothèque ou lors de soirées. Elle est spécia-
lement conçue pour une fixation au plafond et
fonctionne grâce à un moteur.
2 Conseils d’utilisation et de sécurité
Les moteurs répondent à toutes les directives né-
cessaires de l’Union européenne et portent donc
le symbole .
AVERTISSEMENT Le moteur est alimenté par une
tension dangereuse. Ne touchez
jamais l’intérieur de l’appareil
car, en cas de mauvaise mani-
pulation, vous pourriez subir
une décharge électrique.
• Cet appareil n’est conçu que pour une utilisation
en intérieur. Protégez-le de tout type de projec-
tions d’eau, des éclaboussures, d’une humidité
de l’air élevée et de la chaleur (plage de tempé-
rature de fonctionnement autorisée : 0–40°C).
• Lorsque vous la manipulez, veillez à porter des
gants de protection et faites attention au risque
de cassure des facettes !
• Ne le faites pas fonctionner et débranchez-le im-
médiatement lorsque:
1. des dommages apparaissent sur l’appareil ou
le cordon secteur,
2. après une chute ou accident similaire, vous
avez un doute sur l’état de l’appareil,
3. des défaillances apparaissent.
Dans tous les cas, seul un technicien spécialisé
peut effectuer les réparations.
• Tout cordon secteur endommagé doit être rem-
placé impérativement par un technicien spécia-
lisé.
• lNe débranchez jamais l’appareil en tirant sur le
cordon secteur, tenez-le toujours par la fiche.
• Pour le nettoyer, utilisez un chiffon sec et souple,
en aucun cas de produits chimiques ou d’eau.
• Nous déclinons toute responsabilité en cas de
dommages matériels ou corporels résultants si
l’appareil est utilisé dans un but autre que celui
pour lequel il a été conçu ou s’il n’est pas correc-
tement installé; en outre, la garantie deviendrait
caduque.
Lorsque le moteur et la boule à facettes
sont définitivement retirés du service,
vous devez les déposer dans une usine
de recyclage adaptée pour contribuer à
leur élimination non polluante.
3 Montage
Sur les moteurs MBM-100 et MBM-300 ne doivent
être fixées que les boules :
1) Une fois le montage de l’unité moteur au pla-
fond effectué, fixez la boule à l’aide de la chaîne
livrée avec chaque unité moteur.
2) Vous pouvez maintenant relier le cordon secteur
à une prise 230V/50Hz. Le moteur est alors al-
lumé, la boule à facettes tourne. Pour décon-
necter, débranchez le moteur du secteur. Pour
une opération plus facile, branchez le moteur
à une prise du secteur qui peut être allumée
et débranchée via un commutateur d’éclairage.
4 Caractéristiques techniques
Moteurs
Alimentation :. . . . . . . . .230 V/50 Hz/3VA
Charge max.
de suspension : . . . . . . .4 kg
Vitesse de rotation
MBM-100 :. . . . . . . . . .1 tr/mn
MBM-300 :. . . . . . . . . .3 tr/mn
Dimensions/poids : . . . . .⌀10 cm/450g
Boules à facettes
Dimensions/poids
MB-200:. . . . . . . . . . . .⌀20 cm/ 880g
MB-300:. . . . . . . . . . . .⌀30 cm/2100g
Tout droit de modification réservé.
FrançaisItaliano
CARTONS ET EMBALLAGE
PAPIER À TRIER

This manual suits for next models

7

Other Monacor Dj Equipment manuals

Monacor IMG Stage Line SDC-202LED User manual

Monacor

Monacor IMG Stage Line SDC-202LED User manual

Monacor IMG Stage Line SCAN-22LED User manual

Monacor

Monacor IMG Stage Line SCAN-22LED User manual

Monacor PARL-5RGBW User manual

Monacor

Monacor PARL-5RGBW User manual

Monacor img Stage Line MPX-2004 User manual

Monacor

Monacor img Stage Line MPX-2004 User manual

Monacor MPX-52PA User manual

Monacor

Monacor MPX-52PA User manual

Monacor img Stage Line WR-2DMX User manual

Monacor

Monacor img Stage Line WR-2DMX User manual

Monacor LEDP-300RGB User manual

Monacor

Monacor LEDP-300RGB User manual

Monacor LS-5 User manual

Monacor

Monacor LS-5 User manual

Monacor img Stage Line LED-810DMX User manual

Monacor

Monacor img Stage Line LED-810DMX User manual

Monacor img Stage Line MPX-5/GO User manual

Monacor

Monacor img Stage Line MPX-5/GO User manual

Monacor IMG STAGELINE MB-5002 User manual

Monacor

Monacor IMG STAGELINE MB-5002 User manual

Monacor img Stage Line LE-225 User manual

Monacor

Monacor img Stage Line LE-225 User manual

Monacor IMG STAGELINE RGBL-80DMX User manual

Monacor

Monacor IMG STAGELINE RGBL-80DMX User manual

Monacor IMG Stageline MPX-2006 User manual

Monacor

Monacor IMG Stageline MPX-2006 User manual

Monacor LUMO-30-BL User manual

Monacor

Monacor LUMO-30-BL User manual

Monacor IMG Stageline MPX-20 User manual

Monacor

Monacor IMG Stageline MPX-20 User manual

Monacor IMG Stage Line PAR-56S/CR User manual

Monacor

Monacor IMG Stage Line PAR-56S/CR User manual

Monacor img Stage Line LE-214 User manual

Monacor

Monacor img Stage Line LE-214 User manual

Monacor DMP-130MIXBT User manual

Monacor

Monacor DMP-130MIXBT User manual

Monacor MB-5002 User manual

Monacor

Monacor MB-5002 User manual

Monacor IMG Stageline MB-3002 User manual

Monacor

Monacor IMG Stageline MB-3002 User manual

Monacor TWIST-30LED User manual

Monacor

Monacor TWIST-30LED User manual

Monacor IMG STAGELINE MB Series User manual

Monacor

Monacor IMG STAGELINE MB Series User manual

Monacor IMG STAGELINE STROBE-195LED User manual

Monacor

Monacor IMG STAGELINE STROBE-195LED User manual

Popular Dj Equipment manuals by other brands

Event Lighting PAR12X12L user manual

Event Lighting

Event Lighting PAR12X12L user manual

Party Light & Sound PARTY-DERBY6 user manual

Party Light & Sound

Party Light & Sound PARTY-DERBY6 user manual

American DJ Fan-1000 User instructions

American DJ

American DJ Fan-1000 User instructions

Numark MIXTRACK NKC4 Service manual

Numark

Numark MIXTRACK NKC4 Service manual

Vestax DCR-1500 owner's manual

Vestax

Vestax DCR-1500 owner's manual

Hercules DJ CONSOLE MK2 How-to

Hercules

Hercules DJ CONSOLE MK2 How-to

Monoprice 612760 user manual

Monoprice

Monoprice 612760 user manual

Chauvet DJ Swarm 5FX user manual

Chauvet DJ

Chauvet DJ Swarm 5FX user manual

VaporFlame VF6b instruction manual

VaporFlame

VaporFlame VF6b instruction manual

Chauvet COLORdash Par-Hex 12 user manual

Chauvet

Chauvet COLORdash Par-Hex 12 user manual

Chauvet Professional Ovation P-56FC user manual

Chauvet Professional

Chauvet Professional Ovation P-56FC user manual

Elation PLATINUM SPOT LED PRO II user manual

Elation

Elation PLATINUM SPOT LED PRO II user manual

Vestax ITCH VCI-300MKII owner's manual

Vestax

Vestax ITCH VCI-300MKII owner's manual

Flash butrym 108 user manual

Flash butrym

Flash butrym 108 user manual

Pioneer XDJ-1000 operating instructions

Pioneer

Pioneer XDJ-1000 operating instructions

EuroLite LED BR-50 Flower Effect user manual

EuroLite

EuroLite LED BR-50 Flower Effect user manual

Traxon Technologies ecue e:bus User introduction manual

Traxon Technologies

Traxon Technologies ecue e:bus User introduction manual

Future light DMH-200 user manual

Future light

Future light DMH-200 user manual

manuals.online logo
manuals.online logoBrands
  • About & Mission
  • Contact us
  • Privacy Policy
  • Terms and Conditions

Copyright 2025 Manuals.Online. All Rights Reserved.