manuals.online logo
Brands
  1. Home
  2. •
  3. Brands
  4. •
  5. Monacor
  6. •
  7. Dj Equipment
  8. •
  9. Monacor IMG STAGELINE MB-5002 User manual

Monacor IMG STAGELINE MB-5002 User manual

MB-5002
Best.-Nr. 38.2720
MBM-1002
Best.-Nr. 38.2350
Spiegelkugel und Motor
Bitte lesen Sie diese Anleitung vor der Inbetriebnahme
gründlich durch und heben Sie sie für ein späteres Nach-
lesen auf.
1 Einsatzmöglichkeiten
Die Spiegelkugel MB-5002 dient in Verbindung mit
einem Punktstrahler zur Erzeugung von Lichteffekten
und ist für den Einsatz in öffentlichen Bereichen (Disko-
thek, Theater etc.) geeignet. Sie ist speziell für die
Deckenmontage konzipiert und wird durch den Motor
MBM-1002 angetrieben.
2 Hinweise für den sicheren Gebrauch
Der Motor entspricht allen erforderlichen Richtlinien der
EU und ist deshalb mit gekennzeichnet.
Beachten Sie auch unbedingt die folgenden Punkte:
GDer Motor ist nur zur Verwendung im Innenbereich
geeignet. Schützen Sie ihn vor Tropf- und Spritzwas-
ser, hoher Luftfeuchtigkeit und Hitze (zulässiger Ein-
satztemperaturbereich 0 – 40 °C).
GTragen Sie beim Umgang mit Spiegelkugeln grund-
sätzlich Handschuhe. Beachten Sie die Schnitt- und
Splittergefahr durch Glas!
GNehmen Sie den Motor nicht in Betrieb und trennen
Sie ihn sofort von der Netzspannung:
1. wenn sichtbare Schäden am Motor oder am Netz-
kabel vorhanden sind,
2. wenn nach einem Sturz oder Ähnlichem der Ver-
dacht auf einen Defekt besteht,
3. wenn Funktionsstörungen auftreten.
Geben Sie den Motor in jedem Fall zur Reparatur in
eine Fachwerkstatt.
GEin beschädigtes Netzkabel darf nur durch den Her-
steller oder eine Fachwerkstatt ersetzt werden.
GVerwenden Sie für die Reinigung des Motors nur ein
trockenes, weiches Tuch, auf keinen Fall Chemikalien
oder Wasser. Für die Spiegelkugel können handels-
übliche Glasreiniger verwendet werden.
GWird der Motor oder die Spiegelkugel zweckentfrem-
det, nicht fachgerecht montiert, falsch angeschlossen
oder nicht fachgerecht repariert, kann keine Garantie
für diese Teile und keine Haftung für daraus resultie-
rende Sach- oder Personenschäden übernommen
werden.
3 Montage
Sollen der Motor und die Spiegelkugel end-
gültig aus dem Betrieb genommen werden,
übergeben Sie sie zur umweltgerechten Ent-
sorgung einem örtlichen Recyclingbetrieb.
WARNUNG Der Motor MBM-1002 und die Spiegel-
kugel MB-5002 sind genau aufeinander
abgestimmt und dürfen nur zusammen
verwendet werden. Die Kugel muss, wie
folgt beschrieben, sicher und fachge-
recht am Motor montiert werden, damit
sie sich nicht lösen und auf Personen
fallen kann.
WARNUNG Der Motor wird mit lebensgefährlicher
Netzspannung (230 V~) versorgt. Neh-
men Sie deshalb niemals selbst Eingriffe
an ihm vor. Es besteht die Gefahr eines
elektrischen Schlages.
Copyright©by MONACOR INTERNATIONAL GmbH & Co. KG, Bremen, Germany. All rights reserved. A-0495.99.03.05.2009
®
wwwwww..iimmggssttaaggeelliinnee..ccoomm
Mirror Ball and Motor
Please read these operating instructions carefully prior
to operating the unit and keep them for later use.
1 Applications
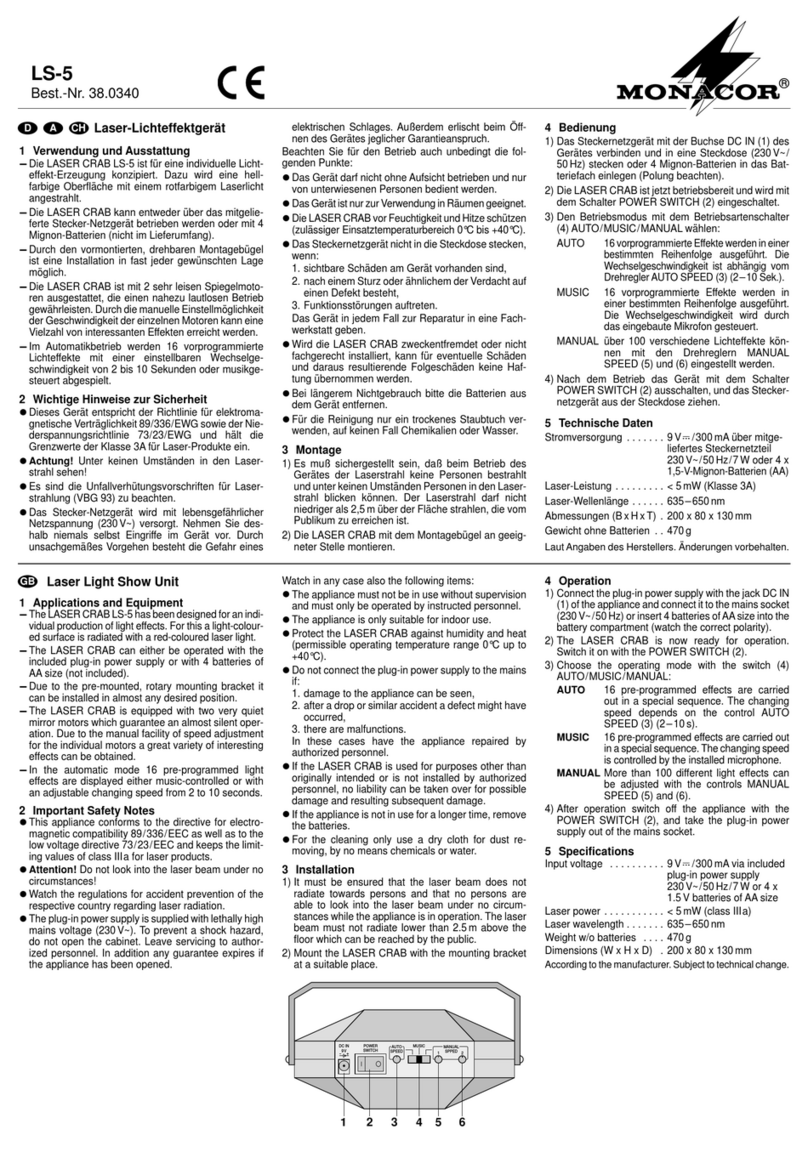
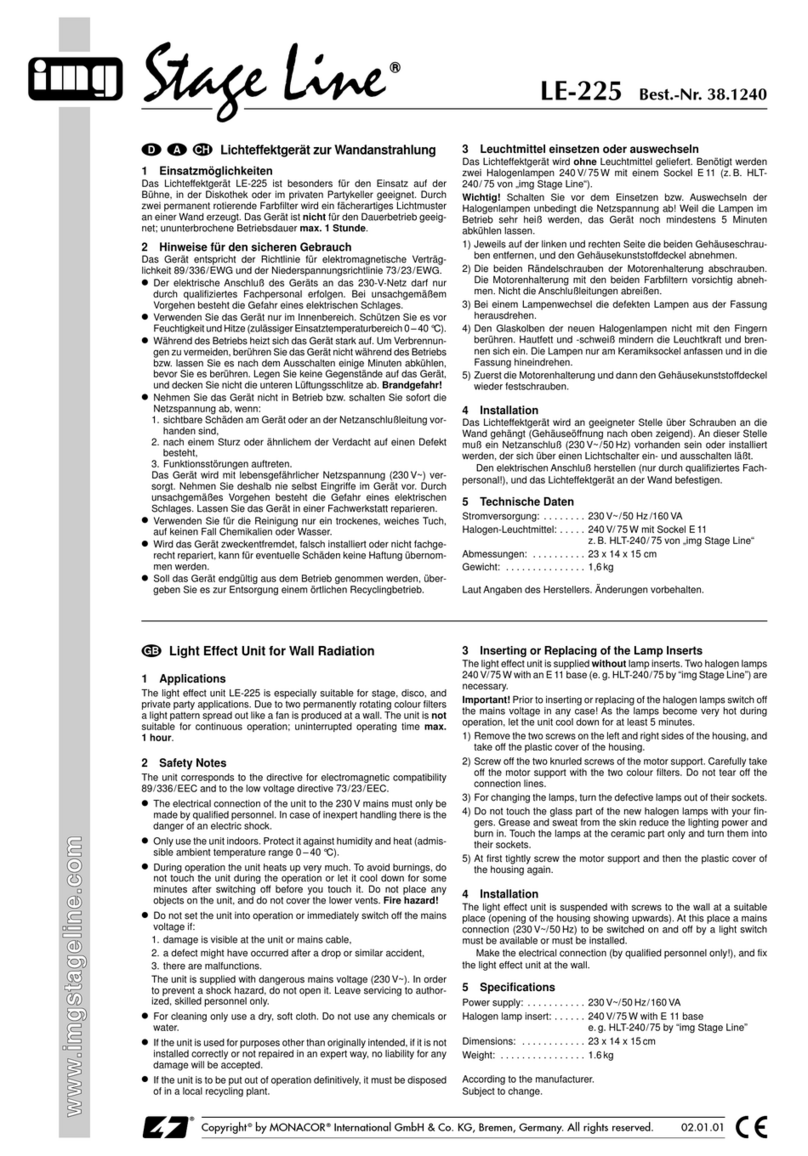
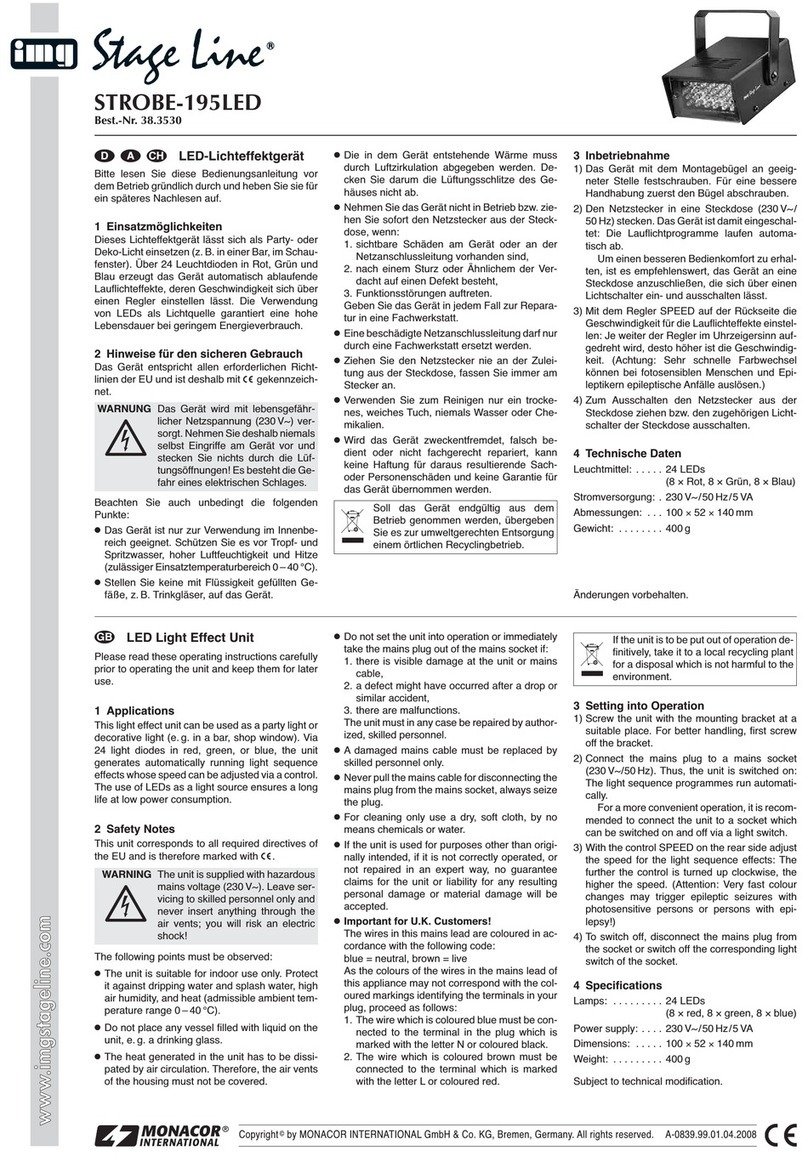
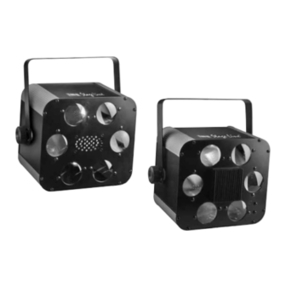
In connection with a spotlight, the mirror ball MB-5002
serves for creating light effects and is ideally suited for
use in public areas (discothèque, theatre, etc.). The mir-
ror ball is specially designed for ceiling suspension and
is driven by the motor MBM-1002.
2 Safety Notes
The motor corresponds to all required directives of the
EU and is therefore marked with .
Please observe the following items in any case:
GThe motor is suitable for indoor use only. Protect it
against dripping water and splash water, high air
humidity, and heat (admissible ambient temperature
range 0 – 40 °C).
GAlways wear gloves when handling mirror balls; glass
splinters may cause injuries!
GDo not operate the motor and immediately disconnect
it from the mains voltage:
1. in case of visible damage to the motor or to the
mains cable,
2. if a defect might have occurred after the unit was
dropped or suffered a similar accident,
3. if malfunctions occur.
In any case the motor must be repaired by skilled per-
sonnel.
GA damaged mains cable must be replaced by the man-
ufacturer or skilled personnel only.
GFor cleaning the motor only use a dry, soft cloth; never
use water or chemicals. For the mirror ball, a com-
mercial glass cleaner may be used.
GNo guarantee claims for the motor or the mirror ball
and no liability for any resulting personal damage or
material damage will be accepted if the items are used
for other purposes than originally intended, if they are
not correctly mounted or connected, or not repaired in
an expert way.
GImportant for U. K. Customers!
The wires in this mains lead are coloured in accord-
ance with the following code:
green/yellow = earth,
blue = neutral,
brown = live
As the colours of the wires in the mains lead of this
appliance may not correspond with the coloured mark-
ings identifying the terminals in your plug, proceed as
follows:
1. The wire which is coloured green and yellow must
be connected to the terminal in the plug which is
marked with the letter E or by the earth symbol
, or coloured green or green and yellow.
2. The wire which is coloured blue must be connected
to the terminal which is marked with the letter N or
coloured black.
3. The wire which is coloured brown must be con-
nected to the terminal which is marked with the
letter L or coloured red.
Warning – This appliance must be earthed.
3 Mounting
1) Fasten the motor to a suitable spot on the ceiling by
means of four screws. Suspend the ball in such a way
that it will be out of reach of the audience.
2) Hook the chain (7) in the locking hook (6) of the motor
and in the small eye (8) of the ball. Lock the hook.
3) Hook the locking hook (2) of the safety rope (4) in the
eye (1) of the motor. Guide the loop (3) of the safety
rope through the large eye (5) of the ball and hook it
in the locking hook (2). Lock the hook. Never use the
small eye (8) of the ball for the safety rope; in case of
damage, it will not be able to bear the drop weight of
the ball.
4) Finally connect the motor to the mains (230 V~/
50 Hz). Thus, the motor is switched on and the mirror
ball will start rotating. It is recommended to connect
the motor to an electric circuit which is switched on or
off via a light switch.
5) Check the ball at regular intervals to make sure that it
is still safely suspended.
WARNING The motor MBM-1002 and the mirror
ball MB-5002 are perfectly matched; only
use them together. Mount the ball safely
and expertly to the motor as described
below. Make sure that it will not work loose
and drop on the audience.
If the motor and the mirror ball are to be put
out of operation definitively, take them to a
local recycling plant for a disposal which is not
harmful to the environment.
WARNING The motor is supplied with hazardous
mains voltage (230 V~). Leave servicing
to skilled personnel only. Inexpert hand-
ling may cause an electric shock hazard.
1
6
1) Den Motor mit 4 Schrauben an geeigneter Stelle der
Decke festschrauben. Die Kugel muss außerhalb
der Reichweite des Publikums aufgehängt werden.
2) Die Kette (7) am Motor in den Kettenverschluss (6)
und an der Kugel in die kleine Öse (8) einhaken. Den
Kettenverschluss fest zuschrauben.
3) Den Verschluss (2) des Sicherungsseils (4) in die
Öse (1) des Motors einhaken. Die Öse (3) des
Sicherungsseils durch die große Öse (5) der Kugel
führen und in den Verschluss (2) einhaken. Den
Verschluss fest zuschrauben. Auf keinen Fall für
das Sicherungsseil die kleine Öse (8) der Kugel
verwenden. Im Schadensfall hält sie dem Fallge-
wicht der Kugel nicht stand.
4) Zum Schluss den Motor an das Stromnetz (230 V~/
50 Hz) anschließen. Damit ist der Motor einge-
schaltet und die Spiegelkugel rotiert. Am bestem
den Motor an einen Stromkreis anschließen, der
sich über einen Lichtschalter ein- und ausschalten
lässt.
5) In regelmäßigen Abständen überprüfen, ob die
Kugel noch sicher hängt.
4 Technische Daten
Motor
Stromversorgung: . . . . . 230 V~/50 Hz/5 VA
Tragfähigkeit: . . . . . . . . 10 kg
Drehgeschwindigkeit: . . 1,5 U/min
Abmessungen, Gewicht: ∅195 mm × 127 mm, 1 kg
Spiegelkugel
Abmessungen: . . . . . . . ∅50 cm
Gewicht: . . . . . . . . . . . . 6,2 kg
Änderungen vorbehalten.
2
3
4
5
7
8
D A CH
GB
4 Specifications
Motor
Power supply: . . . . . . . . 230 V~/50 Hz/5 VA
Carrying capacity: . . . . . 10 kg
Rotating speed: . . . . . . . 1.5 rpm
Dimensions, weight: . . . ∅195 mm × 127 mm, 1 kg
Mirror ball
Dimensions: . . . . . . . . . ∅50 cm
Weight: . . . . . . . . . . . . . 6.2 kg
Subject to technical modification.
1
6
2
3
4
5
7
8
Boule à facettes et moteur
Veuillez lire la présente notice avec attention avant le
fonctionnement et conservez-la pour pouvoir vous y
reporter ultérieurement.
1 Possibilités dʼutilisation
La boule à facettes MB-5002, combinée à un projecteur
spot, sert à produire des effets lumineux et est adaptée
pour une utilisation dans des endroits publics (disco-
thèques, théâtres …). La boule à facettes est spéciale-
ment conçue pour un montage au plafond et fonctionne
via le moteur MBM-1002.
2 Conseils dʼutilisation et de sécurité
Le moteur répond à toutes les directives nécessaires de
lʼUnion Européenne et porte donc le symbole .
Respectez scrupuleusement les points suivants :
GLe moteur nʼest conçu que pour une utilisation en inté-
rieur. Protégez-le de tout type de projections dʼeau,
des éclaboussures, dʼune humidité élevée et de la
chaleur (plage de température de fonctionnement
autorisée : 0 – 40 °C).
GLorsque vous manipulez la boule à facettes, portez
toujours des gants. Faites attention aux éventuels
éclats de verre qui peuvent vous blesser !
GNe faites pas fonctionner le moteur et débranchez-le
immédiatement du secteur :
1. des dommages apparaissent sur le moteur ou sur
le cordon secteur,
2. après une chute ou un cas similaire, vous avez un
doute sur lʼétat de lʼappareil,
3. des défaillances apparaissent.
Tout dommage doit être réparé par un technicien ha-
bilité.
GTout cordon secteur endommagé ne doit être rempla-
cé que par le constructeur ou un technicien qualifié.
GPour nettoyer le moteur, utilisez un chiffon sec et doux,
en aucun cas, de produits chimiques ou dʼeau. Pour la
boule à facettes, vous pouvez utiliser des nettoyants
pour verres usuels.
GNous déclinons toute responsabilité en cas de dom-
mages matériels ou corporels résultants si le moteur
ou la boule à facettes est utilisé dans un but autre que
celui pour lequel il a été conçu, sʼils ne sont pas cor-
rectement montés, branchés ou ne sont pas réparés
par une personne habilitée.
3 Montage
1) Vissez le moteur à lʼendroit souhaité au plafond à
lʼaide de quatre vis. Suspendez la boule hors de por-
tée du public.
AVERTISSEMENT Le moteur MBM-1002 et la boule à
facettes MB-5002 sont faits lʼun
pour lʼautre et ne doivent être utili-
sés quʼensemble. La boule, comme
décrit ci-après, doit être montée sur
le moteur de manière sûre et appro-
priée afin quʼelle ne se détache pas
et tombe sur le public.
Lorsque le moteur et la boule à facettes sont dé-
finitivement retirés du service, vous devez les
déposer dans une usine de recyclage adaptée
pour contribuer à leur élimination non polluante.
AVERTISSEMENT Le moteur est alimenté par une ten-
sion dangereuse 230 V~. Ne tou-
chez jamais lʼintérieur de lʼappareil,
une mauvaise manipulation pourrait
générer une décharge électrique.
Copyright©by MONACOR INTERNATIONAL GmbH & Co. KG, Bremen, Germany. All rights reserved. A-0495.99.03.05.2009
®
wwwwww..iimmggssttaaggeelliinnee..ccoomm
Palla a specchi e motore
Vi preghiamo di leggere attentamente le presenti istru-
zioni prima della messa in funzione e di conservarle per
un uso futuro.
1 Possibilità di impiego
La palla a specchi MB-5002 serve, in combinazione con
uno spot, a produrre effetti luce ed è adatta allʼimpiego in
luoghi pubblici (discoteche, teatri ecc.). La palla è previ-
sta per il montaggio al soffitto ed è azionata dal motore
MBM-1002.
2 Avvertenze di sicurezza
Il motore è conforme a tutte le direttive richieste dellʼUE
e pertanto porta la sigla .
Si devono osservare assolutamente anche i seguenti
punti:
GIl motore è adatto solo per lʼuso allʼinterno di locali.
Proteggerlo dallʼacqua gocciolante e dagli spruzzi
dʼacqua, da alta umidità dellʼaria e dal calore (tempe-
ratura dʼimpiego ammessa fra 0 e 40 °C).
GManovrando le palle a specchi occorre per principio
portare dei guanti in considerazione del pericolo di
tagli da schegge!
GNon mettere in funzione il motore e staccarlo subito
dalla tensione di rete se:
1. il motore o il cavo rete presentano dei danni visibili;
2. dopo una caduta o dopo eventi simili sussiste il
sospetto di un difetto;
3. lʼapparecchio non funziona correttamente.
Per la riparazione rivolgersi sempre ad unʼofficina
competente.
GIl cavo rete, se danneggiato, deve essere sostituito
solo dal costruttore o da un laboratorio autorizzato.
GPer la pulizia del motore usare solo un panno morbido,
asciutto; non impiegare in nessun caso acqua o pro-
dotti chimici. Per la palla a specchi si possono usare
normale detergenti per vetro.
GNel caso dʼuso improprio, di montaggio non a regola
dʼarte, di collegamenti sbagliati o di riparazione non a
regola dʼarte del motore o della palla a specchi, non si
assume nessuna responsabilità per eventuali danni
consequenziali a persone o a cose e non si assume
nessuna garanzia per lʼapparecchio.
3 Montaggio
1) Avvitare il motore con quattro viti i un punto adatto del
soffitto. La palla deve essere appesa fuori dalla por-
tata del pubblico.
2) Agganciare la catena (7) al giunto (6) sul motore e
allʼasola piccola (8) della palla. Avvitare bene il
giunto.
3) Agganciare lʼattacco (2) della fune di sicurezza (4)
allʼasola (1) del motore. Fare passare lʼasola (3) della
fune di sicurezza attraverso lʼasola grande (5) della
palla e agganciarla allʼattacco (2). Avvitare bene lʼat-
tacco. In nessun caso usare lʼasola piccola (8) della
palla per la fune di sicurezza perché tale asola non
resisterebbe al peso della palla mentre cade.
4) Alla fine collegare il motore con la rete (230 V~/
50 Hz). In questo moto, il motore è acceso e la palla a
specchi si mette a roteare. La cosa più comoda è col-
legare il motore con un circuito comandabile da un
interruttore di luce.
5) Controllare ad intervalli regolari la sistemazione
sicura della palla.
4 Dati tecnici
Motore
Alimentazione: . . . . . . . 230 V~/50 Hz/5 VA
Portata: . . . . . . . . . . . . . 10 kg
Velocità di rotazione: . . . 1,5 g/min
Dimensioni, peso: . . . . . ∅195 mm × 127 mm,1 kg
Palla a specchi
Dimensioni: . . . . . . . . . . ∅50 cm
Peso : . . . . . . . . . . . . . . 6,2 kg
Con riserva di modifiche tecniche.
Se si desidera eliminare il motore e la palla a
specchi definitivamente, consegnarli per lo
smaltimento ad unʼistituzione locale per il rici-
claggio.
AVVERTIMENTO Il motore MBM-1002 e la palla a
specchi MB-5002 sono regolati
esattamente lʼuno per lʼaltra e de-
vono esser usati solo insieme. La
palla deve essere montata in modo
sicuro e a regola dʼarte sul motore,
come descritto qui di seguito, per
evitare che si possa staccare e
cadere su delle persone.
AVVERTIMENTO Il motore funziona con pericolosa
tensione di rete (230 V~). Non inter-
venire mai personalmente al suo
interno! Esiste il pericolo di una sca-
rica elettrica pericolosa.
2) Accrochez la chaîne (7) au mousqueton (6) et
accrochez lʼensemble dans le petit œillet (8) sur la
boule. Vissez fermement le mousqueton.
3) Accrochez le mousqueton (2) de la corde de sécu-
rité (4) dans lʼœillet (1) du moteur. Faites passer
lʼœillet (3) de la corde de sécurité dans le grand
œillet (5) de la boule et accrochez dans le mous-
queton (2). Verrouillez fermement le mousqueton.
En aucun cas, vous ne devez utiliser le petit œillet
(8) de la boule à facettes pour la corde de sécurité.
En cas de dommage, il ne supportera pas le poids
de la boule.
4) Enfin, reliez le moteur au secteur (230 V~/50 Hz).
Le moteur est ainsi allumé et la boule tourne. Il est
recommandé de relier le moteur à un circuit élec-
trique pouvant être allumé et éteint via un interrup-
teur de lumière.
5) Vérifiez, à intervalles réguliers, si la boule est
encore solidement fixée.
4 Caractéristiques techniques
Moteur
Alimentation : . . . . . . . . 230 V~/50 Hz/5VA
Charge admissible : . . . 10 kg
Vitesse de rotation : . . . 1,5 tr/mn
Dimensions, poids : . . . ∅195 mm × 127 mm,1 kg
Boule à facettes
Dimensions : . . . . . . . . . ∅50 cm
Poids : . . . . . . . . . . . . . . 6,2 kg
Tout droit de modification réservé.
MB-5002
Best.-Nr. 38.2720
MBM-1002
Best.-Nr. 38.2350
F B CH
I
1
6
2
3
4
5
7
8
MB-5002
Best.-Nr. 38.2720
MBM-1002
Best.-Nr. 38.2350
Kula lustrzana z silnikiem
Przed użyciem urządzenia prosimy o uważne przeczyta-
nie poniższej instrukcji, oraz o zachowanie tekstu do
wglądu.
1 Zastosowanie
Kula lustrzana MB-5002 służy do tworzenia efektów
świetlnych, znajduje idealne zastosowanie w dyskotece
lub w teatrze. Kula jest przeznaczona do montażu sufi-
towego, napędzana jest silnikiem MBM-1002.
2 Bezpieczeństwo użytkowania
Ponieważ silnik napędzający kulę lustrzaną spełnia
wymogi obowiązujące w Unii Europejskiej, został ozna-
czony symbolem .
Należy przestrzegać następujących zasad:
GUrządzenie jest przeznaczone do użytku tylko w
pomieszczeniach. Urządzenie należy chronić przed
działaniem wody, wilgoci oraz wysokiej temperatury
(dopuszczalna temperatura otoczenia pracy wynosi
od 0 do 40 °C).
GPrzed rozpoczęciem montażu szklanej kuli należy
założyć rękawice ochronne, aby uniknąć uszkodzenia
skóry odłamkami szkła.
GNie włączać silnika oraz natychmiast odłączyć
wtyczkę od gniazdka sieciowego jeśli:
1. istnieje widoczne uszkodzenie urządzenia lub kabla
sieciowego,
2. w wyniku upuszczenia urządzenia itp. mogło nastą-
pić jego uszkodzenie,
3. urządzenie działa nieprawidłowo.
W razie wystąpienia któregoś z powyższych przypad-
ków urządzenie należy dostarczyć do naprawy w auto-
ryzowanym punkcie serwisowym.
GWymianą uszkodzonego kabla sieciowego może
zająć się jedynie producent lub pracownik autoryzo-
wanego punktu serwisowego.
GDo czyszczenia silnika należy używać suchej, miękkiej
tkaniny; nie należy stosować wody ani chemicznych
środków czyszczących. Do czyszczenia lustrzanej kuli
można używać płynu do mycia szyb.
GProducent ani dostawca nie ponoszą odpowie-
dzialności za wynikłe szkody (uszkodzenie sprzętu lub
obrażenia użytkownika), jeśli urządzenie (lustrzana
kula lub silnik) było używane niezgodnie z przezna-
czeniem, nieprawidłowo zamontowane, lub jeśli zo-
stało poddane nieautoryzowanej naprawie.
3 Montaż
1) Należy przymocować silnik do sufitu w żądanym
miejscu za pomocą czterech śrub. Należy zamonto-
wać lustrzaną kulę w taki sposób, aby była poza
zasięgiem publiczności.
2) Należy przymocować łańcuch (7) do blokady (6), znaj-
dującej się przy silniku, oraz do małego uchwytu (8),
znajdującego się przy kuli lustrzanej. Następnie
należy zabezpieczyć blokadę.
3) Należy umieścić blokadę (2) linki zabezpieczającej (4)
w otworze (1) znajdującym się przy silniku. Następnie
należy przeciągnąć pętlę (3) linki zabezpieczającej
przez duży uchwyt (5), znajdujący się przy kuli, do
blokady, po czym zabezpieczyć połączenie (2). Nie
wolno używać małego uchwytu (8) do zamocowania
linki zabezpieczającej; w przypadku oberwania kuli
mały uchwyt nie utrzyma jej ciężaru.
4) Na końcu podłączyć silnik do gniazdka sieciowego
(230 V~/50 Hz). Silnik jest już włączony, a kula zaczy-
na się obracać. Zaleca się podłączenie silnika do
obwodu elektrycznego włączanego i wyłączanego
razem z oświetleniem.
5) Należy co pewien czas sprawdzać bezpieczeństwa
montażu urządzenia.
Jeśli urządzenie (lustrzana kula lub silnik) ma
zostać ostatecznie wycofane z użycia, należy
przekazać je do punktu utylizacji odpadów,
aby uniknąć zanieczyszczenia środowiska.
UWAGA Kula lustrzana MB-5002 oraz silnik MBM-
1002 stanowią zestaw, nie należy ich uży-
wać w połączeniu z innymi urządzeniami.
Należy stosować się do poniższego opisu
montażu kuli oraz silnika, zapewniając tym
samym bezpieczeństwao użytkowania
urządzeń. Po zamontowaniu urządzeń,
należy sprawdzić, czy są one mocno i bez-
piecznie przymocowane.
UWAGA Urządzenie jest zasilane niebezpiecznym
dla życia napięciem zmiennym (230 V~).
Aby uniknąć porażenia elektrycznego, nie
wolno otwierać urządzenia. Jego naprawą
powinien zajmować się jedynie pracownik
autoryzowanego punktu serwisowego.
Bola de espejos y motor
Por favor, lea estas instrucciones cuidadosamente antes
de utilizar el aparato y guárdelas para usos posteriores.
1 Usos
Combinada con un proyector de luz, la bola de espejos
MB-5002 sirve para crear efectos luminosos y es ideal
para ser usada en zonas públicas (discotecas, teatros,
etc.). La bola de espejos está especialmente diseñada
para ser colgada en el techo y se mueve mediante el
motor MBM-1002.
2 Notas de seguridad
El motor responde a todas las Directivas requeridas por
la CEE y por lo tanto está marcado con .
Por favor, tenga en cuenta los puntos siguientes en todo
caso:
GEl motor sólo está indicado para un uso en interior.
Protéjalo de todo tipo de proyecciones de agua, de la
humedad elevada del aire y del calor (temperatura
ambiente admisible: 0 – 40 °C).
GUse siempre guantes cuando manipule bolas de espe-
jos: las astillas del cristal pueden causar heridas.
GNo utilice el motor y desconéctelo inmediatamente de
la corriente si:
1. en caso de daños visibles en el motor o en el cable
de red,
2. si aparecen daños después de una caída o acci-
dente similar,
3. si surge un mal funcionamiento.
El motor debe ser reparado en cualquier caso por per-
sonal cualificado.
GUn cable de red dañado sólo debe ser remplazado por
el fabricante o por personal autorizado.
GPara limpiar el motor use sólo un paño seco y suave,
no use en ningún caso productos químicos o agua.
Para la bola de espejos, puede usarse un producto
común para cristal.
GNo se aceptará ninguna reclamación de garantía para
el motor o para la bola de espejos ni se aceptará nin-
guna responsabilidad en caso de daños personales o
materiales resultantes si los artículos se usan con un
fin distinto a aquel para el que fueron fabricados, si no
son correctamente montados o conectados, o si no
son reparados de manera profesional.
3 Montaje
ADVERTENCIA El motor MBM-1002 y la bola de es-
pejos MB-5002 hacen una pareja per-
fecta; úselos sólo juntos. Monte la
bola de manera segura y profesional
con el motor como se describe más
abajo. Asegúrese de que no se sol-
tará y caerá sobre la gente.
Cuando el motor y la bola de espejos sean
retirados definitivamente de servicio, usted
debe depositarlos en un centro de reciclaje
para su eliminación no contaminante.
ADVERTENCIA El motor está alimentado por una
corriente peligrosa (230 V~). Deje su
mantenimiento sólo en manos de
personal especializado. Una mani-
pulación inexperta puede causar un
riesgo de descarga eléctrica.
Copyright©by MONACOR INTERNATIONAL GmbH & Co. KG, Bremen, Germany. All rights reserved. A-0495.99.03.05.2009
®
wwwwww..iimmggssttaaggeelliinnee..ccoomm
1) Sujete el motor en un sitio apropiado en el techo
mediante cuatro tornillos. Cuelgue la bola de
manera que quede fuera del alcance de la gente.
2) Cuelgue la cadena (7) en el gancho de fijación (6)
del motor y en la anilla pequeña (8) de la bola. Cie-
rre el gancho.
3) Cuelgue el gancho de fijación (2) de la cuerda de
seguridad (4) en la anilla (1) del motor. Guíe el lazo
(3) de la cuerda de seguridad a través de la anilla
grande (5) de la bola y cuélguelo en el gancho de
fijación (2). Cierre el gancho. No use nunca la ani-
lla pequeña (8) de la bola de espejos para la cuerda
de seguridad; en caso de daños, no podría resistir
el peso de caída de la bola.
4) Para acabar, conecte el motor a la corriente (230V~/
50 Hz). De este modo, el motor se conecta y la bola
de espejos empieza a girar. Se recomienda conec-
tar el motor a un circuito eléctrico que se conecte y
desconecte mediante un interruptor de luz.
5)
Pruebe la bola de espejos a intervalos regulares pa-
ra asegurar que sigue colgada de manera segura.
4 Características técnicas
Motor
Alimentación: . . . . . . . . 230 V~/50 Hz/5 VA
Capacidad de carga: . . . 10 kg
Velocidad de rotación: . 1,5 rpm
Dimensiones, peso: . . . ∅195 mm × 127 mm,1 kg
Bola de espejos
Dimensiones: . . . . . . . . ∅50 cm
Peso: . . . . . . . . . . . . . . . 6,2 kg
Sujeto a modificaciones técnicas.
E
PL
4 Dane techniczne
Silnik
Zasilanie: . . . . . . . . . . . 230 V~/50 Hz/5 VA
Maksymalne obciążenie: 10 kg
Prędkość obrotów: . . . . 1,5 rpm
Wymiary, waga: . . . . . . ∅195 mm × 127 mm,1 kg
Kula lustrzana
Wymiary: . . . . . . . . . . . . ∅50 cm
Waga: . . . . . . . . . . . . . . 6,2 kg
Może ulec zmianie.

This manual suits for next models

3

Other Monacor Dj Equipment manuals

Monacor img Stage Line LE-214 User manual

Monacor

Monacor img Stage Line LE-214 User manual

Monacor IMG STAGELINE MXR-60 User manual

Monacor

Monacor IMG STAGELINE MXR-60 User manual

Monacor img Stage Line WR-2DMX User manual

Monacor

Monacor img Stage Line WR-2DMX User manual

Monacor IMG Stage Line SCAN-22LED User manual

Monacor

Monacor IMG Stage Line SCAN-22LED User manual

Monacor IMG STAGELINE STROBE-195LED User manual

Monacor

Monacor IMG STAGELINE STROBE-195LED User manual

Monacor PARL-5RGBW User manual

Monacor

Monacor PARL-5RGBW User manual

Monacor IMG Stageline MPX-2006 User manual

Monacor

Monacor IMG Stageline MPX-2006 User manual

Monacor IMG Stage Line PAR-56S/CR User manual

Monacor

Monacor IMG Stage Line PAR-56S/CR User manual

Monacor MPX-52PA User manual

Monacor

Monacor MPX-52PA User manual

Monacor MB-200 User manual

Monacor

Monacor MB-200 User manual

Monacor IMG STAGELINE MB Series User manual

Monacor

Monacor IMG STAGELINE MB Series User manual

Monacor IMG Stage Line SDC-202LED User manual

Monacor

Monacor IMG Stage Line SDC-202LED User manual

Monacor DMP-130MIXBT User manual

Monacor

Monacor DMP-130MIXBT User manual

Monacor IMG STAGELINE LC-8DMX User manual

Monacor

Monacor IMG STAGELINE LC-8DMX User manual

Monacor img Stage Line MPX-2004 User manual

Monacor

Monacor img Stage Line MPX-2004 User manual

Monacor MB-5002 User manual

Monacor

Monacor MB-5002 User manual

Monacor img Stage Line LE-225 User manual

Monacor

Monacor img Stage Line LE-225 User manual

Monacor LUMO-30-BL User manual

Monacor

Monacor LUMO-30-BL User manual

Monacor img Stage Line QUAD FLOWER LED-380RGBW User manual

Monacor

Monacor img Stage Line QUAD FLOWER LED-380RGBW User manual

Monacor IMG Stageline MPX-20 User manual

Monacor

Monacor IMG Stageline MPX-20 User manual

Monacor IMG STAGELINE PAR-20/CR User manual

Monacor

Monacor IMG STAGELINE PAR-20/CR User manual

Monacor img Stage Line LE-306 User manual

Monacor

Monacor img Stage Line LE-306 User manual

Monacor img Stage Line MPX-5/GO User manual

Monacor

Monacor img Stage Line MPX-5/GO User manual

Monacor LEDP-300RGB User manual

Monacor

Monacor LEDP-300RGB User manual

Popular Dj Equipment manuals by other brands

Flash STROBO FL-1500SC DMX user manual

Flash

Flash STROBO FL-1500SC DMX user manual

Zzipp ZZFMLOW1200 user manual

Zzipp

Zzipp ZZFMLOW1200 user manual

American DJ Verti-Pro II User instructions

American DJ

American DJ Verti-Pro II User instructions

PR Lighting XR 380 Beam user manual

PR Lighting

PR Lighting XR 380 Beam user manual

Rosco Image Spot HO user guide

Rosco

Rosco Image Spot HO user guide

Marq Colormax PAR56 Service manual

Marq

Marq Colormax PAR56 Service manual

involight BL4650 instruction manual

involight

involight BL4650 instruction manual

Chauvet DJ Freedom Par H9 IP user manual

Chauvet DJ

Chauvet DJ Freedom Par H9 IP user manual

Elation CUEPIX 16IP user manual

Elation

Elation CUEPIX 16IP user manual

BoomToneDJ HELIX LED user manual

BoomToneDJ

BoomToneDJ HELIX LED user manual

Ledj Fresco 12 RGBW user manual

Ledj

Ledj Fresco 12 RGBW user manual

Numark MIXDECK EXPRESS user manual

Numark

Numark MIXDECK EXPRESS user manual

Show Technology Fusionpar QXII LEDPAR122 user manual

Show Technology

Show Technology Fusionpar QXII LEDPAR122 user manual

TECshow FRESNELED 3100 MKII user manual

TECshow

TECshow FRESNELED 3100 MKII user manual

ADJ VIZI CMY300 user guide

ADJ

ADJ VIZI CMY300 user guide

Brighter X-Dot user manual

Brighter

Brighter X-Dot user manual

The One Studio TH-373 MINI PROFILE 60W Zoom user manual

The One Studio

The One Studio TH-373 MINI PROFILE 60W Zoom user manual

NJS NJS052 user guide

NJS

NJS NJS052 user guide

manuals.online logo
manuals.online logoBrands
  • About & Mission
  • Contact us
  • Privacy Policy
  • Terms and Conditions

Copyright 2025 Manuals.Online. All Rights Reserved.