Parts List for Morse 5-Gallon Pail Handler Model 83
Serial Number 1105 to 0311 (MMYY)
The Specialist In Drum Handling Equipment
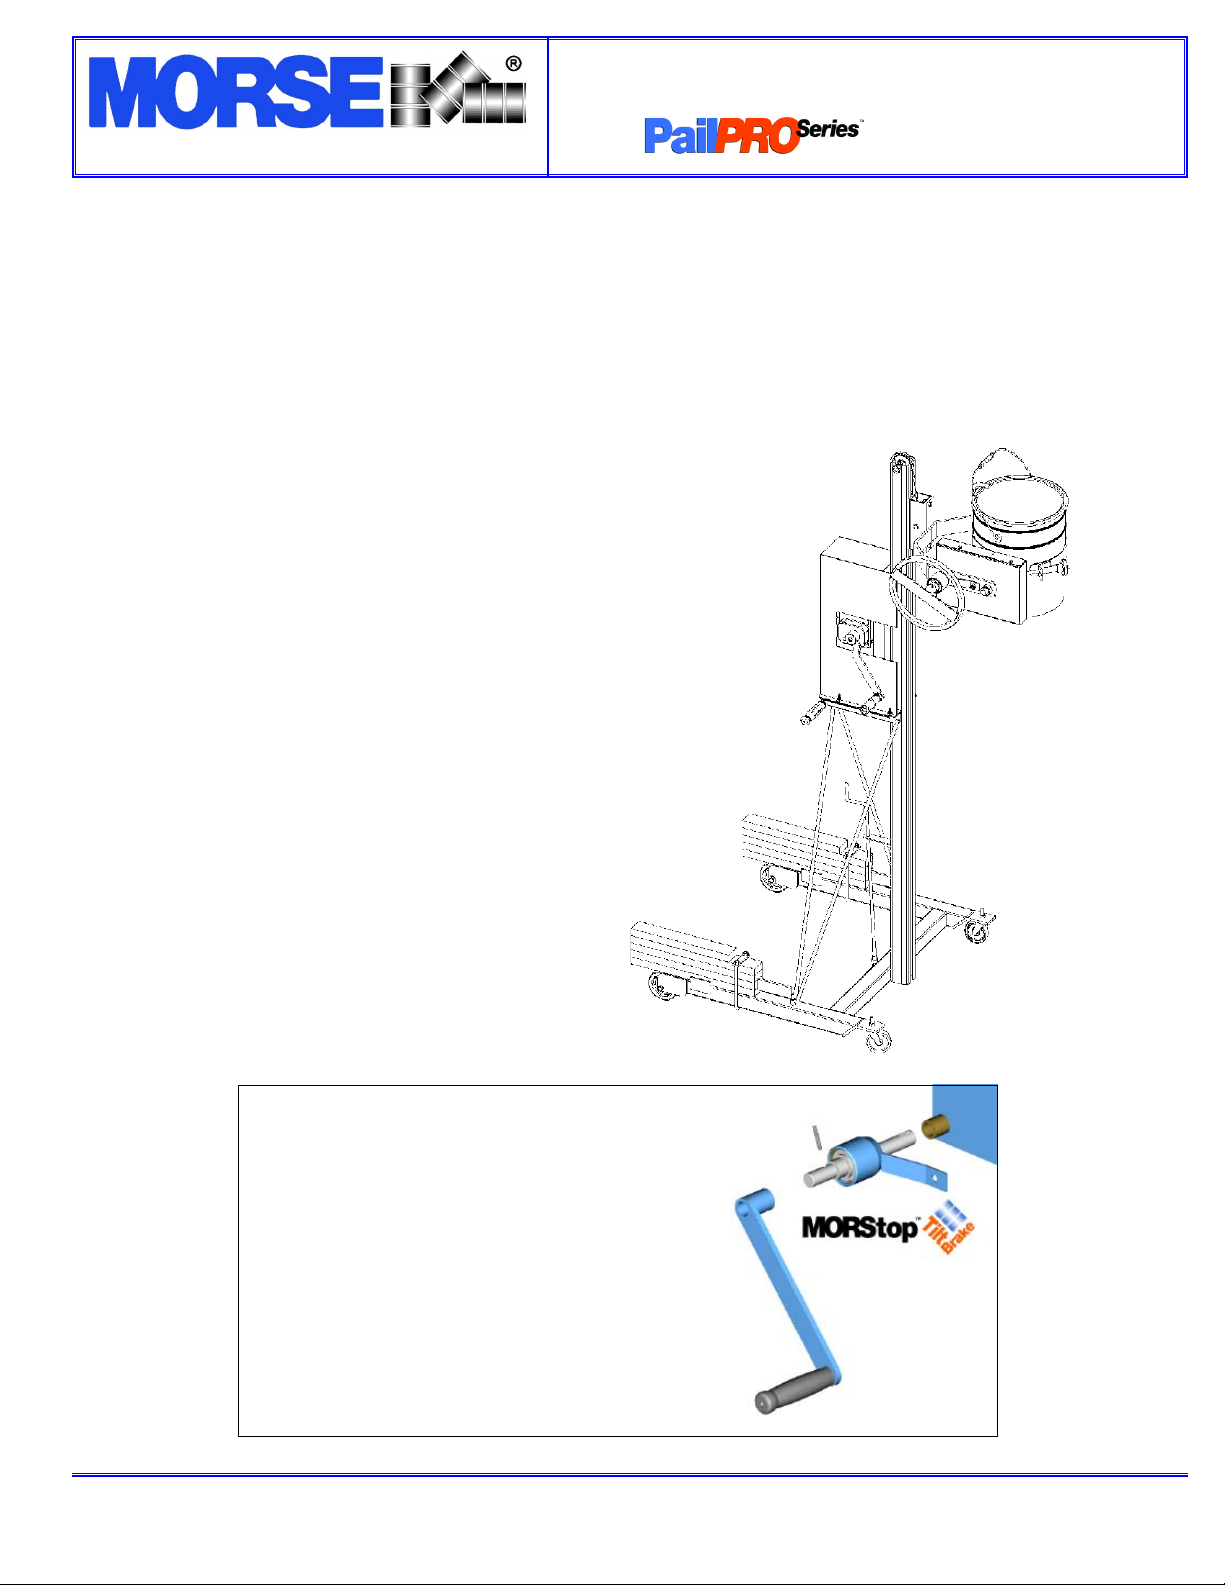
MODEL 83
Pail Handler
COPYRIGHT 2007 MORSE MFG. CO., INC. Form PL 83 (1105 - 0311) (Updated 10-2007) Page 7
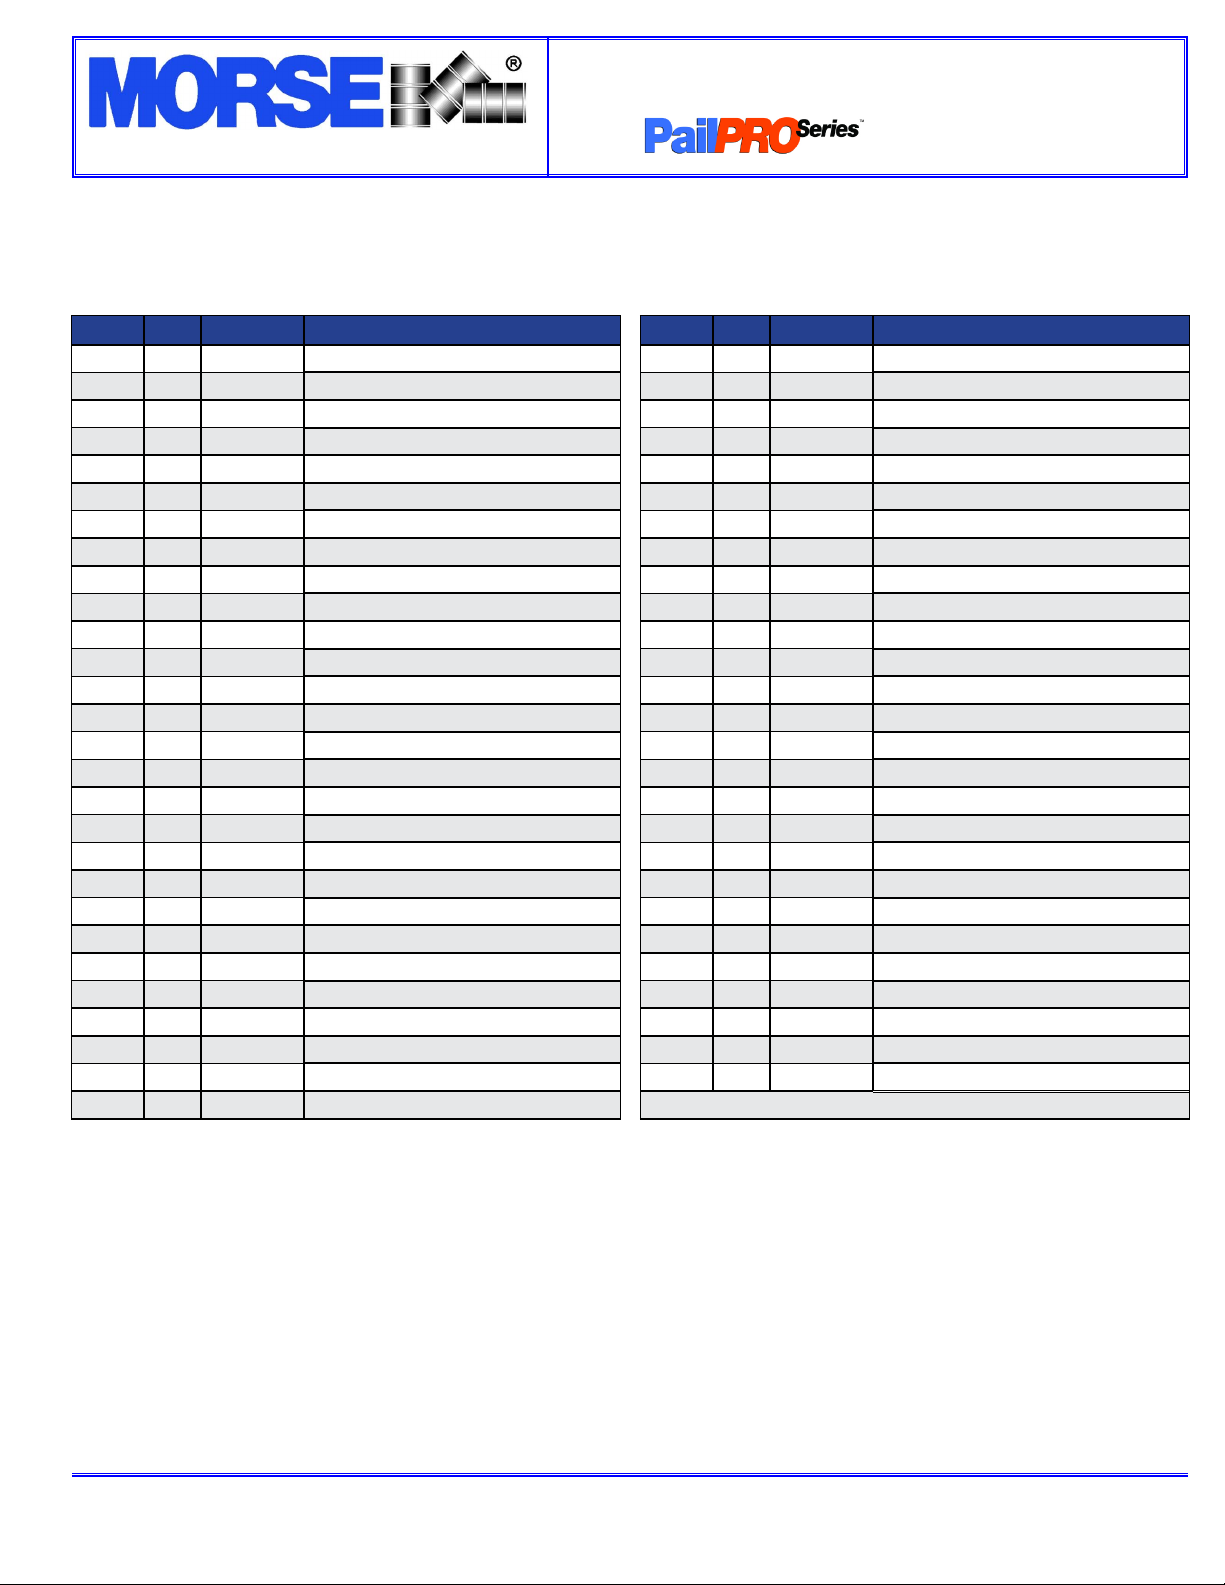
ITEM # QTY. PART # DESCRIPTION
1 2 3829-P GUARD WELD, 83
2 9 1169-P NUT, 3/8-16 REV HEX LOCK
3 5 1166-P WASHER, 3/8 USS 1” OD
4 1 3797-P WINCH, 83
5 1 4365-P WIRE CABLE CPT, 1/8”, 83
6 4 1035-P COLLAR, 1/2”
8 2 3803-P SHAFT, PULLEY, 83
9 1 3798-P TOP SHEAVE, 3” POLY, 83 PP
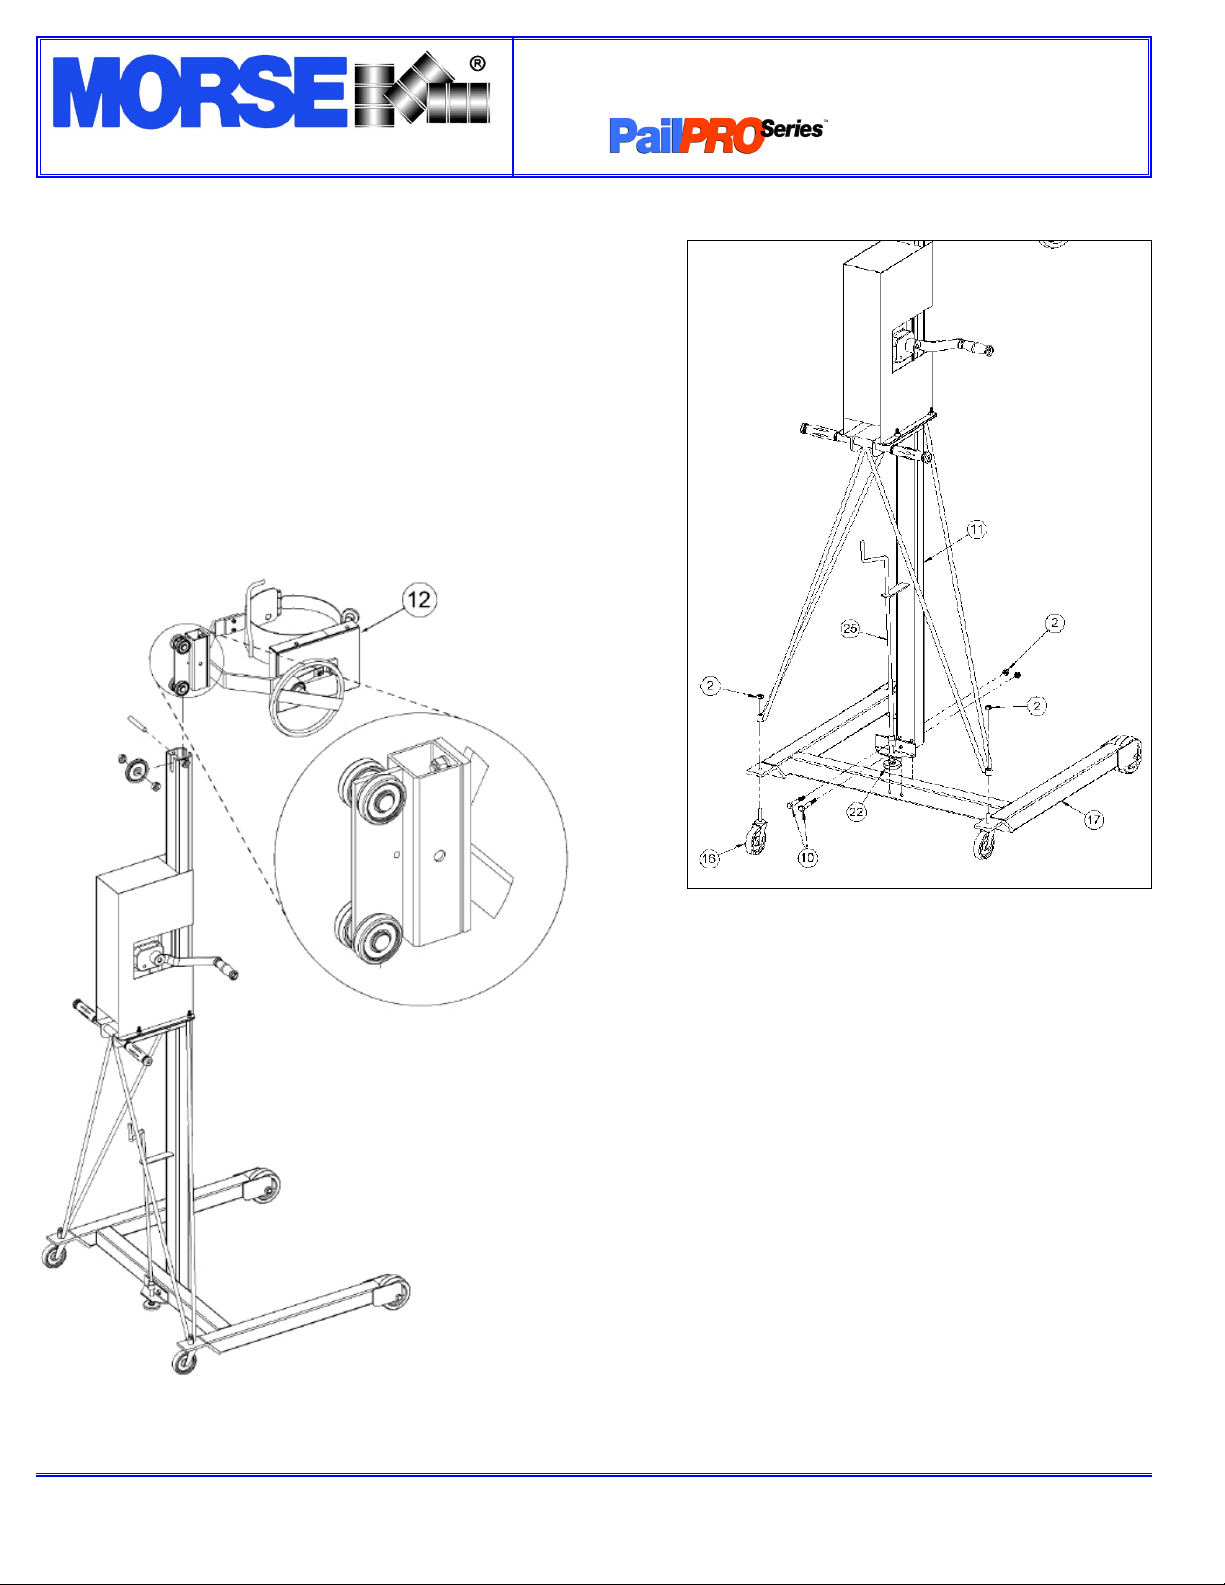
10 1 3911-P MID SHEAVE, 1-1/2 STEEL, 83
11 1 4355-P MAST WELD, 83
12 1 4329-P CARRIAGE ASM, 83
13 5 1315-P HHCS, 3/8-16 X 2-3/4 GR2
14 2 3921-P NUT, ACORN, 3/8-16
15 2 3885-P WHEEL, 4 X 1-1/2, 83
16 2 3789-P CASTER, STEM, 3” SWIVEL, 83
17 1 3790-P BASE WELD, 83
18 4 35-P 5/16 - 18 X 1 HHCS GR 2
19 2 136-P HANDLE GRIP, 7/8” X 4-3/4”
20 1 4381-P HHCS, 3/8-16 X 3-1/2 GR5
21 1 4358-P HANDLE WELD, 83
22 1 8353-P PAD FLOOR LOCK DRILLED, 83
23 1 3775W-P ANGLE, FLOOR LOCK WELD, 83
25 1 8351W-P CRANK WELD, FLOOR LOCK, 83
26 1 1675-P ROLL PIN, 1/8 X 7/8
27 4 3920-P NUT, LOCK, 5/16-18 NYLON
28 4 4068-P ROLLER, GORBEL, 83
29 4 4071-P SNAP RING, .669 ID, 83
30 2 149-P NUT, FIN, 3/8-16 HEX
ITEM # QTY. PART # DESCRIPTION
31 2 1474-P WASHER, 3/8 SPLIT LOCK
32 3 1572-P HHCS, 3/8-16 X 1 GR2
33 2 1641-P HHCS, 1/4-20 X 1 GR2
34 1 4163B-P COVER, GEARS, INSIDE BACK 83
35 1 4163C-P COVER, GEARS, INSIDE FRONT 83
36 1 3794-P BACK BAND WELD, 83
37 4 1297-P NUT, LOCK, 1/4-20 REV HEX
38 1 4161-P PLATE, IDLER, BOLT ON, 83
39 2 64-P ROLL PIN, 3/16 X 1-1/4
40 1 55-P WASHER, 3/4 SAE FL 1-1/2 OD
41 2 3804-P SHCS, 1/4-20 X 3-1/4
43 1 3714W-P KNOB WELD, CLAMP SCREW 83, 7-X
44 1 3795-P FRONT BAND WELD, 83
45 1 4221-P CLAMP SCREW WELD, 83
46 1 3796-P SADDLE ASM, 83
47 1 4163A-P COVER, GEARS, OUTSIDE, 83
48 4 193-P SCREW, TEK, 12-14 X 3/4, 3 PT
49 1 2537-P CHAIN, ROLLER, #35 72 PITCH
50 1 7-P BEARING, 3/4” ID X 1-1/2”
51 1 15-P COLLAR, 3/4” ID
52 1 4385-P HANDWHEEL, 10” 3/4” BORE, 83
53 1 3901-P MORStop TILT BRAKE
54 1 19-P BEARING, 3/4” ID X 2-1/2”
55 1 4082-P CARRIAGE WELD, BOLT ON, 83
56 1 735-P KEY, WOODRUFF, SIZE 9, ASA606
57 1 11-P SPROCKET, #35 12T, 3/4” BORE
58 1 4083-P TROLLEY WELD, 83
* Recommended spare parts