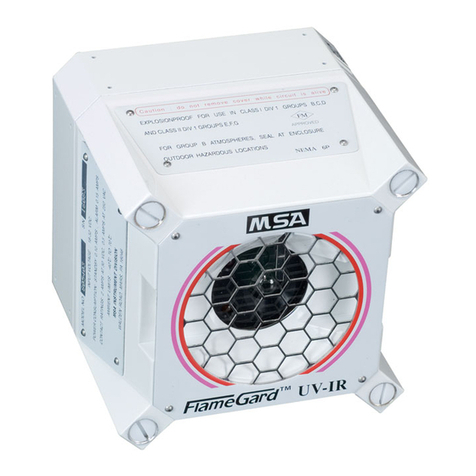
MSA FlameGard 5 User manual

FlameGard 5 MSIR Flame Detector
Quick Start Guide
GB
MAN5MSIR-QG/01
Warning!
The quick start guide does not replace the operating manual. It is imperative
that the operating manual be read and observed when using the device. In
particular, the safety instructions, as well as the information for the use and
operation of the device, must be carefully read and observed.
The operating manual can also be provided as a hard copy upon request.
1. Mounting Instructions
Mount the detector by using the swivel mount or mounting bracket assembly.
(1) Loosen the captive screws (A) located on the Optical Housing Assy.
Caution!
Do not unscrew the field wiring board from the base housing assembly for
wiring
(2) Pull the Optical Housing Assy from the Base Housing Assy to
separate, gently rock from side to side if necessary to loosen the
connector’s grip.
(3) Wire the unit to the site-wiring following the connection diagram shown
in opposite side.
(4) Reassemble the unit using steps 1 through 2 in reverse.
2. FlameGard 5 Housing 3. Bracket Assembly

FlameGard 5 MSIR Flame Detector
Quick Start Guide
GB
MAN5MSIR-QG/01
4. Mounting Instructions
5. Wall Mount Assembly
6. Testing the Detector Using Test Lamp
Test the integrity of your system by using a Test Lamp. The original configuration (i.e.
sensitivity and relay options) can be changed by referring to Section 3.5. of the manual
and then changing the dipswitch settings located on the bottom of the power board
(SW1).
The instrument is now ready to operate. Please consult the Test Lamp manual for more
information on the instrument’s many features. If you have any problems in the set-up or
testing of the detector, please refer to the “Trouble Shooting Section”, or call the factory
direct.
7. Applying Power to the Detector
Two light emitting diodes (LEDs) are visible through the window. Immediately upon
powering up the detector, both LEDs will start blinking alternately for 15 seconds. The
unit will then enter the “Ready” mode. During the “Ready" mode, the green LED will
flash off 0.5 seconds every 5 seconds.

FlameGard 5 MSIR Flammendetektor
Kurzanleitung
DE
MAN5MSIR-QG/01
Warnung!
Die Kurzanleitung ist kein Ersatz für die Gebrauchsanleitung. Die Gebrauchsanleitung
ist für die Nutzung des Gerätes zwingend zu lesen und zu beachten. Insbesondere die
darin enthaltenen Sicherheitshinweise sowie die Angaben zu Einsatz und Betrieb des
Gerätes müssen aufmerksam gelesen und beachtet werden.
Die Gebrauchsanleitung wird auf Wunsch auch in Papierform zur Verfügung gestellt.
1. Montageanleitungen
Montieren Sie den Detektor mithilfe der drehbaren Gerätehalterung oder der
Montagevorrichtung.
(1) Die unverlierbaren Schrauben (A) im Optik-Gehäuseteil lösen.
Achtung!
Bei der Verdrahtung darf die Feldverdrahtungsplatine nicht vom Basisgehäuseteil
entfernt werden.
(2) Am Optik-Gehäuseteil ziehen, um es vom Basisgehäuseteil zu trennen. Es
gegebenenfalls vorsichtig hin- und herbewegen, um die Steckverbindung zu
lösen.
(3) Das Gerät an die Kabel am Standort anschließen. Dabei das
Anschlussdiagramm auf der Seite gegenüber verwenden.
(4) Das Gerät wieder zusammensetzen und dazu die Schritte 1 und 2 in
umgekehrter Reihenfolge durchführen.
2. FlameGard 5 Gehäuse 3. Montagevorrichtung

FlameGard 5 MSIR Flammendetektor
Kurzanleitung
DE
MAN5MSIR-QG/01
4. Montageanleitungen
5. Vorrichtung für die Wandmontage
6. Testen des Detektors mithilfe der Testlampe
Testen Sie die Funktionsfähigkeit Ihres Systems mithilfe einer Testlampe. Die ursprüngliche
Konfiguration (d. h. die Empfindlichkeit und Relaisoptionen) kann geändert werden, indem Sie die
Anweisungen in Abschnitt 3.5 des Handbuchs befolgen und anschließend die Einstellungen für den
DIP-Schalter unter der Hauptplatine (SW1) ändern.
Das Gerät ist nun einsatzbereit. Im Handbuch für die Testlampe finden Sie weitere Informationen
zu den zahlreichen Funktionen des Gerätes. Wenn beim Einrichten oder Testen des Detektors
Probleme auftreten, lesen Sie den Abschnitt zur Fehlerbehebung oder rufen Sie direkt beim
Hersteller an.
7. Stromzufuhr für den Detektor
Durch das Fenster sind zwei LEDs zu erkennen. Sofort nach dem Einschalten des Detektors blinken
die beiden LEDs abwechselnd für eine Dauer von 15 Sekunden. Das Gerät wechselt dann in den
Modus „Betriebsbereit“. Im Modus „Betriebsbereit“ erlischt die grüne LED im Abstand von 5
Sekunden für die Dauer von 0,5 Sekunden.

Detector de llamas FlameGard 5 MSIR
Guía rápida
ES
MAN5MSIR-QG/01
¡Aviso!
Esta guía rápida no sustituye al manual de funcionamiento. Para utilizar el
equipo es obligatorio leer y cumplir el manual de funcionamiento, en especial, las
instrucciones de seguridad, así como la información relativa al uso y
funcionamiento del equipo.
También se puede suministrar, bajo pedido, una copia en papel del manual de
funcionamiento.
1. Instrucciones de montaje
Monte el detector utilizando el soporte basculante o el conjunto de soporte de
montaje.
(1) Suelte los tornillos cautivos (A) ubicados en el conjunto de la carcasa
óptica.
Precaución
No desatornille la placa de cableado de campo del conjunto de la carcasa base
para efectuar el cableado.
(2) Separe el conjunto de la carcasa óptica del conjunto de la carcasa base
tirando de él y muévalo suavemente de lado a lado, si fuera necesario,
para soltar el agarre del conector.
(3) Cablee la unidad hasta la instalación eléctrica de la ubicación siguiendo el
diagrama de conexión situado en el lado contrario.
(4) Monte de nuevo la unidad siguiendo los pasos 1 y 2 en orden inverso.
2. Carcasa del FlameGard 5 3. Conjunto de soporte

Detector de llamas FlameGard 5 MSIR
Guía rápida
ES
MAN5MSIR-QG/01
4. Instrucciones de montaje
5. Conjunto de montaje mural
6. Verificación del detector utilizando una lámpara de
prueba
Verifique la integridad de su sistema utilizando una lámpara de prueba. Es posible cambiar la
configuración original (p. ej. las opciones de sensibilidad y relés) según se indica en la sección
3.5. del manual y, a continuación, modificando los ajustes del interruptor DIP ubicado en la
parte inferior de la tarjeta eléctrica (SW1).
El aparato está ahora operativo. Consulte el manual de la lámpara de prueba para obtener
más información sobre las funciones principales del aparato. Si tuviera cualquier problema
durante la configuración o la verificación del detector, consulte la sección "Resolución de
problemas" o llame directamente a la fábrica.
7. Aplicación de corriente al detector
A través de la mirilla pueden verse dos diodos luminosos (LED). Inmediatamente después de
encender el detector, los dos LED comienzan a parpadear de forma alterna durante 15
segundos. A continuación, la unidad entra en el modo "Operativo". Durante el modo
"Operativo", el LED verde parpadea durante 0,5 segundos cada 5 segundos.

Détecteur de flamme FlameGard 5 MSIR
Manuel de prise en main rapide
FR
MAN5MSIR-QG/01
Avertissement !
Le manuel de prise en main rapide ne remplace pas le manuel d'utilisation. Ce
manuel d'utilisation doit impérativement être lu et respecté lors de l'utilisation de
l'appareil. En particulier, les consignes de sécurité ainsi que les informations
concernant l'utilisation et le fonctionnement de l'appareil doivent être
minutieusement lues et respectées.
Sur demande, le manuel d'utilisation peut aussi être livré sur papier.
1. Instructions de montage
Monter le détecteur en utilisant soit l'assemblage par support pivotant ou par
étrier de montage.
(1) Desserrer les vis imperdables (A) figurant sur l'ensemble du boîtier
optique.
Attention !
Ne pas dévisser le fond de panier sur site de l'ensemble boîtier de base pour le
câblage
(2) Retirer l'ensemble boîtier optique de l'ensemble boîtier de base ; si
nécessaire, bouger l'ensemble d'un côté à l'autre pour relâcher la prise du
connecteur.
(3) Raccorder l'unité au câblage sur site en tenant compte du schéma de
connexion indiqué sur le côté opposé.
(4) Remonter l'unité en procédant aux phases 1 à 2 dans le sens inverse.
2. Boîtier FlameGard 5 3. Dispositif à étrier de montage

Détecteur de flamme FlameGard 5 MSIR
Manuel de prise en main rapide
FR
MAN5MSIR-QG/01
4. Instructions de montage
5. Dispositif de fixation murale
6. Test du détecteur en utilisant la lampe d'inspection
Tester l'intégrité du système un utilisant une lampe d'inspection. La configuration initiale (c.a.d.
sensibilité et options de relais) peut être modifiée en se référant au chapitre 3.5. du manuel et
en modifiant par la suite les réglages du commutateur DIP figurant sur le haut de la platine
d'alimentation (SW1).
L'instrument est désormais prêt à être utilisé. Consulter le manuel de la lampe d'inspection
pour obtenir plus d'informations sur les nombreuses fonctions de l'instrument. En cas de
problèmes durant la configuration ou le test du détecteur, se référer au chapitre “Elimination
de pannes” ou bien appeler directement le fabricant.
7. Mise sous tension du détecteur
Deux diodes électroluminescentes (LED) sont visibles à travers la fenêtre. Immédiatement
après la mise sous tension du détecteur, les LED commencent à clignoter en alternance
pendant 15 secondes. L'unité passe alors en mode “Prêt”. Pendant le mode “Prêt", la LED
verte s'éteint pendant 0,5 secondes toutes les 5 secondes.

Rivelatore di fiamma FlameGard 5 MSIR
Guida rapida
IT
MAN5MSIR-QG/01
Attenzione!
La guida rapida non sostituisce il manuale d'uso. Il manuale d'uso deve
essere letto e seguito attentamente durante l'utilizzo del dispositivo. In
particolare vanno lette e seguite attentamente le istruzioni di sicurezza,
nonché le informazioni sull'uso e il funzionamento del dispositivo.
Su richiesta, il manuale d'uso può essere fornito anche in forma cartacea.
1. Istruzioni per il montaggio
Montare il rivelatore con l'uso del supporto snodato o del gruppo di staffe di
montaggio.
(1) Allentare le viti imperdibili (A) disposti sul gruppo di alloggiamento
ottico.
Attenzione!
Non svitare la scheda di cablaggio di campo dal gruppo di alloggiamento di
base per il cablaggio
(2) Estrarre per separare il gruppo di alloggiamento ottico dal gruppo di
alloggiamento di base, scuotere delicatamente da lato a lato per
allentare la presa del connettore.
(3) Cablare l'unità rispettando lo schema di collegamento mostrato sul lato
opposto.
(4) Rimontare l'unità nella successione inversa da 1 a 2.
2. Alloggiamento FlameGard 5 3. Gruppo di staffe

Rivelatore di fiamma FlameGard 5 MSIR
Guida rapida
IT
MAN5MSIR-QG/01
4. Istruzioni per il montaggio
5. Gruppo di montaggio a parete
6. Provare il rivelatore con l'uso della lampada di prova
Provare l'integrità del vostro sistema con l'uso di una lampada di prova. La configurazione
originale (p.e. opzioni sensibilità e relè) si può modificare consultando la sezione 3.5 del
manuale e poi cambiando le impostazioni dell'interruttore dip disposte sul fondo della
scheda di alimentazione (SW1).
Lo strumento ora è pronto per l'uso. Siete pregati di consultare il manuale della lampada
di prova per avere maggiori informazioni sulle tante funzioni dello strumento. In caso di
problemi con la configurazione o la prova del rivelatore siete pregati di consultare la
“Sezione Risoluzione dei problemi”, o contattare direttamente la fabbrica.
7. Alimentare il rivelatore
Due diodi elettroluminescenti (LED) sono visibili nella finestra. All'accensione del
rilevatore, entrambi i LED iniziano a lampeggiare alternandosi per 15 secondi. L'unità
entra poi nella modalità “Ready”. Durante la modalità “Ready", il LED verde lampeggerà
per 0,5 secondi, ogni 5 secondi.

FlameGard 5 MSIR Vlamdetector
Verkorte gebruiksaanwijzing
NL
MAN5MSIR-QG/01
Waarschuwing!
De verkorte gebruiksaanwijzing vervangt de gebruiksaanwijzing niet.
Wanneer u dit toestel gebruikt dient u de gebruiksaanwijzing te lezen en de
instructies erin op te volgen. In het bijzonder de veiligheidsvoorschriften en
de informatie over gebruik en bediening van het toestel moeten zorgvuldig
worden gelezen en nageleefd.
De gebruiksaanwijzing is op verzoek eveneens in gedrukte versie
verkrijgbaar.
1. Montage-instructies
Bevestig de detector met behulp van de draaibare houder of
montagebeugel.
(1) Draai de schroeven (A) op de optische behuizing los.
Let op!
Schroef de printplaat voor veldbedrading niet los van de onderzijde van de
behuizing.
(2) Trek de optische behuizing uit de onderkant van de behuizing. Beweeg
deze voorzichtig heen en weer om hem los te trekken.
(3) Sluit de unit aan op de bedrading op locatie volgens het
aansluitschema op de andere kant.
(4) Zet de unit volgens stap 1 en 2 in omgekeerde volgorde weer in elkaar.
2. Behuizing FlameGard 5 3. Beugel

FlameGard 5 MSIR Vlamdetector
Verkorte gebruiksaanwijzing
NL
MAN5MSIR-QG/01
4. Montage-instructies
5. Set voor wandmontage
6. Testen van de detector met testlamp
Test de integriteit van uw systeem met een testlamp. De originele configuratie (d.w.z.
gevoeligheid en relaisopties) kunnen worden gewijzigd; zie hiervoor hoofdstuk 3.5 van de
handleiding. Daarna kunnen de instellingen van de dipschakelaars op de
voedingsprintplaat worden gewijzigd (SW1).
Het instrument is nu gereed voor gebruik. Raadpleeg de handleiding van de testlamp
voor meer informatie over de eigenschappen van het toestel. Hebt u problemen bij het
instellen of het testen van de detector, ga dan naar "Storingen verhelpen" of neem
contact op met de fabriek.
7. De detector van stroom voorzien
Twee LED's zijn zichtbaar in het venster. Nadat de detector is ingeschakeld, zullen
beide LED's om de beurt 15 seconden lang knipperen. De unit komt nu in de "Gereed"
modus. Tijdens deze modus zal de groene LED om de 5 seconden een halve seconde
uitgaan.

Detektor płomieni FlameGard 5 MSIR
Skrócona instrukcja obsługi
PL
MAN5MSIR-QG/01
Ostrzeżenie!
Krótkie wprowadzenie nie zastępuje instrukcji obsługi. Przeczytanie i
przestrzeganie instrukcji jest koniecznączęściąużytkowania urządzenia.
Dotyczy to szczególnie instrukcji bezpieczeństwa, a także informacji
związanych z użytkowaniem i działaniem urządzenia, które należy uważnie
przeczytaći przestrzegać.
Na życzenie, instrukcja obsługi może byćtakże dostarczona w postaci
papierowej.
1. Instrukcje montażu
Zamontowaćdetektor za pomocąuchwytu obrotowego lub zespołu
wspornika montażowego.
(1) Poluzowaćśruby mocujące (A) umieszczone w zespole obudowy
układu optycznego.
Uwaga!
Nie odkręcaćpłyty z okablowaniem od podstawy zespołu obudowy w celu
wykonania podłączeń
(2) Odciągnąć zespółobudowy układu optycznego od podstawy zespołu
obudowy, aby je rozdzielić, delikatnie kołysząc na boki, jeśli konieczne
jest poluźnienie zaciśnięcia złącza.
(3) Połączyćokablowanie urządzenia z okablowaniem na obiekcie
zgodnie ze schematem połączeńpokazanym na przeciwnej stronie.
(4) Ponownie zmontowaćurządzenie wykonując czynności 1 i 2 w
odwrotnej kolejności.
2. Obudowa FlameGard 5 3. Zespółwspornika

Detektor płomieni FlameGard 5 MSIR
Skrócona instrukcja obsługi
PL
MAN5MSIR-QG/01
4. Instrukcje montażu
5. Zespółdo montażu ściennego
6. Testowanie detektora za pomocąlampy testowej
Przetestowaćsprawność systemu używając lampy testowej. Oryginalna konfiguracja (tzn.
czułość i opcje przekaźników) może byćzmieniona, po sprawdzeniu punktu 3.5 instrukcji,
za pomocąustawieńprzełączników DIP umieszczonych w dolnej części płyty zasilającej
(SW1).
Przyrząd jest gotowy do użytku. Więcej informacji na temat wielu funkcji przyrządu
można znaleźć w instrukcji lampy testowej. W razie problemów podczas montażu lub
testowania detektora, prosimy sprawdzićczęść "Rozwiązywanie problemów" lub
skontaktowaćsiębezpośrednio z fabryką.
7. Podłączanie zasilania do detektora
Dwie diody świecące (LED) sąwidoczne przez okienko. Natychmiast po włączeniu
zasilania detektora obie diody zaczynająmigaćna przemian przez 15 sekund.
Urządzenie przechodzi w tym momencie do trybu "Gotowości". W trybie "Gotowości"
zielona dioda gaśnie na 0,5 sekundy, co 5 sekund.

Detector de Chamas FlameGard 5 MSIR
Guia de Iniciação Rápida
PT
MAN5MSIR-QG/01
Aviso!
O guia de iniciação rápida não substitui o manual de utilização. É indispensável
que o manual de utilização seja lido e respeitado durante a utilização do
aparelho. Em particular, as instruções de segurança, assim como as
informações sobre a utilização e o funcionamento do equipamento, têm de ser
cuidadosamente lidas e respeitadas.
Quando solicitado, o manual de utilização pode também ser fornecido em papel.
1. Instruções de Montagem
Monte o detector com o apoio rotativo ou com o suporte de fixação.
(1) Solte os parafusos presos (A) que se encontram na caixa óptica.
Cuidado!
Não desaparafuse a placa de ligação de campo da caixa da base para efectuar
as ligações.
(2) Puxe o conjunto da caixa óptica do conjunto da caixa da base para os
separar e, se necessário, movimente ligeiramente de um lado para o outro
para soltar o conector.
(3) Ligue a unidade ao circuito eléctrico do local de acordo com esquema de
ligações mostrado ao lado.
(4) Volte a montar a unidade seguindo os passos 1 a 2 pela ordem inversa.
2. Caixa do FlameGard 5 3. Conjunto do suporte

Detector de Chamas FlameGard 5 MSIR
Guia de Iniciação Rápida
PT
MAN5MSIR-QG/01
4. Instruções de Montagem
5. Conjunto para Montagem na Parede
6. Testar o Detector com uma Luz de Teste
Teste a integridade do seu sistema com uma luz de teste. É possível alterar a configuração
original (opções de sensibilidade e de relé) conforme indicado na Secção 3.5. do manual e
alterando a configuração do comutador DIP na parte inferior da placa de alimentação (SW1).
O instrumento encontra-se agora pronto a funcionar. Consulte o manual da luz de teste para
obter mais informações sobre as várias funções do instrumento. Se tiver problemas a
configurar ou a testar o detector, consulte a secção "Resolução de problemas" ou contacte
directamente o fabricante.
7. Fornecer Alimentação ao Detector
São visíveis dois díodos emissores de luz (LED) pelo visor. Imediatamente depois de ligar o
detector, ambos os LED começam a piscar alternadamente durante 15 segundos. A unidade
entra no modo "Pronto a funcionar". No modo “Pronto a funcionar", o LED verde piscará
durante 0,5 segundos a cada 5 segundos.

Датчик пламени FlameGard 5 MSIR
Краткое руководство по эксплуатации
RU
MAN5MSIR-QG/01
Предупреждение!
Краткое руководство не заменяет руководство по эксплуатации. Перед
началом эксплуатации устройства следует обязательно ознакомиться с
руководством по эксплуатации инеукоснительно соблюдать приведенные в
нем указания. Необходимо особо тщательно изучить ивыполнять в
дальнейшем правила техники безопасности иэксплуатации устройства.
Руководство по эксплуатации по желанию можно получить враспечатанном
виде.
1. Инструкция по монтажу
Монтаж датчика выполняется спомощью поворотного крепления или
монтажного кронштейна.
(1) Ослабьте невыпадающие винты (A), расположенные на оптическом
корпусе.
Внимание!
Не отвинчивайте плату для подключения проводки от основания корпуса.
(2) Отделите оптический корпус от основания, при необходимости слегка
покачав из стороны всторону, чтобы освободить разъем.
(3) Подключите кдатчику проводку согласно соединительной схеме,
приведенной собратной стороны.
(4) Соберите устройство, выполнив действия 1 и2 вобратном порядке.
2. Корпус FlameGard 5 3. Кронштейн

Датчик пламени FlameGard 5 MSIR
Краткое руководство по эксплуатации
RU
MAN5MSIR-QG/01
4. Инструкция по монтажу
5. Настенное крепление
6. Проверка детектора спомощью испытательной
лампы
Проверьте работоспособность системы спомощью испытательной лампы. Исходную
конфигурацию (то есть настройку чувствительности иреле) можно изменить,
обратившись кразделу 3.5 руководства, спомощью переключателей, расположенных
снизу платы питания (SW1).
Прибор готов кработе. Дополнительную информацию по возможностям прибора можно
прочесть вруководстве киспытательной лампе. Если не удается настроить или
проверить датчик, обратитесь кразделу «Поиск иустранение неисправностей» или
непосредственно на завод-изготовитель.
7. Подключение питания кдатчику
Через окно видны два светодиода. Сразу после включения питания оба светодиода
начинают мигать втечение около 15 секунд. После этого датчик переходит врежим
«Готовность». Врежиме «Готовность» зеленый светодиод выключается на 0,5 секунды
каждые 5 секунд.
Other manuals for FlameGard 5
1
Table of contents
Languages:
Other MSA Security Sensor manuals

MSA
MSA V-TEC Tie-Back PFL User manual

MSA
MSA Dyna-Glide User manual

MSA
MSA FlameGard 5 User manual

MSA
MSA altair 5 Technical manual

MSA
MSA FL500 UV/IR User manual

MSA
MSA V-TEC PFL User manual

MSA
MSA ALTAIR 5X User manual

MSA
MSA FL500 UV/IR User manual

MSA
MSA Ultima OPIR-5 User manual

MSA
MSA Altair User manual

MSA
MSA ALTAIR 5X User manual

MSA
MSA MMR Quick start guide

MSA
MSA ALTAIR 4XR User manual

MSA
MSA OptimAir 3000 User manual

MSA
MSA Suretyman Anchorage Sling User manual

MSA
MSA FlameGard 5 UV/IR-E User manual

MSA
MSA General Monitors TL105 User manual

MSA
MSA Ultima X User manual

MSA
MSA MiniOX 710965 User manual

MSA
MSA ALTAIR 5X PID User manual