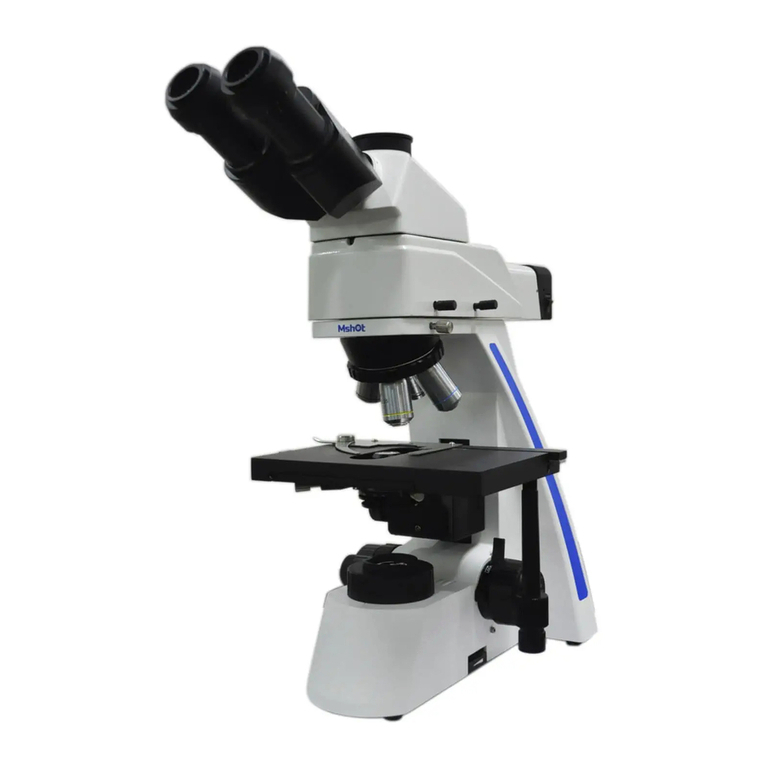
MshOt ML41 Series User manual

Guangzhou Micro-shot Technology Co., Ltd
ML41
Biological microscope
User manual
Website:www.m-shot.com
Tel:0086-20-38262481

Biological microscope ML41

ML41 biological microscope user manual
Website
:
Welcome to use ML41 biological microscope!
ML31 series biological microscope is widely used at biology and medical university laboratory,
medical treatment and public health, scientific study instrument, etc.
This unit is a precision optical instrument. Our product has been design to provide the highest level of
safety, however, improper operation or negligence in following the instructions in this manual may cause
personal injuries and property losses. In order to ensure your safety, prolong the life of this unit and
maintain it properly, please read this manual carefully before operating this unit.
Safety Reminder
1. Be sure to turn off the power switch and remove the power cord before installing this unit,
replacing the bulb or fuse, plugging and unplugging the power supply.
To prevent electric shock or fire, be sure to turn off the power switch and remove the power cord
before installing this unit, replacing the bulb or fuse, plugging and unplugging the power supply.
2. Do not disassemble
Except the removable parts mentioned herein, no part of this unit shall be removed, otherwise the
performance of this unit may be reduced, or may cause an electric shock, injury or damage to this
unit. Please contact the supplier if any fault occurs.
3. Input voltage
Check if the input voltage is consistent with your local voltage supply. If not, do not operate this
unit and contact the supplier. Improper input voltage may cause a short circuit or fire thereby
causes damage to this unit.
4. Use specific bulb, fuse and power cord
Use of an improper bulb, fuse or power cord may cause damage or fire to this unit. Any extended
power cord used must be grounded (PE).
5. Protect this unit from high temperatures, dampness and foreign objects
To prevent short circuit or any other fault, do not expose this unit to any high temperatures or
dampness environment for a prolonged period of time. A suitable operating environment is
designated at a temperature of 5°C-35°C, and relative humidity of 20%-80% (at 25°C). If water splashes on this unit,
turn off the power switch and remove the power cord immediately, and then wipe the water off with dry cloth. When any
foreign object enters or drips onto this unit, please stop operating the unit and contact the supplier.
6. Heat of light source
The lighting bulb generates high temperatures during operation. Do not touch the collector lens or
lamp box when the lamp is illuminated, and do not touch the bulb within 10 minutes after the
lamp goes out due to high temperatures arising from operation. When replacing the bulb, make sure it has cooled down
!
Warning!
!
Warning!
!
Warning!
!
Warning!
!
Warning!
!
Warning!

ML41biological microscope user manual
:
www.m-shot.com
properly (the lamp should be off for at least 10min).
★To prevent burn, do not touch the bulb when the lamp is illuminated or within 10min after it goes out.
★To prevent fire, do not place any fibrous product, paper, flammable or explosive material (e.g., gasoline,
petroleum ether, alcohol) near the halogen lamp housing or mercury lamp housing.
7. Coarse/fine focusing knobs
This unit employs a coarse/fine coaxial focusing mechanism. Do not turn the left/right coarse/fine
focusing knob in the opposite direction. When the objectives lifting device reaches the limit of
motion, do not continue to turn the coarse focusing knob, otherwise the focusing mechanism may be damaged.
8. Storage place
This unit is a precision optical instrument, and improper operation or storage may cause damage or
its precision may be adversely affected. Consider the following when selecting a storage place:
※Avoid placing the unit under direct sunlight, directly under interior lighting or any other bright place.
※A suitable operating environment is designated at a temperature of 5°C-35°C, and relative humidity of 20%-80% (at
25°C). Do not expose this unit to high temperatures, dampness or dust for a prolonged period of time, otherwise mist
or mold may develop or dust may deposit on the lens, thus cause damage to this unit and shortening its life.
9. Installation of bulb
Do not touch the glass surface of the bulb directly with bare hands. When mounting the bulb, wear
gloves or wrap it with cotton material.
※Wipe off any dirt on the surface of the bulb with a clean cotton fabric dipped in alcohol. If the dirt is
not thoroughly removed, it would etch the surface of the bulb weakening its brightness and shortening its life.
※Mount the bulb with care to avoid slipping off or injuries to your fingers.
※When replacing the bulb, make sure its contact is intact. If its contact is damaged, the bulb may be disabled or
short-circuited.
※When replacing the bulb, the feet should be inserted into the holder as deeply as possible. If the feet are not
tightly inserted, the bulb may go out or short circuit.
10. Instrument handling
This precision optical instrument is heavy and should be handled with care. Strong impact and
rough handling are strictly prohibited, it may cause damage to this unit.
11. Environmental protection
Please dispose the wastes from the packaging and operation of this unit by category such as
cartoon, foam, plastic, bulb and etc. Do not discard the damaged mercury lamp carelessly in order
to avoid creating environmental pollution.
!
Warning!
Caution!
Caution!
Caution!

ML41biological microscope user manual
:
www.m-shot.com
Content
Ⅰ. Attention.........................................................................................................................7
Ⅱ. Product characteristic......................................................................................................9
1.Name of each part...............................................................................................................................................................9
2. Installation of complete machine......................................................................................................................................11
Ⅲ.Instructions.....................................................................................................................13
Ⅳ.Specifications..................................................................................................................17
Ⅴ.Common Troubleshooting............................................................................................19

ML41 biological microscope user manual
Website
:
Ⅰ. Attention
1. Do not disassemble
Please do not disassemble the detachable parts not mentioned in this manual. If the
instrument is found to be faulty, please find an experienced professional to repair it or
contact the manufacturer directly.
2. Check the voltage
(1) The rated input voltage is marked on the microscope base. Note that the local power
supply voltage must be consistent with it. If the microscope is used under non rated
voltage, it will be seriously damaged.
(2) The power supply socket shall be provided with grounding wire.
3. Handling and placement
(1) Turn off the power switch before handling the instrument.
(2) Working environment requirements:
Room temperature: 0 ° C ~ 40 ° C
Maximum relative humidity: 85%
(3) Avoid placing the instrument under direct sunlight or room light. The bright
environment will affect the imaging quality of the specimen.
(4) Avoid placing the microscope in a dusty environment. When the microscope is not in
use, it should be covered with a dust cover.
(5) The microscope should be placed flat without vibration.
4. Operate with care
(1) Microscope is a kind of precision optical instrument. Strong vibration and hard
operation will cause serious damage to the instrument. Pay special attention not to force

ML41 biological microscope user manual
Website
:
2. Installation of complete machine
2.1 installation step diagram: the following step diagram shows how to install each
component, and the number indicates the sequence of installation.
☆before installation, please make sure that all parts of the microscope are free of dust,
dirt and other foreign matters affecting the installation. During installation, be careful not
to scratch or scratch any part or touch the glass surface.
Observation head
Eyepiece
Power line
Objective
Stage
Condenser

ML41biological microscope user manual
2.2 Installation steps:
2.2.1 Install the stage
(1)Completely loosen the fixing screws①on the stage.
(2)Carefully place the two V-shaped buckles on the bottom of the
stage away from the center of the bracket circular hole, and fit them
into the V-shaped circular grooves②on the bracket, and then tighten
the fixing screws①. (Picture 3)
2.2.2 Install the condenser
(1)Turn coarse hand wheel①to raise the stage to the highest position.
(2)Turn condenser lift hand wheel②to lower the condenser bracket to
the lowest position.
(3)Completely loosen the condenser fixing screws③.
(4)Roll out the front lens group of the condenser, with the numerical
scale facing forward, and align the set screw on the back of the
condenser with the slot on the condenser holder, and push the
condenser into the innermost part of the condenser holder. (Picture 4)
(5)Tighten the condenser fixing screw ③, then turn the condenser
lifting hand wheel②to raise the condenser to the highest position.
2.2.3 Install the objectives
Turn the coarse hand wheel to lower the stage, and then install the
objectives on the nosepiece in a counterclockwise direction from low
to high magnification. (Picture 5)
2.2.4 Install binocular head
(1)Completely loosen the observation base locking screw①.
(2)Move the dovetail interface at the bottom of the observation base to
the right from the center of the round hole on the main frame, tilt it
slightly to the left, insert the circular hole along the hole, make the
double cylinder of the observation base face forward, and tighten the
locking screw①. (Picture 6)

ML41 biological microscope user manual
Website
:
2.2.5 Install the eyepiece
(1)Remove the dust cover①of the eyepiece tube.。
(2)Insert eyepiece②into the bottom of the eyepiece tube. (Picture 7)
2.2.6 Connect the power cord
(1) Make sure that the switch①is set to "O" (OFF).
(2) Insert one end of the power cord into the power socket ②of the
microscope. (Picture 8)
(3)Plug the other end of the power cord into a power outlet.
☆The power cord is easily damaged when bent and twisted,
please do not use excessive force.
☆Please use the power cord provided by us, and choose another
suitable power cord if it is lost or damaged.
☆The power socket should have a ground terminal to ensure that
the instrument can be safely grounded.
Ⅲ.Instructions
3.1 Lighting adjustment
(1)Turn on the power, put the switch in the "1" state and the bulb will
light up.
(2)Rotate the brightness adjustment hand wheel ①to adjust the
brightness to a comfortable viewing position (Picture 9)
(3)Press the adjustment hand wheel①to switch the observation mode
of different color temperature, there are 3 kinds of effects.

ML41biological microscope user manual
3.2 Put slices
(1)Gently push back the wrench①on the slicer.
(2)Put the cover glass of the sample②into the slide holder, and release
the spanner①to clamp the slice firmly.
(3)Turn the X and Y axis movement knobs③of the stage to move the
slice to the center of the field of view and align it with the center of
the objectives. (Picture 10)
3.3 Focusing
(1)Turn the 4X objective into the optical path.
(2)Loosen the coarse limit hand wheel①, observe the right eyepiece,
turn the coarse hand wheel②until the outline of the specimen appears
in the field of view, and then lock the coarse limit hand wheel in the
direction shown in the picture.
☆The coarse adjustment limit hand wheel can prevent the slice
and the objective lens from colliding during focusing.
☆Coarse adjustment limit hand wheel has no effect on micro
hand wheel.
(3)Turn the micro-hand wheel ③to clearly observe the details of the
specimen. (Picture 11)
☆When using the 4X and 10X objectives, the aperture diaphragm
and field diaphragm are opened to the maximum, and the condenser is
moved out of the light path. Operation of the condenser is shown in
"3.8 Condenser Centering".
3.4 Adjustment of the tightness of the focusing
If the hand feel is heavy during rough focusing, or the specimen
leaves the focal plane due to the automatic lowering of the stage after
focusing, it can be solved by turning the elastic adjustment ring ①,
and the focus of the focusing mechanism can be changed by rotating
according to the picture. (Picture 12)

ML41 biological microscope user manual
Website
:
3.5 Vision adjustment
After the image of the right eyepiece is clear, if the image of the
left eyepiece is not clear, turn the diopter adjustment ring ①until the
left eye can observe a clear image through the eyepiece. (Picture 13)
The visual adjustment ring is engraved with ±5 diopters, the
value of the aligned straight line is the current diopter value of the eye,
and the left indicating point "·
" also plays the same marking function.
☆Please remember the diopter value of your eyes, and turn the
diopter adjustment ring to the corresponding position next time.
3.6 Pupil distance adjustment
Adjust the pupil distance of the observation seat, hold the left and
right prism seat by hand and rotate around the rotation axis until the
images observed by the left and right eyes coincide. Pupil distance
adjustment range: 50 ~ 76mm. (Picture 14)
In Figure 13, the indication point " ·" above the left eyepiece
holder points to the scale on the pupil distance sign, and the
corresponding value is the current observer's pupil distance.
☆Please remember your pupil distance value for your next use.
3.7 Adjusting the stage
During observation, the specimen can be moved to the x-axis and
y-axis respectively by rotating the x-axis and y-axis moving knobs of
the stage. If the moving direction of the stage is inconsistent with the
moving direction of the image, you can adjust the stage according to
the following steps: (Picture 15)
(1) Slightly loose the tightening screw of the stage
Turn the stage clockwise or anti-clockwise, until the image moves with
the stage on the same axis, and tighten the screw ①.
Rotation angle:
Right hand position: 90 degree clockwise, 20 degree anti-clockwise;
Left hand position: 20 degree clockwise, 90 degree anti-clockwise.
3.8 condenser centering adjustment
(1) Rotate the lifting knob and the lift the condenser to the ceiling.
(2) Pull the wrench ②and shift the front group lens into the light
path. (Picture16)
longer
short
Picture15
Picture16
out
small
big

ML41biological microscope user manual
When using the objectives with magnification higher than 20x, the
front lens of the condenser shall be shifted in the light path.
(3) Shift the 20x objective into the light path and focus on the
specimen.
(4) Rotate the field diaphragm adjusting ring ③narrow the field
diaphragm to the minimum position. At this time, the image formed
by the field diaphragm can be observed in the eyepiece.
(5) Adjust the condenser lifting knob until the image is clear.
(6) Adjust the adjusting screw ④until the image is in thee middle of
the field.
(7) Gradually widen the field diaphragm. If the image formed by the
field diaphragm is always in the middle of the field and can be
inscribed with the field, the condenser has been correctly aligned.
(Picture 17)
(8)When actually using the microscope, please slightly widen the field
diaphragm until the image circumscribes to the field.
3.9 Field diaphragm
The field aperture limits the diameter of the light beam entering the
condenser, so as to block the excess light at the periphery and enhance
the image response. When the imaging of the field aperture is just at
the outer edge of the field of view, the objective lens can play the
most superior performance and get the clearest specimen image.
3.10 Aperture diaphragm
The aperture aperture determines the numerical aperture of the
lighting system. Matching the numerical aperture of the lighting
system with that of the objective lens can result in better image
resolution, contrast and the increase the depth of field.
The contrast of the samples is usually low, thus, for the best
contrast and the clearest image, it is recommended to adjust the
aperture of the condenser to 70% ~ 80% of the numerical aperture of
the objective lens (Picture 18). The adjustment steps: remove the
eyepiece, observe through the eyepiece barrel, adjust the aperture
diaphragm adjusting ring ①in Picture 19 until the image shown in
Picture18
Picture 17
Aperture
objective
Picture 19

ML41 biological microscope user manual
Website
:
Picture 18 appears, and then adjust according to this proportion.
Use of scale: adjust the condenser numerical aperture scale to
80% of the numerical aperture ②marked on the objective. For
example, when using a 40x objective (the numerical aperture is 0.65),
adjust the marking line of the aperture at 0.52 (0.65*0.8).
3.11 use of oil immersion objectives
(1) Focus on the specimen under 4x objective.
(2) Drip one drop of oil on observation part. (Picture 20)
(3) Turn the nose-piece and shift the oil immersion objective in, and
using the fine focal knob to focus on the specimen.
☆Make sure no bubbles in the oil because they can affect the
imaging.
a.When checking the bubbles, remove the eyepiece and open the field
diaphragm and aperture diaphragm thoroughly. Look through the
eyepiece barrel and observe the outline of objective’s aperture (it
should be round and bright).
b.When eliminating the bubbles, slightly turn the nose piece and wave
the oil immersion objective back and forth for several times.
(4) After finished using the oil immersion objective, carefully wipe
the front lens with clean gauze and or lens wipes dipped in Ethanol
ethyl ether mixture (mixed with 3:7 ) or xylene.
☆Do not shift other objectives in before the oil immersion
objective was cleaned, or the dry objectives may stained by oil.
☆Too much xylene can dissolve the adhesive on the objective
lens.
3.12 use of color filter
Color filter can moderate the background light and improve the
contrast of the image. (Picture 21)
The filters have four colors namely yellow, green, blue and white.
☆The filters shall be installed with blurred side downward.
3.13 use of the reticle
(1) Spin the reticle ①off the pressing ring.
(2) Put the reticle in the pressing ring ①, with scale ②upward.
(3) Install the pressing ring ①equipped with reticle into the
eyepiece. (Picture 22)
☆The size of the reticle
¢
24
×
1.2mm. Attention: The scaled side
shall be upward.
oil
Picture 20
Picture 21
Picture 22

ML41biological microscope user manual
Ⅳ.Specifications
4.1 parameters for objectives
Categories
Optical
system
Magnification
N. A.
(mm)
W.D.
(mm)
Conjugate
distance
(mm)
Parfocal
distance
(mm)
Coverslip
thickness
(mm)
Infinite
plan
chromatic
objective
dry
4×
0.13
17.15
∞
45
0.17
dry
10×
0.30
7.68
∞
45
0.17
dry
40×
0.75
0.78
∞
45
0.17
oil
100×(S)
1.30
0.15
∞
45
0.17
☆Attention: The refraction index of the immersion oil is 1.515.
4.2 parameters for eyepieces
Categories
Magnification
Field of view(mm)
High vision plan
eyepiece
10×
Φ23
4.3 Total magnification
total
4×
10×
40×
100×
10×
40×
100×
400×
1000×
4.4 Condenser:Swing-Out Achromatic Condenser,NA1.2/0.22
4.5 Coaxial coarse and fine focus adjustment mechanism: with coarse adjustment upper
limit and elastic adjustment device, total stroke 25mm
4.6 Slightly twist the handwheel to adjust the accuracy: 0.002mm
4.7 Movement range of mechanical table: X-axis direction: 77mm, Y-axis direction:
objective
eyepiece

ML41 biological microscope user manual
Website
:
60mm
4.8 Condenser lifting stroke:35mm
4.9 Iris diaphragm aperture of the condenser:Φ2~Φ30mm
4.10 Light source:Input:100V~240V wide voltage
Bulb type: dual color temperature LED light source
Ⅴ.Common Troubleshooting
If you find any fault when using the microscope, please check the instrument according to
the following tips. If you still can't find the cause of the fault, please find an experienced
professional for repair or contact the manufacturer directly.
Fault
Cause
Troubleshooting method
Specimen imaging is
not clear
Put the specimen upside
down
Reposition the specimen
Inappropriate coverslip
thickness
Use 0.17mm thick coverslips
Dirt on the lens
wipe clean
Oil immersion objective is
not oiled
Add cedar oil
air bubbles in oil
Turn the converter left and right
several times
Dry objective is stained
with oil
wipe clean the oil
Aperture diaphragm is not
open properly
Adjust the size of the aperture stop

ML41biological microscope user manual
Condenser position is
incorrect
Adjust the up and down position of
the condenser
Using an unsuitable
immersion oil
Use immersion oil with a
refractive index of 1.515
Uneven illumination
of the field of view
The converter is not in
place
Turn the converter into place
Dirt on the lens
wipe clean
The specimen is not laid
flat
Lay the specimen flat
The condenser is not
aligned in the center
Adjust the condenser center
The bulb brightness
is turned to
maximum, but the
field of view lighting
is not bright enough
The field diaphragm is not
wide enough
Open the field diaphragm wider
The condenser is not
aligned in the center
Adjust the condenser center
Condenser position is too
low
Raise the condenser
Aperture diaphragm
opened too small
Appropriately open the aperture
diaphragm wider
Smudges or dust
appear in the field of
view
Dirt builds up on the
specimen
clean the specimen
Dirt builds up on the lens
clean the lens
The high-power
Put the specimen upside
Reposition the specimen
Table of contents
Other MshOt Microscope manuals

MshOt
MshOt MF31 Series User manual

MshOt
MshOt TP R200 Guide

MshOt
MshOt MF52-N User manual

MshOt
MshOt MF-UV-LED User manual

MshOt
MshOt MI-BGU-LED IX50 User manual

MshOt
MshOt MZ62 User manual

MshOt
MshOt MZX81 User manual

MshOt
MshOt MI-BGU-LED-CKX53 User manual

MshOt
MshOt MF52-N User manual

MshOt
MshOt MF53-N User manual